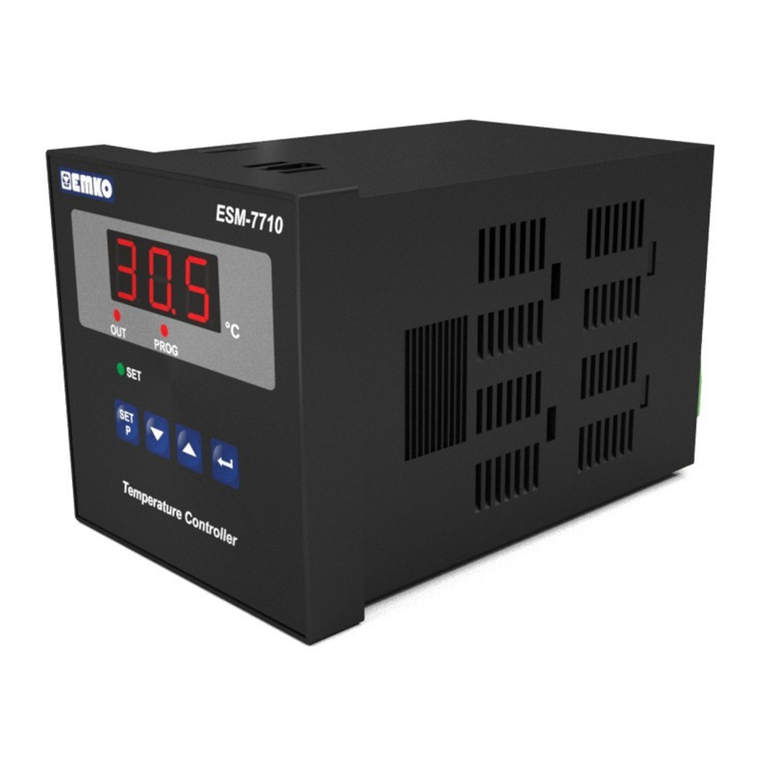
EMKO EGG HATCHER User manual

CONTENT
1 INTRODUCTION............................................................................................................................... 3
1.1 General Specifications.......................................................................................................3
1. Warranty.............................................................................................................................4
1.3 Maintenance.......................................................................................................................4
1.4 Ordering Information.......................................................................................................5
INSTALLATION............................................................................................................................ .5
.1 General Description...........................................................................................................6
. Front View, Dimension and Panel Cutout Off EGG-HATCHER .............................6
.3 Mounting..............................................................................................................................8
.4 Electrical Wiring Diagram................................................................................................9
3 MAIN OPERATION SCREEN AND GENERAL DESCRPTION......................................
3.1 Main Operation Screen..................................................................................................
3. Second Working Page................................................................................................... 2
3.3 Menus..................................................................................................................................3
3.4 Button Definetions...........................................................................................................4
4 SHUTTER CONTROL....................................................................................................................5
5 SETTINGS........................................................................................................................................6
6 ADVANCED SETTINGS.............................................................................................................. 7
6.1 Control Parametres..........................................................................................................8
6. . General Parameters
6. .2 Temperature Parameters
6. .3 Humidity Parameters
6. .4 Temperature Alarm Parameters
6. .5 Humidity Alarm Parameters
6. .6 Water Spray Parameters
6. .7 Shutter Parameters
6. .8 Tray Rotation Parameters
6. .9 Hatching Parameters
6. Device Settings..................................................................................................................28
6.2. Date & Time Settings
6.2.2 Update Software
6.2.3 Default Settings
6.2.4 Change Password
7 LOGS..................................................................................................................................................3
8 ALARMS.........................................................................................................................................32
9 LANGUAGE SELECTION.............................................................................................................33
10 ALARM TYPES..................................................................................................................34
ENG EGG HATCHER 02 V01 04/16 2

11 SPECIFICATIONS.............................................................................................................35
1 OTHER INFORMATIONS..............................................................................................36
1. INTRODUCTION
1.1. General Specifications
ENG EGG HATCHER 02 V01 04/16 3

1. . Warranty
EMKO Elektronik warrants that the equipment delivered is free from defects in material and workmanship.
This warranty is provided for a period of two years. The warranty period starts from the delivery date. This
warranty is in force if duty and responsibilities which are determined in warranty document and instruction
manual performs by the customer completely.
Emko Elektronik, warns the user that the device has complex structure and may not be completely free of
errors. It's the responsibility of the user to make provision by installing an independent alarm system
besides EGG HATCHER, against possible errors that can result from manufacturing or design errors or non-
standard environmental conditions (electrical noise, lightning, humidity, temperature, etc), although EGG
HATCHER device is designed, manufactured and tested according to related standards. Emko Elektronik is
not responsible for losses that occurs with possible errors.
It's strongly recommended to install an independent alarm system that warns the user and provide at least
minimum conditions for animals to live.
Also, Emko Elektronik isn't responsible for results from misuseage of the device.
Warranty is limited for only changing or repairing defected device.
1.3. Maintenance
Repairs should only be performed by trained and specialized personnel. Cut power of the device before
accessing internal parts.
Do not clean the case with hydrocarbon-based solvents (Petrol, Trichlorethylene etc.). Use of these kind of
solvents can reduce the mechanical reliability of the device. Use a cloth dampened in ethyl alcohol or water
to clean the external plastic case.
ENG EGG HATCHER 02 V01 04/16 4

1.4.Ordering Information
. INSTALLATION
Before commencing installation:
• Disconnect all electrical power to the machine.
• Make sure the machine cannot operate during installation.
• Follow all of the machine manufacturer’s safety warnings.
• Read and follow all installation instructions.
A visual inspection of this product for possible damage occurred during shipment is recommended before
installation. It is your responsibility to ensure that qualified mechanical and electrical technicians install this
product.
Be sure to use the rated power supply voltage to protect the unit against damage and to prevent failure.
Keep the power off until all of the wiring is completed so that electric shock and trouble with the unit can
be prevented.
Never attempt to disassemble, modify or repair this unit. Tampering with the unit may results in
malfunction, electric shock or fire.
Do not use the unit in combustible or explosive gaseous atmospheres.
During the equipment is putted in hole on the metal panel while mechanical installation some metal burrs
can cause injury on hands, you must be careful.
Montage of the product on a system must be done with it’s own fixing screws. Do not do the montage of
the device with inappropriate fixing screws. Be sure that device will not fall while doing the montage.
It is your responsibility if this equipment is used in a manner not specified in this instruction manual.
Report any shortage or damage to your local sales office as soon as possible.
ENG EGG HATCHER 02 V01 04/16 5

.1 General Description
. Front View, Dimensions and Panel Cutout of EGG HATCHER
ENG EGG HATCHER 02 V01 04/16 6

ENG EGG HATCHER 02 V01 04/16 7

.3. Panel Mounting
During installation into a metal panel, care should be taken to avoid injury from metal burrs which
might be present. The equipment can loosen from vibration and become dislodged if installation
parts are not properly tightened. These precautions for the safety of the person who does the
panel mounting.
The unit is designed for panel mounting.
– Insert the unit in the panel cut-out
from the front side.
2 – Insert the mounting clamps to the holes that
located top and bottom sides of device and
screw up the fixing screws until the unit
completely immobile within the panel
ENG EGG HATCHER 02 V01 04/16 8

.4 Electrical Wiring Diagram
Electrical Wiring Diagram for Pronem Type Input Card
ENG EGG HATCHER 02 V01 04/16 9

Electrical Wiring Diagram for mA Type Input Card
ENG EGG HATCHER 02 V01 04/16 10

3. MAIN OPERATION SCREEN AND GENERAL DESCRPTION
3.1. Main Operation Screen
Actual date is located on the top left corner and Actual time is located on the top right corner.
Cabinet Temperature
Cabinet Humidty
Hatching time is showed as a day, hours and minute in label which is bottom of temperature and humidity
label. When any alarm is occurs, the alarm definetion is showed in this label.
Used to access Menu page
Used to silence the buzzer.
Used to start the hatchig time.
Used to stop the hatching time
Used to access second working page
ENG EGG HATCHER 02 V01 04/16 11

3. .Second Working Page
Actual date is located on the top left corner and Actual time is located on the top right corner.
Outer Temperature
Actual Shutter status
Actual Tray rotation direction
Current Inputs and Outputs status are showed on screen.
Inputs:
0 – Fan digtal Input status
1 – Cabinet Door Open Input status
– Tray Rotation Limit Input status
Outputs:
0 – Cooling SSR output status
1 – Heating SSR output status
– Tray Rotation Left Relay output satus
3 – Tray Rotation Right Relay output satus
4 – Shutter Close Relay output status
5 – Shutter Open Relay output status
6 – General Alarm Relay output status
7 – Temperature Alarm Relay output status
8 – Humidifier Alarm/Water Spray Realy output status
9 – Humidifier Relay output status
Hatching time is showed as a day, hours and minute in label which is bottom of Input/output status label.
Used to return Main Operation Page
ENG EGG HATCHER 02 V01 04/16 12

Used to start manual Tray rotation.
3.3. Menus
Shutter Control
Settings
Advanced Settings
Logs
Alarms
Language Selection
ENG EGG HATCHER 02 V01 04/16 13

3.4. Button Definetions
Device has four buttons which are F , F2, F3 and F4 buttons. These buttons have different functions on
different pages.
Up/Down buttons: Used to go up and go down in menus and lists and also
used to increase/decrease parameter's value.
Left/Right buttons: Used to go left or right in menus.
Confirm button: Used to go in to selected page, to make parameter's cell available to
change and to confirm parameter’s change.
Return button: Used to go back to previous menu and to cancel parameter's change.
Alarm button: Used to suspend alarms.
Erase button: Used to erase logs on the screen.
ENG EGG HATCHER 02 V01 04/16 14

4. MANUAL SHUTTER CONTROL
Shutter control manual/automatic selection is can be made in this page.
If shutter control is selection as a manual, shutter status is can be adjusted manualy.
ENG EGG HATCHER 02 V01 04/16 15

5. SETTINGS
Heat Temperature Set(°C):(Default = 37,7) Set value for heating control output.
Cool Temperature Set(°C):(Default = 40) Set value for cooling control output.
Humdity Set(%):(Default = 50) Desired cabinet humidty value.
Backlight OnLevel(%):(Default = 50) Backlight in normal operation. This parameter is can be adjusted from
50 to 00.
Backlight OffLevel(%):(Default = 0) ECO mode for backlight; in case off selection no backlight . This
parameter is can be adjusted from to 00. When this parameter value is , if decrement button is
pressed, 'OFF' is observed. In this time the screen turns off.
Backlight OffTime(sec):(Default = 0) Time for the access to ecomomic backlight mode. This parameter is
can be adjusted from 0 to 300.
Temp. Filter Value:(Default = 100) Temperature filtering coefficiant factor. This parameter is can be adjusted
from to 300.
Hum. Filter Value:(Default = 1) Humdity filtering coefficiant factor. ( not activated yet)
Change Password:(Default = 0000) It is used to access to user password changing screen.
ENG EGG HATCHER 02 V01 04/16 16

6. ADVANCED SETTINGS
These following pages can be accessed via Advanced Settings Menu:
6. Control Parameters
6.2 Device Settings
6.3 Calibration
ENG EGG HATCHER 02 V01 04/16 17

6.1. CONTROL PARAMETERS
This menu contains parameters pages related to control function of the device.
6.1.1. GENERAL PARAMETERS
This menu contins parameters related to general operation functions.
Temperature Control Select (Default =ON/OFF): Temperature control 'ON/OFF' or 'PID'selection can be
made with this parameter.
Water Spry&Hum Alrm(Default =HUMIDITY ALARM): Relay2 output function selection can be made with
this parameter. This parameter must be set ('SU PSK') for Water spray function or ( 'ALARM') for Humidity
Alarm function.
Buzzer Function Select(Default =OFF): Buzzer activation on when alarm occur is selection with this
parameter.
Buzzer Active Time(min)(Default =1): Buzzer active time can be define with this parameter. It can be
adjusted from to 99 minutes. When this parameter is 99, if increment button is pressed, (---) is observed.
In this condition buzzer is active till buzzer silence button is pressed
ENG EGG HATCHER 02 V01 04/16 18

Shutter Control Select(Default =DIGITAL): Shutter control output selection can be made with this
parameter. This parameter must be set ('ANL') for analog output, or ('DIG') for dihital output.
Lid Open Delay(sec)(Default =OFF): If Cabinet door is opened much more time with this parameter value,
door open alarm is occur. This parameter is can be adjusted from 0 to 300 seconds.
When the parameter value is 300, if increment button is pressed, (OFF) is observed. In this time door open
alarm is passive.
Rotation Motor Feedback (Default =OFF): Whether tray motor limit switch using can be made with this
parameter. If tray motor limit switch will be use this parameter value must be ON, otherwise parameter
value must be OFF.
Fan Speed (rpm)(Default = OFF ) Fan Speed alarm value is adjusted with this parameter. When the readed
fan speed value is lower than this parameter value Fan Alarm is occur.
This parameter value is adjusted from to 30 000 rpm. When this parameter value is , if decrement button
is pressed, 'OFF' is observed. In this time Fan speed alarm is passive.
OutTemp Offset: (Default = 0) This parameter is can be adjusted from - 2.0°C to 2.0°C
ENG EGG HATCHER 02 V01 04/16 19

6.1. . TEMPERATURE PARAMETERS
Unit Select(Default =°C): Device temperature unit is can be
selected as a '°C' or '°F' with this parameter.
Heat Min. Set (°C):(Default =10) Heating Temperature set value can not be lower than this value. This
parameter value can be adjusted from minimum value of device scale to Heating Max. Set parameter value.
Heat Max. Set (°C):(Default =40) Heating Temperature set value can not be higher than this value. This
parameter value can be adjusted from Heating Min Set parameter value to maximum value of device scale.
Cool Min. Set (°C):(Default =10) Cooling Temperature set value can not be lower than this value. This
parameter value can be adjusted from minimum value of device scale to Cooling Max. Set parameter value.
Cool Max. Set (°C):(Default =40) Cooling Temperature set value can not be higher than this value. This
parameter value can be adjusted from Cooling Min Set parameter value to maximum value of device scale.
Sensor Offset(°C):(Default =0) This parameter is can be adjusted from - 0.0°C to 0.0°C
Heat Hysteresis:(Default =0.1°C) This parameter is active If heating control selection parameter value is
selected as a ON/OFF. This parameter value is can be adjusted
0. °C to 0.0 °C for Pronem Mini PMI-P ( -20.0°C, 80.0°C )
0. °C to 8.0 °C for Pronem Mini PMI-P ( -4.0°C, 76.0°C )
Cool Hysteresis:(Default =0.1°C) This parameter value is can be adjusted
0. °C to 0.0 °C for Pronem Mini PMI-P ( -20.0°C, 80.0°C )
0. °C to 8.0 °C for Pronem Mini PMI-P ( -4.0°C, 76.0°C )
Sens Low Value (Default =- 0.0) This parameter is can be adjusted from -200.0°C to 000.0°C
Sens High Value (Default =80.0) This parameter is can be adjusted from -200.0°C to 000.0°C
Sensor Scale (Default =Scale1) Scale : 0-20mA,
Scale2: 4-20mA
The below parameters is can be used If temperature control selection parameter is selected as a 'PID'.
Proportionally (Proportional Control Parameter)(Default =50): This parameter is can be adjusted form 0 to
00 value.
Integral(Integral Parameter)(Default =1000): This parameter is can be adjusted from 0 to 3600 value.
ENG EGG HATCHER 02 V01 04/16 20
Table of contents
Other EMKO Control Unit manuals
Popular Control Unit manuals by other brands

WDT
WDT Granudos 10 Touch Operating and installation instructions

Piratelogic
Piratelogic EVE Construction manual

Parallax
Parallax 28560 manual

Bosch
Bosch DS7400 operating instructions

Kemper
Kemper kHS 686 00 Installation and operating instructions

Comunello
Comunello QUAD - 24V - 2M Installation and user manual

Elvaco
Elvaco CMi2130G3 Quick manual

Mitsubishi Electric
Mitsubishi Electric MELSEC iQ-R Series user manual

Worldwide
Worldwide WORLDDRIVE WD4X quick start guide

ABB
ABB ACQ580-04 Quick installation guide

KMC Controls
KMC Controls VEB-53 Series installation guide

Simplex
Simplex MINIPLEX 4100ES Series quick start guide