www.enclume.com
Assembly and Installation Instructions for the PR34
Hardware included:
12 – 3/8” x ½” Button head Screws
2 – Plastic End Caps
2 – 3/8” Eye Bolts
2 – Large Ceiling Screw Hooks
2 – 7” Extension Hooks
12 – Straight Pot Hooks
6 – Angled Pot Hooks
1 – 7/32” Allen Wrench
Toggle Kit
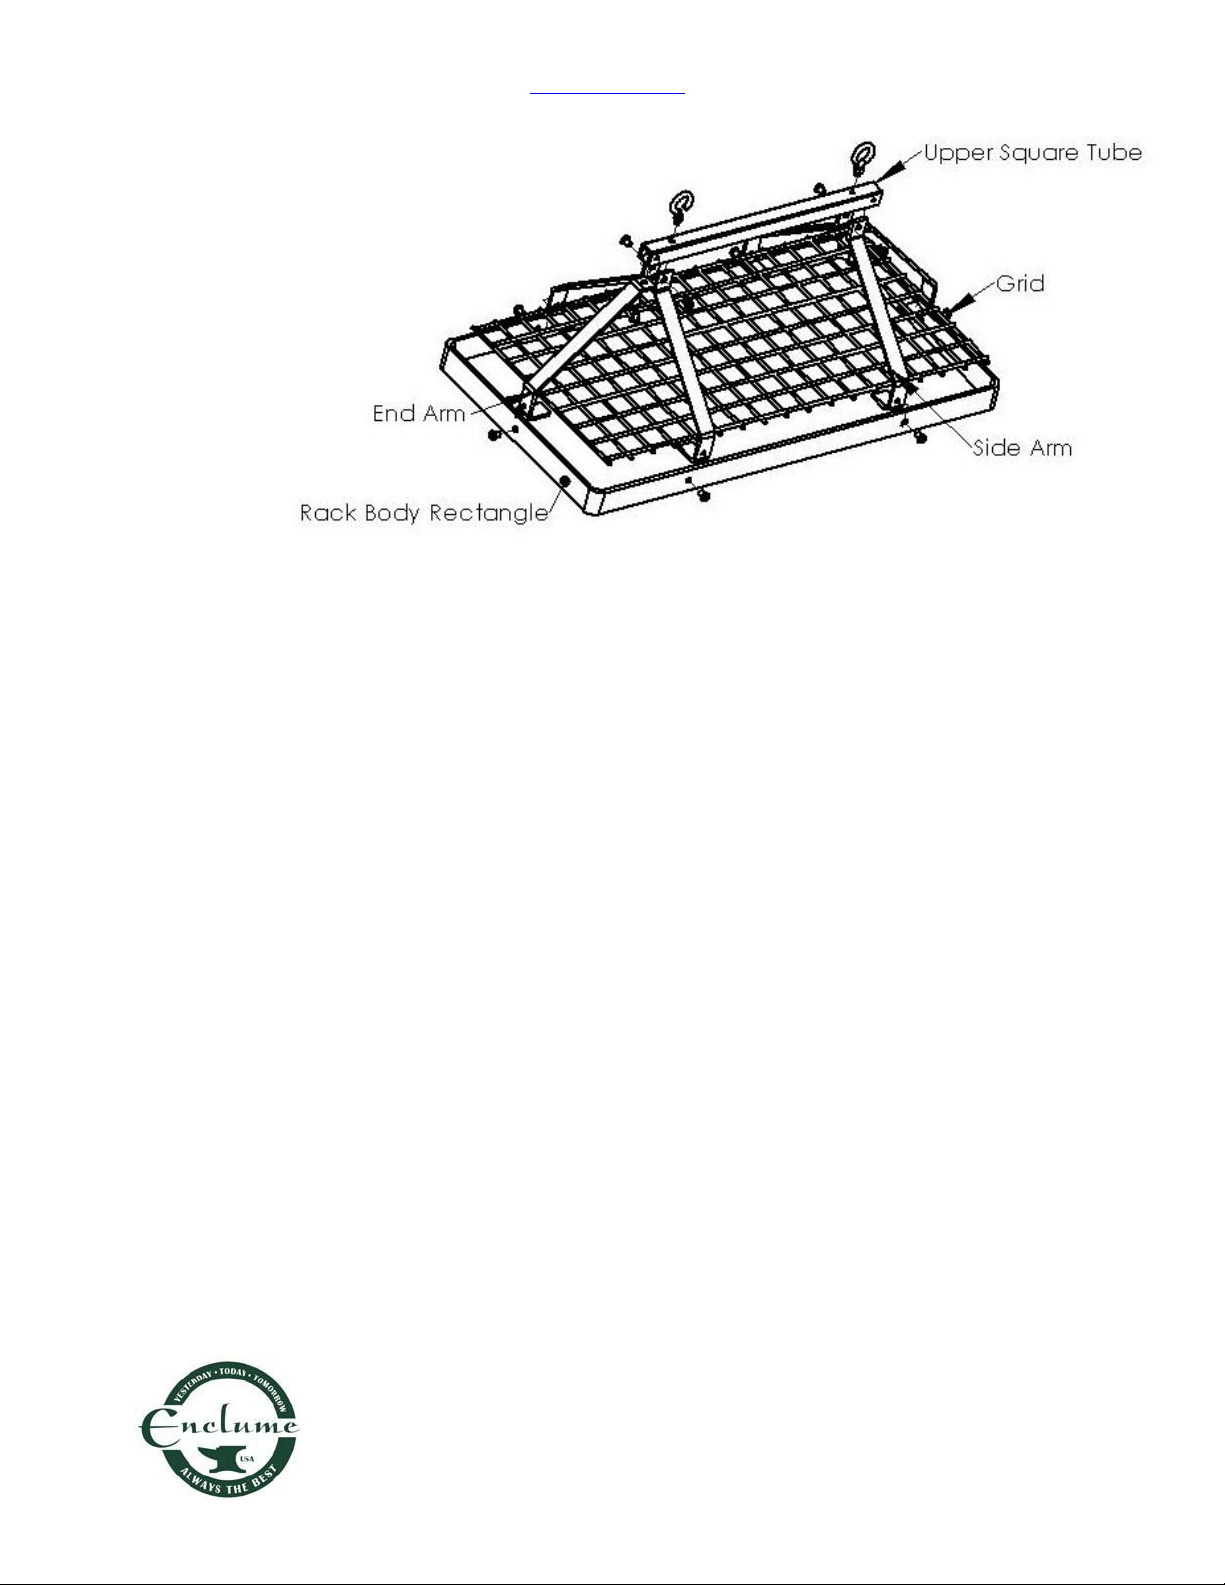
Components included:
1 – Rack Body - Rectangle
1 – Upper Square Tube
2 – End Arms
4 – Side Arms
1 – Grid
Rack Assembly:
1) Place rack on firm surface
2) Using two (2) of the 12 3/8” x ½” button head screws, attach the 2 end arms, one to each end of the rack body.
(NOTE: the 2 end arms can be identified as having the ends of the arms facing in the same direction and in the
horizontal plane. Square the two end arms up and tighten securely with the Allen wrench provided.
3) Locate the “square tube” upper and the two 3/8” eyebolts. Attach the eyebolts to the square tube using the two
holes that are located approximately 2 inches from each end of the upper. (NOTE: the other 3 holes in each end
will be used to attach the arms in Step 4, 5, and 7, and are approximately ½” from each end.) The eyebolt should
be threaded into the upper approximately 7 – 8 full turns.
4) Once the eyebolts have been threaded into the proper holes, place the upper with eyebolts facing upwards on the
two end arms. Align the holes in arms with the corresponding holes in the upper and attach with 3/8” x ½”
Button Head screws.
5) Locate and attach 2 side arms to the same side of the rack body and upper leaving the remaining 2 side arms for
Step 7.
6) With one side of the rack open, carefully place the grid onto the tabs of the end arms and side arms.
7) Locate the remaining 2 side arms. Carefully lift the grid and place one of the arms into position and attach to the
rack body and upper with 3/8” x ½” Button head Screws. Repeat this process for the last remaining arm.
8) Square up the arms and securely tighten all Button Head Screws.
9) Insert the extension hooks into the eyebolts in the square tube upper.
10) Locate the two black end caps and place on into each of the square tube upper.
11) We recommend that you anchor your rack into the solid wood of ceiling joists or beams. Carefully measure the area where
the rack is to be hung and install the ceiling screw hooks directly into the wood joists. If it is not convenient to hang your
rack directly into wood joists you may use the new-technology DRYWALL anchors enclosed with your rack. The steel
anchors are very strong and when installed in drywall will hold 200 lbs. each. Two anchors hold about 400 lbs. Follow the
instructions in the Toggler kit.
12) Hang your pot hooks from the interior squares only. Do not hang them from the perimeter or the cut portions of
the grid. Distribute your cookware evenly.
13) All of our hammered steel racks are finished with an industrial wax designed to give years of protection to the
rack. Cleaning is easily done with a damp cloth. Dry thoroughly after cleaning. If a touch-up is ever needed we
recommend a "Pledge" like wax product.
::
potracks.com
Call 1-800-667-8721 anywhere in the US and Canada - www.kitchensource.com
::potracks.com
powered by ::kitchensource.com


