ENERGY SISTEM Clip 8GB User manual

1/13 energysistem.com
ENGLISH
Introduction 3 .....................................................................................................................................................................
Care and maintenance 3 ...................................................................................................................................................
Main features 3 ...................................................................................................................................................................
Product content 4 ...............................................................................................................................................................
General overview 4 ............................................................................................................................................................
Power on, power off and charging 6 ...............................................................................................................................
Main menu 6 ........................................................................................................................................................................
MUSIC MODE 6 ...............................................................................................................................................................
RECORD MODE 7 ............................................................................................................................................................
VOICE MODE 7 ................................................................................................................................................................
RADIO MODE 7 ...............................................................................................................................................................
SYSTEM SETTING 7 .........................................................................................................................................................
Music playback 8 ................................................................................................................................................................
Voice recorder 9 .................................................................................................................................................................
Voice recordings 9 .............................................................................................................................................................
Radio mode 10 ....................................................................................................................................................................
Settings 11 ..........................................................................................................................................................................
PC Connection 11 ...............................................................................................................................................................
Firmware reinstallation 12 ...............................................................................................................................................
Firmware Upgrade 12 ........................................................................................................................................................
Warranty 12 .........................................................................................................................................................................
Declaration of conformity 12 ............................................................................................................................................

2/13 energysistem.com
3/13 energysistem.com
Introduction
Thank you for your trust in us and for buying your new MP3 Clip. We hope you enjoy it.
It is perfect to listen to your music the way you prefer thanks to its playback features. Its 8 GB built-in memory and the
possibility to expand it via cards make it possible for you to take along all your music.
We recommend you to read this user manual to enjoy your device in a safe way and with maximum performance.
Care and maintenance
Do not expose your MP3 to impacts, dust, direct sunlight, moisture or high temperatures.
Do not use corrosive nor abrasive cleaning products.
Keep the device clean and free of dust using a soft and dry cloth.
Charge the battery when the display shows the low battery icon.
Do not disassemble the device. All repairs should be exclusively done by qualified staff of Energy Sistem Technology,
S.A.
Main features
128x64 pixels LCD screen.

4/13 energysistem.com
Built-in FM radio with preset stations and recording function.
Digital voice recorder with built-in microphone.
MP3 / WMA music playback
7 EQ modes: Natural, Rock, Pop, Classic, Soft, Jazz, DBB-Bass.
7 repeat and playback modes (including shuffle mode).
Folder navigation.
Rechargeable lithium battery.
Updatable firmware.
No drivers needed.
Limit of elements: 4000 songs / 999 folders in root.
Product content
MP3 Clip.
Hi-Fi in-ear earphones.
USB cable to charge the battery and connect the device to the PC.
Quick guide.
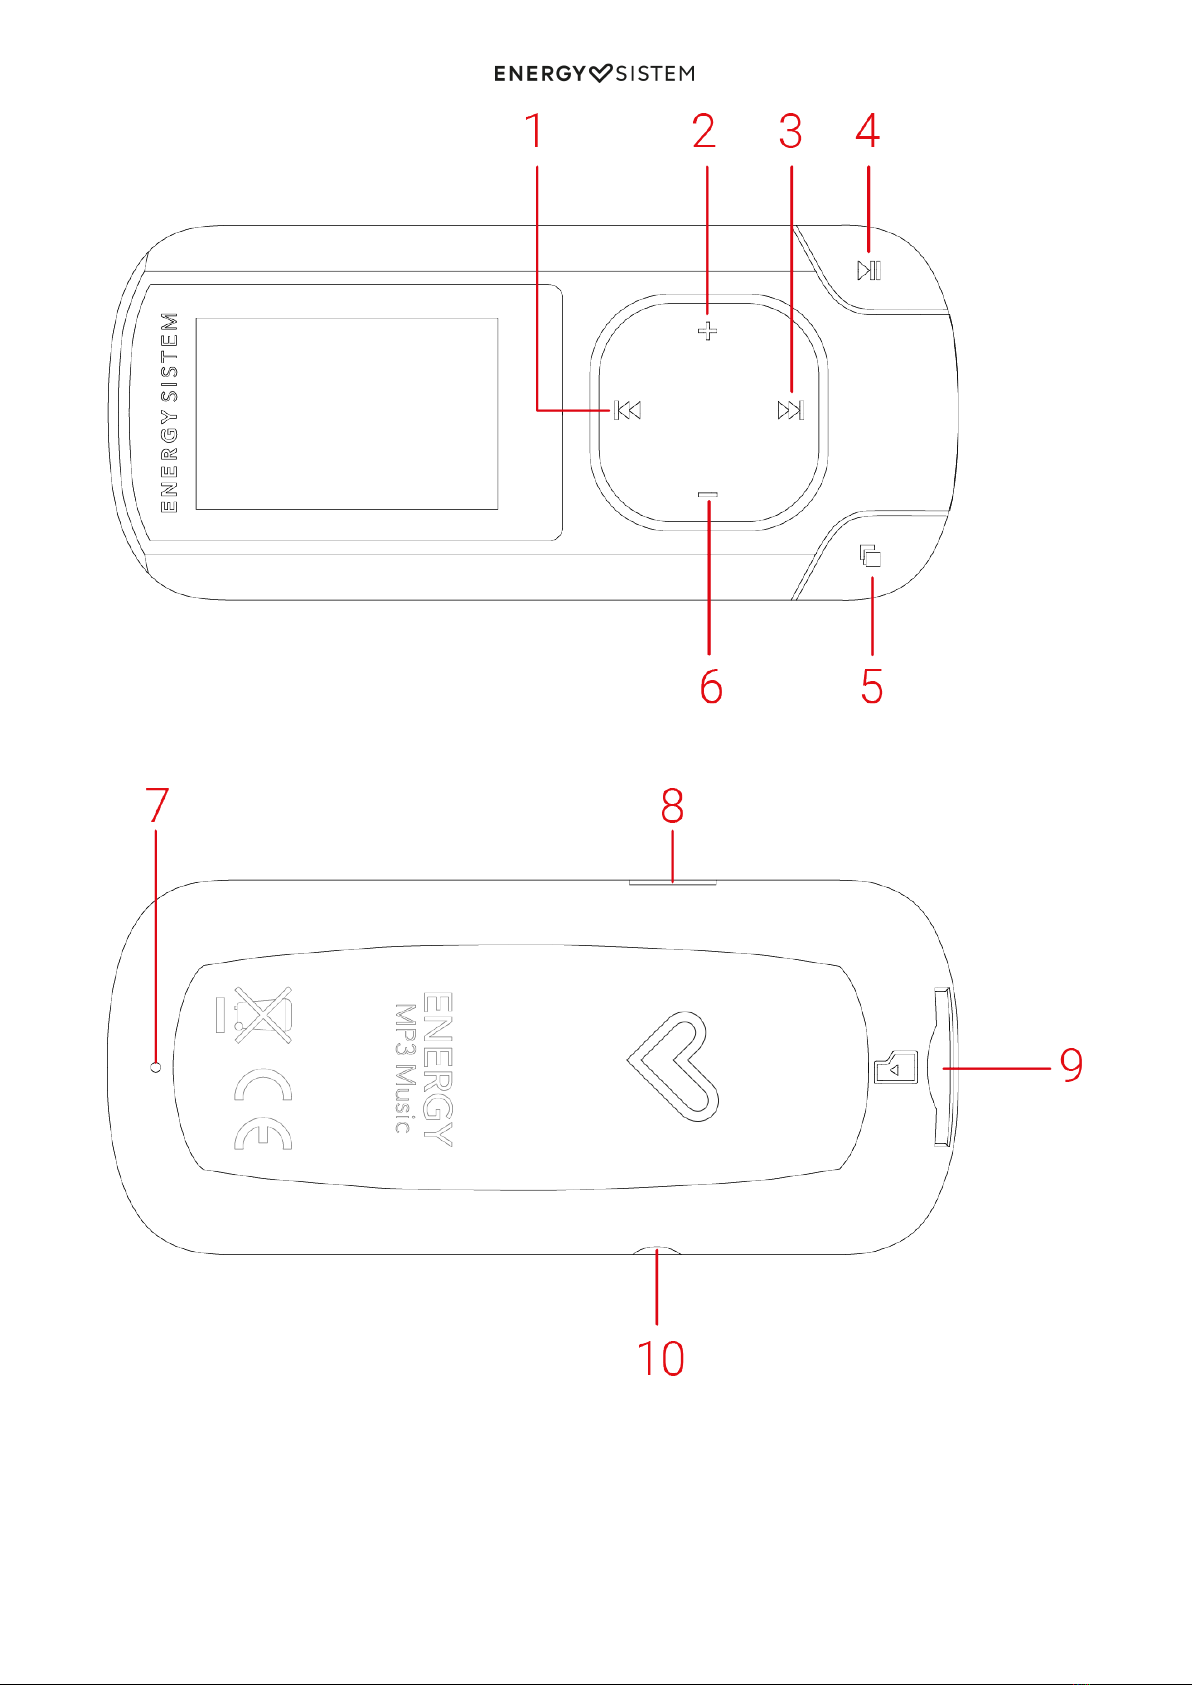
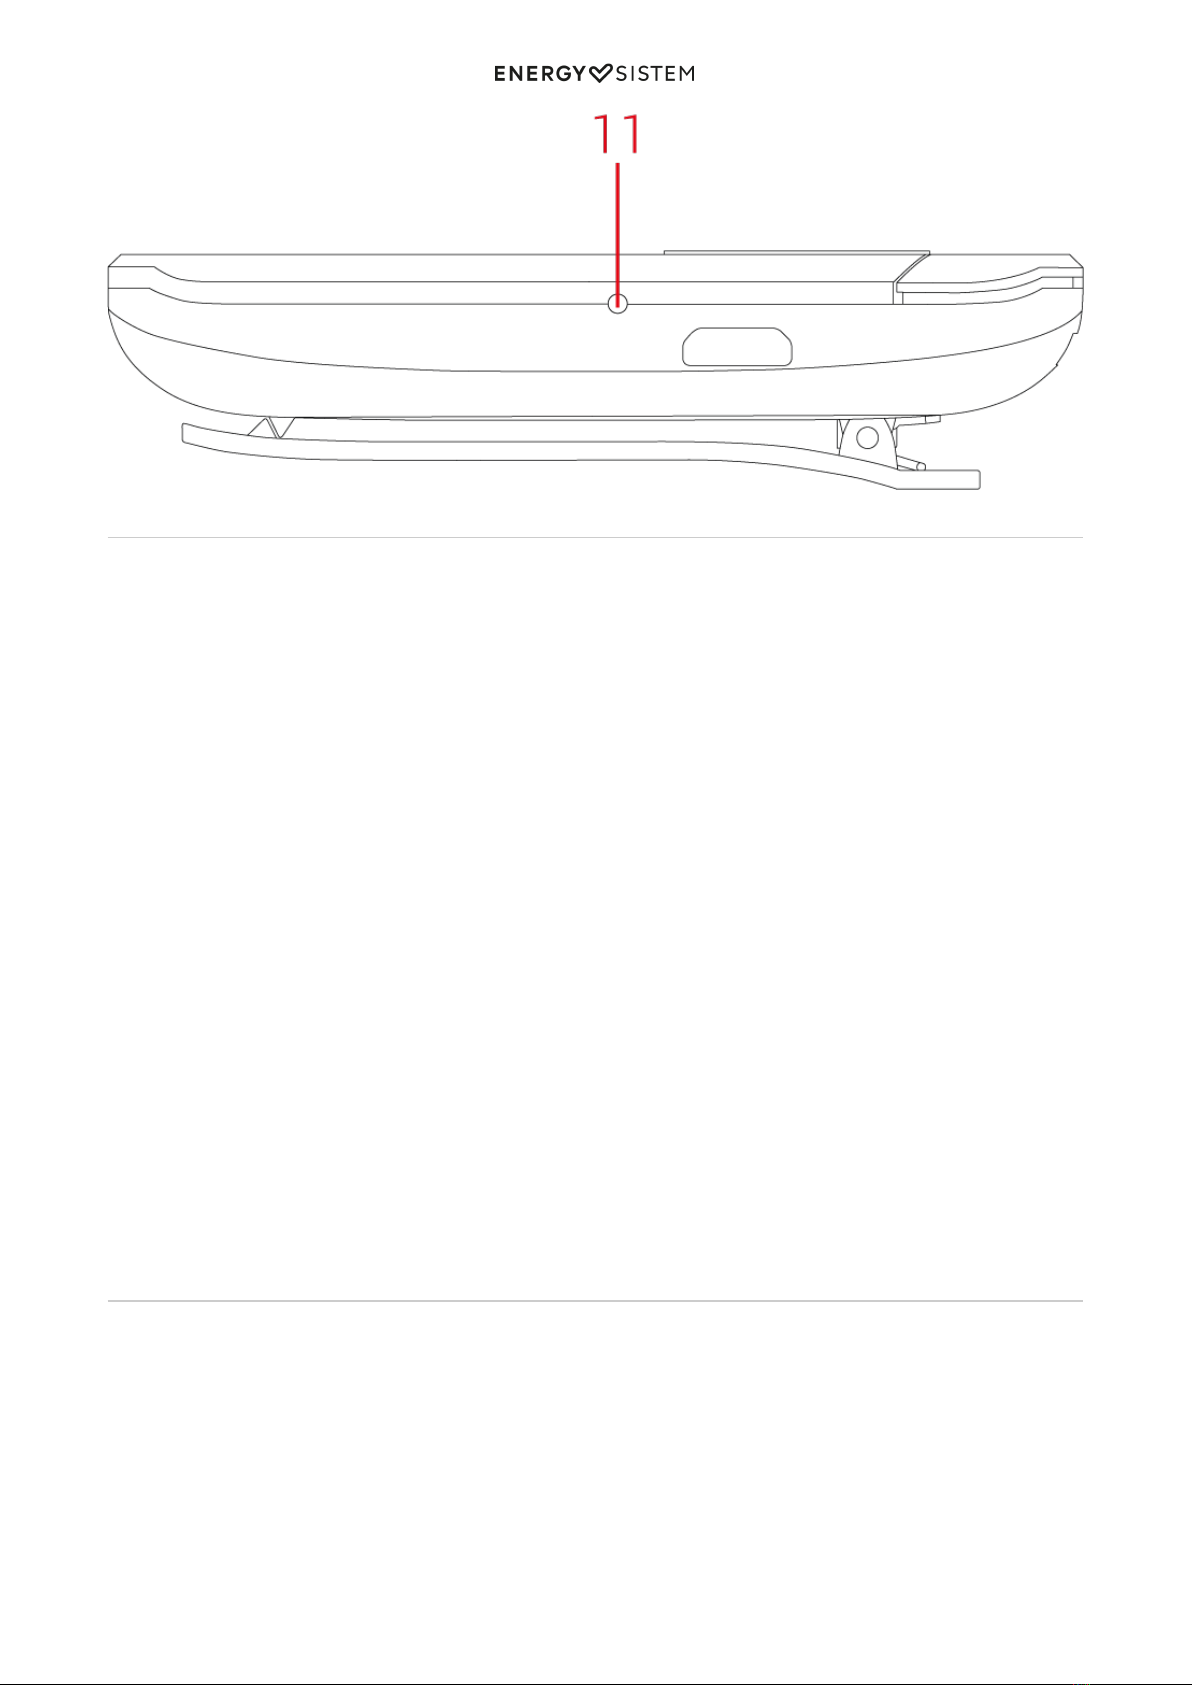
General overview
BACK1.
VOLUME +2.
NEXT3.
PLAY / PAUSE4.
MENU5.
VOLUME - / LOCK6.
MICROPHONE7.
USB CONNECTION8.
MICRO SD SLOT9.
AUDIO OUTPUT10.
RESET11.
5/13 energysistem.com
6/13 energysistem.com
Power on, power off and charging
Turn your MP3 Clip on and off by keeping the Play / Pause (4) button pressed for 3 seconds. If you want to lock the
buttons while enjoying your music, keep the Volume - / Lock (6) pressed for 2 seconds. Press the Volume - / Lock (6)
button briefly to unlock the device and when the lock icon appears, press and hold again the Volume - / Lock (6) button
for 2 seconds.
Connect the micro-USB cable to the USB connection (8) to charge the battery, then connect the other end to a computer
or any other device with USB charging port.
By connecting your MP3 to the PC or Tablet, you will be able to transfer files and you could also use the device while
charging it by keeping the Menu (5) button pressed.
Your MP3 has an integrated rechargeable Li-Ion battery. Charge the battery fully before first use in order to optimize
battery life. Charge the battery by connecting the MP3 player to a computer via the USB connector.
The charging time varies between 2 to 3 hours, depending on whether the device is off or on. In order to maintain the
battery in excellent condition, we recommend you to turn it off when charging it and not to charge it for more than 8
hours.
Access the SYSTEM SETTING -> Backlight option to disable automatic display backlight after some seconds of inactivity
and optimize your MP3 battery life. Press any button to activate again the display backlight.
Notice: If you select '0' seconds, the screen will be always on.
In order to increase the battery lifespan, we recommend not to disable this power saving system.
Notice:
-We recommend you fully charge the battery before using the product for the first time.
-We recommend you not to store or leave your device disused for a long period of time with the battery completely
discharged.
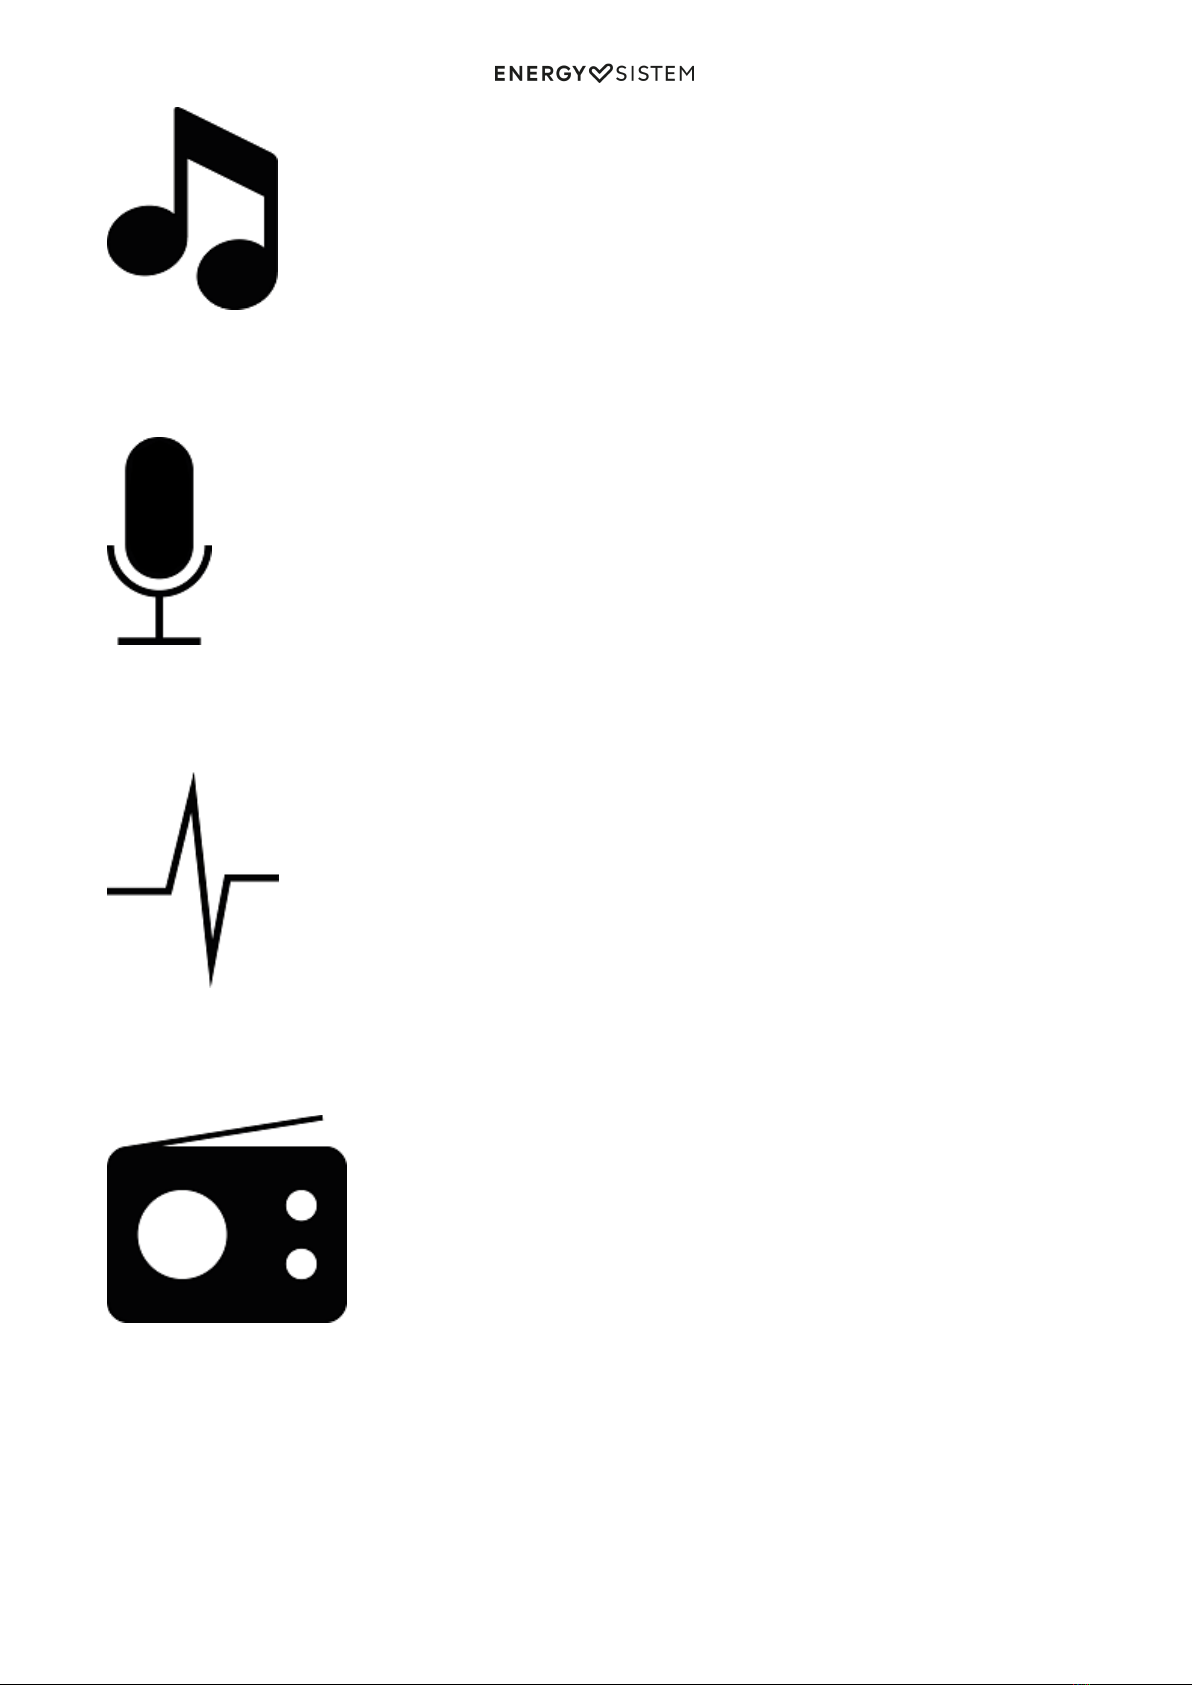
Main menu
MUSIC MODE
7/13 energysistem.com
RECORD MODE
VOICE MODE
RADIO MODE
SYSTEM SETTING

8/13 energysistem.com
Music playback
Your MP3 allows you to enjoy codified audio in MP3 / WMA formats thanks to its high-fidelity sound processor.
Move through the options of the main menu using the Next (3) and Back (1) buttons. Select the option you like and
proceed to choose the preferred playback mode by pressing Play / Pause (4). Press and hold the Menu (5) button to
return to the main menu.
You can access the playback mode settings, by pressing the Menu (5) button briefly. Move from one option to the next
by using the Next (3) or Back (1) buttons and use the Play / Pause (4) button to select. To return to the playback mode,
press Menu (5).
To start, pause or resume music playback, press the Play / Pause (4) button.
Press briefly the Next (3) or Back (1) buttons to change to the next/ previous track respectively. You can also rewind /
fast-forward the song by pressing and holding the Back (1) / Next (3) buttons respectively.
When the music is paused, press the Menu (5) button briefly to access management options:
"Local folder":
This option allows you to browse the folders of your MP3 Clip internal memory or microSD external memory and select
the music file you prefer, just like you would do from your computer.
"Delete file":
This option allows you to delete the current song from the internal memory.
"Delete all":
This option allows you to delete all songs stored in the internal memory.
"Playlist": Use this option when you store or delete songs to create again playlists by album, artist or genre:
Create Playlist: This option enables you to create again playlists by album, artist or genre.1.
"All songs": With this option you will see all songs stored in your MP3 memory, sorted alphabetically by file2.
name.
"Album List": You will see the list of your favourite music sorted by album respectively.3.
"Artists": You will see the list of your favourite music sorted by artist respectively.4.
"Genres": You will see the list of your favourite music sorted by genre respectively.5.
When music playback is on, press the Menu (5) button briefly to access the playback settings:
"Repeat":
The playback order of songs depends on the selected mode. Selected mode by default is "Normal". You can choose your
favourite mode through this option: "Repeat One" (it repeats the current track), "Folder" (it repeats just the tracks in the
current folder and then stops), "Repeat Folder" (it repeats the tracks in the current folder), "Repeat All" (continuous
playback of all tracks), "Random" (all tracks are played in a random order) and "Intro" (it plays just the first 10 seconds
and then switches to next track).

9/13 energysistem.com
"Equalizer ":
This option will allow you to equalize the audio according to your preferences. Among the 7 available modes are:
"Natural", "Rock", "Pop", "Classic", "Soft", "Jazz" or "DBB".
"Tempo rate":
This option allows you to increase or decrease the playback speed. In case you don't want to change the song speed,
select the '+0' option in this submenu.
"Replay mode":
Replay from A to B: You can continuously repeat a segment of a song with this function. To do so, select the 'Replay
mode' from the submenu and press shortly the Next (3) button to mark the start of the playback (point A) and press
again the Next (3) button to mark the end (point B).
You can choose how many times you want the A-B interval selected to be replayed.
To cancel this function, press briefly the Play / Pause (4) button.
"Playlist": Use this option when you store or delete songs to create again playlists by album, artist or genre:
Create Playlist: This option enables you to create again playlists by album, artist or genre.1.
"All Songs": With this option you will see all songs stored in your MP3 memory, sorted alphabetically by file2.
name.
"Album List": You will see the list of your favourite music sorted by album respectively.3.
"Artists": You will see the list of your favourite music sorted by artist respectively.4.
"Genres": You will see the list of your favourite music sorted by genre respectively.5.
Voice recorder
Your MP3 Clip enables you to perform voice recordings thanks to its built-in microphone. To access the voice recording
mode, select the Record mode option from the main Menu with the Play / Pause (4)* button.
You will access directly the recording interface. Press 2 times (briefly) the Play / Pause (4) button to start the recording
process. Right after, the recording time indicator above will start blinking '000:00:00?, then press Play / Pause (4) to
start recording. During the recording process, you can pause the recording by pressing Play / Pause (4) briefly. Press the
Menu (5) button for a few seconds to finish the recording. A 'RECXXX' file will be stored in the default recordings folder.
In order to access the saved recordings, we recommend you to select the 'VOICE MODE' from the main menu (see the
section that comes afterwards).
From the recording menu, you can access the recording settings menu by pressing the Menu (5) button to see the
different options available. You will be able to select the recording type from 32, 64, 128, 192 or 384 kbps among others
in WAV format.
Move from one option to the next by using the Next (3) or Back (1) buttons and use the Play / Pause (4) button to select.
Press and hold the Menu (5) button to exit the settings submenu.
Press and hold the Menu (5) button to return to the main menu.
Voice recordings
You will find directly the recordings saved in 'RECORD MODE'. It will show you the playback interface with the first
recording file saved: 'REC001.WAV'.
Notice: If you have not saved any recording in 'RECORD MODE', you will not be able to access this mode.
Recordings will be saved in .WAV format as follows: 'RECxxx.WAV'. To start, pause or resume music playback, press the
Play / Pause (4) button.
Press briefly the Next (3) or Back (1) buttons to change to the next/ previous track respectively. You can also rewind /

10/13 energysistem.com
fast-forward the song by pressing and holding the Back (1) / Next (3) buttons respectively.
From the recording menu, you can access the recording settings menu by pressing the Menu (5) button to see the
different options available.
Move from one option to the next by using the Next (3) or Back (1) buttons and use the Play / Pause (4) button to select.
Press and hold the Menu (5) button to exit the settings submenu.
Press and hold the Menu (5) button to access the following options available while playback is paused:
"Local folder":
This option allows you to browse the folders of your MP3 Clip internal memory or microSD external memory and select
the music file you prefer, just like you would do from your computer.
"Delete file":
This option allows you to delete the current song from the internal memory.
"Delete all":
This option allows you to delete all songs stored in the internal memory.
When the recording playback is on, press the Menu (5) button briefly to access the playback settings:
"Repeat":
The playback order of songs depends on the selected mode. Selected mode by default is "Normal". You can choose your
favourite mode through this option: "Repeat One" (it repeats the current track), "Folder" (it repeats just the tracks in the
current folder and then stops), "Repeat Folder" (it repeats the tracks in the current folder), "Repeat All" (continuous
playback of all tracks), "Random" (all tracks are played in a random order) and "Intro" (it plays just the first 10 seconds
and then switches to the next track).
"Equalizer ":
This option will allow you to equalize the audio according to your preferences. Among the 7 available modes are:
"Natural", "Rock", "Pop", "Classic", "Soft", "Jazz" or "DBB".
"Tempo rate":
This option allows you to increase or decrease playback speed. In case you don't want to change song speed, select the
'+0' option in this submenu.
"Replay mode":
Replay from A to B: You can continuously repeat a segment of a song with this function. To do so, select the 'Replay
mode' from the submenu and press shortly the Next (3) button to mark the start of the playback (point A) and press
again the Next (3) button to mark the end (point B).
You can choose how many times you want the selected A-B interval to be replayed.
To cancel this function, press briefly the Play / Pause (4) button.
Radio mode
Your MP3 Clip has an integrated FM Radio with some presets and direct recording option. To listen to the radio, select
the FM Radio option in the main menu.
From the FM Radio Mode, use the Next (3) or Back (1) buttons to browse the frequencies range and, by keeping the
buttons pressed, you can perform auto searches.
To tune in the stations automatically, access the radio submenu by pressing the Menu (5) button and selecting 'Auto
Search'. Once you have performed an automatic search of stations, use the Play /Pause (4) button to change from one
saved station to another. This way, you can browse all your saved stations.
Notice: Make sure your earphones are properly connected to the audio output. Otherwise, the FM search won't be
performed correctly.
Other manuals for Clip 8GB
1
Table of contents
Other ENERGY SISTEM MP3 Player manuals

ENERGY SISTEM
ENERGY SISTEM 2110 User manual

ENERGY SISTEM
ENERGY SISTEM ENERGY 12 Series User manual

ENERGY SISTEM
ENERGY SISTEM MUSIC BOX ENERGY Bike User manual

ENERGY SISTEM
ENERGY SISTEM Xplosionn 5500 User manual

ENERGY SISTEM
ENERGY SISTEM ENERGY Music Box Z210 User manual

ENERGY SISTEM
ENERGY SISTEM Aquatic 2 Series User manual

ENERGY SISTEM
ENERGY SISTEM Z250 User manual

ENERGY SISTEM
ENERGY SISTEM MP3 ELEGANCE COMPACT User manual

ENERGY SISTEM
ENERGY SISTEM 14 Series User manual

ENERGY SISTEM
ENERGY SISTEM ENERGY MP3 Running User manual


