epiphan Pearl-2 Rackmount User manual

Epiphan Pearl-2
UserGuide
Release 4.0.0
September 09, 2016
UG115-02
© and ™ 2016, Epiphan Systems, Inc

Terms and conditions
This document, the Epiphan web site, and the information contained therein, including but not limited to the
text, videos and images as well as Epiphan System Inc.’s trademarks, trade names and logos are the property
of Epiphan Systems Inc. and its affiliates and licensors, and are protected from unauthorized copying and
dissemination by Canadian copyright law, United States copyright law, trademark law, international
conventions and other intellectual property laws.
Epiphan, Epiphan Video, Epiphan Systems, Epiphan Systems Inc., and Epiphan logos are trademarks or
registered trademarks of Epiphan Systems Inc., in certain countries. All Epiphan product names and logos are
trademarks or registered trademarks of Epiphan. All other company and product names and logos may be
trademarks or registered trademarks of their respective owners in certain countries.
Copyright © 2016 Epiphan Systems Inc. All Rights Reserved.
THE SOFTWARE LICENSE AND LIMITED WARRANTY FOR THE ACCOMPANYING PRODUCT ARE SET FORTH IN
THE INFORMATION PACKET OR PRODUCT INSTALLATION SOFTWARE PACKAGE THAT SHIPPED WITH THE
PRODUCT AND ARE INCORPORATED HEREIN BY REFERENCE. IF YOU ARE UNABLE TO LOCATE THE SOFTWARE
LICENSES OR LIMITED WARRANTY, CONTACT YOUR EPIPHAN REPRESENTATIVE FOR A COPY.
PRODUCT DESCRIPTIONS AND SPECIFICATIONS REGARDING THE PRODUCTS IN THIS MANUAL ARE SUBJECT
TO CHANGE WITHOUT NOTICE. EPIPHAN PERIODICALLY ADDS OR UPDATES THE INFORMATION AND
DOCUMENTS ON ITS WEB SITE WITHOUT NOTICE. ALL STATEMENTS, INFORMATION AND
RECOMMENDATIONS ARE BELIEVED TO BE ACCURATE AT TIME OF WRITING BUT ARE PRESENTED WITHOUT
WARRANTY OF ANY KIND, EXPRESS OR IMPLIED. USERS MUST TAKE FULL RESPONSIBILITY FOR THEIR
APPLICATION OF ANY PRODUCTS.
LIMITATION OF LIABILITY
UNDER NO CIRCUMSTANCES SHALL EPIPHAN BE LIABLE FOR ANY INCIDENTAL, SPECIAL, CONSEQUENTIAL,
EXEMPLARY OR OTHER INDIRECT DAMAGES THAT RESULT FROM THE USE OF, OR THE INABILITY TO USE,
THIS PRODUCT OR THE INFORMATION CONTAINED IN THIS DOCUMENT OR PROVIDED ON EPIPHAN’S WEB
SITE, EVEN IF EPIPHAN HAS BEEN ADVISED OF THE POSSIBILITY OF SUCH DAMAGES. IN NO EVENT SHALL
EPIPHAN’S TOTAL LIABILITY TO YOU FOR ALL DAMAGES, LOSSES, AND CAUSES OF ACTION RESULTING FROM
YOUR USE OF THIS PRODUCT, WHETHER IN CONTRACT, TORT (INCLUDING, BUT NOT LIMITED TO,
NEGLIGENCE) OR OTHERWISE, EXCEED THE AMOUNTS YOU PAID TO EPIPHAN DURING THE MOST RECENT
THREE-MONTH PERIOD IN CONNECTION WITH AMOUNTS WHICH YOU PAID FOR USING THIS PRODUCT.
INFORMATION AND DOCUMENTS, INCLUDING PRODUCT SPECIFICATIONS, PROVIDED IN THIS DOCUMENT
OR THE EPIPHAN WEB SITE ARE PROVIDED “AS IS”. SPECIFICALLY, BUT NOT WITHOUT LIMITATION, EPIPHAN
DOES NOT WARRANT THAT: (i) THE INFORMATION IS CORRECT, ACCURATE, RELIABLE OR COMPLETE; (ii) THE
FUNCTIONS CONTAINED ON THE EPIPHAN WEB SITE WILL BE UNINTERRUPTED OR ERROR-FREE; (iii) DEFECTS
WILL BE CORRECTED, OR (iv) THIS WEB SITE OR THE SERVER(S) THAT MAKES IT AVAILABLE ARE FREE OF
VIRUSES OR OTHER HARMFUL COMPONENTS. EPIPHAN SPECIFICALLY DISCLAIMS ALL REPRESENTATIONS,
WARRANTIES, AND CONDITIONS, EITHER EXPRESS, IMPLIED, STATUTORY, BY USAGE OF TRADE OR
OTHERWISE INCLUDING BUT NOT LIMITED TO ANY IMPLIED WARRANTIES OF MERCHANTABILITY, NON-
INFRINGEMENT, TITLE, SATISFACTORY QUALITY OR FITNESS FOR A PARTICULAR PURPOSE.
For additional terms and conditions, please refer to additional sections in this document.

Thank you for choosing Epiphan!
At Epiphan Video (“Epiphan”), product function and quality are our top priority. We make every effort to make
sure that our products exceed your expectations.
Product feedback
Your feedback is important! We regularly contact our customers to ensure our products meet your
performance and reliability requirements. We strive to continually enhance our products to accommodate
your needs. Please let us know how you think we can improve our products by emailing your suggestions to
info@epiphan.com.
Specifications
Go to the page of the Epiphan website to get the most recent product specifications and additional
information about Epiphan Pearl-2.
Warranty
All Epiphan Systems products are provided with a 100% return to depot warranty for one year from the date
of purchase.
Technical support
Epiphan’s products are backed by our professional support team. If you are having issues with your product,
please gather details about your system and contact our team by:
lEmailing support@epiphan.com
lLive chat via the link on our support site http://www.epiphan.com/support/
lPhone toll free at 1-877-599-6581 or call +1-613-599-6581
Be sure to include as much information about your problem as possible. Including:
lProblem description
lDetails of the video or audio source (type, connection, resolution, refresh rate, etc.)
lProduct serial number
lProduct firmware version (if applicable, from web admin interface)
Copyright © 2016 Epiphan Systems Inc. All Rights Reserved.

What's new in release 4.0.0?
Firmware 4.0.0 is the inaugural firmware for Pearl-2, and it brings all the features of Pearl to a powerful new
platform. There are few significant updates to the operation of the firmware, as the differences between
Pearl-2 and Pearl lie in the hardware, and are detailed at many other places in this User Guide.

v
Table of contents
What's new in release 4.0.0? iv
Table of contents v
Start here 1
About this Guide 1
What is Pearl-2? 2
Using Pearl-2 effectively 3
AV inputs 3
What's in the Box? 4
Front and back view 6
Pearl 6
Tech specs 8
About 4K on Pearl-2 10
4K feature add-on 11
Quick start 13
Get started quickly with auto channels: 13
To view the auto channels: 14
Record the Channel 15
What’s Next? 15
Epiphan Live 17
Accessing Epiphan Live 18
Streaming, recording and monitoring using the Dashboard interface 20
Understanding the Dashboard interface 21
Configuring Dashboard panels for visual confidence monitoring 24
Monitoring video and audio sources 25
Configuring and monitoring video outputs 28
Controlling streaming and recording using Epiphan Live 31
Live switching using the Switcher interface 33
Understanding the Switcher interface 34
Switching while live streaming and recording 36

vi
PART 1: Setup 40
The Admin panel 41
Connect to the Admin panel 41
Connect using the touch screen 41
Connect via DNS-based service discovery 42
Connect via the Epiphan discovery utility 44
Connect via persistent static IP address 46
User administration 47
User types and privileges 47
Set or change user passwords 50
Remove user passwords 52
Overcome lost passwords 53
Configure LDAP 53
Change the logged-in user 55
Restrict viewers by IPaddress 56
IPrestriction examples 57
Pearl-2's touch screen 60
Touchscreen overview 60
View system information 62
Channel monitoring 64
Individual channel monitoring 65
Grid-view channel monitoring 66
Pearl-2's audio jack 68
Control recording of individual channels 69
Control streaming of individual channels 71
One Touch streaming and recording control 72
Understand and use One Touch control 73
Specify channels and recorders for One Touch recording 75
Specify channels for One Touch streaming 79
Customize how One Touch control is displayed 80

vii
View AFU status 81
Configure the touch screen 84
Disable (or enable)the touch screen 84
Hide (or show) channel previews on the touch screen 85
Disable (or enable) system status on the touch screen 86
Block (or allow) configuration functions from the touch screen 87
Block (or allow) recording, streaming and switching from the touch screen 87
Set touch screen timeout 88
Configure touch screen PIN security code 89
View system information 91
Configure network settings 92
Verify IP Address and MAC address via the touch screen 92
Verify IP address and MAC address via the Admin panel 93
Configure DHCP 94
Configure a static IP address 96
Tether to a mobile network 100
Network ports used by Pearl-2 101
Perform network diagnostics 102
Configuration presets 105
Configuration presets overview 105
Configuration presets in action 106
Configuration groups 108
Create a configuration preset 110
Export and import configuration presets 111
Download a configuration preset 111
Import a configuration preset 112
Apply a configuration preset from the Admin panel 113
Apply a configuration preset using the touch screen 114
Apply theFactory default configuration preset 118
Update a configuration preset 119

viii
Delete a configuration preset 121
Configurationpreset considerations 122
Channel and recorder index number behavior 122
Recording and streaming states 123
Recorded files (in channels and recorders) 123
Deleting channels 124
Branding content 124
Configuration presets are not user profiles 125
Touch screen considerations 125
Configure date and time 126
Verify date and time via the touch screen 126
Verify date and time settings 127
Configure synchronized time (NTP, PTP v1 and RDATE) 128
Configure the date and time manually 129
Change the time zone 130
Configure a local NTP server 130
Video output ports 131
Show a channel on the video output port 132
Show a source on the video output port 134
Select a resolution for the video output port 135
Preview the video output port 136
View the video output port status 137
Disable the video output port 138
Disable or enable the audio on the video output port 139
Configure the audio meter 140
Rename a video output port 141
PART 2: Capture 143
What is a channel? 144
Use the automatic channels Auto A and Auto B 145
Know which signal is used for Auto-A or Auto-B 146

ix
Configure auto channels 147
Create a simple channel 148
Create a custom channel 151
Custom channel layout editor 153
Custom channel examples 156
Create a custom channel or layout 159
Add a video source (custom channel) 161
Add an audio source (custom channel) 165
To upload an image 167
Add an image (custom channel) 169
Add a text overlay (custom channel) 173
Set the background color (custom channel) 178
Resize and position layout items using percents or pixels (custom channel) 178
Rename a layout (custom channel) 185
Delete or move a layout (custom channel) 186
Delete an uploaded image 187
Configure encoding 188
Configure video codec 188
Configure frame size 190
Fine tune stream settings 192
Configure audio codec 194
Codec and file format compatibility 196
Add channel metadata 197
Add channel metadata 198
Remove metadata from a channel 199
Preview a channel 199
Preview a channel from the Info page 199
Preview a channel from the Status page 200
Preview all channels at once 201
Rename a channel 202

x
Delete a channel 203
Live video mixing / switching 204
Switching / mixing using the touch screen 204
Switching / mixing using the Admin panel 207
Switching / mixing using Epiphan Live 208
What is a source? 211
Video sources 211
Audio sources 212
Connect a source 213
Connect an RTSP source 213
List of tested RTSP-based IP cameras 217
Preview a source 219
Configure a source 220
DVIand HDMIsignals 221
SDI signals 221
RTSP sources 222
Add a No Signal image to a source 222
Rename a source 223
Adjust audio gain (analog audio) 224
Confirm audio levels (via the touch screen) 226
Troubleshoot capture 228
Remove black bars (matte) from the video 228
Match the output frame size to the aspect ratio of the source signal 229
Stretch the image 231
Force the capture card to use a specific EDID 231
Upload a new EDID 231
Restore factory default EDID 233
Unstretch the output video 234
Remove the combing effect on images 235
PART 3: Stream 237

xi
What is streaming? 238
Choose a streaming option 238
Supported streaming formats 239
Stream to viewers 240
Stream content using HTTPor RTSP 240
Configure HTTP and RTSP streaming ports 242
Stream content using HLS(HTTP Live Streaming) 243
Send stream URLs to viewers 244
View the Flash stream 245
View your broadcast using the View link on the Info menu 245
View your broadcast using the Live broadcast link on the Status page 247
Viewing with a web browser 249
Viewing with a media player (RTSP) 251
Disable (and enable) streams for viewers 252
Restrict access to streams for viewers 253
Restrict viewers by IPaddress 254
IPrestriction examples 256
Allow list with distinct IP addresses 256
Allow list with a range of IP addresses 256
Allow list with a range of IP addresses and one or more specific IP addresses 257
Deny list with distinct IP addresses 257
Allow list with a range of IP addresses, distinct IP addresses and an exception 258
Deny list with a range of IP addresses 258
Stream to a server 259
Stream to a CDN 260
Start and stop streaming to a CDN 261
To stream content to a CDN using RTSP announce 266
To stream content to a CDN using RTMP push 267
Stream to a CDN using an XML profile 268
Stream to Wowza Streaming Cloud 269

xii
Stream to Original Livestream 273
Test using Epiphan TV CDN 276
Stream content using multicast 279
MPEG-TS streams using RTP/UDP push 279
MPEG-TS streams using UDP push 281
Multicast streaming using RTP/UDP 282
Stream to a media player 284
Stream content using multicast 284
MPEG-TS streams using RTP/UDP push 284
MPEG-TS streams using UDP push 286
Multicast streaming using RTP/UDP 287
Viewing with Session Announcement Protocol (SAP) 288
Stream content using UPnP 290
Enable UPnP 290
Disable UPnP 294
Viewing with UPnP 295
Play directly to a media player 297
Auto-restart playback to a UPnPdevice 297
Change UPnPdevice name 298
Samples of stream settings 299
Streaming video content 299
Streaming slide content 299
PART 4: Record 301
What is a recording? 302
Recording basics 302
Record a channel via the Admin panel 303
Record channels and recorders (using One Touch control) 305
Record a channel via Epiphan Live 307
Record a channel via the touch screen 308
Configure recording file size and type 309

xiii
Restart recording 313
Recorders 315
Add a recorder 315
Change the channels recorded by a recorder 316
Record with a recorder (using the admin panel) 317
Record a recorder (using One Touch control) 319
Record a recorder (using Epiphan Live) 320
Rename a recorder 321
Delete a recorder 321
Recorded files 323
View list of recorded files 323
Download recorded files manually 324
Extract tracks from a recording 325
Rename recorded files 327
Delete recorded files manually 328
File and recording transfer 330
Automatic file upload (AFU) overview 330
Choose files to include in AFU 331
Enable and set timing for AFU 333
AFU to an FTP server 336
AFU using RSync 337
AFU using CIFS 339
AFU to a secure FTP server 340
AFU using SCP 342
AFU or copy to USB drive 344
AFU to a USB drive 345
One-time copy/move of all recorded files to USB drive 346
Manually copy recorded files to USB drive 348
View available USBstorage space 349
Safely eject the USBdrive 350

xiv
View the AFU log 351
View AFU status 352
Manage the AFU queue 354
Access the AFU queue 354
View content in the AFU queue 355
Delete content in the AFU queue 355
Local FTPserver 357
Configure the local FTP server 357
Using the local FTP server 358
PART 5: Maintenance 361
Power down and system restart 362
Restarting the device via the Admin panel 362
Shutting down the device via the Admin panel 362
Shutting down the device manually 363
Save and restore device configuration 364
Perform factory reset 365
Restore factory configuration via the Admin panel 365
Firmware upgrade 367
Check for firmware updates 367
Install firmware 368
Install firmware directly from the Admin panel: 368
Install firmware from a file 370
Support 372
Download logs and "allinfo" 372
Configure remote support 374
Disable remote support 375
Storage disk maintenance 376
Check disk storage space 376
Check disk storage space via the touch screen 377
Schedule disk check 377
Perform disk check 378

xv
Third party integration 380
Control with RS-232 / serial port 381
Connect and configure the RS-232 cable 381
Control Pearl-2 with RS-232 382
RS-232 / Serialport command examples 385
Control with HTTPcommands 387
HTTP command syntax 387
HTTP command examples 389
Global variable HTTP command syntax for custom layouts 390
Configurationkeys forthirdparty APIs 393
System-level settings keys (read-only) 394
System-level settingskeys (read/write) 395
System-level custom layout keys (read/write) 395
Touch screen settings keys (read/write) 395
Recording configuration keys 396
HTTP server configuration keys 397
IP-based access control configuration keys 397
UPnP configuration keys 398
Frame grabber configuration keys 398
Broadcast configurationkeys 399
Channel encoder configuration keys 400
Channel layout configuration keys 401
Audio configuration keys 401
Stream publishing configuration keys 402
RTSP Announce configuration keys (Publish type 2) 403
RTP/UDP configuration keys (Publish type 3) 403
MPEG-TS configuration keys (Publish types 4 and 5) 404
RTMP push configuration keys (Publish type 6 and 7) 404
Livestream configuration keys (Publish type 8) 405
Content metadata configuration keys 405

Pearl-2 User Guide Start here
Start here
Welcome, and thank you for buying Epiphan Pearl-2™. This guide is designed to help you configure your new
system.
Pearl-2 details are described in the What is Pearl-2? and What's in the Box? sections. Read the Quick start
guide for the basic steps to get a single video (and optional audio) source configured as a streamable,
recordable output from Pearl-2.
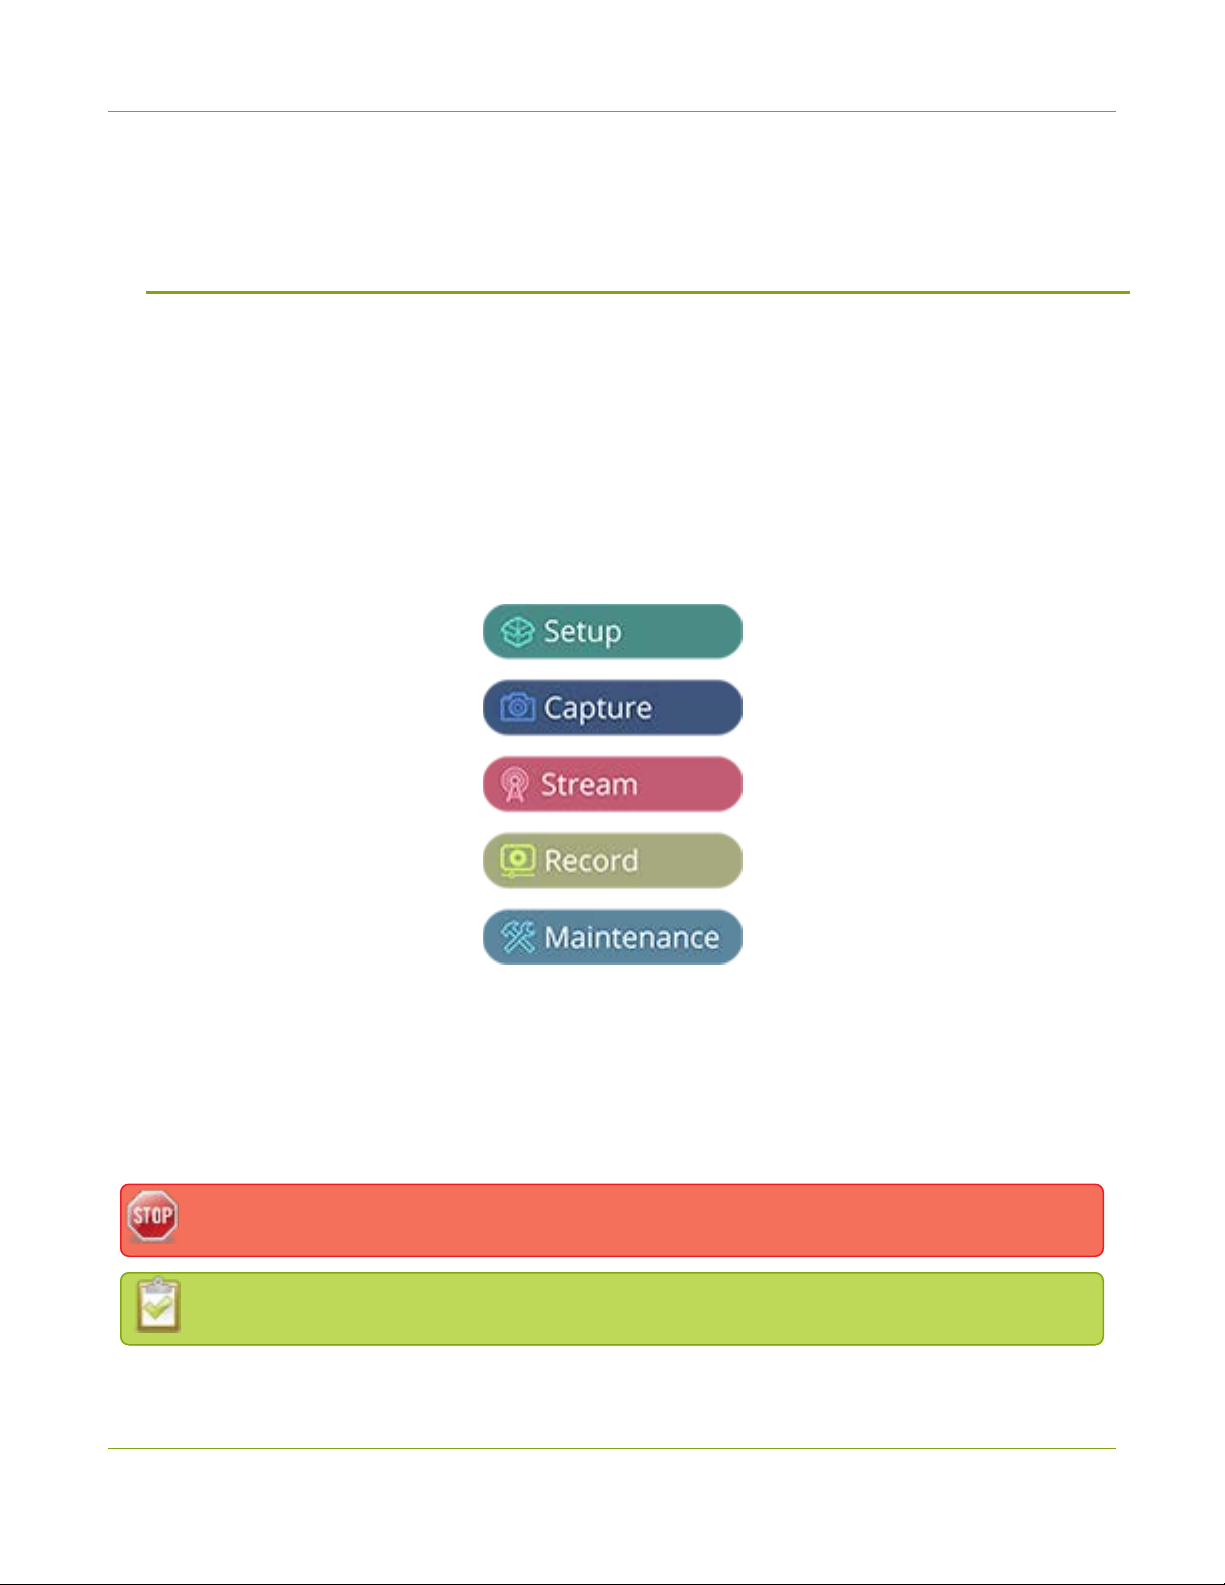
Following the quick start section, a set of task-based procedures help you to tweak the system exactly how
you want it. These procedures are broken into five categories: Setup, Capture, Stream, Record and
Maintenance.
About this Guide
Throughout this guide there are situations where more than one solution will complete a task. In those cases
the guide describes the simplest or most common variation first. Warnings, tips and notes are depicted as
follows.
This is a warning. Pay special attention to information in red boxes.
This is a tip or note. Data in green boxes help you get the most from your new system.
1

Pearl-2 User Guide What is Pearl-2?
What is Pearl-2?
Pearl-2, our most versatile live video production switcher, is a video encoder, video streamer, live switcher and
video recorder.
With Pearl-2, you can capture, record and stream computer monitors, radar displays, or anything that outputs
to SDI, HDMI™, HDMI 4K* or DVI-I(single link). Accompanying audio capture is supported via XLR, RCA, SDI or
HDMI.
Simultaneously capture up to six HD audio visual sources or two 4K sources with two HD sources and choose
how you want to record and stream them. You can create up to five simultaneous channels for live switching,
or one 4K channel. Keep your sources separate, configure them in multi-source layouts for live switching, or
do both!
The resulting streams can be viewed a number of ways through media players, browsers, on mobile devices
and through Content Distribution Networks (CDNs). Recorded files can be downloaded via FTPor set to
automatically upload via FTP, RSYNC, or CIFS and can be integrated into your Content Management System
(CMS).
Pearl-2 does not capture from HDCP encrypted sources.
2
Pearl-2 User Guide Using Pearl-2 effectively
Using Pearl-2 effectively
Pearl-2 can perform many different tasks, however, like any other computer system, there is a limit to the
number of concurrent tasks that can be processed and run smoothly.
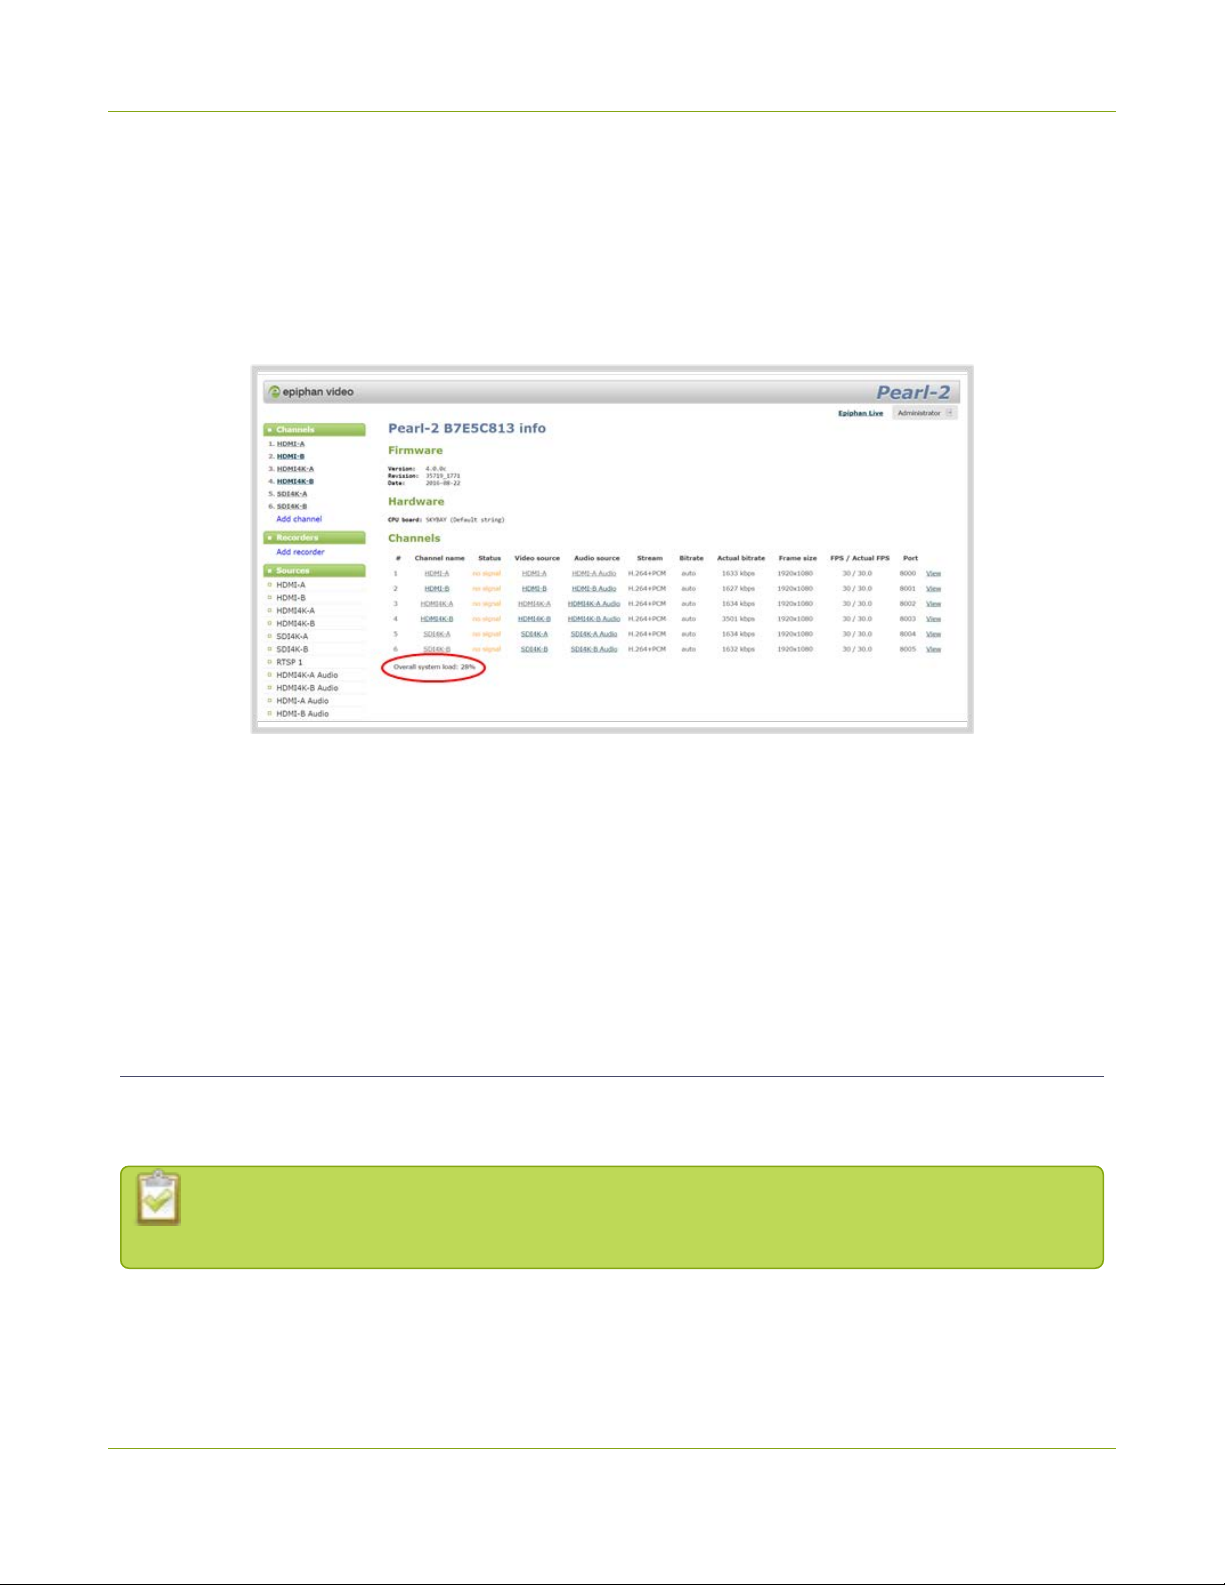
For best results, we recommend you always keep Pearl-2's CPU usage under 70%. You can check the Overall
system load from the Info page.
The actual number of tasks your Pearl-2 can complete concurrently depends on many factors including how
many channels you have, how many layouts you have per channel, how often you are switching layouts,
whether or not the system is resizing input signals, frame rate and bit rate per channel, whether or not you are
using the video output ports etc.
If you find that system load is higher than recommended, disable any unused video output ports, remove
unused channels or layouts, reduce the number of channels created or ensure sources come in at the right
resolution to avoid CPU time spent scaling.
AV inputs
Pearl-2 supports the following AVinputs directly. Nearly every other AV input is supported provided you have
the correct converter or adapter.
When using Pearl-2 it is recommended you use no more than six simultaneous HD sources or two
4K sources with two HD input sources for best results.
3

Pearl-2 User Guide What's in the Box?
Table 1 Inputs for Pearl-2
SDI
Audio
(Linear
PCM)
HDMI™ (Linear PMC, non-
HDCP protected)/
DVI-I (single link)
4K HDMI (Linear PMC, non-
HDCP protected)/
DVI-I (single link)
Left/Right
XLR Audio
(Balanced)
Left/Right
RCA Audio
(Balanced)
2 2 2 2 1
NB: Pearl-2 cannot simultaneously use both XLR audio input pairs along with the RCA audio pair. Use the left-
most XLR pair when using the RCA pair. For more detail,
What's in the Box?
Pearl-2 is shipped in a hard shell case that you can re-use for storing or moving the system between
jobs.Cable storage is under the custom foam tray that holds Pearl-2 in the case.
Inside the box with yourPearl-2 system, you'll find the power cable and the following items:
4
Other manuals for Pearl-2 Rackmount
2
Table of contents
Other epiphan DVR manuals


Popular DVR manuals by other brands


Panasonic
Panasonic WJ-ND400K Setup instructions

ZMODO
ZMODO DX-SIN8 user manual

Defender
Defender SENTINEL10 instruction manual

Innovative systems
Innovative systems IPTV Middleware user guide

United Technologies
United Technologies interlogix TruVision DVR 44HD quick start guide

Grundig
Grundig GPVR1250 instruction manual


