manuals.online logo
Brands
  1. Home
  2. •
  3. Brands
  4. •
  5. Epson
  6. •
  7. Printer
  8. •
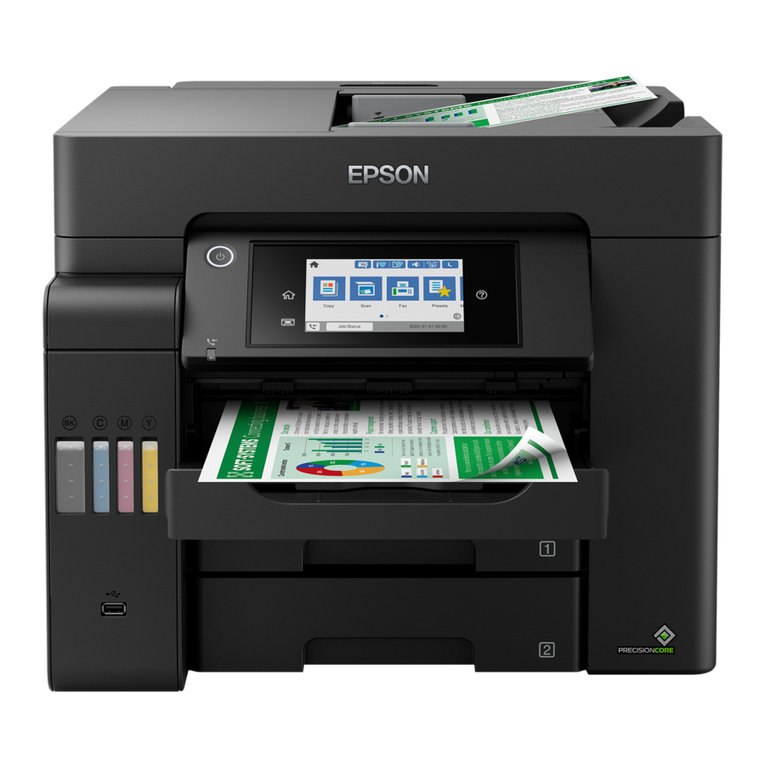
  9. Epson EcoTank L15160 Instruction Manual

Epson EcoTank L15160 Instruction Manual

This manual suits for next models

1

Other Epson Printer manuals

Epson Stylus C63 User manual

Epson

Epson Stylus C63 User manual

Epson MX-82 User manual

Epson

Epson MX-82 User manual

Epson WorkForce AL-MX200DNF Original instructions

Epson

Epson WorkForce AL-MX200DNF Original instructions

Epson Stylus C44 Firmware update

Epson

Epson Stylus C44 Firmware update

Epson SC-B6000 User manual

Epson

Epson SC-B6000 User manual

Epson NPD4919-00 EN User manual

Epson

Epson NPD4919-00 EN User manual

Epson Stylus Photo R2000 Series Instruction Manual

Epson

Epson Stylus Photo R2000 Series Instruction Manual

Epson Stylus Color 980 User manual

Epson

Epson Stylus Color 980 User manual

Epson Stylus Photo 925 User manual

Epson

Epson Stylus Photo 925 User manual

Epson 4000 - Stylus Pro Color Inkjet Printer User manual

Epson

Epson 4000 - Stylus Pro Color Inkjet Printer User manual

Epson Office BX310FN Series Instruction Manual

Epson

Epson Office BX310FN Series Instruction Manual

Epson PictureMate Instruction Manual

Epson

Epson PictureMate Instruction Manual

Epson PictureMate Show - PM 300 - PictureMate Show Digital... User manual

Epson

Epson PictureMate Show - PM 300 - PictureMate Show Digital... User manual

Epson L1300 User manual

Epson

Epson L1300 User manual

Epson Stylus Color 200 User manual

Epson

Epson Stylus Color 200 User manual

Epson SC-F9400H Series User manual

Epson

Epson SC-F9400H Series User manual

Epson TM-P60II Use and care manual

Epson

Epson TM-P60II Use and care manual

Epson SC-T5400 SERIES User manual

Epson

Epson SC-T5400 SERIES User manual

Epson AcuLaser C9200 Series User manual

Epson

Epson AcuLaser C9200 Series User manual

Epson Stylus Pro GS6000 User manual

Epson

Epson Stylus Pro GS6000 User manual

Epson TM-H6000V-234 User manual

Epson

Epson TM-H6000V-234 User manual

Epson Stylus Photo PX830FWD User guide

Epson

Epson Stylus Photo PX830FWD User guide

Epson Stylus Color User manual

Epson

Epson Stylus Color User manual

Epson Stylus Pro 7900 User manual

Epson

Epson Stylus Pro 7900 User manual

Popular Printer manuals by other brands

Evolis Elypso user guide

Evolis

Evolis Elypso user guide

Lexmark 522n - C Color Laser Printer Service manual

Lexmark

Lexmark 522n - C Color Laser Printer Service manual

Panduit COUGAR LS9Q Operator's manual

Panduit

Panduit COUGAR LS9Q Operator's manual

Olivetti PG L2140 Operation guide

Olivetti

Olivetti PG L2140 Operation guide

Samsung SL-M2820DW user manual

Samsung

Samsung SL-M2820DW user manual

Kyocera FS-9530DN specification

Kyocera

Kyocera FS-9530DN specification

Canon LASER SHOT LBP-1210 Specifications

Canon

Canon LASER SHOT LBP-1210 Specifications

Canon PIXMA PRO-1 Series Getting started

Canon

Canon PIXMA PRO-1 Series Getting started

Canon LBP113w Getting started

Canon

Canon LBP113w Getting started

Lexmark Infoprint 1332 user manual

Lexmark

Lexmark Infoprint 1332 user manual

TransAct POSJET 1500 Spare parts

TransAct

TransAct POSJET 1500 Spare parts

Telpar MTP-1500 user manual

Telpar

Telpar MTP-1500 user manual

Star DP8340 SERIES user manual

Star

Star DP8340 SERIES user manual

MGI JETVARNISH 3DS user manual

MGI

MGI JETVARNISH 3DS user manual

Kyocera TASKalfa PA4500ci Operation guide

Kyocera

Kyocera TASKalfa PA4500ci Operation guide

Emaar EP-360 user manual

Emaar

Emaar EP-360 user manual

Fujitsu DL7400 user manual

Fujitsu

Fujitsu DL7400 user manual

Centronics 101A Technical manual

Centronics

Centronics 101A Technical manual

manuals.online logo
manuals.online logoBrands
  • About & Mission
  • Contact us
  • Privacy Policy
  • Terms and Conditions

Copyright 2025 Manuals.Online. All Rights Reserved.

10 Raise the control panel, then press the power button to
turn on the product.
Note: If an error message appears, turn off the product and
check that no protective material has been left inside the product
and that the transportation lock is in the printing position.
11 Select your language, country, date, and time settings.
Note: You can change these settings later using the product’s
control panel. For more information, see the online User’s Guide.
Follow steps 12 and 13 to continue ink charging.
12 When the message to see the Start Here sheet appears
on the LCD screen, press and hold OK for 5 seconds.
13 When the ink confirmation message appears on the LCD
screen, select Done to start charging the ink. Ink charging
takes approximately 9 minutes. A message appears when
ink charging is complete. Press OK to proceed with initial
setup.
Note: Part of the ink from the included bottles is used for printer
setup. You will notice ink levels in the tanks decrease during
charging. This decrease is normal and does not affect the stated
in-box yields.
Caution: Do not unplug or turn off the product, raise the
scanner unit, or load paper while the product is charging or you’ll
waste ink.
3Load paper
See the online User’s Guide for information about loading
capacity, available paper types and sizes, loading envelopes,
and using the rear paper feed slot or ADF.
1 Make sure the
product is not
charging ink, then
pull out a paper
cassette.
2 Slide the side edge guides
all the way out.
IMPORTANT: Before using this product, make sure you read
these instructions and the safety instructions in the online User’s
Guide.
Important Safety Instructions: When using telephone equipment, you
should always follow basic safety precautions to reduce the risk of fire,
electric shock, and personal injury, including the following:
• Do not use the Epson®product near water.
• Always keep this guide handy.
• Avoid using a telephone during an electrical storm. There may be a
remote risk of electric shock from lightning.
• Do not use a telephone to report a gas leak in the vicinity of the leak.
Caution: To reduce the risk of fire, use only a No. 26 AWG or larger
telecommunication line cord.
The illustrations show the L15160, but the steps are the same for
both models, unless otherwise specified.
1Unpack
Note: Do not open the ink bottles until you are ready to fill the ink
tanks. The ink bottles are vacuum packed to maintain reliability.
1 Remove all protective materials from the product.
2 Lift up the scanner unit. Remove all protective materials
from inside the product.
Caution: The printer ships with the transportation lock in the
printing position. Do not move the transportation lock from the
printing position.
3 Lower the scanner unit.
2Fill ink tanks
Warning: Keep the ink bottles out of the reach of children and do not
drink the ink.
Caution: This product requires careful handling of ink. If ink spills,
wipe it off immediately with a damp towel to avoid permanent stains.
If ink gets on your clothes or belongings, it may not come off.
Note:
• Epson cannot guarantee the quality or reliability of third-party ink.
• Use the ink bottles included with the printer to set up the product.
• The included ink bottles are designed for reliable printer setup and
cannot be resold.
Epson recommends the use of Genuine Epson 542 pigment
inks. The use of any other inks may cause damage not covered
by the warranty, particularly if they are not pigment. Epson
cannot guarantee that non-Epson 542 inks are pigment, even if
labeled as compatible.
1 Open the ink tank cover, then open the cap for the
black ink tank.
Note: Refer to the color-coded sticker on the ink tank unit to
identify the color of each tank.
2 Unpack the black (BK) ink bottle. Hold the ink bottle
upright and slowly turn the bottle cap to remove it.
Caution: Do not shake or squeeze the ink bottles. Do not touch
the top of the ink bottle after its cap is removed.
3 Insert the ink bottle into the filling port.
Note: Do not force the bottle into position; each bottle is keyed
for each color.
4 Wait for the bottle to empty. Do not squeeze the bottle.
Note: If ink does not flow from the bottle, lift and reinsert the
bottle.
5 When the ink bottle is empty, remove the ink
bottle and replace the bottle cap.
Note: Do not leave the ink bottle inserted;
otherwise the bottle may be damaged or ink
may leak.
6 Close the black ink tank cap.
7 Repeat the previous steps for the other colors.
8 Close the ink tank cover.
9 Connect the power cord to the back of the product and to
an electrical outlet.
Caution: Do not connect to your computer yet.
Start Here
L15150/L15160
2 Insert the product CD (Windows only) or download and
run your product’s software package. For the latest
software, visit:
L15150
www.epson.com.jm/support/L15150
L15160
www.epson.com.jm/support/L15160
3 Follow the instructions on the computer screen to run the
setup program.
4 When you see the Select Your Connection screen, select
one of the following:
• Wireless connection
In most cases, the software installer automatically
attempts to set up your wireless connection. If setup
is unsuccessful, you may need to enter your network
name (SSID) and password.
• Direct USB connection
Make sure you have the USB cable ready.
• Wired network connection
Make sure you have an Ethernet cable (not included).
Mobile printing
Connect wirelessly from your smartphone, tablet, or computer.
Print documents and photos from across the room or around
the world:
• Print directly from your smartphone or tablet using iOS or
Android™ with Epson iPrint™. Simply connect your printer
and device to the same network and tap the action icon to
select the print option.
• Print directly from your Android™ (v4.4 or later) device*.
Simply connect your printer and device to the same network
and tap the menu icon to select the print option.
• Print from wherever you are, next to your printer or
remotely with Epson Connect™. Learn more at
www.epson.com.jm/connect.
* May require the Epson Print Enabler or Mopria Print Service app from
Google Play™.
Any problems?
Network setup was unsuccessful.
• Make sure you select the right network name (SSID).
• Restart your router (turn it off and then on), then try to
connect to it again.
• If you see a firewall alert message, click Unblock or Allow
to let setup continue.
• The printer can only connect to a network that supports
2.4 GHz connections. If your router offers both 2.4 GHz
and 5 GHz connections, make sure the 2.4 GHz is enabled.
• If your network has security enabled, make sure you enter
your network password (WEP key or WPA passphrase)
correctly. Be sure to enter your password in the correct
case.
EPSON is a registered trademark, EPSON Exceed Your Vision is a registered logomark, and
Epson Connect and Epson iPrint are trademarks of Seiko Epson Corporation.
Designed for Excellence is a trademark of Epson America, Inc.
Mac is a trademark of Apple Inc., registered in the U.S. and other countries.
Windows is a registered trademark of Microsoft Corporation in the United States and/or other
countries.
Android and Google Play are trademarks of Google LLC.
General Notice: Other product names used herein are for identification purposes only and may
be trademarks of their respective owners. Epson disclaims any and all rights in those marks.
This information is subject to change without notice.
© 2020 Epson America, Inc., 2/20
Printed in XXXXXX CPD-57854
3 Insert paper with the glossy or printable side facedown.
Note: Make sure the paper is loaded against the front edge
guide and not sticking out from the end of the cassette.
4 Slide the side edge
guides against the
paper but not too
tightly.
Note: Do not load paper
above the arrow mark on
the side edge guide.
5 Keep the cassette
flat as you insert it all
the way.
6 Select the paper settings on the product’s control panel.
4Connect the fax line
1 Connect a phone cord to a telephone wall jack and to the
LINE port on your product. See the online User’s Guide
for more information.
2 Select Proceed on the LCD screen to set up the fax, or
select Close to set it up later.
5Install software
Note: If you are using a Mac or your computer does not have a
CD/DVD drive, an Internet connection is required to obtain the product
software.
1 Make sure the product is NOT CONNECTED to your
computer.
Windows®:If you see a Found New Hardware screen, click
Cancel and disconnect the USB cable.
• Print a network connection report to identify network
problems and solutions. See your online User’s Guide for
instructions.
There are lines or incorrect colors in my printouts.
Run a nozzle check to see if there are any gaps in the printout.
Then clean the print head, if necessary. See the online User’s
Guide for more information.
The product’s screen is dark.
Make sure your product is turned on and touch the LCD screen
to wake it from sleep mode.
Setup is unable to find my product after connecting it
with the USB cable.
Make sure your product is on and securely connected.
Any questions?
User’s Guide
Windows: Click the icon on your desktop or Apps screen to
access the online User’s Guide.
Mac: Click the icon in Applications/Epson Software/Guide to
access the online User’s Guide.
If you don’t have a User’s Guide icon, go to the Epson website,
as described below.
Technical support
To download drivers, view manuals, get FAQs, or contact
Epson.
You can also speak to a service technician by calling one of
these numbers:
Argentina (54 11) 5167-0300 Guatemala* 1-800-835-0358
0800-288-37766 Mexico 01-800-087-1080
Bolivia* 800-100-116 Mexico City (52 55) 1323-2052
Chile (56 2) 2484-3400 Nicaragua* 00-1-800-226-0368
Colombia 018000-915235 Panama* 00-800-052-1376
Bogota (57 1) 592-2200 Paraguay 009-800-521-0019
Costa Rica 800-377-6627 Peru 0800-10-126
Dominican Lima (51 1) 418-0210
Republic* 1-888-760-0068 Uruguay 00040-5210067
Ecuador* 1-800-000-044 Venezuela (58 212) 240-1111
El Salvador* 800-6570
* Contact your local phone company to call this toll-free number from a mobile
phone.
If your country does not appear on the list, contact your
nearest Epson sales office. Toll or long distance charges
may apply.
Need paper and ink?
Ensure brilliant results with Epson specialty
and plain papers, engineered specifically for
Epson printers. You can purchase them from
an Epson authorized reseller. To find the
nearest one, visit www.epson.com.jm or
contact Epson as described in “Any
questions?” on this sheet.
L15150/L15160 replacement inks
Color Ultra high-capacity
Black 524
Cyan 524
Magenta 524
Yellow 524
2 Insert the product CD (Windows only) or download and
run your product’s software package. For the latest
software, visit:
L15150
www.epson.com.jm/support/L15150
L15160
www.epson.com.jm/support/L15160
3 Follow the instructions on the computer screen to run the
setup program.
4 When you see the Select Your Connection screen, select
one of the following:
• Wireless connection
In most cases, the software installer automatically
attempts to set up your wireless connection. If setup
is unsuccessful, you may need to enter your network
name (SSID) and password.
• Direct USB connection
Make sure you have the USB cable ready.
• Wired network connection
Make sure you have an Ethernet cable (not included).
Mobile printing
Connect wirelessly from your smartphone, tablet, or computer.
Print documents and photos from across the room or around
the world:
• Print directly from your smartphone or tablet using iOS or
Android™ with Epson iPrint™. Simply connect your printer
and device to the same network and tap the action icon to
select the print option.
• Print directly from your Android™ (v4.4 or later) device*.
Simply connect your printer and device to the same network
and tap the menu icon to select the print option.
• Print from wherever you are, next to your printer or
remotely with Epson Connect™. Learn more at
www.epson.com.jm/connect.
* May require the Epson Print Enabler or Mopria Print Service app from
Google Play™.
Any problems?
Network setup was unsuccessful.
• Make sure you select the right network name (SSID).
• Restart your router (turn it off and then on), then try to
connect to it again.
• If you see a firewall alert message, click Unblock or Allow
to let setup continue.
• The printer can only connect to a network that supports
2.4 GHz connections. If your router offers both 2.4 GHz
and 5 GHz connections, make sure the 2.4 GHz is enabled.
• If your network has security enabled, make sure you enter
your network password (WEP key or WPA passphrase)
correctly. Be sure to enter your password in the correct
case.
EPSON is a registered trademark, EPSON Exceed Your Vision is a registered logomark, and
Epson Connect and Epson iPrint are trademarks of Seiko Epson Corporation.
Designed for Excellence is a trademark of Epson America, Inc.
Mac is a trademark of Apple Inc., registered in the U.S. and other countries.
Windows is a registered trademark of Microsoft Corporation in the United States and/or other
countries.
Android and Google Play are trademarks of Google LLC.
General Notice: Other product names used herein are for identification purposes only and may
be trademarks of their respective owners. Epson disclaims any and all rights in those marks.
This information is subject to change without notice.
© 2020 Epson America, Inc., 2/20
Printed in XXXXXX CPD-57854
3 Insert paper with the glossy or printable side facedown.
Note: Make sure the paper is loaded against the front edge
guide and not sticking out from the end of the cassette.
4 Slide the side edge
guides against the
paper but not too
tightly.
Note: Do not load paper
above the arrow mark on
the side edge guide.
5 Keep the cassette
flat as you insert it all
the way.
6 Select the paper settings on the product’s control panel.
4Connect the fax line
1 Connect a phone cord to a telephone wall jack and to the
LINE port on your product. See the online User’s Guide
for more information.
2 Select Proceed on the LCD screen to set up the fax, or
select Close to set it up later.
5Install software
Note: If you are using a Mac or your computer does not have a
CD/DVD drive, an Internet connection is required to obtain the product
software.
1 Make sure the product is NOT CONNECTED to your
computer.
Windows®:If you see a Found New Hardware screen, click
Cancel and disconnect the USB cable.
• Print a network connection report to identify network
problems and solutions. See your online User’s Guide for
instructions.
There are lines or incorrect colors in my printouts.
Run a nozzle check to see if there are any gaps in the printout.
Then clean the print head, if necessary. See the online User’s
Guide for more information.
The product’s screen is dark.
Make sure your product is turned on and touch the LCD screen
to wake it from sleep mode.
Setup is unable to find my product after connecting it
with the USB cable.
Make sure your product is on and securely connected.
Any questions?
User’s Guide
Windows: Click the icon on your desktop or Apps screen to
access the online User’s Guide.
Mac: Click the icon in Applications/Epson Software/Guide to
access the online User’s Guide.
If you don’t have a User’s Guide icon, go to the Epson website,
as described below.
Technical support
To download drivers, view manuals, get FAQs, or contact
Epson.
You can also speak to a service technician by calling one of
these numbers:
Argentina (54 11) 5167-0300 Guatemala* 1-800-835-0358
0800-288-37766 Mexico 01-800-087-1080
Bolivia* 800-100-116 Mexico City (52 55) 1323-2052
Chile (56 2) 2484-3400 Nicaragua* 00-1-800-226-0368
Colombia 018000-915235 Panama* 00-800-052-1376
Bogota (57 1) 592-2200 Paraguay 009-800-521-0019
Costa Rica 800-377-6627 Peru 0800-10-126
Dominican Lima (51 1) 418-0210
Republic* 1-888-760-0068 Uruguay 00040-5210067
Ecuador* 1-800-000-044 Venezuela (58 212) 240-1111
El Salvador* 800-6570
* Contact your local phone company to call this toll-free number from a mobile
phone.
If your country does not appear on the list, contact your
nearest Epson sales office. Toll or long distance charges
may apply.
Need paper and ink?
Ensure brilliant results with Epson specialty
and plain papers, engineered specifically for
Epson printers. You can purchase them from
an Epson authorized reseller. To find the
nearest one, visit www.epson.com.jm or
contact Epson as described in “Any
questions?” on this sheet.
L15150/L15160 replacement inks
Color Ultra high-capacity
Black 524
Cyan 524
Magenta 524
Yellow 524