manuals.online logo
Brands
  1. Home
  2. •
  3. Brands
  4. •
  5. Epson
  6. •
  7. Printer
  8. •
  9. Epson L565 Instruction Manual

Epson L565 Instruction Manual

© 2015 Seiko Epson Corporation.
All rights reserved.
Printed in XXXXXX
Windows
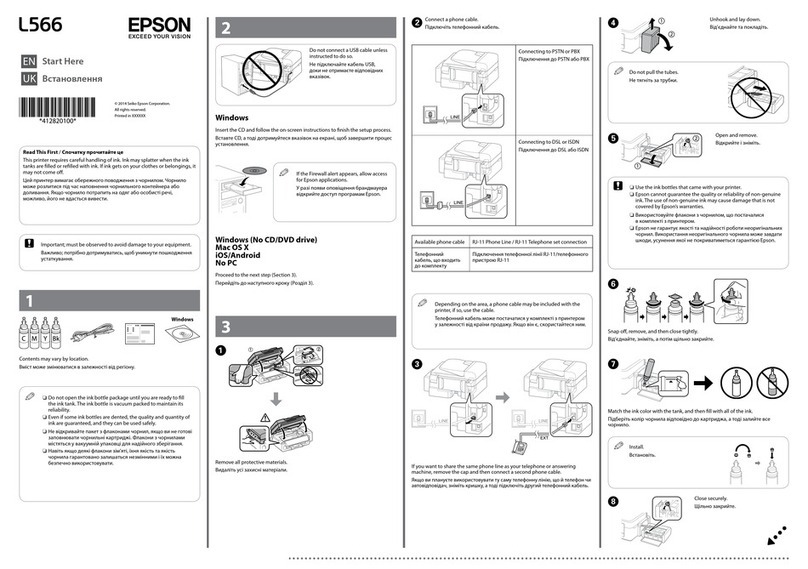
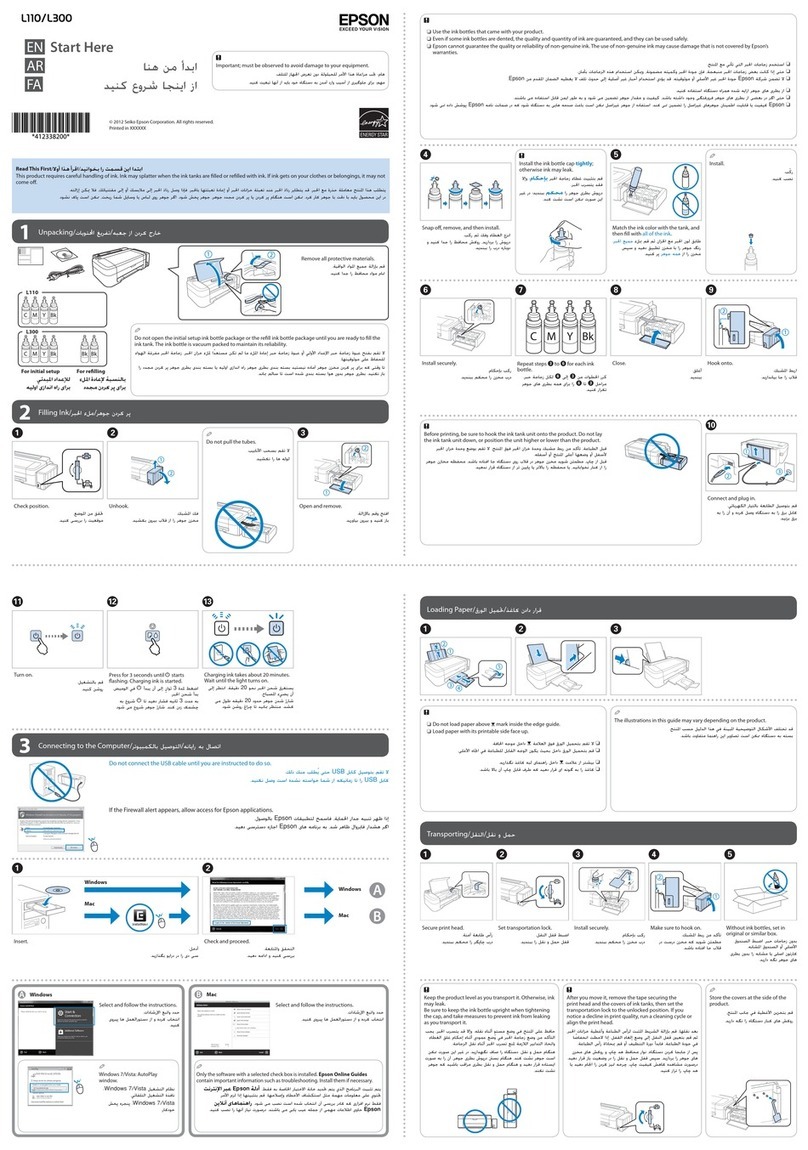
EN Start Here
TH 
Do not connect a USB cable unless
instructed to do so.


1
Contents may vary by location.

2
Read This First / 
This printer requires careful handling of ink. Ink may splatter when the ink
tanks are lled or relled with ink. If ink gets on your clothes or belongings, it
may not come o.


cImportant; must be observed to avoid damage to your equipment.

QDo not open the ink bottle package until you are ready to ll
the ink tank. The ink bottle is vacuum packed to maintain its
reliability.
Even if some ink bottles are dented, the quality and quantity of
ink are guaranteed, and they can be used safely.
O
O
O

O

cUse the ink bottles that came with your printer.
Epson cannot guarantee the quality or reliability of non-genuine
ink. The use of non-genuine ink may cause damage that is not
covered by Epson’s warranties.
O
O
O 
O

Epson
Unhook and lay down.

QDo not pull the tubes.

Open and remove.

D�
E�
F�
C�
QIf the Firewall alert appears, allow access
for Epson applications.


Windows
Windows (No CD/DVD drive)
Mac OSX
iOS/Android
No PC
Proceed to the next step (Section 3).

3
Remove all protective materials.

A�
Insert the CD and follow the on-screen instructions to nish the setup process.

Connect a phone cable. / 
Except for Australia and New Zealand Users

Connecting to PSTN or PBX

Connecting to DSL or ISDN

Available phone cable RJ-11 Phone Line / RJ-11 Telephone set connection


If you want to share the same phone line as your telephone or answering
machine, remove the cap and then connect a second phone cable.


QDepending on the area, a phone cable may be included with the
printer, if so, use the cable.


For Australia and New Zealand Users

For Australia and New Zealand Users
•Make sure you connect the noise lter as shown.
•Do not use this lter for any other products.

•
•
B�
Except for Australia and New Zealand Users

Skip this step.

For Australia and New Zealand Users

Connecting to PSTN or PBX

Connecting to DSL or ISDN

For Australia and New Zealand Users

Except for Australia and New Zealand Users

Basic Operations / 
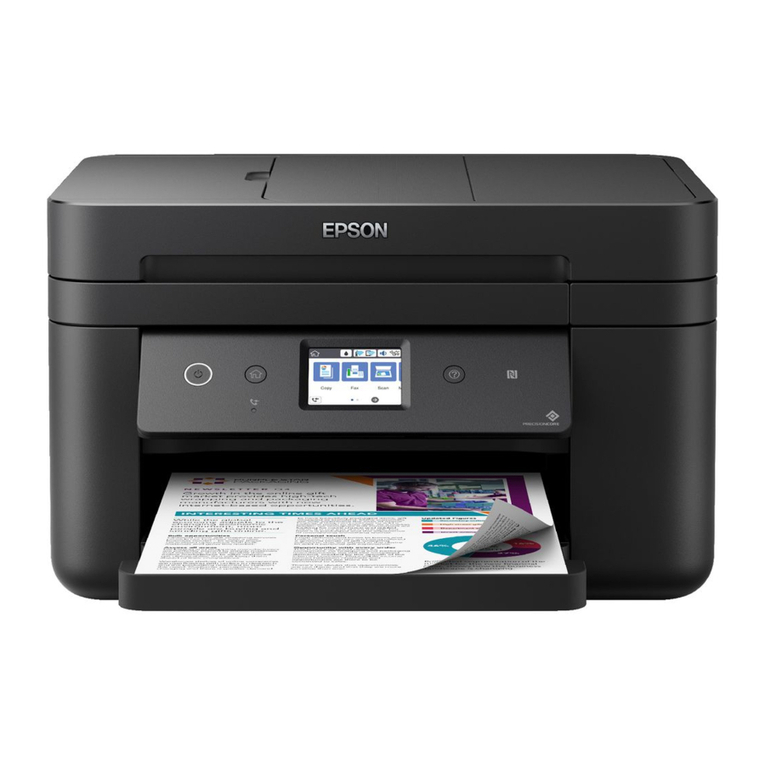
Guide to Control Panel

ATurns the printer on or o.
Unplug the power cord when the power light is o.


BDisplays the home screen.

CEnter the last dialed number or enter a pause when
entering a fax number.


DStops the current operation.

E-Displays menus and messages.

F, , , , Press l, u, r and dto select menus. Press OK to
conrm your selection or run the selected feature.
l,u,rdOK

GReturns to the previous screen.

H0-9
*, #
Enters numbers, characters, and symbols.

IOpens the contacts list.

JStarts printing, copying, scanning, and faxing in black
and white.

KStarts printing, copying, scanning, and faxing in color.

http://epson.sn
Windows (No CD/DVD drive)
Mac OS X
Visit the website to start the setup process, install software, and congure
network settings.

cMake sure to hook the tank unit before printing. Do not lay the unit
down, or position it higher or lower than the printer.


R�
Connect and plug in.

Turn on.

Close.

Hook onto the printer.

K�
L�
Conrm that the tanks are lled with ink, and then press xto start charging ink.
Charging ink takes about 20 minutes.
x

O� Select a language, country and time.

M�
N�
When the message of seeing the
setup manual is displayed, press OK
for 3 seconds.

OK
P�
Q�
Repeat steps Eto Hfor each ink bottle.
EH
J�
S�
T�
U�
Pull out.

Load paper with the printable side face-up.

Slide the edge guide
then close the feeder
guard.


Pull out.

V�
Set the paper size and paper type.

W�
Make the fax settings. You can change these settings later. If you do not want to
make settings now, close the fax settings screen.


X�
http://ipr.to/c
iOS / Android
Visit the website to install Epson iPrint application, start the setup process, and
congure network settings.


Epson Connect
Using your mobile device, you can print from any location worldwide to your
Epson Connect compatible printer. Visit the website for more information.


https://www.epsonconnect.com/
QDo not load paper above the arrow mark inside the edge guide.

Slide the edge guide to the left.

Y�
Match the ink color with the tank, and then ll with all of the ink.

QInstall.

H�
Close securely.

I�
Snap o, remove, and then close tightly.

G�
Print Quality Help

(a) (b)
Print a nozzle check pattern to check if the print head nozzles are clogged.
Select Setup > Maintenance > Print Head Nozzle Check.
If all lines are printed as shown in (a), the nozzles are not clogged. Select
Finish.
If you notice any missing segments or broken lines as shown in (b), go to
step B.

>>


B
QIf you see missing segments or broken lines in your printouts, try
the following solutions.


A�
B�
Select Clean the print head and follow the on-screen instructions.

Clearing Paper Jam

Remove all of the paper inside, including any torn pieces.

A�
B�
C�
Open.

Close.

QThe cleaning uses some ink from all tanks, so run the cleaning only
if quality declines on your prints.

 D�
Press the button displayed on the LCD screen.

Checking Ink Levels and Relling Ink

cContinuing to use the printer when the ink level is below the lower
line could damage the printer. Make sure you visually check the ink
levels. The printer’s ink-low alert may not be accurate because it is
not generated by directly measuring the ink levels in the tanks.




Visually check the ink levels of all ink tanks. If the ink level is below the lower line
on the tanks, go to step Bto rell the tanks.

B
A�
Refer to steps Eto Lin section 3 of the front page to rell the tanks to the
upper line.
EL
C�
QIf any ink remains in the ink bottle after lling the ink tank up to the
upper line, install the cap securely and store the ink bottle upright
for later use.



B�
D�
Select Setup > Maintenance > Reset Ink Levels.
>
Press x.
x
E�
Press the OK button.
OK
cDo not touch the white at cable, translucent part, and ink tubes
inside the printer. Doing so may cause a malfunction.


QYou can reset the ink levels even if you did not ll the ink to the
upper line. However, doing so will cause the printer to generate a
false ink-low alert or fail to generate any alert.



QIf paper still remains near the rear
paper feed, gently pull it out.


F�
Follow the instructions on the LCD screen to reset the ink levels.

A�
B�
D�
E�
F�
C�
G�
Copying

Open the document cover.

Place the original.

Select Copy on the home
screen.

Press the uand dbuttons to
enter the number of copies.
ud

Press the OK button. Select Layout, and then select the appropriate
layout.
OK
Press the dbutton, and then make other settings as necessary.
d
Press xto start copying.
x
H�
Close the document cover.

Use only the power cord that comes with the printer. Use of
another cord may cause re or shock. Do not use the cord with
any other equipment.


Be sure your AC power cord meets the relevant local safety
standard.


Except as specically explained in your documentation, do not
attempt to service the printer yourself.


Safety Instructions / 
Place the printer near a wall outlet where the power cord can
be easily unplugged.

Do not let the power cord become damaged or frayed.

Do not place or store the product outdoors, near excessive dirt
or dust, water, heat sources, or in locations subject to shocks,
vibrations, high temperature or humidity.



If the LCD screen is damaged, contact your dealer. If the liquid
crystal solution gets on your hands, wash them thoroughly
with soap and water. If the liquid crystal solution gets into
your eyes, ush them immediately with water. If discomfort or
vision problems remain after a thorough ushing, see a doctor
immediately.





Take care not to spill liquid on the product and not to handle
the product with wet hands.

Windows® is a registered trademark of the Microsoft Corporation.
Mac OS is a trademark of Apple Inc., registered in the U.S. and other countries.
Android™ is a registered trademark of Google Inc.
The contents of this manual and the specications of this product are subject to change without notice.
Questions?
You can open the User’s Guide (PDF) and Network Guide (PDF) from the shortcut
icon, or download the latest versions from the following website.
User’s Guide (คู่มือผู้ใช้)Network Guide(คู่มือเครือข่าย)

BK C M Y
664 664 664 664
Ink Bottles / 
cUse of genuine Epson ink other than specied could cause damage
that is not covered by Epson’s warranties.


Transporting

A�
Secure print head with a tape.

B�
C�
Close securely.

Make sure to hook on.

D�
Pack the printer with protective materials to prevent the ink tank unit
from being unhooked.

cAfter you move it, remove the tape securing the print head. If you
notice a decline in print quality, run a cleaning cycle or align the
print head.


cKeep the printer level as you transport it. Otherwise, ink may leak.
As you transport the ink bottle, be sure to keep it upright when
tightening the cap, and take measures to prevent ink from leaking.



Keep ink bottles and the ink tank unit out of the reach of children
and do not drink the ink.

Do not tilt or shake an ink bottle after removing its seal; this can
cause leakage.


Be sure to keep the ink bottles upright and do not subject them to
impacts or temperature changes.


If ink gets on your skin, wash the area thoroughly with soap and
water. If ink gets into your eyes, ush them immediately with
water. If discomfort or vision problems continue after a thorough
ushing, see a doctor immediately. If ink gets into your mouth,
spit it out immediately and see a doctor right away.




http://support.epson.net/
Avoid using a telephone during an electrical storm. There may be
a remote risk of electric shock from lightning.


Do not use a telephone to report a gas leak in the vicinity of the
leak.


Always keep this guide handy.

Keep this product at least 22 cm away from cardiac
pacemakers. Radio waves from this product may adversely
aect the operation of cardiac pacemakers.


For New Zealand Users
General warning
The grant of a Telepermit for any item of terminal equipment indicates only that Telecom
has accepted that the item complies with the minimum conditions for connection to its
network. It indicates no endorsement of the product by Telecom, nor does it provide any
sort of warranty. Above all, it provides no assurance that any item will work correctly in all
respects with another item of Telepermitted equipment of a dierent make or model, nor
does it imply that any product is compatible with all of Telecom’s network services.
Telepermitted equipment only may be connected to the EXT telephone port. This port is
not specically designed for 3-wire-connected equipment. 3-wire-connected equipment
might not respond to incoming ringing when attached to this port.
The automatic calling functions of this equipment must not be used to cause a nuisance to
other Telecom customers.
Other manuals for L565

4

Other Epson Printer manuals

Epson Stylus Color 670 User manual

Epson

Epson Stylus Color 670 User manual

Epson Stylus Pro 9900 User manual

Epson

Epson Stylus Pro 9900 User manual

Epson Stylus Photo 780 User manual

Epson

Epson Stylus Photo 780 User manual

Epson Stylus COLOR 900G Instruction Manual

Epson

Epson Stylus COLOR 900G Instruction Manual

Epson C11CF50201 User manual

Epson

Epson C11CF50201 User manual

Epson LQ-2180 User manual

Epson

Epson LQ-2180 User manual

Epson B-510DN - Business Color Ink Jet Printer User manual

Epson

Epson B-510DN - Business Color Ink Jet Printer User manual

Epson C1100 - AcuLaser Color Laser Printer User manual

Epson

Epson C1100 - AcuLaser Color Laser Printer User manual

Epson EPL-6200 User manual

Epson

Epson EPL-6200 User manual

Epson Stylus Pro 10000CF User guide

Epson

Epson Stylus Pro 10000CF User guide

Epson B-510DN - Business Color Ink Jet Printer User manual

Epson

Epson B-510DN - Business Color Ink Jet Printer User manual

Epson WF-3520 Series User guide

Epson

Epson WF-3520 Series User guide

Epson Printer User manual

Epson

Epson Printer User manual

Epson SC-F10000 Series User manual

Epson

Epson SC-F10000 Series User manual

Epson WorkForce Pro WF-C5790 User manual

Epson

Epson WorkForce Pro WF-C5790 User manual

Epson C31C514007LG User manual

Epson

Epson C31C514007LG User manual

Epson Stylus Office T40W User manual

Epson

Epson Stylus Office T40W User manual

Epson Stylus Color 400 User manual

Epson

Epson Stylus Color 400 User manual

Epson ProofPlus TM-H6000III User manual

Epson

Epson ProofPlus TM-H6000III User manual

Epson Expression Premium XP-800 Instruction Manual

Epson

Epson Expression Premium XP-800 Instruction Manual

Epson Stylus Pro 9700 Series User manual

Epson

Epson Stylus Pro 9700 Series User manual

Epson Stylus Color IIs User manual

Epson

Epson Stylus Color IIs User manual

Epson WF-C8690 User manual

Epson

Epson WF-C8690 User manual

Epson PX650 Series Instruction Manual

Epson

Epson PX650 Series Instruction Manual

Popular Printer manuals by other brands

Evolis Elypso user guide

Evolis

Evolis Elypso user guide

Lexmark Infoprint 1332 user manual

Lexmark

Lexmark Infoprint 1332 user manual

Star DP8340 SERIES user manual

Star

Star DP8340 SERIES user manual

Fujitsu DL7400 user manual

Fujitsu

Fujitsu DL7400 user manual

Kyocera Mita Ecosys FS-6020 Operation guide

Kyocera Mita

Kyocera Mita Ecosys FS-6020 Operation guide

Reiner speed-i-Marker 940 Short Instruction

Reiner

Reiner speed-i-Marker 940 Short Instruction

Canon advanced anywhere print user guide

Canon

Canon advanced anywhere print user guide

Lexmark 10Z0100 user guide

Lexmark

Lexmark 10Z0100 user guide

QMS Magicolor 2 Desklaser install guide

QMS

QMS Magicolor 2 Desklaser install guide

Squid Ink CoPilot 500 user guide

Squid Ink

Squid Ink CoPilot 500 user guide

Ricoh SP 6430DN Quick installation guide

Ricoh

Ricoh SP 6430DN Quick installation guide

TSC TA300 Series Quick installation guide

TSC

TSC TA300 Series Quick installation guide

BIXOLON SPP-R210 reference guide

BIXOLON

BIXOLON SPP-R210 reference guide

Dell 2350D user guide

Dell

Dell 2350D user guide

Canon lpb3360 user guide

Canon

Canon lpb3360 user guide

Lexmark MS610 Series Specfications

Lexmark

Lexmark MS610 Series Specfications

Kyocera Mita FS-C5016N Service manual

Kyocera Mita

Kyocera Mita FS-C5016N Service manual

Canon iPF610 - imagePROGRAF Color Inkjet Printer Service manual

Canon

Canon iPF610 - imagePROGRAF Color Inkjet Printer Service manual

manuals.online logo
manuals.online logoBrands
  • About & Mission
  • Contact us
  • Privacy Policy
  • Terms and Conditions

Copyright 2025 Manuals.Online. All Rights Reserved.