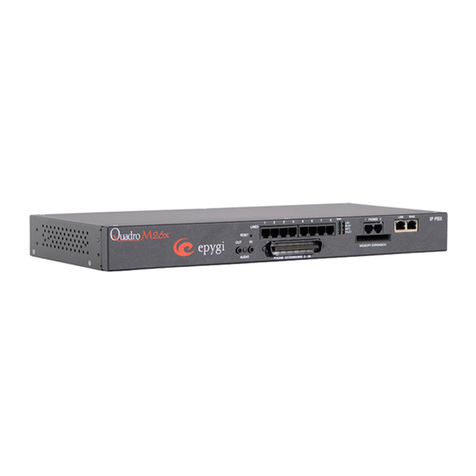
Epygi Manual III User manual

Manual III: Extension User’s Guide
Edition 1, November 2014
SW Release 6.0.7 and higher

QX50/QX200/QX2000; (SW Version 6.0.x) 2
QX50/QX200/QX2000 Manual III: Extension User’s Guide
Notice to Users
This document, in whole or in part, may not be reproduced, translated or reduced to any machine-readable form without prior written approval.
Epygi provides no warranty with regard to this document or other information contained herein and hereby expressly disclaims any implied warranties of
merchantability or fitness for any particular purpose in regard to this document or such information. In no event shall Epygi be liable for any incidental,
consequential or special damages, whether based on tort, contract or otherwise, arising out of or in connection with this document or other information
contained herein or the use thereof.
Copyright and Trademarks
Copyright © 2003-2014 Epygi Technologies, LTD. All Rights Reserved. Quadro and QX are registered trademarks of Epygi Technologies, LTD. Microsoft,
Windows and the Windows logo are registered trademarks of Microsoft Corporation. All other trademarks and brand names are the property of their
respective proprietors.
Emergency 911 Calls
YOU EXPRESSLY ACKNOWLEDGE THAT EMERGENCY 911 CALLS MAY NOT FUNCTION WHEN USING QUADRO OR QX AND THAT EPYGI TECHNOLOGIES,
LTD. OR ANY AFFILIATES (AGENTS) SUBSIDIARIES, PARTNERS OR EMPLOYEES ARE NOT LIABLE FOR SUCH CALLS.
Limited Warranty
Epygi Technologies, LTD. (‘Epygi’) warrants to the original end-user purchaser every Quadro and QX to be free from physical defects in material and
workmanship under normal use for a period of one (1) year from the date of purchase (proof of purchase required) or two (2) years from the date of
purchase (proof of purchase required) for products purchased in the European Union (EU). If Epygi receives notice of such defects, Epygi will, at its
discretion, either repair or replace products that prove to be defective.
This warranty shall not apply to defects caused by (i) failure to follow Epygi’s installation, operation or maintenance instructions; (ii) external power
sources such as a power line, telephone line or connected equipment; (iii) products that have been serviced or modified by a party other than Epygi or an
authorized Epygi service center; (iv) products that have had their original manufacturer’s serial numbers altered, defaced or deleted; (v) damage due to
lightning, fire, flood or other acts of nature.
In no event shall Epygi’s liability exceed the price paid for the product from direct, indirect, special, incidental or consequential damages resulting from the
use of the product, its accompanying software or its documentation. Epygi offers no refunds for its products. Epygi makes no warranty or representation,
expressed, implied or statutory with respect to its products or the contents or use of this documentation and all accompanying software, and specifically
disclaims its quality, performance, merchantability or fitness for any particular purpose.
Return Policy
If the product proves to be defective during this warranty period, please contact the establishment where the unit was purchased. The Integrator will
provide guidance on how to return the unit in accordance with its established procedures. Epygi will provide the Return Merchandise Authorization
Number to your retailer.
Please provide a copy of your original proof of purchase. Upon receiving the defective unit, Epygi, or its service center, will use commercially reasonable
efforts to ship the repaired or a replacement unit within ten business days after receipt of the returned product. Actual delivery times may vary depending
on customer location. The Distributor is responsible for shipping and handling charges when shipping to Epygi.
European Limited Warranty
The European Limited Warranty is the same as the Limited Warranty above, except the warranty period is for two years from the date of purchase.
Extended Warranty
Extended Warranty Option
Epygi offers an extended warranty program available for purchase by end users. This option is available at the time of purchase, extending the users
original warranty for an additional three (3) years. Combined with the original warranty, the extended warranty would offer a total of five (5) years
protection for European end users and four (4) years protection for non-European end users.
Extended Warranty Statement
Epygi Technologies, LTD. extends its Limited Warranty for an additional period of three (3) years from the date of the termination of the original Limited
Warranty period (proof of purchase required).
Epygi reserves the right to revise or update its products, pricing, software, or documentation without obligation to notify any individual or entity. Please
direct all inquiries to:
Epygi Technologies, LTD.
1400 Preston Road, Suite 300, Plano, Texas 75093

QX50/QX200/QX2000; (SW Version 6.0.x) 3
QX50/QX200/QX2000 Manual III: Extension User’s Guide
Administrative Council for Terminal Attachments (ACTA) Customer Information
This equipment complies with Part 68 of the FCC rules and the requirements adopted by the ACTA. Located on the equipment is a label that contains,
among other information, the ACTA registration number and ringer equivalence number (REN). If requested, this information must be provided to the
telephone company.
The REN is used to determine the quantity of devices which may be connected to the telephone line. Excessive REN’s on the telephone line may result in
the devices not ringing in response to an incoming call. In most, but not all areas, the sum of the REN’s should not exceed five (5.0). To be certain of the
number of devices that may be connected to the line, as determined by the total REN’s contact the telephone company to determine the maximum REN for
the calling area.
This equipment cannot be used on the telephone company-provided coin service. Connection to Party Line Service is subject to State Tariffs.
If this equipment causes harm to the telephone network, the telephone company will notify you in advance that temporary discontinuance of service may
be required. If advance notice isn’t practical, the telephone company will notify the customer as soon as possible. Also, you will be advised of your right
the file a complaint with the FCC if you believe it is necessary.
The telephone company may make changes in its facilities, equipment, operations, or procedures that could affect the operation of the equipment. If this
happens, the telephone company will provide advance notice in order for you to make the necessary modifications in order to maintain uninterrupted
service.
If trouble is experienced with this equipment, please contact EPYGI TECHNOLOGIES, LTD.
If the trouble is causing harm to the telephone network, the telephone company may request you to remove the equipment from the network until the
problem is resolved.
Electrical Safety Advisory
To reduce the risk of damaging power surges, we recommend you install an AC surge arrestor in the AC outlet from which the Quadro or QX is powered.
Industry Canada Statement
This product meets the applicable Industry Canada technical specifications.
Safety Information
Before using the Quadro or QX, please review and ensure the following safety instructions are adhered to:
•To prevent fire or shock hazard, do not expose your Quadro or QX to rain or moisture.
•To avoid electrical shock, do not open the Quadro or QX. Refer servicing to qualified personnel only.
•Never install wiring during a lightning storm.
•Never install telephone jacks in wet locations unless the jack is specified for wet locations.
•Never touch non-insulated telephone wire or terminal unless the telephone line has been disconnected at the network interface.
•Use caution when installing or modifying cable or telephone lines.
•Avoid using your Quadro or QX during an electrical storm.
•Do not use your Quadro, QX or telephone to report a gas leak in the vicinity of the leak.
•An electrical outlet should be as close as possible to the unit and easily accessible.
Emergency Services
The use of VoIP telephony is made available through IP networks such as the Internet and is dependent upon a constant source of electricity, network
availability and proper operation of the equipment. If a power outage, network disruption or equipment failure occurs, the VoIP telephony service could
be disabled. User understands that in any of those events the Quadro or QX may not be able to support 911 emergency services, and further, such services
may only be available via the user's regular telephone line or mobile lines that are not connected to the Quadro or QX. User further acknowledges that any
interruption in the supply or delivery of electricity, network availability or equipment failure is beyond Epygi's control and Epygi shall have no
responsibility for losses arising from such interruption.
Music on Hold Copyright
The default Music on Hold on the Quadro or QX is a 22 second fragment from Chopin's Nocturne Op.9 #2 performed by Marina Vardanyan and kindly
provided to Epygi Technologies, LTD. The recording is royalty free.
Compliance with Laws
You may not use the Epygi Materials for any illegal purpose or in any manner that violates applicable domestic or foreign law. You are responsible for
compliance with all domestic and foreign laws governing Voice over Internet Protocol (VoIP) calls.

QX50/QX200/QX2000; (SW Version 6.0.x) 4
QX50/QX200/QX2000 Manual III: Extension User’s Guide
Table of Contents
Manual I: see Installation Guide
This guide describes step-by-step instruction to install and configure QX IP PBX.
Manual II: see Administrator's Guide
This guide describes detailed the menus available for administrators only and includes further all system default values at a glance.
Manual III: Extension User's Guide
About this Extension User's Guide ................................................................................................................................................................................6
QX IP PBX’s Feature Codes...............................................................................................................................................................................................7
Establishing a call............................................................................................................................................................................................................................................................................7
Using PBX Services..........................................................................................................................................................................................................................................................................7
Outgoing Call Blocking.............................................................................................................................................................................................................................................................9
Unconditional Call Forwarding Management.................................................................................................................................................................................................................9
No Answer Call Forwarding Management.................................................................................................................................................................................................................... 10
Voice Mail Services ...................................................................................................................................................................................................................................................................... 10
Voice Mailbox ................................................................................................................................................................................................................................................................................. 10
Personal Settings .................................................................................................................................................................................................................................................................... 11
Change Password ................................................................................................................................................................................................................................................................... 12
Services for Incoming Calls................................................................................................................................................................................................................................................. 12
Recording Box................................................................................................................................................................................................................................................................................ 13
QX IP PBX’s Auto Attendant Services.........................................................................................................................................................................14
Call Codes Available in Auto Attendant ............................................................................................................................................................................................................................... 16
Your Extension Graphical Interface...........................................................................................................................................................................17
Entering SIP Addresses Correctly .......................................................................................................................................................................................................................................... 17
Voice Mail .......................................................................................................................................................................................................................... 18
Voice Mailbox ................................................................................................................................................................................................................................................................................. 18
Voice Mail Settings ....................................................................................................................................................................................................................................................................... 19
Voice Mail Profiles........................................................................................................................................................................................................................................................................ 22
Group List ........................................................................................................................................................................................................................................................................................ 24
Call History........................................................................................................................................................................................................................26
PBX Information..............................................................................................................................................................................................................27
Speed Calling ....................................................................................................................................................................................................................27
Account Settings .............................................................................................................................................................................................................. 28
Basic Services................................................................................................................................................................................................................... 29
General Settings ............................................................................................................................................................................................................................................................................ 29
Hold Music Settings ..................................................................................................................................................................................................................................................................... 30
Do Not Disturb............................................................................................................................................................................................................................................................................... 31
Hot Line Settings........................................................................................................................................................................................................................................................................... 31
Caller ID Services ............................................................................................................................................................................................................32
Hiding Caller Information ......................................................................................................................................................................................................................................................... 33
Incoming Call Blocking............................................................................................................................................................................................................................................................... 34
Outgoing Call Blocking ............................................................................................................................................................................................................................................................... 34
Distinctive Ringing....................................................................................................................................................................................................................................................................... 35
Call Hunting .................................................................................................................................................................................................................................................................................... 35
Many Extensions Ringing .......................................................................................................................................................................................................................................................... 36
Call Forwarding............................................................................................................................................................................................................................................................................. 37
Unconditional Call Forwarding............................................................................................................................................................................................................................................... 38
QX50/QX200/QX2000; (SW Version 6.0.x) 5
QX50/QX200/QX2000 Manual III: Extension User’s Guide
Busy Call Forwarding.................................................................................................................................................................................................................................................................. 38
No Answer Call Forwarding ..................................................................................................................................................................................................................................................... 39
Unregistered/Inaccessible Call Forwarding ...................................................................................................................................................................................................................... 40
Find Me / Follow Me ................................................................................................................................................................................................................................................................... 40
Emergency Interrupt .................................................................................................................................................................................................................................................................. 42
Intercom........................................................................................................................................................................................................................................................................................... 42
Voicemail Profile........................................................................................................................................................................................................................................................................... 43
Appendix: Glossary.........................................................................................................................................................................................................44
Appendix: Software License Agreement................................................................................................................................................................... 49

QX50/QX200/QX2000; (SW Version 6.0.x) 6
QX50/QX200/QX2000 Manual III: Extension User’s Guide
About this Extension User's Guide
The QX IP PBX Manual is divided into three parts:
•Manual-I: Installation Guide
gives step-by-step instructions to provision the QX IP PBX and configure the phone extensions with the Epygi SIP Server. After successfully
configuring the QX IP PBX, a user will be able to make SIP phone calls to remote QX IP PBX devices, make local calls to the PSTN and access the
Internet from devices connected to the LAN.
•Manual-II: Administrator's Guide that explains all QX IP PBX management menus available for administrators only. It includes a list of all
System Default Values.
•Manual-III: Extension User's Guide explains all QX management menus available for extension users. A list of all call codes can be found here in
Extension User’s Guide.
This guide contains many example screen illustrations. Since QX IP PBXs offer a wide variety of features and functionality, the example screens shown may
not appear exactly the same for your particular QX IP PBX as they appear in this manual. The example screens are for illustrative and explanatory
purposes, and should not be construed to represent your own unique environment.
QX IP PBX’s Feature Codes explains all call codes available for extension users.
QX IP PBX’s Auto Attendant Services explains the operating mode of QX IP PBX's auto attendant and lists the call codes that may be used to enter the
auto attendant.
Your Extension Graphical Interface explains the QX IP PBX's Your Extension graphical user interface and the input options available for extension
users and administrators.
Appendix: Glossary explains various technical terms.
Appendix: Software License Agreement includes the contract for using QX IP PBX's hardware and software.

QX50/QX200/QX2000; (SW Version 6.0.x) 7
QX50/QX200/QX2000 Manual III: Extension User’s Guide
QX IP PBX’s Feature Codes
This chapter describes how QX IP PBX’s feature codes allow the user to navigate through QX IP PBX’s services with the help of a phone handset. These
services are Establishing a Call, PBX Services and Voice Mail Services.
Establishing a call
To make a call, dial the Routing Number.
Routing Numbers and available routes to, from and through QX IP PBX are listed in the Call Routing Table (see Manual II: Administrator’s Guide). The
Call Routing Table is configured and managed by QX IP PBX’s Administrator. To receive information about dialing rules, please contact the administrator.
Please Note: You may accelerate establishing a connection by entering a pound (#) sign dialed at the end of the routing number.
Using PBX Services
PBX Services accessible at the dial tone, characterized by beginning with the key :
Entering the Voice Mail Services
(see further key codes below)
Redialing automatically
For extensions attached to FXS lines, this service may be used in two ways:
•Press *1 and hang up. As soon as the last called destination will be reached, your phone will start ringing.
•Press *1 and stay with the handset lifted. The connection will be established immediately when the called destination answers the
call.
A specific beep will be heard during the entire auto redialing period (specified on the Basic Services – General Settings page). A beep will
be heard if no auto redialing is possible. To stop the auto redialing process, simply lift the handset and hung up again (if you were keep
waiting with the handset lifted, you will need to push the hook button twice on your phone to stop the redialing).
For extensions attached to IP lines:
•Press *1 to redial the last number that you called.
•If the called number is busy after dialing *1 keep the handset lifted to activate the auto redialing of the last called number. The
connection will be established immediately when the called destination answers the call.
Please Note: This service is functional for SIP and PBX calls only. For PSTN calls, this feature works as a single redial (with no multiple
attempts to reach the called destination).
Please Note: This service works when the Voice Mail and Call Waiting services are disabled on the called destination.
Calling back the last caller
If calling back is not possible, you will hear the message “The dialed number doesn’t exist”.
Unconditional Call Forwarding Management
configured for
Any Address or Other Addresses
in the Caller ID Based Services table
will get activated. To toggle (activate or deactivate) the
Unconditional Call Forwarding service
again, press 1directly after entering
the *4 menu. If no unconditional forwarding is configured for
Any Address/Other Addresses
entries, the system will not activate the
forwarding service and a voice message will ask to configure the forwarding settings first. (See further key codes below.)
Enabling/Disabling
the
Do Not Disturb
service turns off/on your phone bell for the time period indicated on the Do Not Disturb
settings page. Incoming calls will be routed to voice mail.
Blocking the last caller
The last caller party will be blocked and added to the table on the Caller ID Based Services. You may unblock it later from the Incoming
Call Blocking page. This service is available for 10 seconds after the call has been terminated.
Attention:
Blocking the caller with anonymous caller ID (for example, anonymous@anonymous or similar) will lead to blocking all
callers with an unknown caller address.
Getting the line information
You will hear your line, extension and SIP number.
Speed Calling
is used to add a new entry to your Speed Calling table. A two digit speed calling code is required followed by the
destination number. In the Speed Calling table, the registered destination will have an Auto call type.
Hot Desking
used to login/logout to the public phone with the virtual extension. To login, the extension number and the password of
the preconfigured virtual extension are required. After login, the phone becomes a full featured QX IP PBX phone with all supplementary
PBX features available. When logged out, the public phone becomes available for other users to login and the extension which has been
last used on that phone becomes again inactive.
Outgoing Call Blocking
used to block or unblock outgoing calls for certain called number. Insert the extension's password and press 1
to block or 2 to unblock a number. Dial a Called Number to be blocked and press #. Dial a Called Number to be unblocked and press #.
Mark the Last Call as Bad
This will mark the last call in the system logs in the specific way and is used for diagnostics purposes only.

QX50/QX200/QX2000; (SW Version 6.0.x) 8
QX50/QX200/QX2000 Manual III: Extension User’s Guide
Logs Collecting
This will generate a special user's failure log with the details of the last call for administrator's revision. Use this code in the cases your
administrator has advised you. You will get the dial tone after this feature code is dialed.
Easy Login/Logout
Used by ACD agent to easy login or logout to all groups where it is subscribed to.
No Answer Call Forwarding Management
configured according to the No Answer Call Forwarding settings for
Any Address
entries in
the Caller ID Based Services table will get activated. To toggle (activate or deactivate) the forwarding service again, press 1 directly after
entering the *84 menu. If no No Answer Call Forwarding is configured for
Any Address
entries, the system will not activate the
forwarding service and a voice message will ask to configure the forwarding settings first. (See further key codes below.)
Access to the Shared Mailboxes
used to access other extension’s mailboxes on the QX IP PBX. If the mailbox is configured as shared, no
password will be prompted to enter it. Otherwise, the corresponding extension’s password will be prompted to enter its mailbox. The
mailbox can be configured as shared either by administrator from Extension’s Management - Voice Mailbox Settings page (see
Manual II: Administrator’s Guide) or by the extension’s user from Many Extensions Ringing page. Once entered the other extension's
mailbox, you will get all the same menu options and functionality as you have in your own mailbox.
Listen in
to the third party’s call. You will not be able to speak in the call.
+
Extension
Number +
Whisper
to the third party’s call. You will be able to listen to the call and speak only to extension you have dialed.
+ Extension
Number +
Barge in
to the third party’s call. You will be able to listen to the call and speak to all participants.
+ Extension
Number+
If you have problems using
,
and
feature codes, turn to your system administrator for the corresponding configuration.
This feature code is only available when the extension you dial is in the call.
Intercept
allows you to pick up a ringing call on another specified extension after this feature code is dialed.
+ Extension
Number+
PBX services accessible during the call (for phones connected to the FXS lines), characterized by starting with the key :
Keeping a call on hold
is used to hold the active connection, in order to place or receive a second call. When holding the first call, the user is able to
place a call to a third party, in particular cases for conferencing (3 way calling) or call transferring purposes. To be able to receive a
second call while currently being on a call, the call waiting service should be enabled on the Basic Services – General Settings page. When
a second call comes in, the beep sound indication is heard in the active call.
Transferring a call without consultation
Press to hold a call partner and to get a dial tone (within approximately 1 second). Enter the
phone number of the
destination
phone where the call should be transferred to. Hang up on the ring tones. The call on hold will be transferred to the specified
destination.
Transferring a call with consultation
Press
to hold a call and to get the dial tone (within approximately 1 second). Enter the phone number of the destination
phone
where the call should be transferred to. Talk to the called party and then hang up. The call partner on hold will be connected to
the called party.
Joining active lines
to start a conference call
Hold the first call (
), make the second call (or receive a new one) and press
to join both active lines together for the
conference call. To terminate the conference call with the first or second party, use correspondingly or key
combinations.
Attention: Pressing and waiting for 5 seconds will initiate a call switch and will connect you back to the held party instead of
initiating the a conference call.
Attention:
After initiating a conference call, the extension can leave the conference by pressing
without terminating the call
between the other two parties.

QX50/QX200/QX2000; (SW Version 6.0.x) 9
QX50/QX200/QX2000 Manual III: Extension User’s Guide
To terminate the call
Call Park
Dial
to park a call (system will play the extension number and SIP username of the first available
Call Park
extension). Go to
the remote location and call the Call Park extension to pick up the parked call. If enabled, the system will ask for the password
authentication. If successfully entered, the parked call will be resumed.
To use the Call Park feature, at least one Call Park extension should be created on the QX IP PBX.
Attention: The Call Parking is valid within the timeout defined by QX IP PBX’s administrator, during which hold music (if configured)
will be played to the parked party. Contact your system administrator if you need the call parking timeout to be modified. When the Call
Park
timeout expires, a short ring notification will be sent to the phone initiating the call parking, and if no one picks up the parked call
or if the phone is off the hook, the parked call will be automatically disconnected.
Directed Call Park
Hold the current call
(
) and dial the
Call Park
extension number within the five second timeout.
Attention: If the five second timeout is exceeded, then the QX IP PBX will consider it as an attempt for retrieving the parked call.
Go to the remote location and call the Call Park extension to pick up the parked call. If enabled, the system will ask for the password
authentication. If successfully entered, the parked call will be resumed.
To use the Directed Call Park feature, multiple Call Park extensions should be created on the QX IP PBX.
Attention: The Call Parking is valid within the timeout defined by QX IP PBX’s administrator, during which hold music (if configured)
will be played to the parked party. Contact your system administrator if you need the call parking timeout to be modified. When the Call
Park
timeout expires, a short ring notification will be sent to the phone initiating the call parking, and if no one picks up the parked call
or if the phone is off the hook, the parked call will be automatically disconnected.
+ Call
Park Extension
Number+
For PBX services on IP phones accessible during the call, refer to the “Epygi IP PBX Features on Epygi Supported IP phones” document on the
Epygi’s Web portal.
Outgoing Call Blocking
(available on the dial tone)
Insert the extension’s password and press
Enable Outgoing Call Blocking
Disable Outgoing Call Blocking
Dial a
Called Number
to be blocked and press
Dial a
Called Number
to be unblocked and press
Unconditional Call Forwarding Management
(when this menu is accessed, the Unconditional Call Forwarding service
is already getting toggled)
Toggle (enable or disable) the Unconditional
Forwarding service again*
Change the Forwarding Number
Dial a new Forwarding Number
and press
Confirm the new Forwarding Number with
or
press
to dial a new Forwarding Number.
Please Note: Using the Change the Forwarding Number option will change the first entry in the Unconditional Call Forwarding table with Auto call
type to the inserted Forwarding Number. Any other entries with Auto call type, as well as with other call types will not be modified.
* Besides Any Address/Other Addresses entry of the Unconditional Call Forwarding table this toggling also affects all those entries that have Toggle from
Handset option selected. The states of those entries will be set equal to the state of Any Address/Other Addresses entry after toggling.

QX50/QX200/QX2000; (SW Version 6.0.x) 10
QX50/QX200/QX2000 Manual III: Extension User’s Guide
No Answer Call Forwarding Management
Toggle (enable or disable) the No Answer Call
Forwarding service again*
Change the Forwarding Number
Dial a new Forwarding Number
and press
Confirm the new Forwarding Number with
or
press
to dial a new Forwarding Number.
Please Note: Using the Change the Forwarding Number option will change the first entry in the No Answer Call Forwarding table with Auto call type to
the inserted Forwarding Number. Any other entries with Auto call type, as well as with other call types will not be modified.
Voice Mail Services
The Voice Mail Services are divided into three parts: Voice
Mailbox, Personal Settings and Password Change. Each of
these parts has a hierarchy that is described below.
The following key combinations are available to navigate
through Voice Mail Services menus.
Enter Voice Mail Services
*
Voice Mailbox
Personal Settings
Change Password
* After the first boot-up of the QX IP PBX or if the Voice Mail Configuration Wizard is
manually enabled by QX IP PBX’s administrator, entering the Voice Mail Services for
the first time will activate the Voice Mail Configuration Wizard which will prompt the
essential user’s personal settings. Below are instructions on how to proceed with the
Voice Mail Configuration Wizard from the handset.
Enter Voice Mail Services
for the first time after QX IP PBX’s first boot-up,
reset factory default or Voice Mail Configuration Wizard activation
Dial the extension user’s new
Password
and press
Confirm the extension user’s new
Password
and press
Record a
Voice Mail Greeting
and press
Apply recorded Voice Mail Greeting and
move forward to the next step
Record Voice Mail Greeting again
Record a
User’s name
and press
Apply recorded User’s name and exit
Record User’s name again
Enter Voice Mail Services
Exit
Voice Mail Services
Go to the top of the
Voice Mail Services Tree
Go one level up in the
Voice Mail Services Tree
Voice Mailbox
After entering the voice mail services (using the keys
)
press the key
to enter the Voice Mailbox menu. The following
key combinations are available to navigate within the new
messages.
•During the message playback and keys change their
functionality and serve to rewind and forward the message
for the timeout (by default 3 seconds) configured by the
extension user from Voice Mail Settings.
Enter Voice Mail Services
Voice Mailbox Menu
Send a Message or Leave a
Reminder
Play First Message
Get Date/Time Info
Play Previous Message*
Play Current Message
Play Next Message*
Print the attached FAX
Play Last Message
Delete Current Message

QX50/QX200/QX2000; (SW Version 6.0.x) 11
QX50/QX200/QX2000 Manual III: Extension User’s Guide
(and press START button
on the FAX machine)
Reply or Forward a
Message
The Voice Mailbox menu has the following sub-hierarchy in the Reply or Forward a Message and the Send a Message or Leave a Reminder menus:
Reply or Forward a Message
Call Back
immediately
Reply by Voice Mail
Forward a Message
(any FAX attached to the message will be also forwarded)
Dial
to mark the message
as Urgent, or press pound to
assign the Normal priority.
Dial
Destination Number
Record a Message
Record a Message
Dial additional
Destination Number
Record a Message
Dial
to mark the message as Urgent, or press pound to
assign the Normal priority.
Send a Message or Leave a Reminder
Dial
Destination Number
Leave a reminder
Record a Message
Dial additional
Destination Number
Dial
to mark the message as
Urgent, or press pound to assign the
Normal priority.
Record a Message
Dial
to mark the message as Urgent, or press pound to assign the Normal
priority.
Please Note: This service is restricted regarding sending a message to PSTN destinations. A message will be successfully received by the destination if all of
the following criteria are met:
- The connection to the destination is successful;
- The voice mail service is enabled on the destination;
- There is enough space in the voice mailbox of the destination;
- The duration of the forwarded/replied message is less than the maximum voice mail duration set up at the destination.
Personal Settings
Use the digit to enter the area where the personal system messages can be modified. A voice notification will play the list of available system messages
that may be modified so the user can select the desired system message by the corresponding buttons:

QX50/QX200/QX2000; (SW Version 6.0.x) 12
QX50/QX200/QX2000 Manual III: Extension User’s Guide
Change Password
Use the digit to enter the area where the extension’s user may change its password. This password is used to access personal configuration settings
(also voice mailbox) through the QX IP PBX Web Management and the voice mailbox through the handset.
Change Password
Dial
Old Password
and press pound
Dial
New Password
and press pound
Confirm
New Password
and press pound
Services for Incoming Calls
Calling to the extension
Calling to the extension’s Voice Mailbox
In call queue
Skip the greeting message
and enter the called
extension’s Voice Mailbox
(authentication required)
(during the greeting message)
Calling to the Zero Out destination
Skip the greeting message and
record a Voice Mail
Leave the call queue and
record a Voice Mail
Enter Voice Mail Services
Review System Messages
Greeting Message
Incoming
Blocking Message
Outgoing
Blocking
Message
Your Name
Out of Office
Message
Find
Me/Follow Me
(FMFM)
Message
Listen to Current
Greeting Message
Listen to Current
Incoming
Blocking Message
Listen to
Current
Outgoing
Blocking
Message
Listen to
Current
Name recorded
Listen to
Current
Out of Office
Message
Listen to
Current FMFM
Message
Record a New
Greeting Message
Record a New
Incoming
Blocking Message
Record a New
Outgoing
Blocking
Message
Record a New
Name
Record a New
Out of Office
Message
Record a New
FMFM
Message
Restore Default
Greeting Message
Restore Default
Incoming
Blocking Message
Restore Default
Outgoing
Blocking
Message
Restore
Default
Name
Restore
Default
Out of Office
Message
Restore Default
FMFM
Message
Stop Recording
or Playback
Greeting Message
Stop Recording or
Playback
Incoming
Blocking Message
Stop Recording
or Playback
Outgoing
Blocking
Message
Stop Recording
or Playback
Name Message
Stop
Recording or
Playback
Out of Office
Message
Stop Recording
or Playback
FMFM
Message

QX50/QX200/QX2000; (SW Version 6.0.x) 13
QX50/QX200/QX2000 Manual III: Extension User’s Guide
Recording Box
To reach the extension’s Recording Box from the phone handset,
you should simply call that extension by dialing its PBX number,
SIP address or calling from PSTN.
•During the recording playback and keys change
their functionality and serve to rewind and forward the
recording for the certain timeout (by default 3 seconds).
Call the extension to enter its Recording Box
Recording Box extension password may be required
if security is configured
Play First Recording
Get Date/Time Info
Play Previous Recording*
Play Current Recording
Play Next Recording*
Play Last Recording
Delete Current Recording

QX50/QX200/QX2000; (SW Version 6.0.x) 14
QX50/QX200/QX2000 Manual III: Extension User’s Guide
QX IP PBX’s Auto Attendant Services
QX IP PBX’s Auto Attendant provides remote access to the QX IP PBX voice connectivity services. Specifically, it supports remote connection to QX IP PBX
extensions along with their mailboxes and making pass-through calls to other destinations. Remote access to the QX IP PBX auto attendant is possible
through IP and PSTN calls.
QX IP PBX’s Auto Attendant can be accessed locally, remotely from the IP network (by dialing Auto Attendant’s SIP address) and from the PSTN network
(by dialing QX IP PBX’s PSTN number) if the calls addressed to the QX IP PBX’s PSTN number are routed to the Auto Attendant.
Attention: If the Auto Attendant authentication attempts fail consecutively five times, QX IP PBX’s Auto Attendant will become unavailable for the next 5
minutes.
The Auto Attendant services are divided several feature groups, but only Connection Service and Extensions Directory are supported by the voice
messages which helps the caller to navigate within the area using the telephone handset buttons. Other services are available using the appropriate call
code, but are not supported by voice messages. Thus, they are hidden for external callers.
Connection Service
provides access to all extensions of the QX IP PBX device without restrictions. All QX IP PBX extensions may call each other dialing the
extension number. All external callers (using PSTN or IP calling) can reach each QX IP PBX extension dialing QX IP PBX’s phone number and using the Auto
Attendant’s voice menu to be connected to the desired extension by entering the extension number.
Remote Enquiry
allows access to the mailboxes of QX IP PBX’s extensions (both, active or inactive) in order for example to check the voice messages left
for an absent user. The mailbox may be protected by a user password (optional, set by the system administrator or user).
You may remotely access your mailbox dialing QX IP PBX’s phone number and using the Auto Attendant’s voice menu (key for Voice Mail) and
entering your password (if any). To navigate within your voice mails use the Voice Mailbox service call codes (for example dial 8 to hear the last message
in your mailbox).
Call Relay
The QX IP PBX Auto Attendant is registered at Epygi’s SIP server by default. It may be used similar to a private switching center if the Auto Attendant is
routed to a particular ISDN trunk a “default user”. It then allows, for example, establishing cost-saving long-distance calls via PSTN to the QX IP PBX Auto
Attendant at the United States headquarters, via IP to the remote QX IP PBX Auto Attendant in the Office Asia or via PSTN to the other desired destinations
(see QX IP PBX’s Feature Codes). Access to
Call Relay
needs authorization.
Remote Configuration Menu
This menu allows extension owners to remotely enable/disable the Unconditional Call Forwarding service for Any Address or Other Addresses
entries of the Caller ID Based Services table on the corresponding extension, as well as to change the certain forwarding number in the Unconditional Call
Forwarding table. This menu requires extension authorization. For more details about the access key combinations, see Unconditional Call Forwarding.
Call Back
With the QX IP PBX's Call Back service callers can save the call charge when calling to/through the QX IP PBX to the third party SIP or PSTN destinations.
The QX IP PBX allows you to configure a list of trusted callers that are allowed to make free of charge calls. Two types of Call Back configurations are
available on the QX IP PBX:
Pre-configured Call Back
and
Remote Call Back
Configuration
.
Pre-configured Call Back
For Pre-configured Call Back, a list of trusted callers must be configured in the QX IP PBX's Authorized Phones Database using Web Management. The
Call Back service should be enabled and a valid callback destination should be specified for each caller.
To use Pre-configured Call Back, the caller registered in the Authorized Phones Database should simply call to the QX IP PBX’s Auto Attendant through
SIP or PSTN, let the call to ring twice and then hang up. Call Back will be instantly activated, and QX IP PBX will call back to the defined Call Back
destination. By answering the incoming call caller will be connected to the Auto Attendant menu.
Remote Call Back Configuration
The Remote Call Back Configuration service is used by authorized callers to configure or reconfigure existing call back configuration on the QX IP PBX.
Remote Call Back Configuration is divided into two modes accessible from the QX IP PBX's Auto Attendant:
•Permanent Call Back
•Non-Permanent (Instant) Call Back
Please Note: Remote Call Back Configuration services are only available when the Automatically Enter Call Relay Menu checkbox is disabled in the Call
Back settings for the trusted user.
Permanent Call Back
Permanent Call Back service allows callers registered in the Authorized Phones Database to create a new trusted caller with Call Back enabled. They can
also modify the Call Back destination of existing callers in the Authorized Phones Database. By calling QX IP PBX's Auto Attendant and entering the Auto
Attendant menu, the caller can use the code (see QX IP PBX’s Feature Codes) to create a new trusted caller as well as to modify the Call Back
destination for the already registered callers in the Authorized Phones Database.

QX50/QX200/QX2000; (SW Version 6.0.x) 15
QX50/QX200/QX2000 Manual III: Extension User’s Guide
By entering Permanent Call Back reconfiguration menu, system asks caller to login by dialing the number and an appropriate password for the QX IP PBX's
extension that is used as login extension in the Call Back settings. After passing the login, callers should follow the voice instructions for configuring a new
entry or reconfiguring existing entries in Authorized Phone database.
When system accepts the inserted settings, the corresponding entry will be logged to the Authorized Phones Database. The caller will then be
disconnected from the QX IP PBX's Auto Attendant and the defined Call Back destination will receive a call from the QX IP PBX within the next 45 seconds.
Answering the incoming call, the caller will be reconnected to the QX IP PBX's Auto Attendant.
Please Note: The detected caller number must correspond to the one applied by the caller. In case of PSTN call back at least one PSTN line must be
available on the QX IP PBX. There must be network connectivity and the destination must be reachable.
Non-Permanent Call Back
Non-Permanent Call Back configuration service allows trusted caller to organize one-time Call Back to the defined destination. In this situation, no entry
will be logged to the Authorized Phones Database. By calling QX IP PBX's Auto Attendant and entering the Auto Attendant menu, the caller can use
menu (see QX IP PBX’s Feature Codes) to modify the Call Back destination for already registered callers in the Authorized Phones Database.
The system will ask to login by dialing the number and an appropriate password for the QX IP PBX's extension that is used as login extension in the Call
Back settings. After login, caller should follow the voice instructions for reconfiguring the existing entry in Authorized Phone database. The caller will then
be disconnected from the QX IP PBX's Auto Attendant and the defined Call Back destination will receive a call from the QX IP PBX within the next 45
seconds. Answering the incoming call, the caller will be reconnected to the QX IP PBX's Auto Attendant.
Please Note: For both Permanent Call Back and Non-Permanent Call Back, the detected caller number must correspond to the one configured for trusted
caller. In case of PSTN call back at least one PSTN line must be available on the QX IP PBX. There must be network connectivity and the destination must be
reachable.
Call Routing Management Menu
This menu is used to manage the routing entries in the Call Routing table, i.e. to enable/disable certain dialing rules by dialing key combinations pre-
configured on each routing entry.
Dialing at the Auto Attendant welcome message, will ask for an enabler/disabler key used to enable or disable the routing rule(s)
correspondingly. Since multiple routing rules may have the same enabler/disabler key combinations (the same key may be used as enabler for one routing
rule, and as disabler for another one), dialing the certain key will affect all pre-configured routing rules.
If the routing record has an authorization enabled on the enabler/disabler key, administrator’s password will be required to be inserted after the key.
Once the administrator’s password is dialed, system plays a confirmation about the accepted configuration and the state of the certain routing rule(s) is
getting modified.
If administrator’s password has been inserted incorrectly for 3 times, no status changes will be applied to any of the routing record(s), even to those which
have no authorization enabled.
Mainly targeting external users, QX IP PBX AA also provides voice services for local users. It will be helpful if the desired extension number is unknown.
The Extensions Directory is used to access QX IP PBX’s extensions by spelling names (assigned to the extensions and configured by administrator) using
the keypad of the phone. More than one name may be assigned to an extension, reaching the extension by spelling one of the names attached to it. If the
spelled name matches to some record in the extensions directory table, a wave file with the extension user name (or any other information characterizing
the extension’s user) will be played to the caller. Every extension’s user may configure these wave files individually.

QX50/QX200/QX2000; (SW Version 6.0.x) 16
QX50/QX200/QX2000 Manual III: Extension User’s Guide
Call Codes Available in Auto Attendant
The following key combinations are available to access and manipulate within Auto Attendant services for external calls addressed to the Auto Attendant,
incoming calls from the mainline routed to the Auto Attendant or local calls made by dialing the 2-digit attendant extension:
Incoming call to Auto Attendant Services
(press
on the Auto Attendant welcome message to dial the ZeroOut destination)
Keys
Extensions Menu
- establishing a connection to an extension on the called QX IP PBX
-
(already in)
Remote Enquiry
- establishing a connection to the mailbox of an extension on the called QX IP PBX
Call Relay Menu
- mainly for external calls (IP/PSTN) but local calls are also allowed.
This service avoids having to hang up and redo the entire dialing process if QX IP PBX detects an error in the dialed number
or the user decides to cancel the call and dial a new number. By entering the combination the call will be interrupted
and the user will get an invitation to dial a new one. This is applicable during dialing, after the ring tone has started, and after
the call has been established.
“” digit combination is
applicable:
•During the dialing,
•
After ring tones start,
•
After call establishment.
Under the following restrictions:
•
This feature can only be used when accessing from PSTN to the external SIP
destination through QX IP PBX’s AA or vice versa.
•
This feature is not available on the second QX IP PBX Auto Attendant (calling from
one Auto Attendant to another).
Remote Configuration Menu –
allows remote enabling/disabling of the Unconditional Call Forwarding service for Any
Address
or
Other Addresses
entries in the Caller ID Based Services table on the extension and to modify the certain
forwarding destination.
Non-Permanent Call Back
– allows PSTN callers registered in the Authorized Phones Database to change the callback
destination for a one-time callback. After the caller hangs up, QX IP PBX will call back to the newly specified number. This
change will not be logged into Authorized Phones Database.
Permanent Call Back
– allows PSTN callers registered in the Authorized Phones Database to reconfigure Authorized
Phones Database entries by modifying the caller’s and/or callback numbers. The caller will then be able to initiate a callback
only by calling from the newly specified caller number.
Administrator Login
Allows to modify Auto Attendant greeting and menu messages, as well as to manage universal extension messages.
Call Routing Management Menu –
allows managing the routing entries in the Call Routing table, i.e. to enable/disable
certain routing rules by dialing key combinations pre-configured on each routing entry.
Extensions Directory -
accesses QX IP PBX extensions by spelling the extension’s user name using the keypad on the
phone.
Quits
the Auto Attendant and starts a dial tone.

QX50/QX200/QX2000; (SW Version 6.0.x) 17
QX50/QX200/QX2000 Manual III: Extension User’s Guide
Your Extension Graphical Interface
QX IP PBX configuration management may be accessed on two different levels: for users (extensions) and administrators. If you are an extension user, log
in with the extension number and the password (if any) you received from your system administrator.
If you are an admin, additionally the Return link will appear to go back to the QX Management page.
Log Out is used to close the session between the user PC and QX and to leave the QX Your Extension Management.
Your Extension menus allow you to access the following settings to operate and perform actions that are private for each user:
Voice Mail
•
Voice Mailbox
•Voice Mail Settings
•Voice Mail Profiles
•Group List
Call History
PBX Information
Speed Calling
Account Settings
Basic Services
•General Settings
•Hold Music Settings
•
Do Not Disturb
•
Hot Line Settings
Caller ID Services
•
Hiding Caller Information
•Incoming Call Blocking
•Outgoing Call Blocking
•Distinctive Ringing
•Call Hunting
•Many Extensions Ringing
•Unconditional Call Forwarding
•Busy Call Forwarding
•No Answer Call Forwarding
•Unregistered/Inaccessible Call Forwarding
•Find Me / Follow Me
•Emergency Interrupt
•Intercom
•Voicemail Profile
Entering SIP Addresses Correctly
Calls over IP are implemented based on Session Initiating Protocol (SIP) on the QX IP PBX. When making a call to a destination that is somewhere on the
Internet, a SIP address must be provided.
SIP addresses needs to be specified in one of the following formats:
“display name” <username@ipaddress:port>
“display name” <username@ipaddress>
username@ipaddress:port
username@ipaddress
username
The display name and the port number are optional parameters in the SIP
address. If a port is not specified, 5060 will be set up as the default one. The
range of valid ports is between 1024 and 65536.
A flexible structure of wildcards is allowed. In comparison with a wildcard,
the “?” character stands for only one unknown digit and the “*” character
stands for any number of any digits.
For your convenience, the following combinations can be used:
•*@ipaddress - any user from the specified SIP server
•
username@* - a specified user from any SIP server
•
*@* - any user from any SIP server
Please Note:
Wildcards are available for caller addresses only. No wildcard
characters are allowed for called party addresses. Exceptions are addresses
in the Caller ID Services - Addresses table that are used by Outgoing Call
Blocking
and
Hiding Caller Information Settings
services. To use “*” and
“?” alone (as non wildcard characters), use “\*” and “\?” correspondingly.

QX50/QX200/QX2000; (SW Version 6.0.x) 18
QX50/QX200/QX2000 Manual III: Extension User’s Guide
Voice Mail
The
Voice Mail Service
provides a possibility to leave brief voice messages on the mailbox of an unavailable or busy QX IP PBX extension. The caller hears
a greeting message (configurable by the extension user) and a signal initiating the Voice Mail recording. The extension user may configure the maximum
duration of the voice message as well as the Voice Mail system activation timeout (see chapter Voice Mail Settings).
Received voice messages are stored in the Voice Mailbox. They can be accessed by the key combination from the phone handset and via QX IP PBX
management. Voice messages can to be played, marked (from GUI only), deleted, replied to (from handset only) or forwarded by the user. Messages with a
facsimile (FAX) attached will be displayed in a special way in the Voice Mailbox on web management access and will be indicated by a special voice signal
when accessing the message from the handset. The Incoming FAX message can be viewed and downloaded to the PC from the Voice Mailbox at Web
management access as a *.tif picture file.
QX IP PBX’s Voice Mail service also allows reviewing system messages used for telephony services functionality. The voice mail greeting, incoming and
outgoing blocking messages, user’s name and out of office greeting can be played, recorded and restored. Greeting messages are played to the caller
announcing that the called extension is unavailable and asking to leave a voice mail. Blocking messages are played when receiving or making
incoming/outgoing calls from/to the restricted destination. User’s name is played when surfing the Extensions Directory. The personal out of office
greeting is played instead of the main greeting message, when out of office option is selected on the extension.
QX IP PBX provides caller the possibility of leaving voice messages when called extension is busy or unavailable. A voice mail greeting message, and a
voice signal indicating voice mail recording initiation, are played back to the caller.
All voice mail functionality settings, such as enabling the greeting message, adjusting the maximal voice mail duration, voice mail system activation
timeout, etc, are configurable by the user through the extension’s Voice Mail Settings.
Voice Mailbox
QX IP PBX supports two ways of accessing the extension’s Voice Mailbox: through the phone handset and through QX IP PBX Web Management. With both
options, the user is free to manipulate with voice mails located in the Voice Mailbox, such as playing, deleting, forwarding, etc.
When accessing the Voice Mailbox through the phone handset, additional settings to manipulate the user defined system messages are provided. The user
can define their own Voice Mail Greeting, Incoming and Outgoing Blocking messages as well as the User’s recorded name. Each of these system messages
can be played, recorded and restored. Voice Mail Greeting messages are played back to the caller announcing that the called extension is unavailable and
asking to leave a voice mail. Blocking messages are played back to the caller when receiving or making incoming/outgoing calls from/to the restricted
destination. User’s recorded Name is used in the Extensions Directory when the spelled name matches the entry in the directory table.
Instructions on accessing and navigating within the voice messages and Voice Mailbox Services via the phone handset are described in the Feature Codes.
Please Note: When playing newly received voice mails (via a phone handset or with the use of the Play button in this page) will deprive the “New” state of
the voice mail.
The
Voice Mailbox
can hold
New
(not yet played) and
Old
(already played) voice mails. The
Status
column in the Voice
Mailbox table indicates the current state of the voice mails. All
new mails in the table are displayed in bold font. Playing a
voice mail cancels both the New status and bold font.
Voice mails can be selected to be played, deleted, marked as
important or book-marked, etc. Additionally they can be
forwarded to desired email addresses.
VM free space
provides information on the number of
minutes/seconds of free voice mailbox space.
The following functional buttons and fields are available:
Check Mail refreshes the mailbox and updates the number
of newly arrived mails (if any).
New Mails shows the number of newly arrived mails since
the user's last access to the voice mailbox.
All Mails
shows the number of all mails existing in the
mailbox.
Fig.III- 1: Voice Mailbox page
The Voice Mailbox tables display all voice mails in the mailbox:
Status - indicates whether the voice mail is New and not yet played. New mails are displayed in bold font.
!- indicates whether message has an urgent priority or not.
BM (bookmark) - shows marked records. The fields can include some indications (image signs) depending on the type of being marked.
Caller – is the address of the caller who left the voice mail.
Date & Time – is the voice mail receipt date and time.
Message – indicates voice mail duration (in minutes/seconds) and a speaker sign used to play (using any available media player supported by your
Operation System) the received voice mail or to download the audio file to the PC.

QX50/QX200/QX2000; (SW Version 6.0.x) 19
QX50/QX200/QX2000 Manual III: Extension User’s Guide
FAX (facsimile) – indicates whether a FAX message is attached to the voice mail, and if so, displays the size of the FAX message (in KBs) and an icon
used to view the incoming FAX message or download the graphical file to PC.
The column headings of the voice mail tables are created as a link. By clicking on the column heading the table will be sorted by the selected column. Upon
sorting (ascending, descending) arrows will be displayed next to the column heading. Each row in the Voice Mailbox tables can be selected by a checkbox
for editing, deleting or marking.
The following functional buttons serve to modify the table entries:
Forward link allows forwarding a selected voice mail to one or more email addresses with some enclosed message in the email body. The link refers to
the page where email addresses should be defined (use a space, semicolon or a comma to separate the mailing addresses in the text field), email subject
and some message can be inserted. Voice mails will get automatically converted to the G.711 codec before being attached to the email. The Voice Mail
forwarding feature is active only when Mail Service is enabled otherwise the “Mail Service is disabled” error appears.
Please Note: If the voice mail contains FAX inside, then the graphical file of the FAX message will be forwarded together with the accompanying voice
mail.
Mark submits the values chosen out of the drop down list aside (Important or Bookmark) to the selected records.
To Play a Voice Mail
1. Click on the speaker icon of the corresponding voice message.
2. Depending on your browser’s settings the .wav file will be played directly or an application will ask you to save the .wav file on the local PC. In the
second option, please specify the path and run the media file from the specified location to play it.
To Mark a Voice Mail Record
1. Select the checkbox of the corresponding record in the Voice Mailbox table that should to be marked.
2. Select the desired marking type from the Mark drop down list.
3. Select the Mark button to initiate the marking operation. Depending on the selected marking type the record(s) will show an image sign in the
corresponding BM field.
To Delete a Voice Mail Record
1. Select the checkbox of the corresponding record(s) in the Voice Mailbox table that should to be deleted.
2. Select the Delete button.
3. Confirm the deletion with Yes. The selected voice messages will be deleted. To abort the deletion and keep the messages in the inbox, select No.
Voice Mail Settings
The Voice Mail Settings permits enabling the Voice Mail Service for the callers if the called extension is not available or does not answer. The voice mail
system will be activated allowing the caller to leave a voice message. This page also provides information on the voice mailbox settings such as maximal
mail message duration, voice mail indication method when a new voice mail arrives, various settings for the voice mailbox as well as a possibility to send
voice mails via e-mail.

QX50/QX200/QX2000; (SW Version 6.0.x) 20
QX50/QX200/QX2000 Manual III: Extension User’s Guide
The
Voice Mail Settings
page offers the following input
options:
Maximum mail message duration lists the possible values
for the maximum mail duration (counted in minutes) during
which a voice mail will be recorded. The Unlimitedselection
allows voice message recording as long as the user’s space
remains.
Ask password before granting local access to mailbox
protects local access of the user’s voice mailbox. If the
checkbox is checked a user password will be required to
access the voice mailbox via digit combination.
Ask password before granting remote access to mailbox
protects remote access of the user’s voice mailbox. If the
checkbox is checked a user password will be required to
access the voice mailbox when reaching it through the Auto
Attendant.
Send welcome message enables a welcome message to be
played to the user when accessing the mailbox locally.
Play Voice Mail Help is an optional setting that plays voice
mail help instructions to the user when entering the Voice
Mailbox. This option guides the user through the mailbox,
explaining how to play and delete the voice mails as well as
modifying system messages.
Automatically play messages will auto play of all voice
mails. Whenever entering the voice mailbox, the system will
sequentially play the date/time when the message was
received followed by the voice mail itself in the order sorted
by the priority level (starting with the message in highest
priority) or. If no priority is specified, they will be played in
the order in which messages were received, i.e. starting with
first (oldest) message. When the last message is played, the
Voice Mail help will be replayed.
Send mails count information message announces the
number of New (unread) voice messages in the mailbox
when entering the mailbox.
Send date/time information message announces the time
and date a voice message was received and is played before
every voice message.
Send beep at the end of message enables an optional
parameter that activates a “beep” sound after each played
voice message.
Fig.III- 2: Voice Mail Settings page
When the Silent VM recording checkbox is selected, callers who have reached the extension's voice mail service will not hear an invitation to record a
voice mail and the following beep sound. The voice mail recording will start without any additional notification.
Send new voice message via email is an option to send new voice mail files via e-mail to the defined recipients. Mails will be automatically converted to
the Windows PCMU (CCITT u-law, 8 kHz, 8 bit Mono) wave format before being attached to the e-mail. Checkbox activates the following input options:
Email Address requires the e-mail address(es) of the person(s) that should to receive the newly arrived voice mails on their e-mail account(s). Use a
space, semicolon or a comma to separate the mailing addresses in the text field.
The next two fields are used for retransmission of the voice mail via email. Number of times text field requires the maximum number of times the
voice mail will be delivered via email to the recipient within the interval (in minutes) defined in the Repeat every text field. If the voice mail is
required to be sent only once, insert “1” in Repeat every text field and “0” in the Number of times text field.
The Voice Mail and Fax dropdown lists allow to select the email sent options- do not send notification, send notification without attachment or send
notification with voice or fax attachments.
Remove Voice Mail on send removes the voice mail from the user mailbox after sending it to the e-mail recipient(s).
Remove Fax On Send removes fax attachment from the user mailbox after sending it to the email recipient(s).
Attention: The e-mail can only handle up to 3 minutes long voice mails. If the voice mail is longer than 3 minutes, it will be truncated and only the
first 3 minutes of it will be sent to the indicated e-mail address. However, in the e-mail body the recipient will receive the information that the
attached voice mail is truncated and the total length of the voice mail. Please note that the voice mails longer than 3 minutes will not be removed
from the voice mailbox once they are sent per e-mail even if the Remove Voice Mail on send checkbox is selected. This gives you a possibility to
listen to the ending of the voice mail directly from your voice mailbox (from the handset or by downloading it from the Web management).
Please Note: This service will work only when System Mail is enabled on the QX IP PBX. Contact your system administrator if you have problems
with voice mail delivery via email.
Table of contents
Other Epygi PBX manuals

Epygi
Epygi QX1000 Service manual

Epygi
Epygi Quadro2x Service manual

Epygi
Epygi Quadro6L User manual

Epygi
Epygi Quadro Quadro M32x User manual

Epygi
Epygi Quadro2x User manual

Epygi
Epygi Quadro Quadro 2x User manual

Epygi
Epygi Quadro Quadro 4xa User manual

Epygi
Epygi Quadro Quadro M32x User manual

Epygi
Epygi Quadro Quadro 6L User manual

Epygi
Epygi Quadro2x User manual

Epygi
Epygi Quadro Quadro 2x User manual

Epygi
Epygi Quadro2x Quick guide

Epygi
Epygi Quadro Quadro 2x User manual

Epygi
Epygi Quadro2x User manual

Epygi
Epygi Quadro Quadro 16x User manual

Epygi
Epygi Quadro Quadro 2xi User manual

Epygi
Epygi Quadro6L User manual

Epygi
Epygi QuadroM8L Service manual

Epygi
Epygi QX series User manual

Epygi
Epygi Quadro4Li User manual