ESD SYSTEMS 94000 Instruction Manual

TB-5508 October 2016 Page 1 of 2
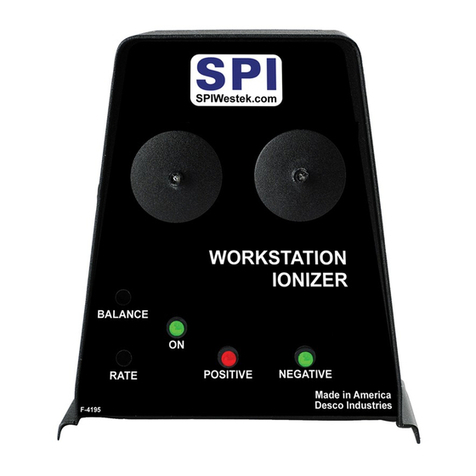
SPI Counter Workstation Ionizer
Operation, Installation and Maintenance
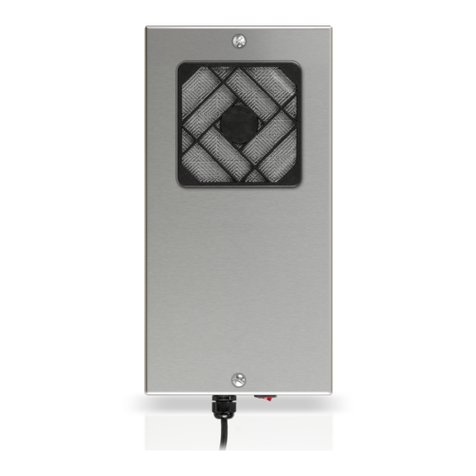
Figure 1. SPI Counter Workstation Ionizer
Description
The SPI Counter Workstation Ionizer is designed to
effectively eliminate localized static charges which exist
in the work area.
Item Description
94000 Counter Workstation Ionizer, 120VAC
94001 Counter Workstation Ionizer, 220VAC
94003 Replacement Emitters, Pack of 2
NOTE: If your ionizer was manufactured prior to 2009,
use item 94002 as your replacement emitter pins.
Contact customer service should you need assistance
with determining your ionizer’s year of manufacture.
Operation
The Counter Workstation Ionizer comes completely
balanced and ready to use.
1. Place the ionizer on a flat, level surface.
2. Plug the ionizer into an appropriate electrical outlet.
3. Power the ionizer using the power switch located
at the back.
FOR BEST RESULTS
1. Keep the targeted area clear and free from
obstructions of ion flow.
2. Effective ionization range: 12" (305 mm)
3. Position the ionizer so its emitter points are
directed towards the area to be ionized.
REMEMBER
1. Keep the work area clear of all static generative
materials.
2. Use only approved static control grounding
methods and material handling equipment.
3. By properly using ionized air, all static potentials
in the work area are greatly reduced, even when
humidity levels decrease.
CAUTION: Care should be exercised during handling
to prevent the unit from falling face down. The delicate
emitter pins will be damaged or broken if this happens.
Maintenance
The Counter Workstation Ionizer is designed to be
virtually maintenance free. The emitter points can be
cleaned when there is a visible accumulation of dirt.
Generally this would be twice a year, depending on the
cleanliness level of the working environment.
1. Check the emitter points for dirt accumulation.
2. Be sure the unit is unplugged.
3. Wipe emitter point with a swab dampened in
isopropyl alcohol.
4. The outside case may be wiped down with a soft
damp cloth.
Calibration
The Counter Workstation Ionizer is factory set to
achieve a maximum balanced ion output in standard,
non-air assisted applications. To certify calibration,
we recommend ANSI/ESD association standard ANSI/
ESD STM3.1.
Objective: To observe, test and record performance
levels of ionization units, utilizing readily available
equipment, thereby verifying or certifying calibration.
EQUIPMENT USED
EMIT 50571 Charged Plate Analyzer
PROCEDURE
1. Position the Counter Workstation Ionizer 12 inches
(305 mm) away from the face of the Charged Plate
Analyzer.
TECHNICAL BULLETIN TB-5508
Made in the
United States of America
© 2016 DESCO INDUSTRIES INC.
Employee Owned
WEST COAST - 3651 Walnut Avenue, Chino, CA 91710 • (909) 627-8178
EAST COAST - One Colgate Way, Canton, MA 02021-1407 • (781) 821-8370 • Website: ESDSystems.com

2. With the Counter SPI and the Charged Plate
Analyzer on, adjust the balance trimpot, located
on the lower left side of the ionizer. Balance the
ionizer to 0 volts on the Charged Plate Anaylzer.
NOTE: There are 3 LEDs located on the front
panel. The one on the left is the on light, the other
two LEDs are the indicators of the positive and
negative. Note the rate in which the lights switch.
Your unit should be set at a slow rate. Also note
when balancing, the indicator lights, as you offset
the positive and the negative (balance), the on and
off times changes on the lights.
3. Charge the Charged Plate Analyzer to 1KV of
either polarity (±) and push the decay button. The
timer will automatically time the decay rate. The
typical decay is 1,000 to 100 volts in under 60
seconds of both polarities.
There are two adjustments that can be made on the
Counter Workstation Ionizer: the BALANCE and the
RATE. The BALANCE of positive and negative ion
output can be adjusted to increase polarity bias by
inserting a small screwdriver through the BALANCE
port and slowly turning the trimpot clockwise to
increase positive and decrease negative ON time
pulses. Turn the trimpot counter-clockwise to increase
negative output and decrease positive ON time pulses.
The RATE or pulse frequency can be adjusted down
to one pulse per second or up to 5 pulses per second
by inserting a small screwdriver through the RATE port
and slowly turning the trimpot clockwise to increase
the frequency and counter-clockwise to decrease the
frequency.
Specifications
Dimensions
5.0" W x 2.5" L x 5.5" H
(127 mm W x 63.5 mm L x 140 mm H)
Balance (offset voltage) at 12" in front of Ionizer*
±25 Volts Maximum
Neutralization (Discharge) Times at 12" in front of
Ionizer*
<15 seconds (positive and negative voltage)
Power Consumption
94000 - 120 VAC, .04 A, 4.8 W
94001 - 220 VAC, .14 A, 30 W
*Factory default settings
REMEMBER
It is important to verify calibration after any adjustments
and before using the Counter Workstation Ionizer
around sensitive electronics. Merely repeat above
Balance Verification steps after all adjustments.
TB-5508 Page 2 of 2 © 2016 DESCO INDUSTRIES INC.
Employee Owned
WEST COAST - 3651 Walnut Avenue, Chino, CA 91710 • (909) 627-8178
EAST COAST - One Colgate Way, Canton, MA 02021-1407 • (781) 821-8370 • Website: ESDSystems.com
Field repairs are not normally encouraged during
the warranty period. Repair attempts by unqualified
personnel may invalidate the warranty.
IMPORTANT
The Counter Workstation Ionizer has been designed
to minimize effects of localized charges. If your
processing involves generation of considerable static
charges you may need more aggressive equipment.
ESD Systems offers a complete line of Ionizing
Blowers, Air Guns, Bars and Overhead Room systems
to meet all ionizing requirements.
Limited Warranty, Warranty Exclusions, Limit of
Liability and RMA Request Instructions
See the ESD Systems Warranty -
http://esdsystems.descoindustries.com/Limited-Warranty.aspx
This manual suits for next models
2
Table of contents
Other ESD SYSTEMS Air Ionizer manuals
Popular Air Ionizer manuals by other brands

Schumacher Electric
Schumacher Electric 1227 manual

EMIT
EMIT 50643 Installation, operation and maintenance manual

P Tec
P Tec IN5130 instruction manual

Desco
Desco Trustat 19550 Installation, operation and maintenance

AirPlus
AirPlus DMR-6000 Installation, operation and maintenance manual

SMC Networks
SMC Networks IZT43 Series Operation manual