manuals.online logo
Brands
  1. Home
  2. •
  3. Brands
  4. •
  5. esotec
  6. •
  7. Lantern
  8. •
  9. esotec 574294 Manual

esotec 574294 Manual

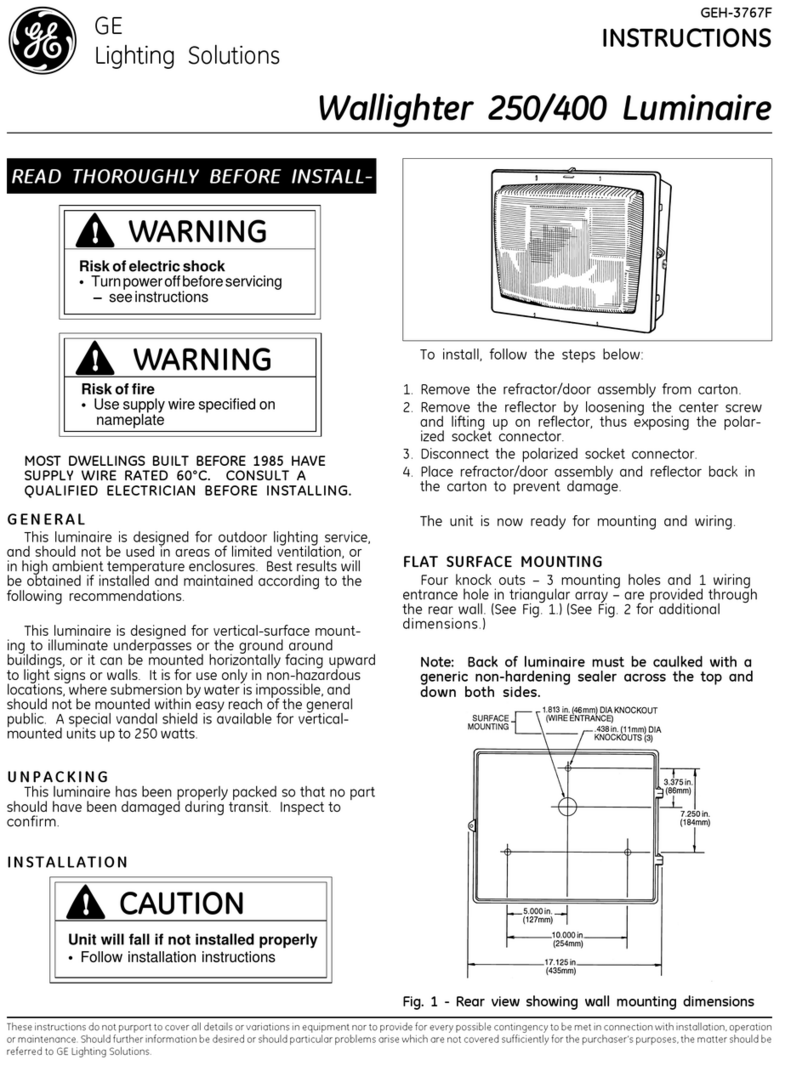
Using Instructions
These instructions relate ONLY to this product and contain important
information for using the product for the first time. lease keep these
instructions for later reference and should always accompany the
product in the event of transference to a new user.
1. Introduction
Dear Costumer,
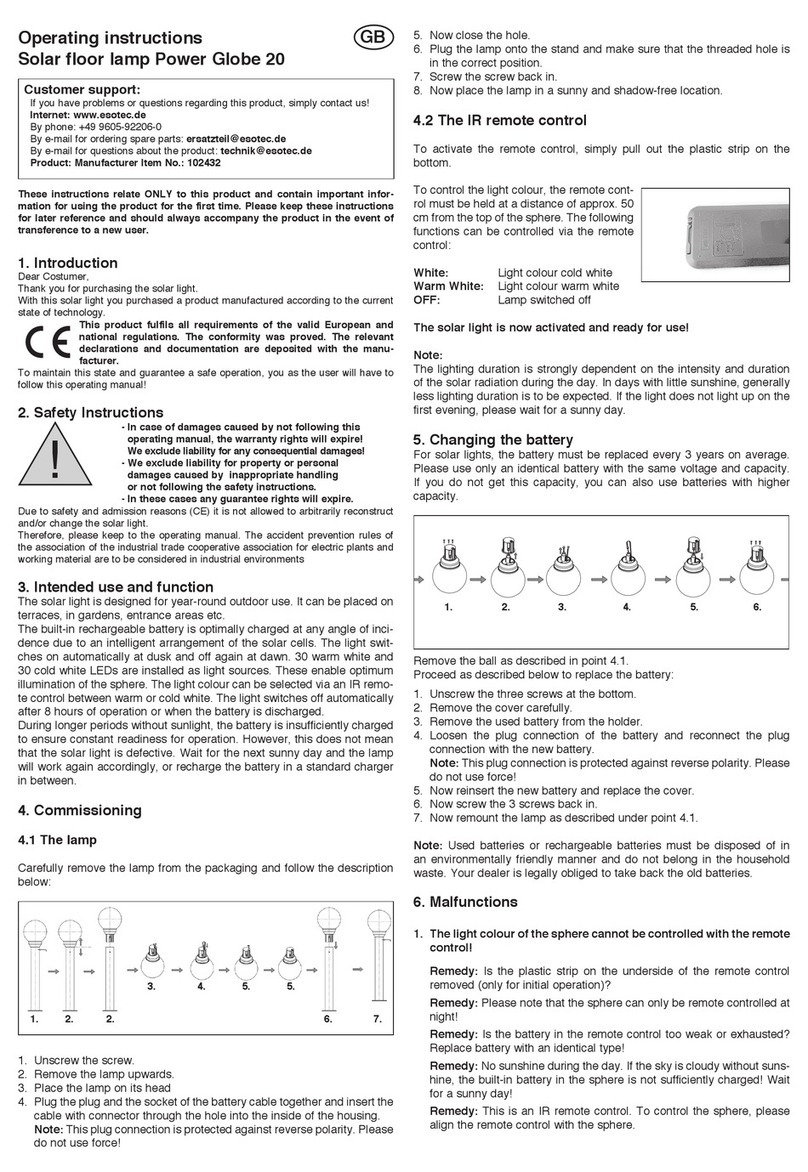
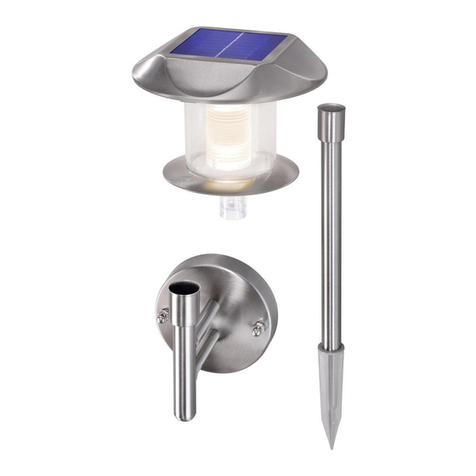
Thank you for purchasing the solar light. With this solar light you purcha-
sed a product manufactured according to the current state of technology.
This product fulfils all requirements of the valid European and natio-
nal regulations. The conformity was proved. The relevant declarati-
ons and documentation are deposited with the manufacturer.
To maintain this state and guarantee a safe operation, you as the user will
have to follow this operating manual!
2. Safety Instructions
- In case of damages caused by not
following this operating manual, the
warranty rights will expire! We exclude
liability for any consequential damages!
- We exclude liability for property or
personal damages caused by inappropriate
handling or not following the safety instructions.
- In these cases any guarantee rights will expire.
Due to safety and admission reasons (CE) it is not allowed to arbitrarily
reconstruct and/or change the solar light.
Therefore, please keep to the operating manual.
3. Usage in Accordance with Requirements
The light is automatically switched on at darkness and switched out in the
morning light. The maximum illumination duration with a full accumulator
and without charging is approximately 8 hours. The solar module installed
in the upper part of the housing charges the integrated accumulator.
Switch1 (the main switch) is used to switch on and off the whole set. In the
position of “off”, the battery cannot be charged.
Switch 2 is used to switch on and off the illumination and in the position of
“A”, the battery can be charged and the illumination is off. In the position of
“C”, the battery is charged and the illumination on.
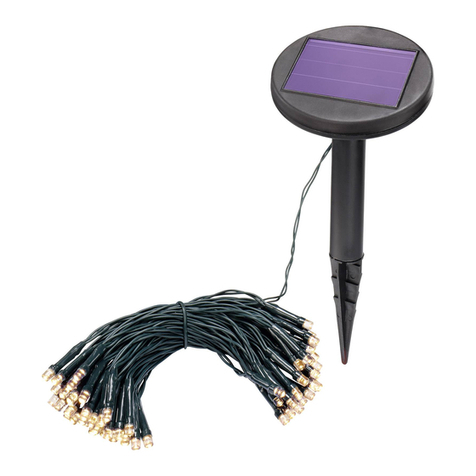
The LED rope is suitable for outdoor usage. This LED net cannot be sunk
into water. The solar module may be installed on a pole, inserted into the
ground or screwed to the wall. The product is designed for the application
in a private environment.
Note: Please make sure that the solar module is preferably directed to the
South and that shadows are avoided. When directing the module to the
North it is not possible to use the product. The solar module shall always
be free of snow in the winter.
4. Installation and Initiation
1. Please carefully take all parts out of the package and lay out the net.
2. Please fix down the LED net on the wall, the fence or the pavilion etc.
please pay attention to the “marginal” net with the cables cannot be pla-
ced too near from one another. If the voltage is too large, you can remo-
ve the cable or demolish the solder joints of LEDs. It is just designed for
the use in the outdoor areas but please notice that the net can not be
permanently submerged into water (pond, etc). For the convenience of
the installation, the light is preferably removed from the module.
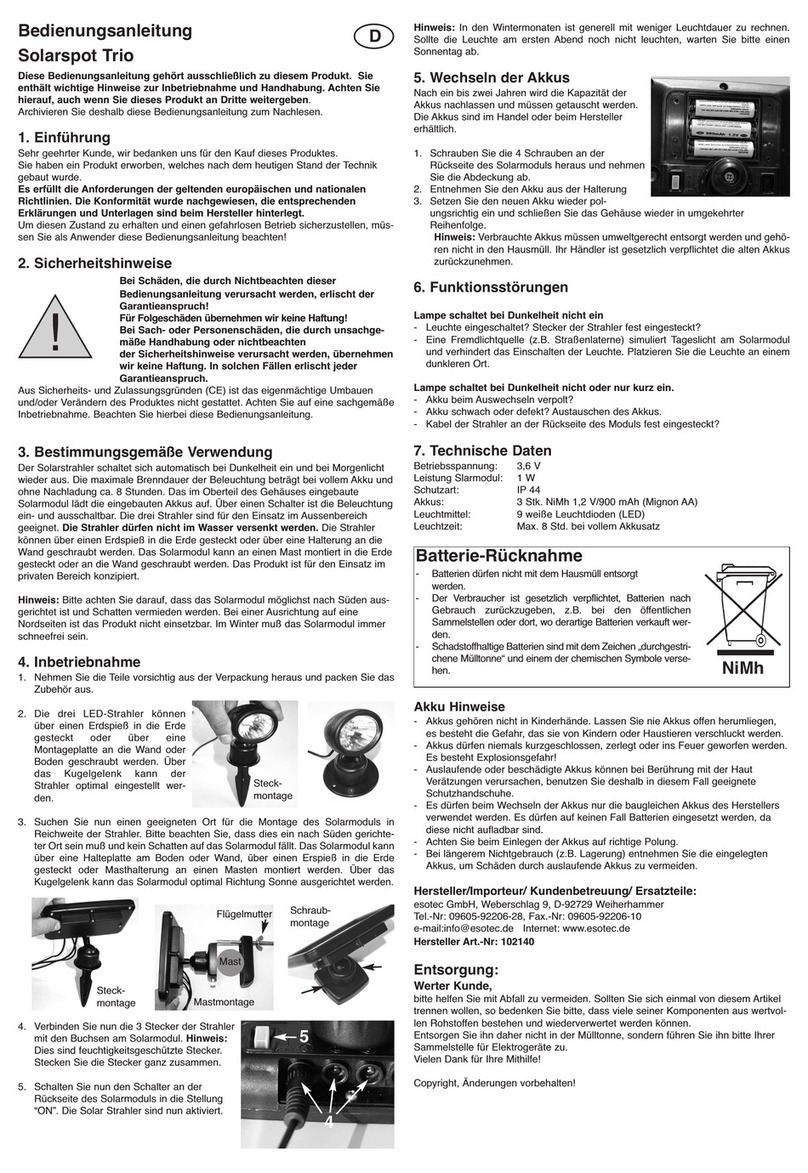
3. Now look for a suitable place for installing the solar module within the
cable range. Please ensure that the solar module is placed pointing
southwards and that no shadows falls on it. The solar module can be
installed on the ground or snapped in place to the ground or wall or on
poles using a retaining plate. Using the ball-and-socket joint, the solar
module can be optimally aligned in the direction of sun.
Note: During the winter months the duration of illumination will generally be
shorter. If the lamp should not shine on the first evening, please wait for a sunny
day.
4. Now push the switch 1 (main
switch) on the back side of the
solar module to the position
"ON". The LED net is now acti-
vated.
5. Via the mode switch on the
back of the module, the LED
light of the net in different light
modes (different blinking light,
continuous light) is controlled.
6. Switch 2 (power switch): in the position “C” the LED net can be turned
off. In the day the battery is charged but at night the net is not lighted.
In this way for several days you can continuously store energy from the
sun in the battery. Then set the switch to the position “A”, the illumina-
tion is on.
Note: During the winter month the duration of illumination will general-
ly be shorter. If the lamp should not shine on the first evening, please
use Switch 2 to store energy for several days.
5. Lighting modes (Smart program)
This product has a built-in microchip and controls the lighting depending
upon the charging status of the batteries. The greater the charge in the
batteries, the brighter is the light from the LEDS. Following list shows the
current as a function of the charging status of the batteries and the
lighting duration. After glowing for about 8 hrs, the light switchs off auto-
matically.
Using the Mode button at the back of the module, the individual flashing
modes can be setup.
There are a total of 8 lighting modes in the following sequence:
Press the Mode key for changing the mode each time. A mode which is
setup is retained permanently.
1. Lighting mode cycles from 2 to 8
2. Continuous light
3. - 8. Different flashing light
5.1 Continuous light
If you press the Mode button for longer than 3 seconds the LEDs glow
continously. The lighting duration is a maximum of 8 hrs and then the
light is switched off. This mode is stored and repeats on the next day.
Note: The continuous lighting mode uses up maximum energy and hence
should be chosen only at those times when the sun is shining brightly.
!
GB
wall mounted
pole mounted
ground
stake
ground
stake
switch 1 switch 2
mode
button
+
Battery voltage 3,8 V (100%) 3,4 - 3,8 V (80%) 3,0 - 3,4 V (50%)
Lighting duration Current Current Current
1. hour 100% 80% 50%
2. - 4. hour 87% 70% 44%
5. - 6. hour 75% 60% 37%
7. - 8. hour 50% 40% 25%
6. Exchange of batteries
After one or two years, the capa-
city of the battery is down and
must be exchanged. The batte-
ries are commercially available
from the manufacturer.
1. Unscrew the 4 screws on the
back side of the solar module
and remove the cover.
2. Remove the battery from the
holder.
3. Insert the new battery with
correct polarity and close the
housing in reverse order.
Note: Used batteries must be
disposed of in a non-polluting way and do not belong into the domestic
waste. Your dealer is legally obliged to take back the old batteries.
7. Malfunctions
- Lamp is not automatically switched on at darkness
- An outside light source (e.g. streetlight) simulates daylight and pre-
vents the lamp from switching on. Place the lamp at a darker location.
- Lamp is not switched on at darkness or only for a short period of
time.
- Is the lamp connected?
- Accumulator weak or defective. Exchange of the accumulators.
8. Specifications
- Operating voltage: 3,6 V
- Power Solarmodule: 2 Wp
- Battery: 3 pcs. NiMh 1.2 V/1300 mAh AA-size
- Illuminating units: 200 LEDs
- Illumination time with
a full battery: Max. 8 h instant light
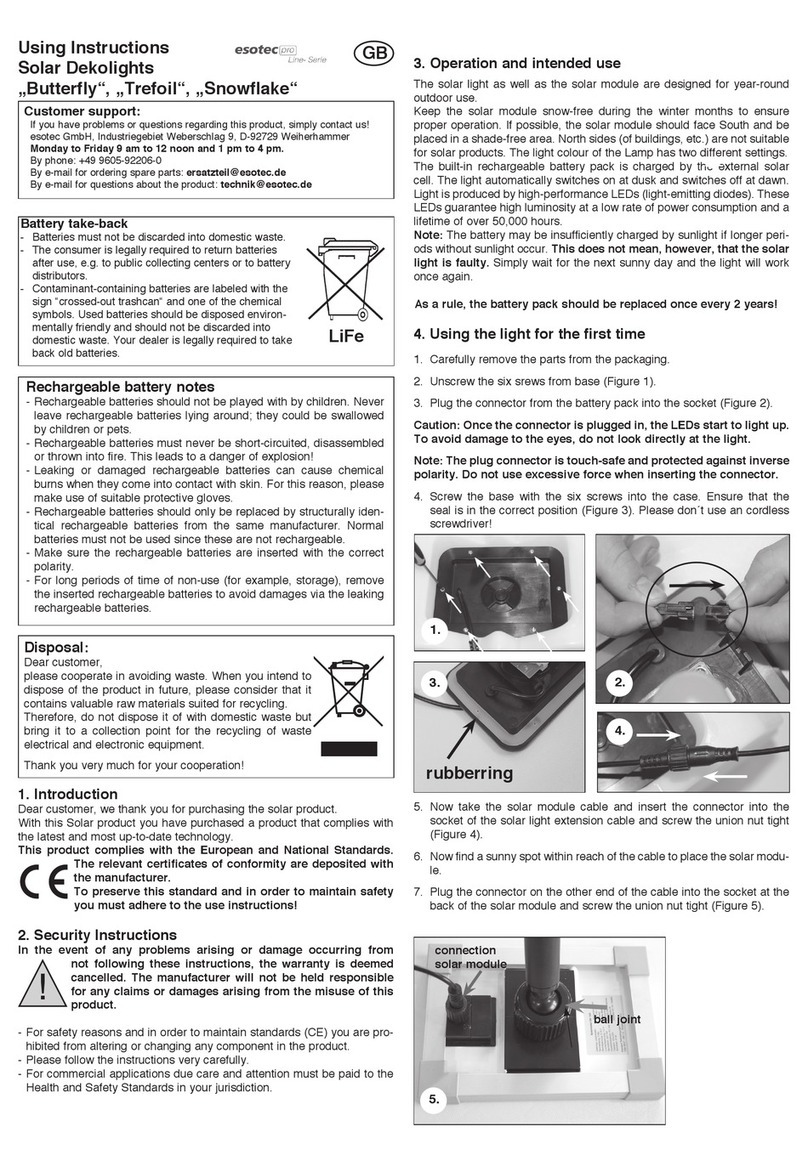
Battery take-back
- Batteries must not be discarded into domestic waste.
- The consumer is legally required to return batteries after
use, e.g. to public collecting centers or to battery distribu-
tors.
- Contaminant-containing batteries are labeled with the sign
“crossed-out trashcan“ and one of the chemical symbols.
Used batteries should be disposed environmentally friend-
ly and should not be discarded into domestic waste. Your
dealer is legally required to take back old batteries. NiMh
Rechargeable battery notes
- Rechargeable batteries should not be played with by children. Never
leave rechargeable batteries lying around; they could be swallowed by
children or pets.
- Rechargeable batteries must never be short-circuited, disassembled or
thrown into fire. This leads to a danger of explosion!
- Leaking or damaged rechargeable batteries can cause chemical burns
when they come into contact with skin. For this reason, please make use
of suitable protective gloves.
- Rechargeable batteries should only be replaced by structurally identical
rechargeable batteries from the same manufacturer. Normal batteries
must not be used since these are not rechargeable.
- Make sure the rechargeable batteries are inserted with the correct pola-
rity.
- For long periods of time of non-use (for example, storage), remove the
inserted rechargeable batteries to avoid damages via the leaking rechar-
geable batteries.
Disposal:
Dear customer,
please cooperate in avoiding waste. When you intend to dispose of the
product in future, please consider that it contains valuable raw materials
suited for recycling.
Therefore, do not dispose it of with domestic waste but bring it to a collec-
tion point for the recycling of waste electrical and electronic equipment.
Thank you very much for your cooperation!
Copyright, esotec Gmb
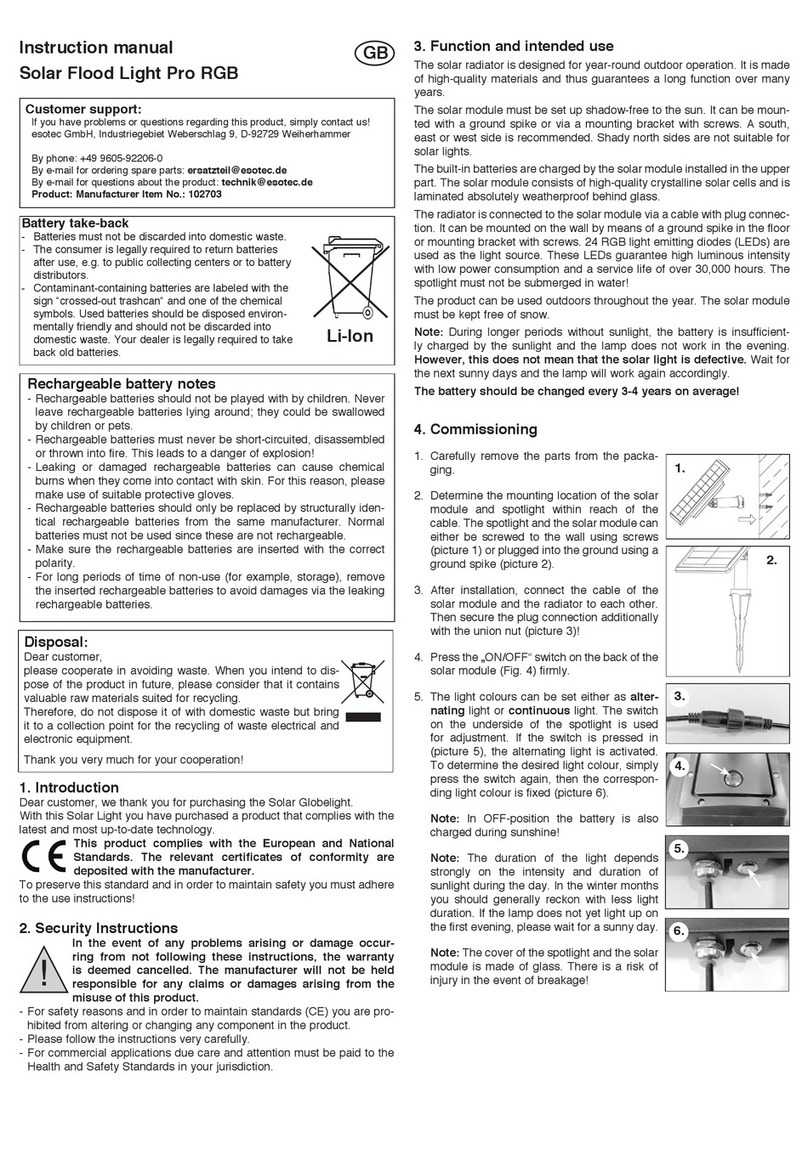
Customer support:
If you have problems or questions regarding this product, simply contact us!
Monday to Friday 8 am to 12 noon and 1 pm to 4 pm.
By phone: 09605-92206-27
By e-mail for ordering spare parts: [email protected]
By e-mail for questions about the product: [email protected]
roduct: LED netlight warmwhite: Manufacturer Item No.: 102068
roduct: LED netlight color light: Manufacturer Item No.: 102070

Other esotec Lantern manuals

esotec Power Trio Duo Color User manual

esotec

esotec Power Trio Duo Color User manual

esotec Stone 40 Manual

esotec

esotec Stone 40 Manual

esotec Float 15 User manual

esotec

esotec Float 15 User manual

esotec Disk Manual

esotec

esotec Disk Manual

esotec Trendy Manual

esotec

esotec Trendy Manual

esotec Freddy Manual

esotec

esotec Freddy Manual

esotec Float 25 User manual

esotec

esotec Float 25 User manual

esotec Trio Manual

esotec

esotec Trio Manual

esotec Modena Manual

esotec

esotec Modena Manual

esotec 106020 Manual

esotec

esotec 106020 Manual

esotec Talo Manual

esotec

esotec Talo Manual

esotec pro Line Series Manual

esotec

esotec pro Line Series Manual

esotec pro Line Series Manual

esotec

esotec pro Line Series Manual

esotec Cube User manual

esotec

esotec Cube User manual

esotec Salerno pro Duo Color User manual

esotec

esotec Salerno pro Duo Color User manual

esotec Float 15 User manual

esotec

esotec Float 15 User manual

esotec Smart Cube User manual

esotec

esotec Smart Cube User manual

esotec Asinara Manual

esotec

esotec Asinara Manual

esotec Twin Manual

esotec

esotec Twin Manual

esotec Lumina User manual

esotec

esotec Lumina User manual

esotec Power Globe 20 User manual

esotec

esotec Power Globe 20 User manual

esotec Pro RGB User manual

esotec

esotec Pro RGB User manual

esotec Super Spot pro Duo Color User manual

esotec

esotec Super Spot pro Duo Color User manual

esotec Sunnylight Parts list manual

esotec

esotec Sunnylight Parts list manual

Popular Lantern manuals by other brands

HQ EL-PILRLA90 manual

HQ

HQ EL-PILRLA90 manual

DS Produkte B3443 instructions

DS Produkte

DS Produkte B3443 instructions

LEGRAND Kenall LUXTRAN LTL Series installation instructions

LEGRAND

LEGRAND Kenall LUXTRAN LTL Series installation instructions

TILLYTEC Mini uni user manual

TILLYTEC

TILLYTEC Mini uni user manual

Portfolio VEL-02251102-PIR-BK User instruction

Portfolio

Portfolio VEL-02251102-PIR-BK User instruction

Finelite HP-2 installation instructions

Finelite

Finelite HP-2 installation instructions

enbrighten 49560 manual

enbrighten

enbrighten 49560 manual

MELINERA HG00308A Operation and safety notes

MELINERA

MELINERA HG00308A Operation and safety notes

Eaton McGraw-Edison GLNA Galleonaire LED installation instructions

Eaton

Eaton McGraw-Edison GLNA Galleonaire LED installation instructions

BEGA 84 083 Series Instructions for use

BEGA

BEGA 84 083 Series Instructions for use

Somogyi home NKL 01 instruction manual

Somogyi

Somogyi home NKL 01 instruction manual

olympia electronics GR-108/12L/90 quick start guide

olympia electronics

olympia electronics GR-108/12L/90 quick start guide

Fanelite KN-3705RD user manual

Fanelite

Fanelite KN-3705RD user manual

Ansell Astro AA28 installation instructions

Ansell

Ansell Astro AA28 installation instructions

MARELD PERFORMANCE Series instruction manual

MARELD

MARELD PERFORMANCE Series instruction manual

Clas Ohlson WX-W-LED20-1WW-1 quick start guide

Clas Ohlson

Clas Ohlson WX-W-LED20-1WW-1 quick start guide

Fenix CL20R user manual

Fenix

Fenix CL20R user manual

Patriot Lighting 343-1474 installation guide

Patriot Lighting

Patriot Lighting 343-1474 installation guide

manuals.online logo
manuals.online logoBrands
  • About & Mission
  • Contact us
  • Privacy Policy
  • Terms and Conditions

Copyright 2025 Manuals.Online. All Rights Reserved.