manuals.online logo
Brands
  1. Home
  2. •
  3. Brands
  4. •
  5. esotec
  6. •
  7. Lantern
  8. •
  9. esotec Duo Power 2000 User manual

esotec Duo Power 2000 User manual

2.2 Mounting on soft ground (e.g. grass)
1. Take the two ground
anchors and knock them
firmly into the ground with
a rubber hammer at a dis-
tance of 6 to 12 cm.
2. Now fasten the mounting
plate with the two ground
anchors using the two
threaded screws.
3. Place the lamp careful-
ly on the mounting plate
and make sure that the 4
holes in the lamp match
the threaded holes of the
base plate.
4. Now take the 4 screws with the washer and the snap ring and screw the
lamp firmly to the mounting plate.
5. Commissioning
The luminaires on both sides can be switched independently of each other.
The setting is made via the switch above the PIR sensor. The battery is
also charged when the light is switched off.
1. switch press = sensor mode
2. switch press = twilight mode
3. switch press = off
Sensor mode:
When a movement is detected, the lamp lights up at full brightness (1000
lm per side). After 20 seconds without movement, the brightness is auto-
matically reduced to approx. 150 lm.
Twilight mode: In darkness, the light switches on automatically and illu-
minates with 500 lm per side. The light is then automatically switched off
again at dawn or when the battery is discharged. The PIR motion sensors
have no function.
The solar light is now activated and ready for use!
6. Malfunctions
Lamp does not switch on in darkness
- An extraneous light source (e.g. street lamp) simulates daylight on the
solar module and prevents the luminaire from switching on. Place the
luminaire in a darker place!
- Battery depleted? Replace the battery!
!
Operating instructions
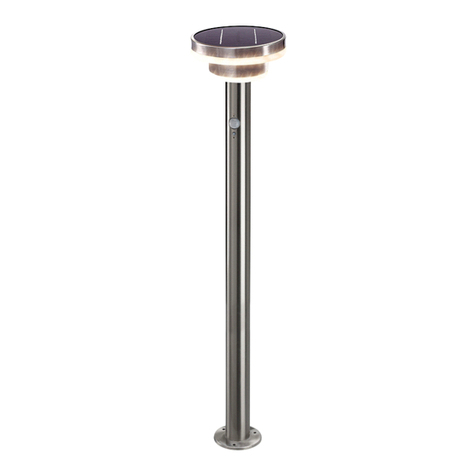
Solar LED Pillar „Duo Power 2000“
These instructions relate ONLY to this product and contain important infor-
mation for using the product for the first time. Please keep these instructions
for later reference and should always accompany the product in the event of
transference to a new user.
1. Introduction
Dear Costumer,
Thank you for purchasing the solar light.
With this solar light you purchased a product manufactured according to the current
state of technology.
This product fulfils all requirements of the valid European and
national regulations. The conformity was proved. The relevant
declarations and documentation are deposited with the manu-
facturer.
To maintain this state and guarantee a safe operation, you as the user
will have to follow this operating manual!
2. Safety Instructions
- In case of damages caused by not following this
operating manual, the warranty rights will expire!
We exclude liability for any consequential damages!
- We exclude liability for property or personal
damages caused by inappropriate handling
or not following the safety instructions.
- In these cases any guarantee rights will expire.
Due to safety and admission reasons (CE) it is not allowed to arbitrarily reconstruct
and/or change the solar light.
Therefore, please keep to the operating manual. The accident prevention rules of
the association of the industrial trade cooperative association for electric plants and
working material are to be considered in industrial environments
3. Intended use and function
The solar light captivates with its unique design and function. It has two
powerful modules and two independent lighting systems. These can light
up the whole night in the dark or be switched via the two built-in PIR sen-
sors. Both sides can be operated independently. 2 x 20 super-bright LEDs
are installed as illuminants. The built-in LiFePo battery is charged via two
powerful monocrystalline solar modules (11 Wp and 9 Wp).
During longer periods without solar radiation, the battery is insufficiently
charged to ensure constant operational readiness. However, this does not
mean that the solar light is defective. Wait for the next sunny days, the
lamp will function accordingly again.
The lamp is suitable for outdoor use all year round.
Extensive mounting material is included for safe mounting of the luminaire.
4. Mounting
1. Carefully remove the lamp and accessories from their packaging.
2. Various accessories are available for stable mounting. The solar light
must be installed in a shady and sunny place.
2.1 Mounting on solid ground (e.g. stone):
1. Take the mounting plate of
the luminaire and mark the
holes on the floor. Take a
suitable drill with 10 mm
diameter and drill the 4
holes with 70 mm depth.
2. Place the mounting plate
on the holes and insert
the 4 metal plugs into the
holes.
3. Screw the mounting plate
firmly to the floor with the
4 screws.
4. Place the lamp carefully
on the mounting plate and
make sure that the 4 holes in the lamp match the threaded holes of the
base plate.
5. Now take the 4 screws with the washer and the snap ring and screw the
lamp firmly to the mounting plate.
GB
Customer support:
If you have problems or questions regarding this product, simply contact us!
By phone: +49 9605-92206-0
By e-mail for ordering spare parts: [email protected]
By e-mail for questions about the product: [email protected]
Product: Manufacturer Item No.: 102268
PIR-Sensor
switch
LEDs
7. Changing the battery pack
The battery pack should be replaced by an authorised specialist or by your
dealer. The dealer should proceed as follows:
1. Switch off the light.
2. Turn out all 4 screws from the side of
the lamp and remove the lamp from the
mounting plate upwards.
3. Open the 8 screws on the battery com-
partment (figure 1) on the underside
of the lamp and carefully remove the
cover.
4. Release the connection of the battery
pack (Fig. 2) and exchange the battery
pack for an equivalent one.
Note: The plug is protected against
reverse polarity. Please do not use
force.
5. Now place the seal from the cover back
onto the battery compartment (Fig. 3)
and press the cover firmly back onto the
seal of the battery compartment (Fig. 4).
6. Now insert the screws and tighten them
again with a suitable screwdriver.
7. Mount the lamp again and select the
desired mode.
Note: Used batteries or accumulators must be disposed of in an environ-
mentally friendly manner and should not be disposed of with household
waste. Your dealer is legally obliged to take back the old batteries.
8. Technical Data
• PIR sensor: 160°, range max. 10 m
• Illuminant: 20 LEDs on each side
• Light angle: 120°.
• Light colour: 3000 K warm white
• Luminous intensity: Max. 1000 lm on each side
• Battery: LiFePo4 6.4 V/ 6000 mAh
• Protection class: IP 65
• Protection class: III
• Temperature range: -20°C to +45°C
Manufacturer/Importer:
esotec GmbH - Gewerbegebiet Weberschlag 9 - D-92729 Weiherhammer
Tel.-Nr: +49 9605-92206-0 - Fax.-Nr: +49 9605-92206-10
Internet: www.esotec.de
Disposal:
Dear customer,
please cooperate in avoiding waste. When you intend to dis-
pose of the product in future, please consider that it contains
valuable raw materials suited for recycling.
Therefore, do not dispose it of with domestic waste but bring
it to a collection point for the recycling of waste electrical
and electronic equipment. Thank you very much for your
cooperation!
Copyright, esotec GmbH
Battery Recycling:
- Used batteries or accumulators must be disposed in the
domestic waste.
- The consumer is legally obliged to bring back old accumula-
tors upon usage, e.g. to public waste collecting locations or
to the place (shops, etc.) where those batteries are sold.
- Batteries that contain harmful substances are marked with
the “strike through dustbin” and one of the chemical sym-
bols. LiFePO4
Rechargeable battery notes
- Rechargeable batteries should not be played with by children. Never
leave rechargeable batteries lying around; they could be swallowed by
children or pets.
- Rechargeable batteries must never be short-circuited, disassembled or
thrown into fire. This leads to a danger of explosion!
- Leaking or damaged rechargeable batteries can cause chemical burns
when they come into contact with skin. For this reason, please make use
of suitable protective gloves.
- Rechargeable batteries should only be replaced by structurally identical
rechargeable batteries from the same manufacturer. Normal batteries
must not be used since these are not rechargeable.
- Make sure the rechargeable batteries are inserted with the correct pola-
rity.
- For long periods of time of non-use (for example, storage), remove the
inserted rechargeable batteries to avoid damages via the leaking rechar-
geable batteries.
1.
2.
3.
4.

This manual suits for next models

1

Other esotec Lantern manuals

esotec Float 15 User manual

esotec

esotec Float 15 User manual

esotec Cube User manual

esotec

esotec Cube User manual

esotec Power Trio Duo Color User manual

esotec

esotec Power Trio Duo Color User manual

esotec Pro RGB User manual

esotec

esotec Pro RGB User manual

esotec Twin Manual

esotec

esotec Twin Manual

esotec 102168 Manual

esotec

esotec 102168 Manual

esotec Smart Cube User manual

esotec

esotec Smart Cube User manual

esotec Salerno pro Duo Color User manual

esotec

esotec Salerno pro Duo Color User manual

esotec Float 15 User manual

esotec

esotec Float 15 User manual

esotec Asinara Manual

esotec

esotec Asinara Manual

esotec Trio Manual

esotec

esotec Trio Manual

esotec Lumina User manual

esotec

esotec Lumina User manual

esotec 106020 Manual

esotec

esotec 106020 Manual

esotec pro Line Series Manual

esotec

esotec pro Line Series Manual

esotec Float 25 User manual

esotec

esotec Float 25 User manual

esotec Stone 40 Manual

esotec

esotec Stone 40 Manual

esotec Sunnylight Parts list manual

esotec

esotec Sunnylight Parts list manual

esotec Power Globe 20 User manual

esotec

esotec Power Globe 20 User manual

esotec Super Spot pro Duo Color User manual

esotec

esotec Super Spot pro Duo Color User manual

esotec Modena Manual

esotec

esotec Modena Manual

esotec pro Line Series Manual

esotec

esotec pro Line Series Manual

esotec Trendy Manual

esotec

esotec Trendy Manual

esotec Disk Manual

esotec

esotec Disk Manual

esotec Talo Manual

esotec

esotec Talo Manual

Popular Lantern manuals by other brands

WAGNER LATINA manual

WAGNER

WAGNER LATINA manual

LED Group Robus RHKLDP40-01 quick start guide

LED Group

LED Group Robus RHKLDP40-01 quick start guide

Eaton Lumark LEL10BPCI instruction manual

Eaton

Eaton Lumark LEL10BPCI instruction manual

delviro energy ZOOM installation manual

delviro energy

delviro energy ZOOM installation manual

GE IP140 Series installation guide

GE

GE IP140 Series installation guide

GE Lumination LVT 24 Series installation guide

GE

GE Lumination LVT 24 Series installation guide

Stahl Tranberg TEF 2457 user manual

Stahl

Stahl Tranberg TEF 2457 user manual

JBL UV-Spot Plus 100 W manual

JBL

JBL UV-Spot Plus 100 W manual

LIGMAN SY-20643 installation manual

LIGMAN

LIGMAN SY-20643 installation manual

Gama Sonic GS-97ATS instruction manual

Gama Sonic

Gama Sonic GS-97ATS instruction manual

LF allen + roth 39500 manual

LF

LF allen + roth 39500 manual

Coleman 639B700 user manual

Coleman

Coleman 639B700 user manual

Home Decorators Collection 5273002 Use and care guide

Home Decorators Collection

Home Decorators Collection 5273002 Use and care guide

Emos ZT1320E manual

Emos

Emos ZT1320E manual

Coleman 8D PACK-AWAY 5324 Series manual

Coleman

Coleman 8D PACK-AWAY 5324 Series manual

McLED LINE user manual

McLED

McLED LINE user manual

IKEA STRALA J2031 manual

IKEA

IKEA STRALA J2031 manual

Kichler Lighting 39518 manual

Kichler Lighting

Kichler Lighting 39518 manual

manuals.online logo
manuals.online logoBrands
  • About & Mission
  • Contact us
  • Privacy Policy
  • Terms and Conditions

Copyright 2025 Manuals.Online. All Rights Reserved.