manuals.online logo
Brands
  1. Home
  2. •
  3. Brands
  4. •
  5. EVERSPRING
  6. •
  7. Control Unit
  8. •
  9. EVERSPRING AN145-2 User manual

EVERSPRING AN145-2 User manual

1
AN145
SCREW-IN ON/OFF MODULE
The AN145 Screw-in On/Off Module is a transceiver which is a Z-Wave
TM
enabled device and is fully compatible with any Z-Wave
TM
enabled network.
Z-Wave
TM
enabled devices displaying the Z-Wave
TM
logo can also be used with
it regardless of the manufacturer, and ours can also be used in other
manufacturer’s Z-Wave
TM
enabled networks. Inclusion of this Module on other
manufacturer’s Wireless Controller allows remote turn-on of On/Off status. Each
Module is designed to act as a repeater. Repeaters will re-transmit the RF
signal to ensure that the signal is received by its intended destination by routing
the signal around obstacles and radio dead spots.
Adding to Z-Wave
TM
Network
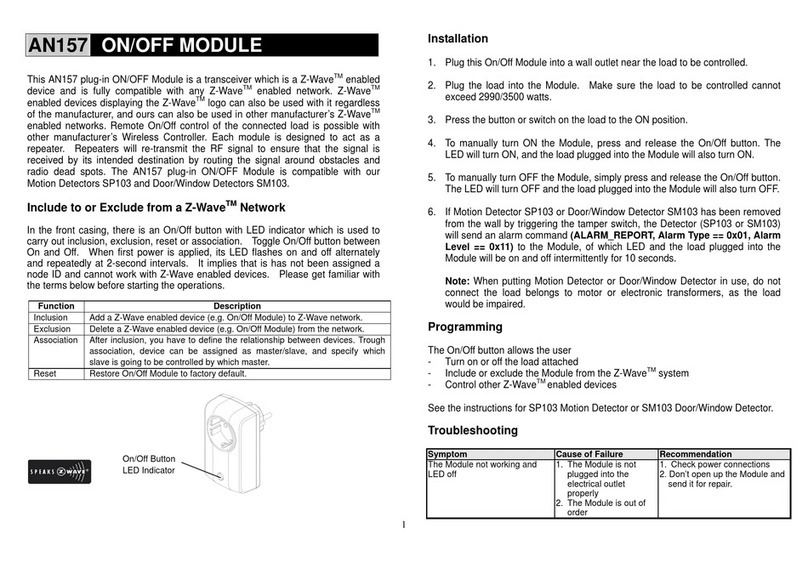
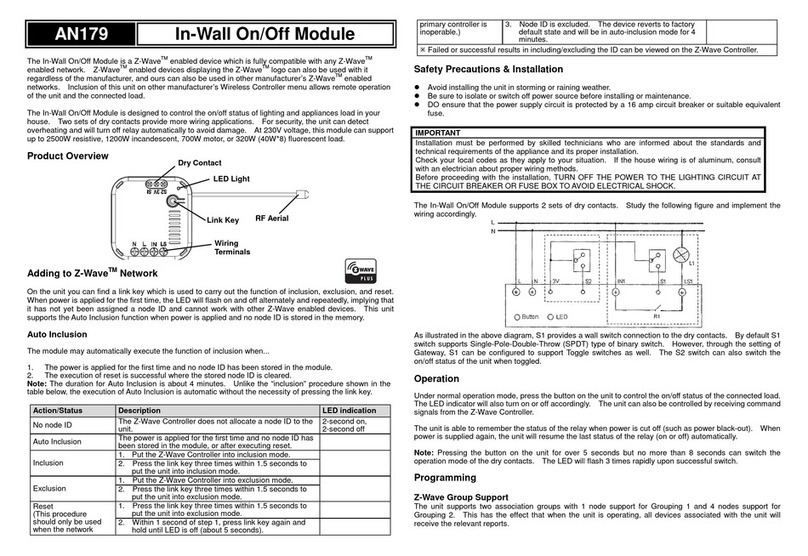
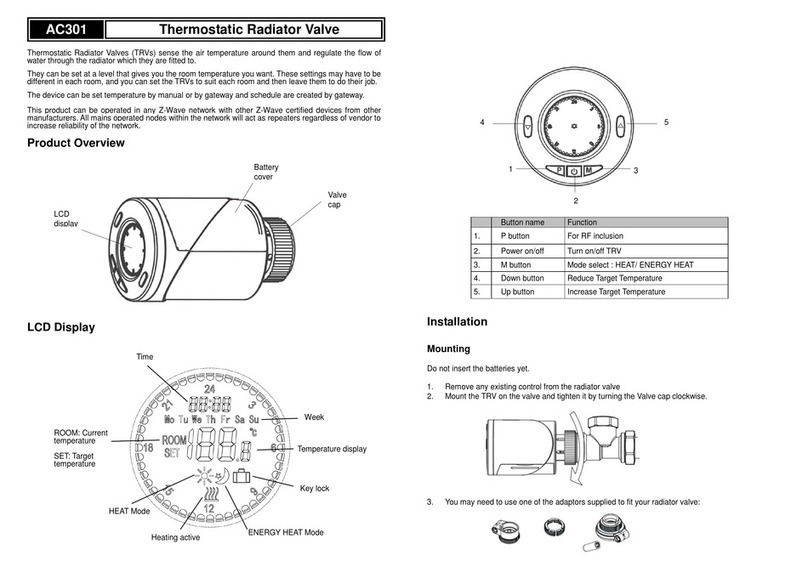
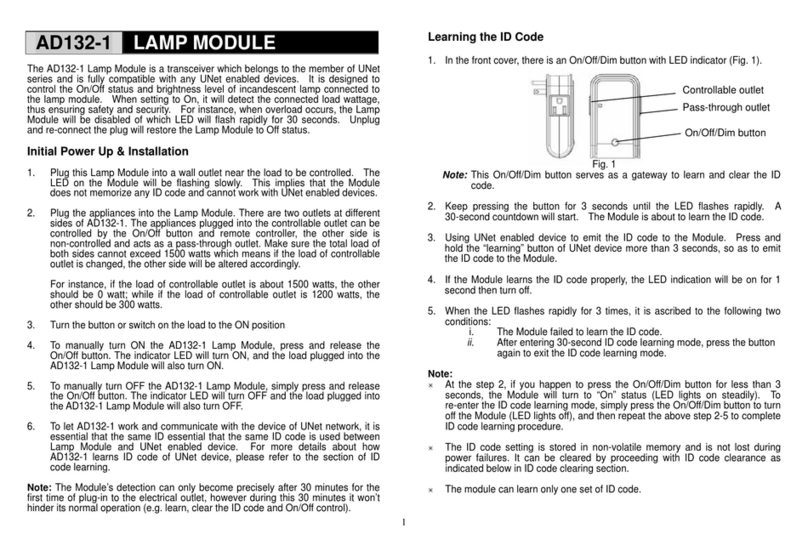
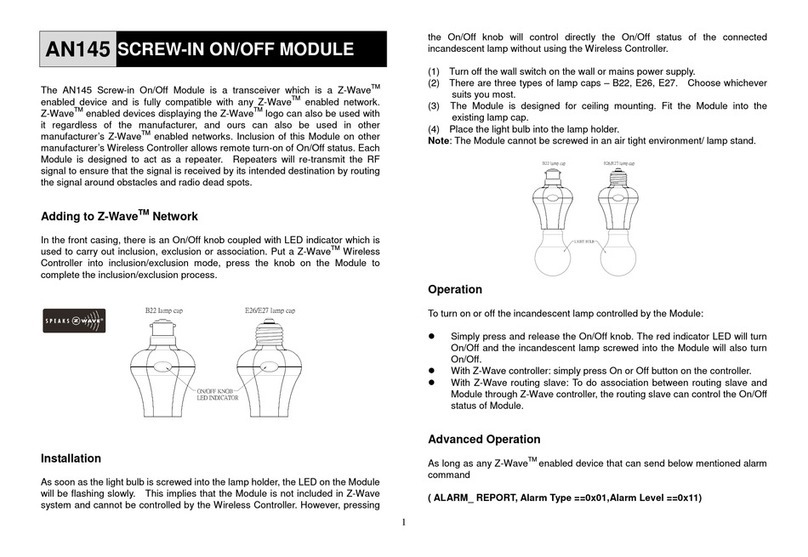
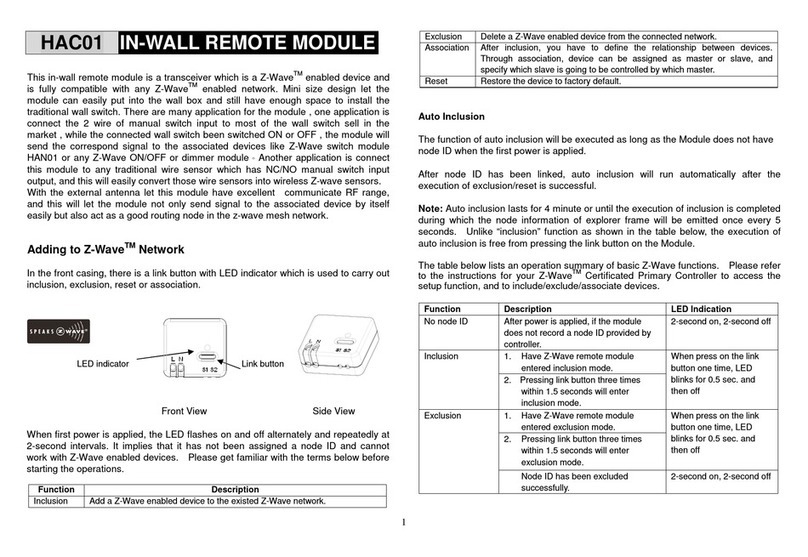
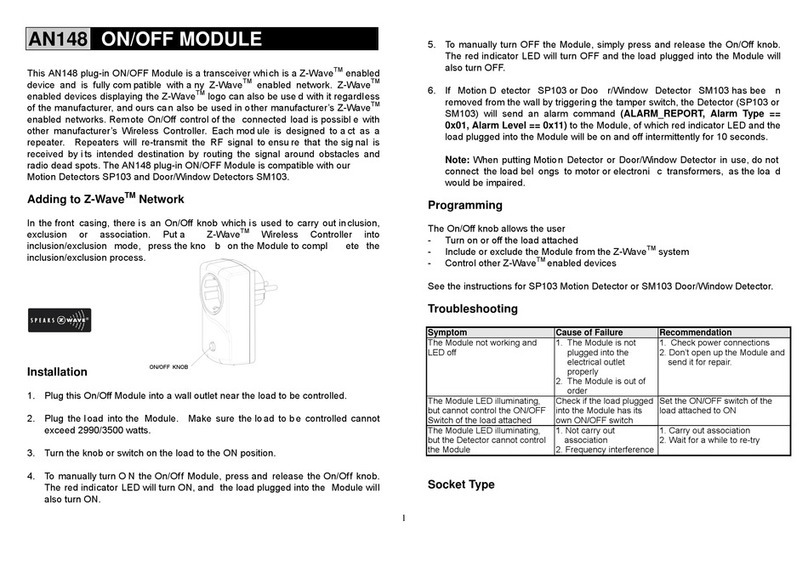
In the front casing, there is an On/Off knob coupled with LED indicator which is
used to carry out inclusion, exclusion or association. Put a Z-Wave
TM
Wireless
Controller into inclusion/exclusion mode, press the knob on the Module to
complete the inclusion/exclusion process.
Installation
As soon as the light bulb is screwed into the lamp holder, the LED on the Module
will be flashing slowly. This implies that the Module is not included in Z-Wave
system and cannot be controlled by the Wireless Controller. However, pressing
the On/Off knob will control directly the On/Off status of the connected
incandescent lamp without using the Wireless Controller.
(1) Turn off the wall switch on the wall or mains power supply.
(2) There are three types of lamp caps – B22, E26, E27. Choose whichever
suits you most.
(3) The Module is designed for ceiling mounting. Fit the Module into the
existing lamp cap.
(4) Place the light bulb into the lamp holder.
Note: The Module cannot be screwed in an air tight environment/ lamp stand.
Operation
To turn on or off the incandescent lamp controlled by the Module:
Simply press and release the On/Off knob. The red indicator LED will turn
On/Off and the incandescent lamp screwed into the Module will also turn
On/Off.
With Z-Wave controller: simply press On or Off button on the controller.
With Z-Wave routing slave: To do association between routing slave and
Module through Z-Wave controller, the routing slave can control the On/Off
status of Module.
Advanced Operation*
*AN145-2, AN145-4 only
As long as any Z-Wave
TM
enabled device that can send below mentioned alarm
command
B22 lamp cap E26/E27 lamp cap
LIGHT BULB
B22 lamp cap E26/E27 lamp cap
ON/OFF KNOB
LED INDICATOR
2
( ALARM_ REPORT, Alarm Type ==0x01,Alarm Level ==0x11)
to the Screw-in On/Off Module will enable its red indicator LED and the load
plugged into the Module to be on and off intermittently for 10 times.
Programming
The On/Off knob allows the user
- Turn on or off the load attached
- Include or exclude the Module from the Z-Wave
TM
system
Troubleshooting
Symptom
Cause of Failure
Recommendation
The module not
working and LED
off
1. Poor connection
between lamp cap
of
mounted ceiling and
lamp cap of the lamp
holder
2. The module break
down
1. Check if the lamp cap of
mounted ceiling fits well
into the module
2. Don’t open up the module and
send it for repair
The module’s LED
working, but the
connected light bulb
not working
1. Light bulb has burnt
out
2. Poor connection or
improper assembly
between lamp cap of
the light bulb
and lamp
holder of the module
3. The module break
down
1. Replace a new bulb
2. The light bulb has screwed
tightly to the lamp holder of the
module
3. Don’t open up the module and
send it for repair
The LED on the
module working,
but the module
cannot control
Motion Detector
SP103 and
Door/Window
Detector SM103
1. Not carry out
association
2. Same frequency
interference
1. Carry out the association
2. Wait for a while to re-try
Specification
Operating Voltage /
Type of Lamp Cap
AN145-1 120VAC/60Hz E26
AN145-2 230VAC/50Hz E27
AN145-4 230VAC/50Hz B22
Maximum Load 70 Watts incandescent
Operating Temperature 0
°
C~40
°
C
Operating Humidity Range
85%RH
Receiving Range 30 meters min. line of sight
Frequency Range 908.42MHz (US) / 868.42MHz (EU)
FCC ID FU5TR003-04
* Specifications are subject to change and improvement without notice.
A501111195R02 2013/10
Federal Communication Commission Interference Statement
This equipment has been tested and found to comply with the limits for a Class
B digital device, pursuant to Part 15 of the FCC Rules. These limits are
designed to provide reasonable protection against harmful interference in a
residential installation. This equipment generates, uses and can radiate radio
frequency energy and, if not installed and used in accordance with the
instructions, may cause harmful interference to radio communications.
However, there is no guarantee that interference will not occur in a particular
installation. If this equipment does cause harmful interference to radio or
television reception, which can be determined by turning the equipment off and
on, the user is encouraged to try to correct the interference by one of the
following measures:
-
Reorient or relocate the receiving antenna.
- Increase the separation between the equipment and receiver.
- Connect the equipment into an outlet on a circuit different from that to which
the receiver is connected.
- Consult the dealer or an experienced radio/TV technician for help.
This device complies with Part 15 of the FCC Rules. Operation is subject to the
following two conditions: (1) This device may not cause harmful interference,
and (2) this device must accept any interference received, including interference
that may cause undesired operation.
FCC Caution: Any changes or modifications not expressly approved by the party
responsible for compliance could void the user's authority to operate this
equipment.
3
IMPORTANT NOTE:
FCC Radiation Exposure Statement:
This equipment complies with FCC radiation exposure limits set forth for an
uncontrolled environment. End users must follow the specific operating
instructions for satisfying RF exposure compliance.
This transmitter must not be co-located or operating in conjunction with any
other antenna or transmitter.
WARNING:
Do not dispose of electrical appliances as unsorted municipal waste, use
separate collection facilities.
Contact your local government for information regarding the collection systems
available.
If electrical appliances are disposed of in landfills or dumps, hazardous
substances can leak into the groundwater and get into the food chain, damaging
your health and well-being.
When replacing old appliances with new ones, the retailer is legally obligated to
take back your old appliance for disposal at least for free of charge.

This manual suits for next models

2

Other EVERSPRING Control Unit manuals

EVERSPRING AD142 User manual

EVERSPRING

EVERSPRING AD142 User manual

EVERSPRING AN179 User manual

EVERSPRING

EVERSPRING AN179 User manual

EVERSPRING AN128 User manual

EVERSPRING

EVERSPRING AN128 User manual

EVERSPRING AN148 User manual

EVERSPRING

EVERSPRING AN148 User manual

EVERSPRING AD126 User manual

EVERSPRING

EVERSPRING AD126 User manual

EVERSPRING AN158 User manual

EVERSPRING

EVERSPRING AN158 User manual

EVERSPRING AN196 User manual

EVERSPRING

EVERSPRING AN196 User manual

EVERSPRING AN145 User manual

EVERSPRING

EVERSPRING AN145 User manual

EVERSPRING AN157 User manual

EVERSPRING

EVERSPRING AN157 User manual

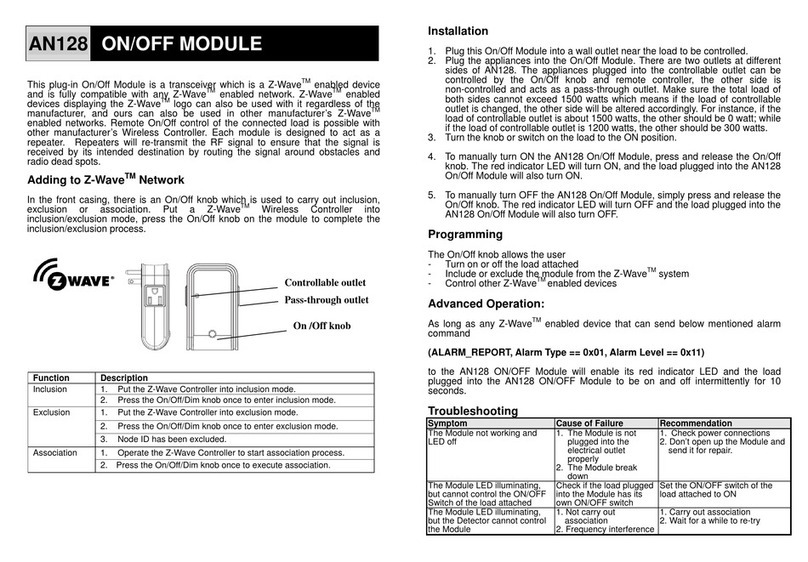
EVERSPRING HAC01 User manual

EVERSPRING

EVERSPRING HAC01 User manual

EVERSPRING AN144 User manual

EVERSPRING

EVERSPRING AN144 User manual

EVERSPRING AD132-1 User manual

EVERSPRING

EVERSPRING AD132-1 User manual

EVERSPRING AN163 User manual

EVERSPRING

EVERSPRING AN163 User manual

EVERSPRING AN149-1 User manual

EVERSPRING

EVERSPRING AN149-1 User manual

EVERSPRING AC301 User manual

EVERSPRING

EVERSPRING AC301 User manual

Popular Control Unit manuals by other brands

Sierra Wireless AirPrime WP7504 Hardware integration guide

Sierra Wireless

Sierra Wireless AirPrime WP7504 Hardware integration guide

ESD CAN-USB/3-FD Hardware manual

ESD

ESD CAN-USB/3-FD Hardware manual

Honeywell ADEMCO 5843 Installation and setup guide

Honeywell

Honeywell ADEMCO 5843 Installation and setup guide

Dimplex LWPM 410 Installation and setting instructions

Dimplex

Dimplex LWPM 410 Installation and setting instructions

bianco iCON Series Installation and operation manual

bianco

bianco iCON Series Installation and operation manual

RTL Scorpion II C MASH TL-3 TMA Assembly Manual and Mounting Instruction Guide

RTL

RTL Scorpion II C MASH TL-3 TMA Assembly Manual and Mounting Instruction Guide

CAME PXC2-32 Installer manual

CAME

CAME PXC2-32 Installer manual

GE NX-591E Installation and startup guide

GE

GE NX-591E Installation and startup guide

Lenze EMF2192IB Mounting instructions

Lenze

Lenze EMF2192IB Mounting instructions

Allen-Bradley ControlNet 1747-ACN15 user manual

Allen-Bradley

Allen-Bradley ControlNet 1747-ACN15 user manual

Argo-Hytos EL7-I Series instruction manual

Argo-Hytos

Argo-Hytos EL7-I Series instruction manual

Sun Oracle Sun Blade X6275 M2 installation guide

Sun Oracle

Sun Oracle Sun Blade X6275 M2 installation guide

Casit EQ211/02 quick start guide

Casit

Casit EQ211/02 quick start guide

Grundfos UP-ZV Installation and operating instructions

Grundfos

Grundfos UP-ZV Installation and operating instructions

PICOLAS LDP-VRM 025-100 CA user manual

PICOLAS

PICOLAS LDP-VRM 025-100 CA user manual

pizzato CS MP312-0 quick start guide

pizzato

pizzato CS MP312-0 quick start guide

claber Hydro 4 Use and installation  manual

claber

claber Hydro 4 Use and installation manual

Graf Aqua-Center Basic Series Installation instructions and maintenance

Graf

Graf Aqua-Center Basic Series Installation instructions and maintenance

manuals.online logo
manuals.online logoBrands
  • About & Mission
  • Contact us
  • Privacy Policy
  • Terms and Conditions

Copyright 2025 Manuals.Online. All Rights Reserved.