manuals.online logo
Brands
  1. Home
  2. •
  3. Brands
  4. •
  5. EVERSPRING
  6. •
  7. Control Unit
  8. •
  9. EVERSPRING AN157 User manual

EVERSPRING AN157 User manual

1
AN157 ON/OFF MODULE
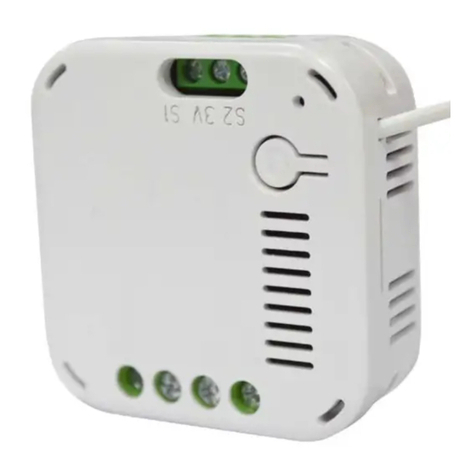
This AN157 plug-in ON/OFF Module is a transceiver which is a Z-WaveTM enabled
device and is fully compatible with any Z-WaveTM enabled network. Z-WaveTM
enabled devices displaying the Z-WaveTM logo can also be used with it regardless
of the manufacturer, and ours can also be used in other manufacturer’s Z-WaveTM
enabled networks. Remote On/Off control of the connected load is possible with
other manufacturer’s Wireless Controller. Each module is designed to act as a
repeater. Repeaters will re-transmit the RF signal to ensure that the signal is
received by its intended destination by routing the signal around obstacles and
radio dead spots. The AN157 plug-in ON/OFF Module is compatible with our
Motion Detectors SP103 and Door/Window Detectors SM103.
Include to or Exclude from a Z-WaveTM Network
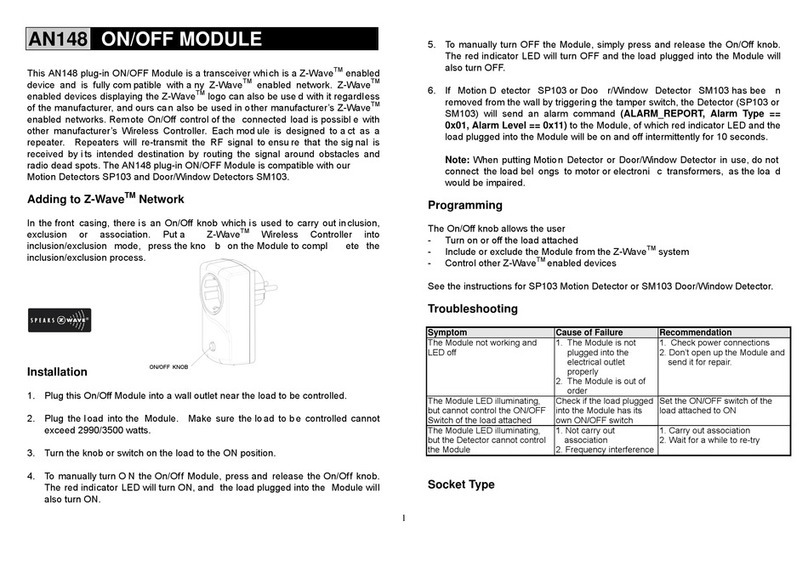
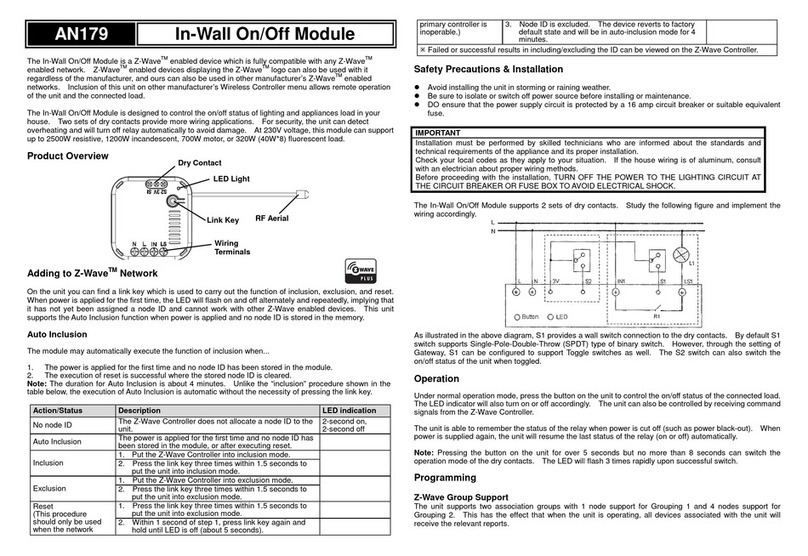
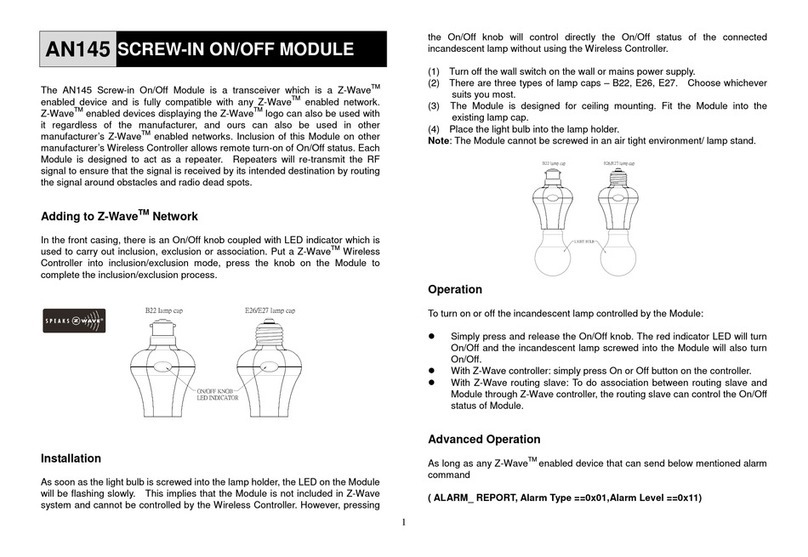
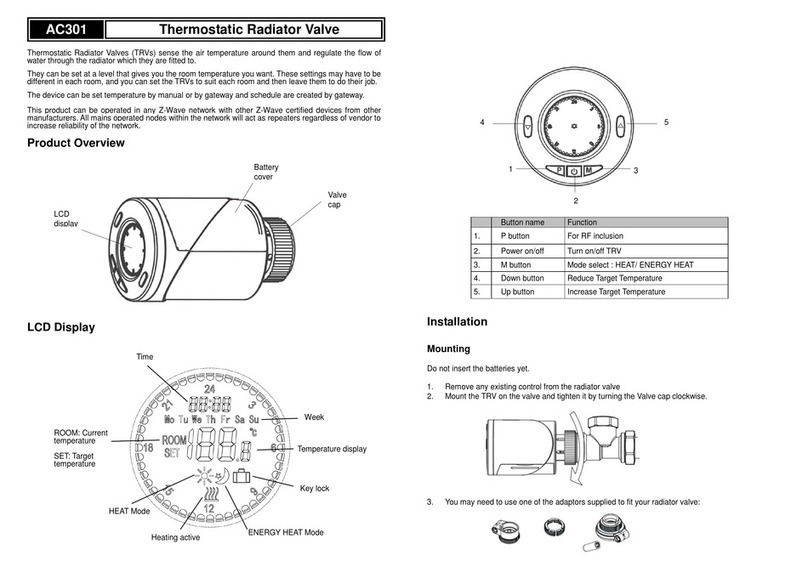
In the front casing, there is an On/Off button with LED indicator which is used to
carry out inclusion, exclusion, reset or association. Toggle On/Off button between
On and Off. When first power is applied, its LED flashes on and off alternately
and repeatedly at 2-second intervals. It implies that is has not been assigned a
node ID and cannot work with Z-Wave enabled devices. Please get familiar with
the terms below before starting the operations.
Function Description
Inclusion Add a Z-Wave enabled device (e.g. On/Off Module) to Z-Wave network.
Exclusion Delete a Z-Wave enabled device (e.g. On/Off Module) from the network.
Association After inclusion, you have to define the relationship between devices. Trough
association, device can be assigned as master/slave, and specify which
slave is going to be controlled by which master.
Reset Restore On/Off Module to factory default.
Installation
1. Plug this On/Off Module into a wall outlet near the load to be controlled.
2. Plug the load into the Module. Make sure the load to be controlled cannot
exceed 2990/3500 watts.
3. Press the button or switch on the load to the ON position.
4. To manually turn ON the Module, press and release the On/Off button. The
LED will turn ON, and the load plugged into the Module will also turn ON.
5. To manually turn OFF the Module, simply press and release the On/Off button.
The LED will turn OFF and the load plugged into the Module will also turn OFF.
6. If Motion Detector SP103 or Door/Window Detector SM103 has been removed
from the wall by triggering the tamper switch, the Detector (SP103 or SM103)
will send an alarm command (ALARM_REPORT, Alarm Type == 0x01, Alarm
Level == 0x11) to the Module, of which LED and the load plugged into the
Module will be on and off intermittently for 10 seconds.
Note: When putting Motion Detector or Door/Window Detector in use, do not
connect the load belongs to motor or electronic transformers, as the load
would be impaired.
Programming
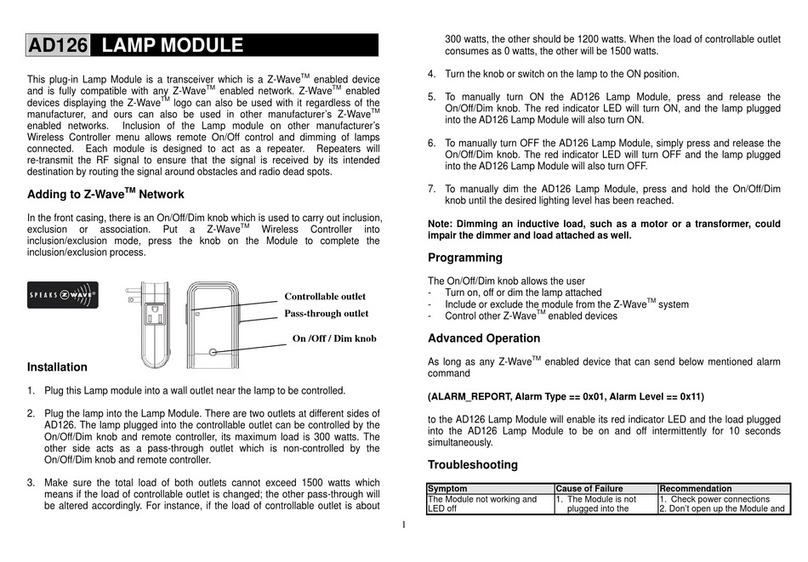
The On/Off button allows the user
- Turn on or off the load attached
- Include or exclude the Module from the Z-WaveTM system
- Control other Z-WaveTM enabled devices
See the instructions for SP103 Motion Detector or SM103 Door/Window Detector.
Troubleshooting
Symptom Cause of Failure Recommendation
The Module not working and
LED off 1. The Module is not
plugged into the
electrical outlet
properly
2. The Module is out of
order
1. Check power connections
2. Don’t open up the Module and
send it for repair.
On/Off Button
LED Indicator
2
Troubleshooting (Cont.)
Symptom Cause of Failure Recommendation
The Module LED illuminating,
but cannot control the ON/OFF
Switch of the load attached
Check if the load plugged
into the Module has its
own ON/OFF switch
Set the ON/OFF switch of the
load attached to ON
The Module LED illuminating,
but the Detector cannot control
the Module
1. Not carry out
association
2. Frequency interference
1. Carry out association
2. Wait for a while to re-try
Socket Type
Since the socket type for each country in Europe varies, refer to the outline for
each socket suited for each country as follows:
AN157-2 Germany AN157-3 U.K.
AN157-4 Italy AN157-5 Denmark
AN157-6 France
Specification
Operating Voltage 230V/50Hz
Maximum Load 2990W for UK, Denmark; 3500W for Germany, Italy and France
Range Minimum 30 m line of sight
Frequency Range 868.42 MHz
** Specifications are subject to change and improvement without notice. A501111450R
Warning:
Do not dispose of electrical appliances as unsorted municipal waste, use separate
collection facilities.
Contact your local government for information regarding the collection systems
available.
If electrical appliances are disposed of in landfills or dumps, hazardous substances
can leak into the groundwater and get into the food chain, damaging your health
and well-being.
When replacing old appliances with new once, the retailer is legally obligated to
take back your old appliance for disposal at least for free of charge.

Other EVERSPRING Control Unit manuals

EVERSPRING AN128 User manual

EVERSPRING

EVERSPRING AN128 User manual

EVERSPRING AN148 User manual

EVERSPRING

EVERSPRING AN148 User manual

EVERSPRING AD126 User manual

EVERSPRING

EVERSPRING AD126 User manual

EVERSPRING AN149-1 User manual

EVERSPRING

EVERSPRING AN149-1 User manual

EVERSPRING AN144 User manual

EVERSPRING

EVERSPRING AN144 User manual

EVERSPRING AN158 User manual

EVERSPRING

EVERSPRING AN158 User manual

EVERSPRING AD142 User manual

EVERSPRING

EVERSPRING AD142 User manual

EVERSPRING AN179 User manual

EVERSPRING

EVERSPRING AN179 User manual

EVERSPRING AN163 User manual

EVERSPRING

EVERSPRING AN163 User manual

EVERSPRING AN145 User manual

EVERSPRING

EVERSPRING AN145 User manual

EVERSPRING HAC01 User manual

EVERSPRING

EVERSPRING HAC01 User manual

EVERSPRING AC301 User manual

EVERSPRING

EVERSPRING AC301 User manual

EVERSPRING AD132-1 User manual

EVERSPRING

EVERSPRING AD132-1 User manual

EVERSPRING AN145-2 User manual

EVERSPRING

EVERSPRING AN145-2 User manual

EVERSPRING AN196 User manual

EVERSPRING

EVERSPRING AN196 User manual

Popular Control Unit manuals by other brands

HIMA HIMax X-DI 32 52 manual

HIMA

HIMA HIMax X-DI 32 52 manual

Zapi Chopper SEM-X Installation and user manual

Zapi

Zapi Chopper SEM-X Installation and user manual

ICP DAS USA ECAT-2061 quick start

ICP DAS USA

ICP DAS USA ECAT-2061 quick start

Renishaw SLM 250 Installation and operation

Renishaw

Renishaw SLM 250 Installation and operation

Acromag BusWorks XT Series user manual

Acromag

Acromag BusWorks XT Series user manual

Videology 45S17 user manual

Videology

Videology 45S17 user manual

Notifier FDM-1 Installation and maintenance instructions

Notifier

Notifier FDM-1 Installation and maintenance instructions

ABB AC500 PLC Hardware manual

ABB

ABB AC500 PLC Hardware manual

Aventics SV01 operating instructions

Aventics

Aventics SV01 operating instructions

SMC Networks VKF300 Series Installation and maintenance manual

SMC Networks

SMC Networks VKF300 Series Installation and maintenance manual

BFT CAPRI instruction manual

BFT

BFT CAPRI instruction manual

Halemeier AppMitter installation instructions

Halemeier

Halemeier AppMitter installation instructions

SMC Networks VFR6000 Series Operation manual

SMC Networks

SMC Networks VFR6000 Series Operation manual

Cobra USA Fi2000 manual

Cobra USA

Cobra USA Fi2000 manual

BFT RIGEL 5 Installation and user manual

BFT

BFT RIGEL 5 Installation and user manual

Red Valve Tideflex 35 Series Installation, operation and maintenance manual

Red Valve

Red Valve Tideflex 35 Series Installation, operation and maintenance manual

CALEFFI LEGIOMIX 600094A Installation and commissioning manual

CALEFFI

CALEFFI LEGIOMIX 600094A Installation and commissioning manual

MKS HPQ2-IP manual

MKS

MKS HPQ2-IP manual

manuals.online logo
manuals.online logoBrands
  • About & Mission
  • Contact us
  • Privacy Policy
  • Terms and Conditions

Copyright 2025 Manuals.Online. All Rights Reserved.