manuals.online logo
Brands
  1. Home
  2. •
  3. Brands
  4. •
  5. EVERSPRING
  6. •
  7. Security Sensor
  8. •
  9. EVERSPRING SP819 User manual

EVERSPRING SP819 User manual

1
SP819 Outdoor PIR Motion Detector
General Introduction
The SP819 Outdoor Motion Detector is a U-Net 4.0 enabled device and is fully compatible with any
U-Net enabled network. The device can be set up in a U-Net network to communicate directly with other
end devices such as lighting controllers, or to report directly to a U-Net gateway.
Product Overview
Setup to report directly to a U-Net gateway
Its great compatibility with our U-Net family security products makes it suitable for smart home cloud
based platforms such as Homesys. The lux level and the timer set by knobs will be ignoring . It features a
PIR motion detector to detect movement in a protected area.
This device can also be used as a basic motion sensor for indoor security application.
Setup directly with other end devices such as lighting devices
This motion detector is primarily designed for outdoor lighting control application. It features a PIR motion
detector to detect movement in a protected area and a lux sensor for determining brightness of its
surroundings. It comes with a built in timer to set the duration for light turn on. The lux level and the timer
can be set through knobs on the device itself. If the PIR detects motion when lux level falls below a
preset setting, the device will transmit a signal to turn on the outdoor lighting (or indirectly through
gateway) and then later turns it off when its timer has elapsed.
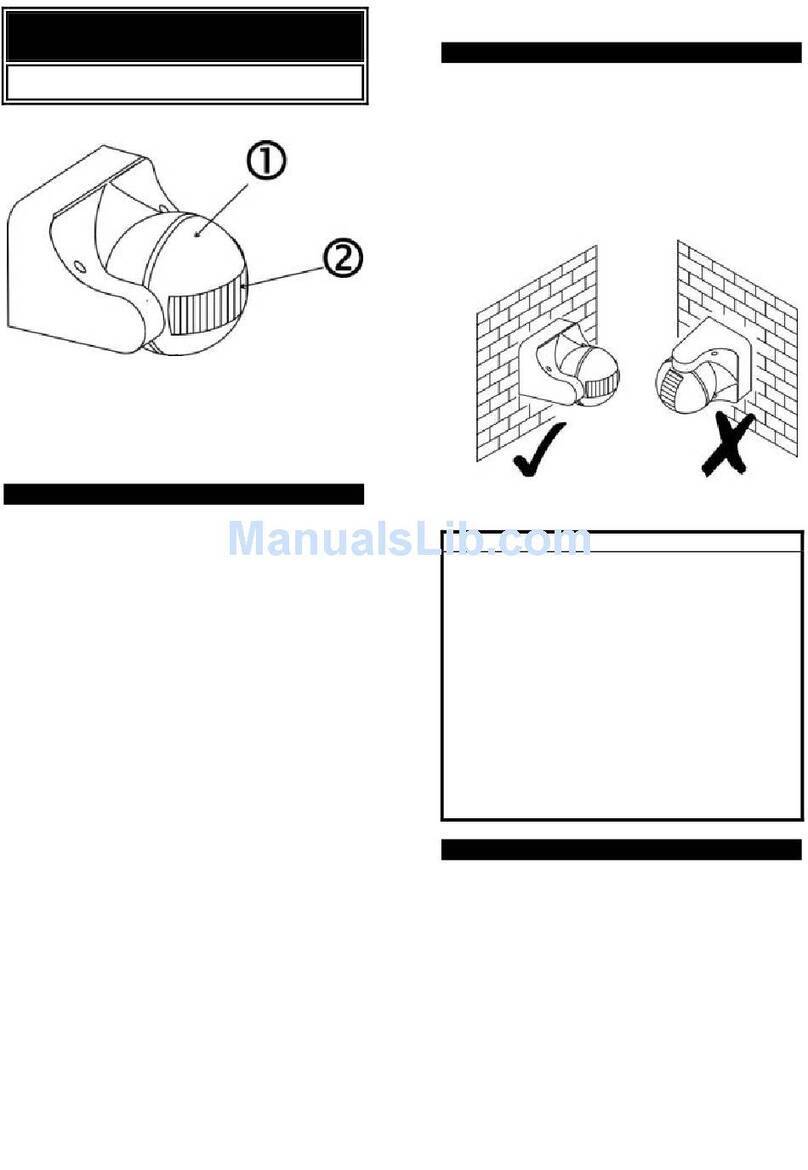
MFront Cover QBattery
NMotion Sensor RRear Cover
OTime-off / Lux Knob ˕
7Tamper Switch
PLED indicator (hidden behind lens)
Binding with Homesys
1 Log into the Homesys account from web browser.
2 Select “System” then “Add a Device”.
3 Select “PIR Detector SP819”.
4 The following screen will appear. Remove the screw and open the battery cover. Insert 3 AA
batteries as shown on the picture, then press “Next Step”.
2
5 The following screen will appear, this means the gateway start to bind. Please press the binding
button for 4s then release. The LED will start blinking. This means the SP819 is entering binding
mode too.
6 The screen below will appear if the process is successful.
7 Time-out will occur if the binding process was unsuccessful. Please refer to the “Manual binding”
section.
Note: Leave the detector with the rear cover open to prepare for testing.
Testing
Warm-Up
It will take approximately 1 minute to warm up the Detector after a battery is inserted. During this period
the LED will flash red slowly. When the LED turns red for 5 seconds, it implies warm-up procedure is
complete and the detector is ready for detection.
Testing
1. Go to SECURITY, and set it to DISARM.
2. GO to SYSTEM, and select the PIR Detector SP819, then press the “Test this device” icon.
3. Please walk within the PIR sensor detection range.
3
4. If the test is successful the screen will show below.
5. If the test is unsuccessful, please check the troubleshooting section.
Mounting the SP819
Choosing a location
The recommended location for the detector is outside the house under the eaves or other shaded
areas where it is not directly exposed to sunlight. Though the detector is waterproof (IP44 rated),
avoid direct contact with rain.
- Do not position the detector facing a window or direct sunlight.
- Do not position the detector directly above or facing any source of heat, eg: fires, radiators, boiler
etc.
- Where possible, mount the detector so that
the path of an intruder would cut across the fan
pattern rather than directly towards the
detector.
mount the detector 2m from the floor. At this height, the
detector will detect movement within its 100 degrees
fan-shaped detection pattern up to 6-12m depending on
adjustment. .
Installation
1. Use the rear cover to mark the two mounting holes.
2. Drill the holes, insert the plastic wall plugs and screw the rear cover to the wall using the screws
supplied.
3. Assemble the detector back to its rear cover using screws as originally supplied.
4. The detector will enter Normal mode after 6 seconds
5. If the Tamper switch is released, the detector will send a Notification command to homesys
gateway.
Operation with device to device mode
SP819 can setup directly with other end devices such as lighting devices. Both of the devices just enter
the binding mode at the same time, it will bind each other together.
- Upon motion being sensed, the detector will turn ON the connected lighting. After the elapse of preset
time-off, the detector will turn OFF the connected lighting (see Time adjustment knob below).
- In Normal mode, the red indicator LED on the detector will not illuminate when the detector is triggered
in order to conserve battery life, unless the battery is low.
(1) Time adjustment
Time-off knob controls how long the connected lighting will stay on after the motion is detected. It can be
set from 5 seconds to 12 minutes.
About 5 seconds About 12 minutes
“T” means 5 seconds, while “+” is 12 minutes. After the expiry of preset time-off, the detector will send a
turn OFF signal.
6
02
2.0
2
0
10
6
(M)
10
(M)
100
°
4 8
4
8
2
4
6
8
10
4
(2) Lux adjustment
The LUX adjustment sets the brightness level threshold that will activate the motion sensor in the
detector.
For instance, turning the LUX knob clockwise to the MOON position will activate detector’s motion sensor
only night and inactivated during the day. The adjustable Lux range is about 30 - 200 Lux.
To set the lux level:
1. Turn the Time-off knob to “T” for maximum response.
2. Turn the LUX control knob to the edge clockwise at the “moon” (dusk) position.
3. Wait until the ambient light level reaches the level of darkness at which you wish the detector to
activate.
4. Slowly rotate the Lux knob while anti-clockwise while keep creating motion during the process until
the detector sends out a signal to turn on the connected lighting. At this position the light should
become operative at approximately the same level of darkness each evening
5. Set the Time-off knob back to the desired preset time.
Maintenance
Low Battery: When the battery becomes low, the LED will flash for 1 second when motion is detected in
Normal mode to indicate low battery condition to the user.
Troubleshooting
The troubleshooting table lists some possible causes and solutions. Please contact your original retailer
or nearest service center if the below solutions cannot solve your problem.
Symptom Cause of Failure Recommendation
LED cannot be displayed 1. Run out of battery power.
2. Check if reverse battery
polarity.
1. Replace a new battery.
2. Refit the battery with correct
polarity.
The detector is not working 1. The PIR detector cannot
communicate with the
gateway HSC04.
2. Check if the detector is out of
order.
1. Place the PIR Detector closer to
the gateway.
2. Send the device in for repair and
do not open it.
After the one-minute warm up is
completed, the detector does not
work and LED flashes on and off
repeatedly at with an interval of 2
seconds
Check if detector has
completed binding with
Homesys Gateway
Remove the battery and follow
the steps for “Manual binding”.
Reset to Factory Settings
1. Press and hold the Tamper switch for 3 or more seconds, and the detector LED will start to flash.
2. Press and hold the Tamper switch for 6 or more seconds within 30 seconds until the LED turns off.
The device is now reset back to factory mode
Specifications
Battery 1.5V AA size x 3
Operating Temperature -10°C to 40°C
PIR Warm Up Time About 1 minute
PIR Detection Coverage Wall-Mounted:
Up to 10m x 100Ʊ(at 2m mounting height & below 20ƱC)
Operating Frequency 868MHz (EU)/ 923MHz (America)
** Specifications are subject to change without notice.
WARNING:
Do not dispose of electrical appliances as unsorted municipal waste, use separate collection facilities.
Contact your local government for information regarding the collection systems available.
If electrical appliances are disposed of in landfills or dumps, hazardous substances can leak into the
groundwater and get into the food chain, damaging your health and well-being.
When replacing old appliances with new ones, the retailer is legally obligated to take back your old
appliance for disposal at least for free of charge.
www.everspring.com
3F., No. 50, Sec 1, Zhonghua Rd., Tucheng Dist.,
New Taipei City 23666, R.O.C
A501112802R
Other EVERSPRING Security Sensor manuals

EVERSPRING SP817 User manual

EVERSPRING

EVERSPRING SP817 User manual

EVERSPRING ES34T User manual

EVERSPRING

EVERSPRING ES34T User manual

EVERSPRING HSP02 User manual

EVERSPRING

EVERSPRING HSP02 User manual

EVERSPRING HSM01 User manual

EVERSPRING

EVERSPRING HSM01 User manual

EVERSPRING HSP01-0 User manual

EVERSPRING

EVERSPRING HSP01-0 User manual

EVERSPRING SP815 User manual

EVERSPRING

EVERSPRING SP815 User manual

EVERSPRING ST802 User manual

EVERSPRING

EVERSPRING ST802 User manual

EVERSPRING SM201 User manual

EVERSPRING

EVERSPRING SM201 User manual

EVERSPRING ES160 User manual

EVERSPRING

EVERSPRING ES160 User manual

EVERSPRING SP816 User manual

EVERSPRING

EVERSPRING SP816 User manual

EVERSPRING EVRESP816 User manual

EVERSPRING

EVERSPRING EVRESP816 User manual

EVERSPRING EVR HSP02 User manual

EVERSPRING

EVERSPRING EVR HSP02 User manual

EVERSPRING SP814 User manual

EVERSPRING

EVERSPRING SP814 User manual

EVERSPRING SP103 User manual

EVERSPRING

EVERSPRING SP103 User manual

EVERSPRING ST812 User manual

EVERSPRING

EVERSPRING ST812 User manual

EVERSPRING SE812 User manual

EVERSPRING

EVERSPRING SE812 User manual

EVERSPRING SM103 User manual

EVERSPRING

EVERSPRING SM103 User manual

EVERSPRING SP103 User manual

EVERSPRING

EVERSPRING SP103 User manual

EVERSPRING HSM02 User manual

EVERSPRING

EVERSPRING HSM02 User manual

EVERSPRING ST802 User manual

EVERSPRING

EVERSPRING ST802 User manual

Popular Security Sensor manuals by other brands

Kobold TSA operating instructions

Kobold

Kobold TSA operating instructions

Danatronics ECHO Series manual

Danatronics

Danatronics ECHO Series manual

BTI Profiline Multi Finder operating instructions

BTI

BTI Profiline Multi Finder operating instructions

Leuze electronic MLC 520 operating instructions

Leuze electronic

Leuze electronic MLC 520 operating instructions

AGD 335 product manual

AGD

AGD 335 product manual

jablotron JA-80PB quick start guide

jablotron

jablotron JA-80PB quick start guide

Trader ARCTIC OWL OWPIROD 180 manual

Trader

Trader ARCTIC OWL OWPIROD 180 manual

Leviton CRS4K manual

Leviton

Leviton CRS4K manual

Thermo Scientific Surveyor UV Plus Hardware manual

Thermo Scientific

Thermo Scientific Surveyor UV Plus Hardware manual

Siemens 5SV60 MC Series operating instructions

Siemens

Siemens 5SV60 MC Series operating instructions

MARTINDALE M26/400 Original instructions

MARTINDALE

MARTINDALE M26/400 Original instructions

Panlux OLGA S LED PN32300003 user manual

Panlux

Panlux OLGA S LED PN32300003 user manual

DirekTronik LSN50v2-S31 user manual

DirekTronik

DirekTronik LSN50v2-S31 user manual

Lince JOLLY Programming and operating manual

Lince

Lince JOLLY Programming and operating manual

KUSSMAUL 091-45 instruction manual

KUSSMAUL

KUSSMAUL 091-45 instruction manual

Antec Scientific FlexCell user manual

Antec Scientific

Antec Scientific FlexCell user manual

Babolat PIQ Fuel Battery Bank user guide

Babolat

Babolat PIQ Fuel Battery Bank user guide

Waeco Multi Gas operating manual

Waeco

Waeco Multi Gas operating manual

manuals.online logo
manuals.online logoBrands
  • About & Mission
  • Contact us
  • Privacy Policy
  • Terms and Conditions

Copyright 2025 Manuals.Online. All Rights Reserved.