WWW.EVO-LITE.COM
• [email protected] • 1-888-887-2980 • ©2020 EVO-LITE, LLC • 6240 W 54TH AVE., ARVADA, CO 80002 • V1–4420TX1-24-53
PATENTPENDING
24VDC 24VDC
TX1-24-53
PATENTPENDING
24VDC 24VDC
TX1-24-53
PATENTPENDING
24VDC 24VDC
TX1-24-53
PATENTPENDING
24VDC 24VDC
TX1-24-53
WWW.EVO-LITE.COM
24VDC 24VDC
24VDC
TX1-24-53
WWW.EVO-LITE.COM
24VDC 24VDC
24VDC
24VDC 24VDC 24VDC 24VDC 24VDC
24VDC
TX1-24-53
24VDC 24VDC 24VDC 24VDC
24VDC 24VDC 24VDC 24VDC 24VDC
24VDC 24VDC 24VDC 24VDC 24VDC
24VDC 24VDC 24VDC 24VDC 24VDC
24VDC 24VDC 24VDC 24VDC 24VDC
24VDC24VDC 24VDC 24VDC 24VDC 24VDC 24VDC
24VDC24VDC 24VDC 24VDC 24VDC 24VDC 24VDC
24VDC 24VDC 24VDC 24VDC
24VDC 24VDC 24VDC 24VDC 24VDC
24VDC 24VDC 24VDC 24VDC 24VDC
24VDC 24VDC 24VDC 24VDC 24VDC
24VDC24VDC 24VDC 24VDC 24VDC 24VDC 24VDC
24VDC24VDC 24VDC 24VDC 24VDC 24VDC 24VDC
24VDC 24VDC 24VDC 24VDC
24VDC 24VDC 24VDC 24VDC 24VDC
24VDC 24VDC 24VDC 24VDC 24VDC
24VDC 24VDC 24VDC 24VDC 24VDC
24” RAILS
(QUANTITY 8)
A
AA
A A
A
RAIL TO RAIL CONNECTORS
(QUANTITY 6)
B
B
RAIL MOUNTING CLIPS
(QUANTITY 16)
C
C
C C
RAIL END MOUNTING CLIPS
(QUANTITY 4)
D
D
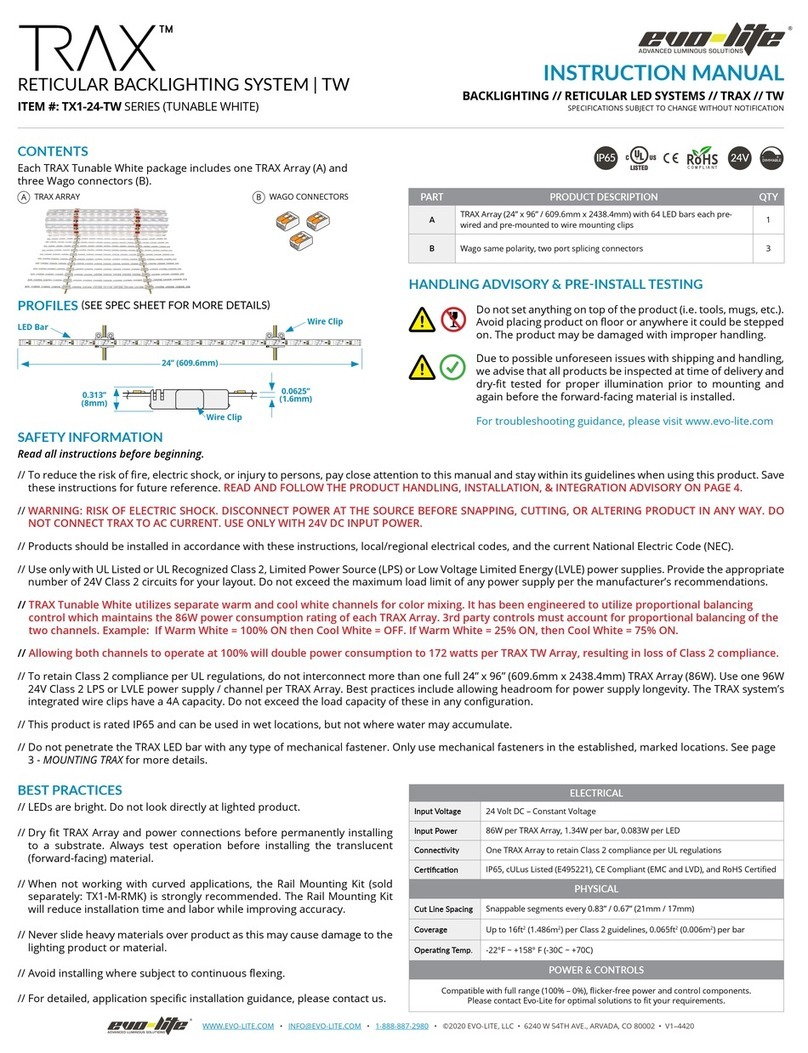
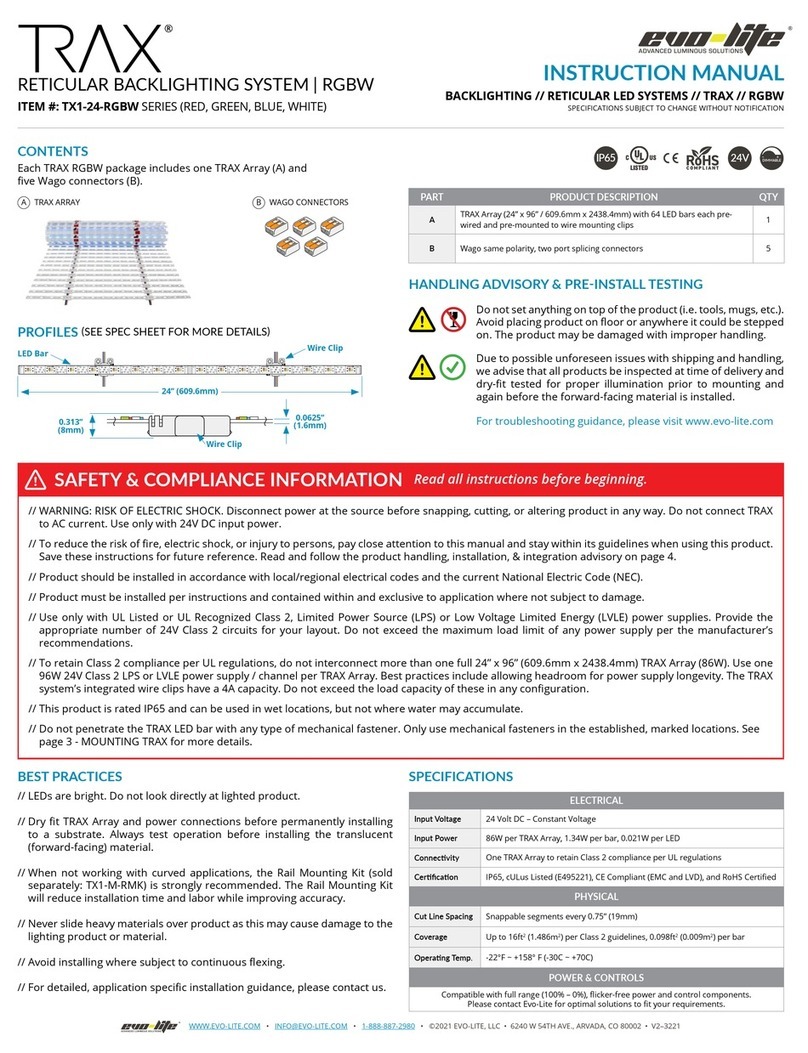
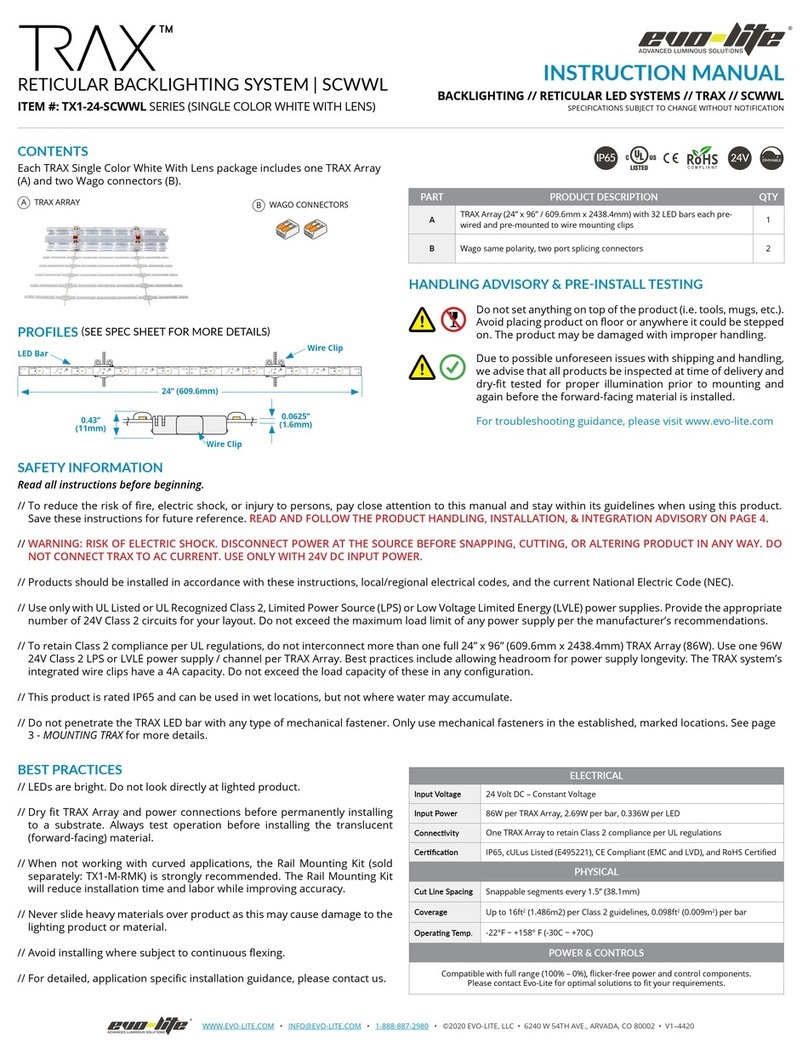
MOUNTING TRAX
TRAX may be mounted vertically or horizontally. Two dierent mounting methods may be used to secure it to the mounting surface. The rst method
involves using the built-in wire clips. The second method involves using the TRAX Rail Mounting Kit that is sold separately. Use the appropriate method or
combination of methods depending on the type of mounting surface and its orientation. Mechanical fastening is required.
Step 1 // Prepare Mounting Location
Determine mounting location and make
measurements. Wire clips are spaced 12”
on center. Line up TRAX Array’s wire clip
mounting holes to installation area.
Step 2 // Fasten To Surface
Use wire clip’s adhesive backing for
temporary placement, if necessary. Drive
mechanical fasteners through wire clip’s
mounting holes.
Step 3 // Secure All Wire Clips
Repeat the previous steps to secure all
wire clips to mounting surface, ensuring
the TRAX Array is taut with LED Bars
laying at.
Step 4 // Add Support As Needed
If needed, use Standard Bar Retention
Clips (sold separately: TX1-BRC-STD-10) to
provide additional LED Bar support.
Step 1 // Assemble The Rails
Assemble the Rail Mounting Kit Rails (A)
using the kit’s included Rail To Rail
Connectors (B) and End Mounting Clips
(D). These pieces slide and click into place,
no tools required. Rails may be cut to size.
Step 2 // Prepare Mounting Location
Mark the desired location for Rails (A).
The correct distance between left rail and
right rail is 12” (30.48cm) on center. Fasten
Rail Mounting Clips (C) to marked surface.
Once mounted, these clips can slide left or
right, adding a small degree of tolerance
to rail location.
Step 3 // Mount To Surface
Snap the TRAX Array into Rails (A) ensuring
it’s taut with LED bars laying at. Test
t assembly to Rail Mounting Clips (C) to
conrm alignment. In vertical applications,
it is advised to apply the TRAX wire clip’s
adhesive backing to the Rail (A) at several
points. This eliminates any undesired
movement from occurring over time.
Step 4 // Add Support As Needed
If needed, use Deep Bar Retention Clips
(sold separately: TX1-BRC-RMK-10) to add
extra support to LED bars in between rails
or where LED bars were modied.
MOUNT USING BUILT-IN WIRE CLIPS
The wire clips that come pre-assembled to the TRAX Array feature mounting holes. Insert mechanical fasteners through these mounting holes (Step 2) to
attach the product to the mounting surface. This method is ideal for installations that involve curved mounting surfaces.
MOUNT USING TRAX RAIL MOUNTING KIT (SOLD SEPARATELY: TX1-M-RMK)
The TRAX Rail Mounting Kit is a recommended accessory for non-curved applications that oers several advantages. It speeds up installations, reduces
labor, keeps install square, and provides a rigid structure that assists with product alignment. For more detailed information, please reference the TRAX Rail
Mounting Kit Instructions (included with each Rail Mounting Kit) and the Rail Mounting Kit Specication Sheet (digital only).
INSTALLATION TIPS
TRAX may be mounted vertically or horizontally. It can be advantageous to pre-mount the TRAX Array to a substrate such as die-bond to help with installation.
When mounting TRAX in a ceiling application (horizontal) the Rail Mounting Kit can be useful for preventing product from sagging and ensuring accurate
alignment. Individual LED bars may be replaced should damage occur during handling / product installation. Please contact Evo-Lite for details.


