manuals.online logo
Brands
  1. Home
  2. •
  3. Brands
  4. •
  5. Evolution Aqua
  6. •
  7. Water Filtration System
  8. •
  9. Evolution Aqua Nexus Eazy 200 Manual

Evolution Aqua Nexus Eazy 200 Manual

200 / 300 Module
Installation & Operating Instructions
Note: Do not attempt to install this Module
without first reading this manual thoroughly
Manufactured by Evolution Aqua Ltd
Evolution House
Kellett Close
Wigan WN5 0LP
England
Tel: +44(0)1942 216554
Fax: +44(0)1942 216562
E-mail: info@evolutionaqua.com
Web: www.evolutionaqua.com
Thank you for purchasing your Module. We are sure you will be delighted
with its performance.
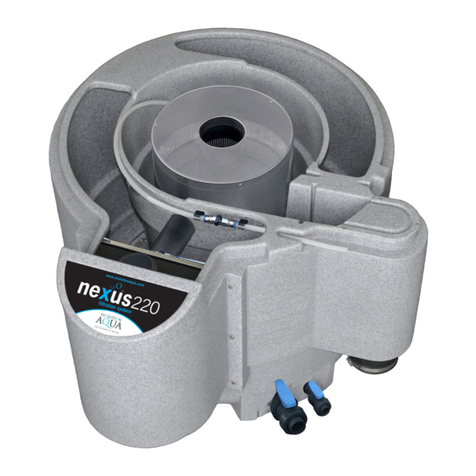
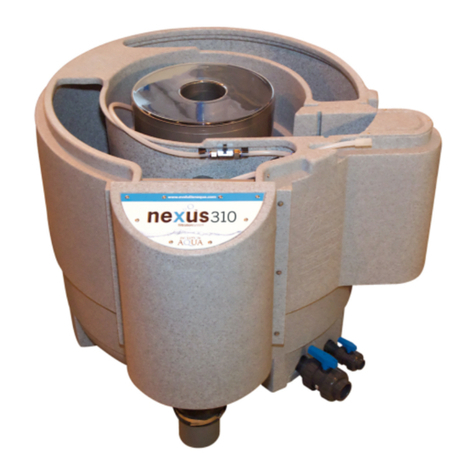
Your new Module comprises of the following components:
300 Module 200 Module
Stainless steel
”Eazy” vessel
Stainless steel
centre pipe
Stainless steel
”Eazy” vessel
Stainless steel
centre pipe
Nexus Isolation Pipe
Kaldnes K1
45 Litres
Nexus Isolation Pipe
Kaldnes K1
30 Litres
Air-valve with “T”
connector
Pipe clips & fixings
Air-valve with “T”
connector
Pipe clips & fixings
“Jubilee” Clip
(Band clamp) Backwash Air-tube
“Jubilee” Clip
(Band clamp)
Backwash Air-tube
300 Installation
1) Drain the Nexus central chamber
2) Remove the central and exit
foams from your Nexus.
3) Remove the existing black spigot
(later models having 3 retaining
screws).
4) Using the template supplied, drill
two 4mm holes in the side of the
inner chamber.
5) Fit the two air-pipe clips using the
M4 screws and “Nyloc” nuts
supplied.
6) Remove the current 90° air-pipe
elbow by pushing in the collar
and pulling pipe out. Connect the
incoming air tube directly to the
new “T” connector.
7) Connect the existing air-ring air
tube to the lower connection on
the “T” connector.
8) Connect the new backwash air
tube to the “Eazy” aeration ring
9) Install the “Eazy” over the spigot in
the Nexus central chamber.
10)Align the air tube as shown,
ensuring that the “Eazy” support
legs are positioned equally either
side of the waste drain.
11)Connect the new back wash air
tube to the other side of the air
valve.
12)Fit the stainless steel centre pipe
over the central spigot in the
Nexus, aligning the top of the
pipe with the top edge of the
“Eazy”, ensuring that the pipe is
vertical.
13)Position the supplied Jubilee Clip
(band clamp) at the base of the
centre pipe and tighten fully.
14)Fill the “Eazy” with 45 litres of
Kaldnes. The volume of Kaldnes
will be found when levelled, to
correspond with the lower edges
of the slots in the centre pipe. It is
recommended that the 45 litres
be taken from the biological
stage and replaced with the
Kaldnes supplied with your “Eazy”.
15)On pump fed installations, you will
need to install a ball/slide valve to
the inlet pipe in order to control
the water level within the centre
chamber.
16)On pump fed installations push
the adjustable collar on the exit
stand pipe to its lowest setting
200 Installation
1) Drain the Nexus central chamber
2) Remove the central and exit
foams from your Nexus.
3) Remove the existing black spigot
(later models having 3 retaining
screws).
4) Using the template supplied, drill
two 4mm holes in the side of the
inner chamber.
5) Fit the two air-pipe clips using the
M4 screws and “Nyloc” nuts
supplied.
6) Remove the current 90° air-pipe
elbow by pushing in the collar
and pulling pipe out. Connect the
incoming air tube directly to the
new “T” connector.
7) Connect the existing air-ring air
tube to the lower connection on
the “T” connector.
8) Connect the new backwash air
tube to the “Eazy” aeration ring
9) Install the “Eazy” over the spigot in
the Nexus central chamber.
10)Align the air tube as shown,
ensuring that the “Eazy” support
legs are positioned equally either
side of the waste drain.
11)Connect the new back wash air
tube to the other side of the air
valve.
12)Fit the stainless steel centre pipe
over the central spigot in the
Nexus, aligning the top of the
pipe with the top edge of the
“Eazy”, ensuring that the pipe is
vertical.
13)Position the supplied Jubilee Clip
(band clamp) at the base of the
centre pipe and tighten fully.
14)Fill the “Eazy” with 30 litres of
Kaldnes. The volume of Kaldnes
will be found when levelled, to
correspond with the lower edges
of the slots in the centre pipe. It is
recommended that the 30 litres
be taken from the biological
stage and replaced with the
Kaldnes supplied with your “Eazy”.
15)On pump fed installations, you will
need to install a ball/slide valve to
the inlet pipe in order to control
the water level within the centre
chamber.
Cleaning
To achieve optimum water clarity we recommend that the “Eazy” be air
backwashed and purged on a regular basis. The frequency of cleaning will
depend on the loading of the pond. The longer the filter is left undisturbed the finer
the filtration will become. However the filter must be purged regularly to avoid
circulation pump starvation on a gravity system or chamber overflow on a pump
fed system.
Gravity Procedure
1) Stop the circulation pump.
2) Wait a short a period of time so as to allow the water levels within the Nexus
to stabilise.
3) Close off the feed to the biological chamber
by inserting the Isolation pipe into the centre of the “Eazy”,
ensuring that the rubber flange engages
within the Nexus centre spigot.
4) Close the inlet to the Nexus by using the inlet slide-plate supplied with your
Nexus. You should now have isolated your “Eazy” from the System.
5) Open the air valve until the Kaldnes in the “Eazy” is boiling.
6) After the “Eazy” has been boiling for a minimum of one minute, open the
Nexus central chamber waste valve.
7) Once central chamber has drained, close waste valve.
8) Close the air valve.
9) Remove the Nexus inlet slide-plate allowing the Nexus to refill.
10)Remove the Isolation pipe from the centre of the “Eazy”.
11)Restart the circulation pump.
Pump Procedure
1) Close inlet valve.
2) Close off the feed to the biological chamber
by inserting the Isolation pipe into the centre of the “Eazy”,
ensuring that the rubber flange engages
within the Nexus centre spigot.
3) Re-open inlet valve until the water level within the Nexus central chamber is
level with the overflow, close inlet valve. It is essential that this water level is
maintained to allow efficient cleaning.
4) Switch off the pond pump.
5) Open the air valve until the Kaldnes in the “Eazy” is boiling.
6) After the “Eazy” has been boiling for a minimum of one minute, open the
Nexus central chamber waste valve.
7) Once central chamber has drained, close waste valve.
8) Close the air valve.
9) Open inlet valve.
10)Remove the Isolation pipe from the centre of the “Eazy”.
11)Restart the pond pump.
Distributed by:
UK
Evolution Aqua Ltd,
Evolution house, Kellett Close, Wigan, WN5 OLP
United Kingdom
Sales: +44 (0)1942 219 898
Technical: +44 (0)1942 219 872
E mail: [email protected] Web: www.evolutionaqua.com
USA & Canada – Wholesaler
Contact: Trevor Cole
Pond Wise Inc.
429 Shields Rd, Huntsville, Alabama, 35811 USA
Tel: +1 256 859 0123 Fax: +1 256 859 0110
E mail: pondwise@hiwaay.net Web: www.pondwise.com
E mail: infousa@evolutionaqua.com
Germany
Contact: Chris Upton
Unique koi, Rauhe Strausse 36, D46459 Rees, Germany.
Tel: +49 2851 58950 Fax: +49 2851 589525
E mail: [email protected] Web: www.uniquekoi.de
E mail: infodeutchland@evolutionaqua.com
Netherlands
Contact: Jan Muller
Quality Totaal, Bohrweg 22-24, 3208 KR, Spijkenisse, Nederlands
Tel: +31 181 628612 Fax: +31 181 611632
E mail: info@qualitytotaal.nl Web: www.qualitytotaal.nl
E mail: infobenelu[email protected]
Australia
Contact: Tim Jacobson
Aussie Koi, PO Box 663, Bulimba 4171, Queensland, Australia
Tel:+ 61 417 601 651 Fax: +61 7 3399 8892
E mail: [email protected] Web: www.aussiekoi.com
South Africa
Contact: Hannes Uys
Cape Koi Aquarium, PO Box 1312, Brackenfell 7561, S Africa
Email: [email protected]
Tel: +27 219889724 Fax: +27 21988 9595
Happy Koi - Contact: William Kelly
E mail: will[email protected] Tel: +27 828867114
E mail: infosout[email protected]
Asia
Contact: Max Ng
Max Koi Farm, 251 Neo Tiew Crescent, Singapore 7, Singapore.
Phone: +65 6862 6363 Fax: +65 6862 6262
E mail: [email protected] Web: www.maxkoifarm.sg
E Mail: infoasia@evolutionaqua.com
200 Template
300 Template

Other manuals for Nexus Eazy 200

2

This manual suits for next models

1

Other Evolution Aqua Water Filtration System manuals
Evolution Aqua eazypod complete User manual

Evolution Aqua

Evolution Aqua eazypod complete User manual

Evolution Aqua Cetus sieve Quick guide

Evolution Aqua

Evolution Aqua Cetus sieve Quick guide

Evolution Aqua evoUV Series User manual

Evolution Aqua

Evolution Aqua evoUV Series User manual

Evolution Aqua eazypod Quick guide

Evolution Aqua

Evolution Aqua eazypod Quick guide

Evolution Aqua Nexus Eazy 200 Manual

Evolution Aqua

Evolution Aqua Nexus Eazy 200 Manual

Evolution Aqua NExus 300 Manual

Evolution Aqua

Evolution Aqua NExus 300 Manual

Evolution Aqua eazypod Manual

Evolution Aqua

Evolution Aqua eazypod Manual

Evolution Aqua eazypod Manual

Evolution Aqua

Evolution Aqua eazypod Manual

Evolution Aqua PURE POND 5,000 Instruction Manual
Evolution Aqua

Evolution Aqua PURE POND 5,000 Instruction Manual

Evolution Aqua evo15 User manual

Evolution Aqua

Evolution Aqua evo15 User manual

Evolution Aqua NExus 300 User manual

Evolution Aqua

Evolution Aqua NExus 300 User manual

Evolution Aqua EAZYPOD AUTOMATIC Quick guide

Evolution Aqua

Evolution Aqua EAZYPOD AUTOMATIC Quick guide

Evolution Aqua Nexus Series Quick guide

Evolution Aqua

Evolution Aqua Nexus Series Quick guide

Evolution Aqua eazypod Manual

Evolution Aqua

Evolution Aqua eazypod Manual
Evolution Aqua nexus 310 Quick guide

Evolution Aqua

Evolution Aqua nexus 310 Quick guide

Evolution Aqua Cetus sieve User manual

Evolution Aqua

Evolution Aqua Cetus sieve User manual

Evolution Aqua Tempest User manual

Evolution Aqua

Evolution Aqua Tempest User manual

Evolution Aqua K1 MICRO BEAD 20 Quick guide

Evolution Aqua

Evolution Aqua K1 MICRO BEAD 20 Quick guide

Evolution Aqua Nexus Eazy 200 Quick guide

Evolution Aqua

Evolution Aqua Nexus Eazy 200 Quick guide

Popular Water Filtration System manuals by other brands

Welbilt Frymaster PF50 CE Series Operation, service and parts manual

Welbilt

Welbilt Frymaster PF50 CE Series Operation, service and parts manual

Much More Water BlueBox 4000 RO manual

Much More Water

Much More Water BlueBox 4000 RO manual

Clear Water FS016 owner's manual

Clear Water

Clear Water FS016 owner's manual

Pure-Pro PJ-103 user manual

Pure-Pro

Pure-Pro PJ-103 user manual

AlkaViva elita Pure user manual

AlkaViva

AlkaViva elita Pure user manual

Net Media NM-CNF7080 Specifications

Net Media

Net Media NM-CNF7080 Specifications

Pure-Pro HRO-200 user manual

Pure-Pro

Pure-Pro HRO-200 user manual

Ecoplus EP-1000-ULT Installation  & owners guide

Ecoplus

Ecoplus EP-1000-ULT Installation & owners guide

Bluewater Pro Series owner's manual

Bluewater

Bluewater Pro Series owner's manual

Pureit autofill instruction manual

Pureit

Pureit autofill instruction manual

BOSSCO 021-5RM boss water systems australia Installation and service guide

BOSSCO

BOSSCO 021-5RM boss water systems australia Installation and service guide

PureAir Ecozone Cumulus PA-CUM-10 user manual

PureAir

PureAir Ecozone Cumulus PA-CUM-10 user manual

Aqua Guard AquaSure Aquaflo DX user manual

Aqua Guard

Aqua Guard AquaSure Aquaflo DX user manual

Bluewater Pro How to use guide

Bluewater

Bluewater Pro How to use guide

Ro-Man PUMP-BOX-200-AF Instructions for use

Ro-Man

Ro-Man PUMP-BOX-200-AF Instructions for use

Waterco GRAVITY operating manual

Waterco

Waterco GRAVITY operating manual

AquaFX 3 Stage Dolphin RO Instruction & owner's manual

AquaFX

AquaFX 3 Stage Dolphin RO Instruction & owner's manual

Puretec FP Series user guide

Puretec

Puretec FP Series user guide

manuals.online logo
manuals.online logoBrands
  • About & Mission
  • Contact us
  • Privacy Policy
  • Terms and Conditions

Copyright 2025 Manuals.Online. All Rights Reserved.