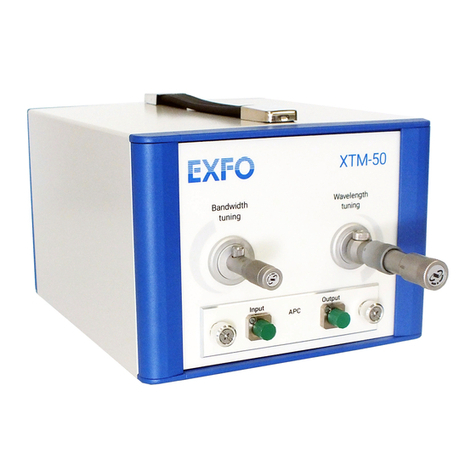
X-Cite®exacte: Quick Start Guide SIDE 1
Warning –Refer to Safety Precautions Booklet 035-00636R for all safety precautions prior to use.
User Guide 035-00283 download: http://www.excelitas.com/Pages/Product/X-Cite-exacte.aspx
WARNING: Never look into the light emitting end of the light guide! The light could severely damage the cornea and retina of the eye if the light is
observed directly. Eye shielding must be used at all times as well as clothing to protect exposed skin
Refer to user guide for more details.
Start Up
1. Install the lamp module (see side 2).
2. Install the light guide (see below).
3. Plug the unit into a properly grounded AC outlet.
4. Turn on the Power switch at the front of the unit.
5. The lamp will automatically strike when power is turned on to the unit. The
LAMP indicator will be illuminated.
6. Allow the lamp to warm up (approximately 4 minutes). During the warm up
period the LED display and indicators will flash.
Installing the Light Guide
1. Remove the protective end caps from the light guide
2. Insert the light guide into the light guide port on the front panel until it
seats with a positive click (up to the “A” line printed on the grey ferrule).
3. Insert the light emitting end of the light guide into the collimating adapter
after it has been installed on the microscope.
Front Panel Controls
1. SHUTTER button will open/close the shutter, OPEN LED will indicate when
shutter is open.
2. MODE button is used to cycle between Coarse, Fine and Hours mode when
pressed and then released within 1 second. The LED’s to the right of the
display indicate the current mode of operation.
Coarse Mode: display shows intensity in %; increase/decrease in
10% steps using UP/DOWN buttons
Fine Mode: display shows intensity in %; increase/decrease in 1%
steps using UP/DOWN buttons
Hours Mode: display shows how many hours the lamp has been in
operation
3. If the unit is calibrated, MODE button is used to toggle between Relative
(XXX %) and Absolute (XX.XX Watts) power display modes when pressed
and then released after more than 1 second. The display number
formatting will indicate the current power display mode.
Using the Footpedal / Remote Device
1. Connect Footpedal /remote device to 3.5mm jack at rear of unit.
2. Depressing the footpedal, or providing a momentary contact closure,
provides the same function as pressing the SHUTTER button
Setting the Intensity Level
1. Set your X-Cite exacte to Coarse or Fine Intensity Mode by pressing the
MODE button.
2. Press the up or down button to increase or decrease the light output.
Note: No light will be emitted if 0% is selected
3. Press the SHUTTER button to open the shutter. The open indicator will
illuminate.
Warning: UV light and high levels of visible light will be emitted
from the end of the light guide !
4. Press the SHUTTER button to close the shutter. The open indicator will
turn off.
Closed-Loop Feedback™ (CLF)
1. To enable CLF: Set the intensity to the desired level. Press and hold the
MODE button, then press and release the UP button. The CLF light will
turn on. (Note: UP must be released before MODE—treat MODE like a
“shift” key).
2. To disable CLF: Press and hold the MODE button, then press and release
the UP button. The CLF light will turn off.
Calibration/Radiometry (optional)
- To Measure Output Power
1. Set the X-Cite to the desired intensity.
2. Close X-Cite shutter using SHUTTER button.
3. Remove light guide from microscope adapter
4. Snap the 3mm (red) light guide adapter into the top of radiometer (if not
already in place).
5. Loosen thumb screw on red light guide adapter, fully insert and fasten light
guide into holder.
6. Turn radiometer on using the ON button
7. Open X-Cite shutter, the power reading will show on the display.
- To Calibrate the X-Cite exacte:
1. Set up the radiometer to obtain a power reading as described above
2. Connect radiometer cable to port on the right side of the radiometer
(under flap in rubber boot), and the port on the right side of the X-Cite
exacte.
3. Press and release the X-CITE CAL button.
The X-Cite will display CAL, and the radiometer will display a moving dash
(–) while the calibration sequence is running.
