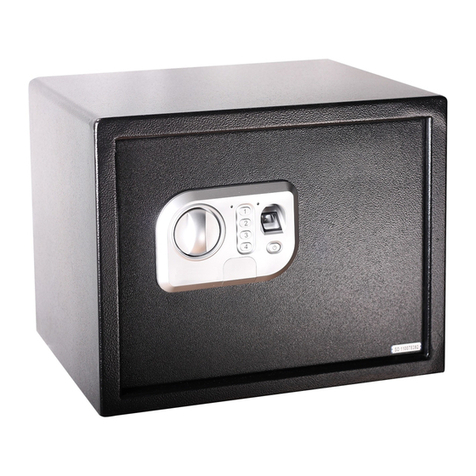
ExecutiveSafe ES035 User manual

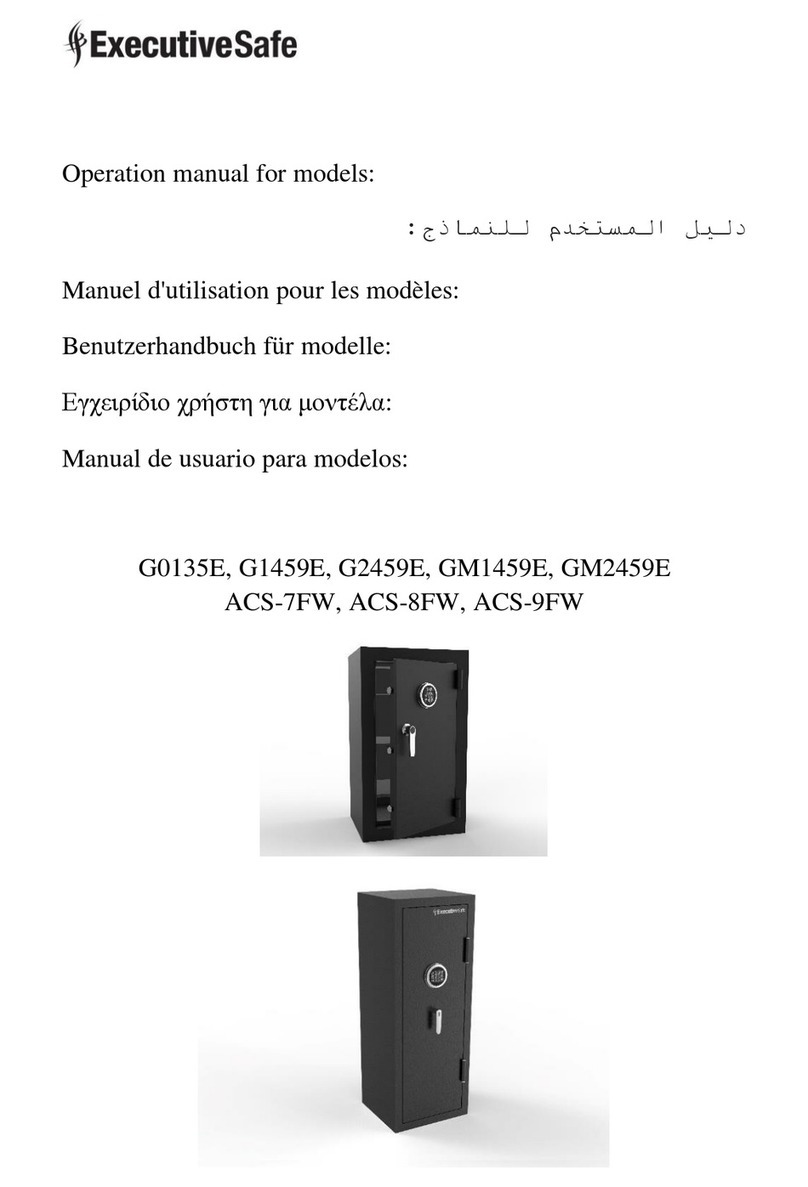
Operation manual for models:
Manuel d'utilisation pour les modèles:
Benutzerhandbuch für Modelle:
Εγχειρίδιο χρήστη για μοντέλα:
Manual de usuario para modelos:
ES035, ES045, ES060, ES080, ES100, ES120

Two Year Limited Warranty
This limited warranty covers all defects in materials only and/or workmanship only.
If a structural or mechanical defect occurs during the warranty period,
ExecutiveSafe Company Limited or its designee (hereafter "ExecutiveSafe") will repair
or replace the defective part(s) of the Product or Product, at its sole option,
at no charge. You may have certain rights under your local law.
Nothing in these terms is intended to affect those rights, if they are applicable.
Warranty Service
To obtain Warranty service contact your local ExecutiveSafe
office with your name address, proof of purchase -
original sales receipt is required with no exception (store your sales receipt in the safe)
and with a brief description of the problem.
DO NOT SEND YOUR DEFECTIVE PRODUCT BACK TO EXECUTIVESAFE.
Limitations of warranty
1. ExecutiveSafe’s responsibility and the
buyer’s exclusive remedy under this warranty are limited to the repair or
replacement of the defective part(s) of the Product or Product, at ExecutiveSafe’s
sole option. In no event shall ExecutiveSafe be liable for loss or damage due to external
events such as theft, fire, water, earthquake, or vandalism or for any incidental or
consequential damages to persons or property (including the contents of the
Product) resulting from the breach of this or any other expressed or implied
warranty applicable to the Product.
2. Except as may be otherwise provided by applicable law, ExecutiveSafe
disclaims any and all other covenants and warranties, whether
written or oral, expressed or implied, including, but not limited to,
the implied warranties of merchantability, satisfactory quality, fitness for a
particular purpose, workmanlike effort, and non-infringement.
3. ExecutiveSafe is not responsible for damage, defects, or malfunction to the
Product caused by shipment.
4. This Limited Warranty does not cover defects, damage, or malfunction
caused by alteration, modification, service or repair of the Product by anyone
other than ExecutiveSafe, or caused by misuse of the product or physical abuse to
the product.
5. This Limited Warranty does not cover normal wear, battery replacement or periodic
maintenance.

PLEASE READ THE MANUAL ENTIRELY BEFORE START USING THE SAFE
Bolt-down instructions for Models ES035, ES045, ES060
To help provide maximum security, bolt down is strongly recommended.
1. Select a suitable and convenient location for your safe. Set the safe in place
and use the hole provided at the bottom of the safe to mark the
location of the hole to be drilled in the floor
2. Move the safe away and drill a hole in the floor, of the appropriate diameter and depth
for the type of hardware being used and the mounting surface
3. Place the safe back over the hole and install the fastener as required.
Using the override key to open the safe
Using your finger nail remove the override key cover, located at the front of the door, see Fig. 1,
Insert the override key and turn it clockwise until it stops.
Turn the handle counter clockwise (downwards) to open the door. To finish the operation, turn the
key counter clockwise and remove it.
Fig. 1
NOTE: DO NOT STORE THE OVERRIDE KEY IN YOUR SAFE!
Please secure your override keys in a safe place. If the override keys are lost or damaged,
contact your local ExecutiveSafe office.

Battery Installation
Four alkaline AA batteries (included) are required.
NOTE: Non-alkaline or rechargeable batteries ARE NOT RECOMMENDED.
To install the batteries, remove the battery cover located on the inside back side of the door. See
Fig. 2. Insert the four batteries as indicated. Insert back the battery cover.
Every time the batteries are installed, the safe will run a self test with the display showing a count
down from “9” to “0” and then “GOOD” at the end of the self test, indicating that the batteries are
installed correctly and the safe is working properly.
The safe will then enter the sleep mode (the display will turn off)
NOTE: Batteries should be replaced when the “Lock” button is pressed for the safe to wake up
and the display shows “LO-BATTE”
1. If the display shows “LO-BATTE” and the red light located on the finger print scanner
flashes 10 times with 10 beeps, the safe can still be operated for a few more times
2. If the display shows “LO-BATTE” and the red light located on the finger print scanner
is on for 3 seconds then the safe cannot be operated.
Fig, 2

Turning the keypad sound on and off
The keypad sound can be turned OFF and ON by pressing the “CLEAR” button when the safe is
in the sleep mode in other words the display is turned off.
The display will show “SOUND ON” or “SOUND OF”
Alarm Function
Note: For the alarm to be activated, the alarm function must be set every time the safe is
locked. In case the alarm function is not set and the safe is moved or jarred or an attempted
forced entry occurs the alarm will not be activated.
To set the alarm function, close the door, and make sure the safe is in the sleep mode, press the
“0” button, the display will Show “BELL ON”, indicating that the alarm has been activated.
If the alarm function is set and the safe experiences severe vibration, the alarm will be activated
for 30 seconds.
The alarm can be deactivated by entering the correct finger print or by pressing the “LOCK”
button for the keypad to wake up and entering the correct combination followed by the “LOCK”
button.
Lockout Function
If the wrong combination or a wrong finger print is entered five consecutive times, the display
will show ERROR each time the wrong combination is entered, and at the fifth incorrect entry the
display will show HOLD and start counting from 210 down to 0 and the alarm will be activated
for 30 seconds. The keypad and the finger recognition scanner will enter a 210 second lock out
period. During this period the keypad and the finger recognition scanner will be disabled. After
the 3.5-minute lock out period the keypad and the finger recognition will become active again.

Opening and Closing the Safe
Opening the Safe using the Keypad:
In the sleep mode, press the “LOCK” button for the keypad to wake up and enter the correct
combination followed by the “LOCK” button. “OPEN” is displayed on the screen, and while the
“OPEN” is displayed turn the handle counter clockwise (downwards) to open the door.
Opening the Safe using the Fingerprint:
In the sleep mode, place the correct fingerprint on the finger recognition scanner.
The screen will display “OPEN”, and while the “OPEN” is displayed
turn the handle counter clockwise (downwards) to open the door.
Closing the Safe:
Close the door, the handle will automatically turn to the horizontal position indicating that the safe
is closed and locked.

Programming the Safe
❖For your safety, please program the combination and at least one finger before
start using the safe.
❖The safe is shipped with a preset combination: 159
❖To restore the above factory settings of the safe at any time, press and hold the
push button located at the back of the door, inside the battery compartment, for
more than 3 seconds up until two beebs are emitted. See Fig. 3.
Fig. 3
Programming the Combination
With the safe door open, press and release the button located at the back of the door, in the battery
compartment, see Fig. 3. One beep is emitted and the fingerprint scanner and the display are
flashing.
Enter the new combination consisting of 3 to 8 digits followed by the “LOCK” button. The new
combination is successfully programmed. You can now operate the safe with your new
combination. The old combination is erased.
Programming the Finger Print
With the safe door open, press and release the button located at the back of the door, in the battery
compartment, see Fig. 3. One beep is emitted and the fingerprint scanner and the display are
flashing.
Place your finger on the fingerprint scanner until you hear a beep, remove your finger and repeat
the same finger scanning two more times. The last time you will hear 2 short beeps and the
scanner flashes twice indicating that the new finger print is registered and saved. You can now
operate the safe with your registered finger print.
To program more finger prints repeat the same process again.
Test the new combination or fingerprint with the door open.
Note: 100 finger prints can be programmed. When the red light flashes on the finger recognition
scanner 10 times and the beep sounds 10 times this is an indication that the fingerprint register is
full. To delete the finger prints and program new ones press and hold the push button located at
the back of the door, in the battery compartment, for more than 3 seconds up until two beebs are
emitted.See Fig. 3. The combination is now 159.
Program again the combination and program again the desired fingerprints.

:
1
2
3
4
5

ES035ES045ES060
.
.
.
..
Fig. 1
!
ExecutiveSafe

AA
GOOD
LockLO-BATTE
LO-BATTE
LO-BATTE
Fig, 2

CLEAR
SOUND ONSOUND OF
BELL ON
LOCK
LOCK

LOCK
LOCKOPEN
OPENOPEN

❖
❖
❖
3
Fig. 3
3LOCK
3

Garantie limitée de deux ans
Cette garantie limitée couvre tous les défauts de matériaux et /ou de fabrication uniquement.
Si un défaut structurel ou mécanique survient pendant la période de garantie,
ExecutiveSafeCompany Limited ou son représentant (ci-après "ExecutiveSafe") réparera ou
remplacera la ou les pièces défectueuses du Produit ou le produit, à sa seule discrétion, sans frais.
Vous pouvez avoir certains droits en vertu de votre loi locale.
Rien dans ces termes n’est destiné à affecter ces droits, s’ils sont applicables.
Service de Garantie
Pour obtenir un service de garantie, contactez votre distributeur local ExecutiveSafe
avec votre nom, adresse et preuve d'achat .
Le reçu original est requis sans exception (conservez votre reçu dans le coffre-fort).
et avec une brève description du problème.
NE RENVOYEZ PAS VOTRE PRODUIT DÉFECTUEUX À EXECUTIVESAFE.
Limites de garantie
1. La responsabilité de ExecutiveSafe et le recours exclusif de l’acheteur au titre de cette garantie
est limité à la réparation ou au remplacement de la ou des pièces défectueuses du ou des produits
chez ExecutiveSafe , à sa seule discrétion. ExecutiveSafe ne peut en aucun cas être tenu
responsable des pertes ou des dommages dus à des dommages externes tels que le vol, l’incendie,
l’eau, un tremblement de terre, le vandalisme ou tout autre incident ou événement.
Dommages consécutifs à des personnes ou à des biens (y compris le contenu de la
Produit) résultant de la violation de cette ou de toute autre cause explicite ou implicite
garantie applicable au produit.
2. Sauf disposition contraire des lois applicables, ExecutiveSafe
renonce à toutes autres clauses et garanties, que ce soit
écrit ou oral, explicite ou implicite, y compris, sans toutefois s'y limiter,
les garanties implicites de qualité marchande, de qualité satisfaisante, d’aptitude à
usage particulier, effort d’exécution et non-violation
3. ExecutiveSafe n'est pas responsable des dommages, défauts ou dysfonctionnements du
produit causé par l'expédition.
4. Cette garantie limitée ne couvre pas les défauts, dommages ou dysfonctionnements
causée par une altération, une modification, un service ou une réparation du produit par quiconque
autres que ExecutiveSafe, ou causés par une mauvaise utilisation du produit ou des abus
physiques portés au produit.
5. Cette garantie limitée ne couvre pas l'usure normale, le remplacement de la batterie ou la
maintenance périodique

VEUILLEZ PRENDRE CONNAISSANCE DE L’INTÉGRALITÉ DU MODE D’EMPLOI
AVANT DE COMMENCER À UTILISER LE COFFRE-FORT
Instructions de scellement pour les modèles ES035, ES045, ES060
Pour assurer une sécurité maximale, le scellement est fortement recommandé.
1. Sélectionnez un emplacement approprié et pratique pour votre coffre-fort. Positionnez le coffre-
fort et utilisez l’orifice prévu sur la surface inférieure du coffre-fort pour marquer l’emplacement
du trou à percer dans le sol
2. Éloignez le coffre-fort et percez un trou dans le sol, du diamètre et de la profondeur appropriés
pour le type de matériel utilisé et la surface de montage
3. Replacez le coffre-fort sur le trou et installez la fixation selon les besoins.
Utilisation de la clé d’urgence pour ouvrir le coffre-fort
À l'aide de votre ongle, retirez le couvercle d’insertion de la clé d’urgence, situé à l'avant de la
porte, voir Fig.1, insérez la clé d’urgence et tournez-la dans le sens des aiguilles d'une montre
jusqu'à ce qu'elle se bloque.
Tournez la poignée dans le sens contraire des aiguilles d’une montre (vers le bas) pour ouvrir la
porte. Afin de terminer l'opération, tournez la clé dans le sens contraire des aiguilles d'une montre
et retirez-la.
Fig. 1
REMARQUE : NE CONSERVEZ PAS LA CLÉ D’URGENCE DANS VOTRE COFFRE-
FORT !
Veuillez garder vos clés d’urgence dans un endroit sûr. Si vous perdez ou endommagez les
clés d’urgence, veuillez contacter votre bureau local ExecutiveSafe.

Installation des piles
Quatre piles alcalines AA (incluses) sont nécessaires.
REMARQUE: les piles non alcalines ou rechargeables NE SONT PAS RECOMMANDÉES.
Pour installer les piles, retirez le couvercle du compartiment des piles situé sur la face arrière
intérieure de la porte. Voir Fig. 2. Insérez les quatre piles comme indiqué. Replacez le couvercle
du compartiment des piles.
Chaque fois que les piles sont installées, le coffre-fort effectuera un test automatique : sur l'écran
s’affichera un compte à rebours de « 9 » à « 0 », puis le mot « GOOD » à la fin du test
automatique, indiquant que les piles sont installées correctement et que le coffre-fort est
opérationnel.
Le coffre-fort entrera alors en mode veille (l'écran s'éteindra)
REMARQUE : les piles doivent être remplacées lorsqu’en pressant le bouton « LOCK » pour que
le coffre-fort s’actionne, l'écran affiche « LO-BATTE »
1. Si l'écran affiche « LO-BATTE » et que le voyant rouge situé sur le lecteur
d'empreintes digitales clignote 10 fois en émettant 10 bips, le coffre-fort peut encore
être utilisé plusieurs fois.
2. Si l'écran affiche « LO-BATTE » et que le voyant rouge situé sur le lecteur
d'empreintes digitales reste allumé pendant 3 secondes, le coffre-fort n’est pas
opérationnel.
Fig. 2

Activer et désactiver le son du clavier
Le son du clavier peut être désactivé et activé en appuyant sur le bouton « CLEAR » lorsque le
coffre-fort est en mode veille, en d'autres termes, lorsque le lecteur est éteint.
L'écran affichera « SOUND ON » ou « SOUND OFF »
Fonction d'alarme
Remarque : pour que l'alarme soit activée, la fonction d'alarme doit être réglée à chaque
verrouillage du coffre-fort. Dans le cas où la fonction d'alarme n'est pas réglée et que le
coffre-fort est déplacé ou secoué ou si une entrée forcée se produit, l'alarme ne s’activera
pas.
Pour régler la fonction d'alarme, fermez la porte et assurez-vous que le coffre-fort est en mode
veille, appuyez sur le bouton « 0 », l'écran affichera « BELL ON », indiquant que l'alarme a été
activée.
Si la fonction d'alarme est enclenchée et que le coffre-fort subit de fortes vibrations, l'alarme se
manifestera durant 30 secondes.
L'alarme peut être désactivée en présentant l'empreinte digitale correcte ou en appuyant sur le
bouton « LOCK » pour que le clavier s’allume, puis en saisissant la bonne combinaison suivie du
bouton « LOCK ».
Fonction de verrouillage
Si la mauvaise combinaison est entrée ou une mauvaise empreinte digitale est présentée cinq fois
consécutive, l'écran affichera ERROR à chaque mauvaise combinaison, et à la cinquième entrée
incorrecte, il affichera « HOLD », puis commencera à décompter de 210 à 0. L'alarme s’activera
alors durant 30 secondes. Le clavier et le lecteur de reconnaissance digitale se verrouilleront
durant 210 secondes. Pendant cette période, le clavier et le lecteur de reconnaissance digitale
seront désactivés. Après la période de verrouillage de 3,5 minutes, ils seront de nouveau actifs.

Ouverture et fermeture du coffre-fort
Ouverture du coffre-fort à l'aide du clavier :
En mode veille, appuyez sur le bouton « LOCK » pour que le clavier s’allume et entrez la
combinaison correcte suivi du bouton « LOCK ». « OPEN » s'affiche à l'écran. Tournez alors la
poignée dans le sens contraire des aiguilles d’une montre (vers le bas) pour ouvrir la porte.
Ouverture du coffre-fort à l'aide de l'empreinte digitale :
En mode veille, placez l'empreinte digitale correcte sur le scanner de reconnaissance digitale.
L'écran affichera « OPEN ». Tournez alors la poignée dans le sens contraire des aiguilles d’une
monde (vers le bas) pour ouvrir la porte.
Fermeture du coffre-fort :
Fermez la porte, la poignée se déplacera automatiquement en position horizontale indiquant que le
coffre-fort est fermé et verrouillé.

Programmation du coffre-fort
❖Pour votre sécurité, veuillez programmer la combinaison et enregistrer au moins
une empreinte digitale avant de commencer à utiliser le coffre-fort.
❖Le coffre-fort est muni d’une combinaison prédéfinie : le 159.
❖Pour restaurer les paramètres d'usine du coffre-fort indiqués ci-dessus à tout
moment, maintenez enfoncé le bouton situé à l'arrière de la porte, à l'intérieur du
compartiment des piles, pendant plus de 3 secondes jusqu'à ce que deux bips se
manifestent. Voir la figure 3.
Fig. 3
Programmation de la combinaison
La porte du coffre-fort ouverte, appuyez et relâchez le bouton situé à l'arrière de la porte, dans le
compartiment des piles, voir Fig. 3. Un bip est émis, puis le lecteur d'empreintes digitales et
l'écran clignotent.
Entrez la nouvelle combinaison composée de 3 à 8 chiffres suivi du bouton « LOCK ». La
nouvelle combinaison est programmée avec succès. Vous pouvez maintenant utiliser le coffre-fort
avec votre nouvelle combinaison. L'ancienne combinaison est ainsi effacée.
Programmation de l'empreinte digitale
La porte du coffre-fort ouverte, appuyez et relâchez le bouton situé à l'arrière de la porte, dans le
compartiment des piles, voir Fig. 3. Un bip est émis, puis le lecteur d'empreintes digitales et
l'écran clignotent.
Placez votre doigt sur le lecteur d'empreintes digitales jusqu'à ce que vous entendiez un bip,
retirez votre doigt et répétez l’opération avec votre doigt deux autre fois. La dernière fois, vous
entendrez 2 bips courts et le lecteur clignotera deux fois pour indiquer que la nouvelle empreinte
digitale a été prise en compte et enregistrée. Vous pouvez maintenant utiliser le coffre-fort avec
votre empreinte digitale enregistrée.
Pour programmer davantage d'empreintes digitales, répétez le même processus.
Testez la nouvelle combinaison ou empreinte digitale avec la porte ouverte.
Remarque : 100 empreintes digitales peuvent être programmées. Le registre d’empreintes digitales
indique que le nombre permis d’empreintes enregistrées est atteint lorsque le voyant rouge sur le
lecteur d’empreintes digitales clignote 10 fois et que le bip retentit 10 fois. Pour supprimer les
empreintes digitales et en programmer de nouvelles, maintenez enfoncé le bouton situé à l'arrière
de la porte, dans le compartiment des piles, pendant plus de 3 secondes jusqu'à ce que deux bips se
manifestent. Voir Fig. 3. La combinaison est maintenant 159. Programmez une nouvelle
combinaison ainsi que les empreintes digitales souhaitées.

2 Jahre Beschränkte Garantie
Diese eingeschränkte Garantie gilt nur für Material- und / oder Verarbeitungsfehler.
Wenn während der Garantiezeit ein struktureller oder mechanischer Defekt auftritt, wird
ExecutiveSafe Company Limited oder sein Beauftragter (nachstehend "ExecutiveSafe") die
Reparatur durchführen oder den defekten Teil des Produkts nach eigenem Ermessen kostenlos
austauschen. Sie haben möglicherweise bestimmte Rechte gemäß Ihrem lokalen Recht.
Nichts in diesen Bedingungen soll diese Rechte beeinträchtigen, sofern sie zutreffen.
Garantieleistungen
Um den Garantieservice zu erhalten, wenden Sie sich an Ihr lokales ExecutiveSafe
Büro mit Ihrem Namen, Kaufbeleg - Originaler Kaufbeleg ist ausnahmslos erforderlich
(Bewahren Sie Ihren Verkaufsbeleg im Safe auf) und mit einer kurzen Beschreibung des
Problems.
SENDEN SIE IHR DEFEKTES PRODUKT NICHT ZURÜCK ZU EXECUTIVESAFE.
Beschränkungen der Garantie
1. Die Verantwortung von ExecutiveSafe und der ausschließliche Rechtsschutz des Käufers im
Rahmen dieser Garantie ist auf die Reparatur beschränkt.
Austausch der defekten Teile des Produkts ist nur durch ExecutiveSafe möglich. ExecutiveSafe
haftet in keinem Fall für Schäden oder Beschwerden, die von außen verursacht wurden Ereignisse
wie Diebstahl, Feuer, Wasser, Erdbeben oder Vandalismus oder für zufällige oder Folgeschäden
an Personen oder Sachen (einschließlich des Inhalts des Produkts), das sich aus einem Verstoß
gegen dieses oder ein anderes ausdrückliches oder impliziertes Produkt fallen unter die Garantie
für das Produkt.
2. Vorbehaltlich anders lautender Bestimmungen, lehnt ExecutiveSafe jegliche anderen
Verpflichtungen und Garantien ab, ob schriftlich oder mündlich, ausdrücklich oder
stillschweigend, einschließlich, jedoch nicht beschränkt auf die implizierten Garantien der
Marktgängigkeit, zufriedenstellende Qualität, Eignung für besondere Zwecke, handwerkliche
Anstrengung und Nichtverletzung.
3. ExecutiveSafe übernimmt keine Haftung für Schäden, Mängel oder Fehlfunktionen des
Produkts, durch den Versand verursacht.
4. Diese eingeschränkte Garantie deckt keine Mängel, Schäden oder Fehlfunktionen abverursacht
durch Veränderung, Modifikation, Service oder Reparatur des Produkts durch andere Parteien als
ExecutiveSafe, oder durch Missbrauch des Produkts oder durch körperlichen Missbrauch am
Produkt.
5. Diese eingeschränkte Garantie gilt nicht für normalen Verschleiß, Batteriewechsel oder die
regelmäßige Wartung.
This manual suits for next models
5
Table of contents
Languages:
Other ExecutiveSafe Safe manuals
ExecutiveSafe
ExecutiveSafe ACS-7 User manual
ExecutiveSafe
ExecutiveSafe P85EB User manual
ExecutiveSafe
ExecutiveSafe CS-2 User manual
ExecutiveSafe
ExecutiveSafe ACS-2 User manual
ExecutiveSafe
ExecutiveSafe CS-3B User manual
ExecutiveSafe
ExecutiveSafe G0135E User manual

ExecutiveSafe
ExecutiveSafe P46ER User manual


