Factair F6001 User manual

0
F6001 SAFE-AIR TESTER
OPERATING MANUAL
FAC QAM 096 Issue D 03/21

1
Contents
Page No
Introduction
2
Calibration & Warranty
2
Diagram and Equipment List
3
1
-
Pre Use
4
2
-
Start Up
5
3
-
Beginning a new test
6
4
-
Reviewing test results
10
5
-
Exporting test results to the PC software
10
Appendix 1 - Configuring the Safe-Air Tester
12
Appendix 2 –Using the test port for other Draeger tubes
14
Appendix 3 - Reading and disposal of Draeger Tubes and
Oil Impactor
16
Appendix 4 - Helpful Tips
21
Appendix 5 –Air Quality Testing –Why?
23
International Breathing Air Standards
Frequency of Breathing Air Tests
Recording Breathing Air Quality Test Results
A.4.5 Compressed Air for Breathing
Apparatus from EN529
24
25
26
27
COSHH L5 (Sixth Edition 2013)
28
Respiratory Protective Equipment at Work
30

2
Introduction
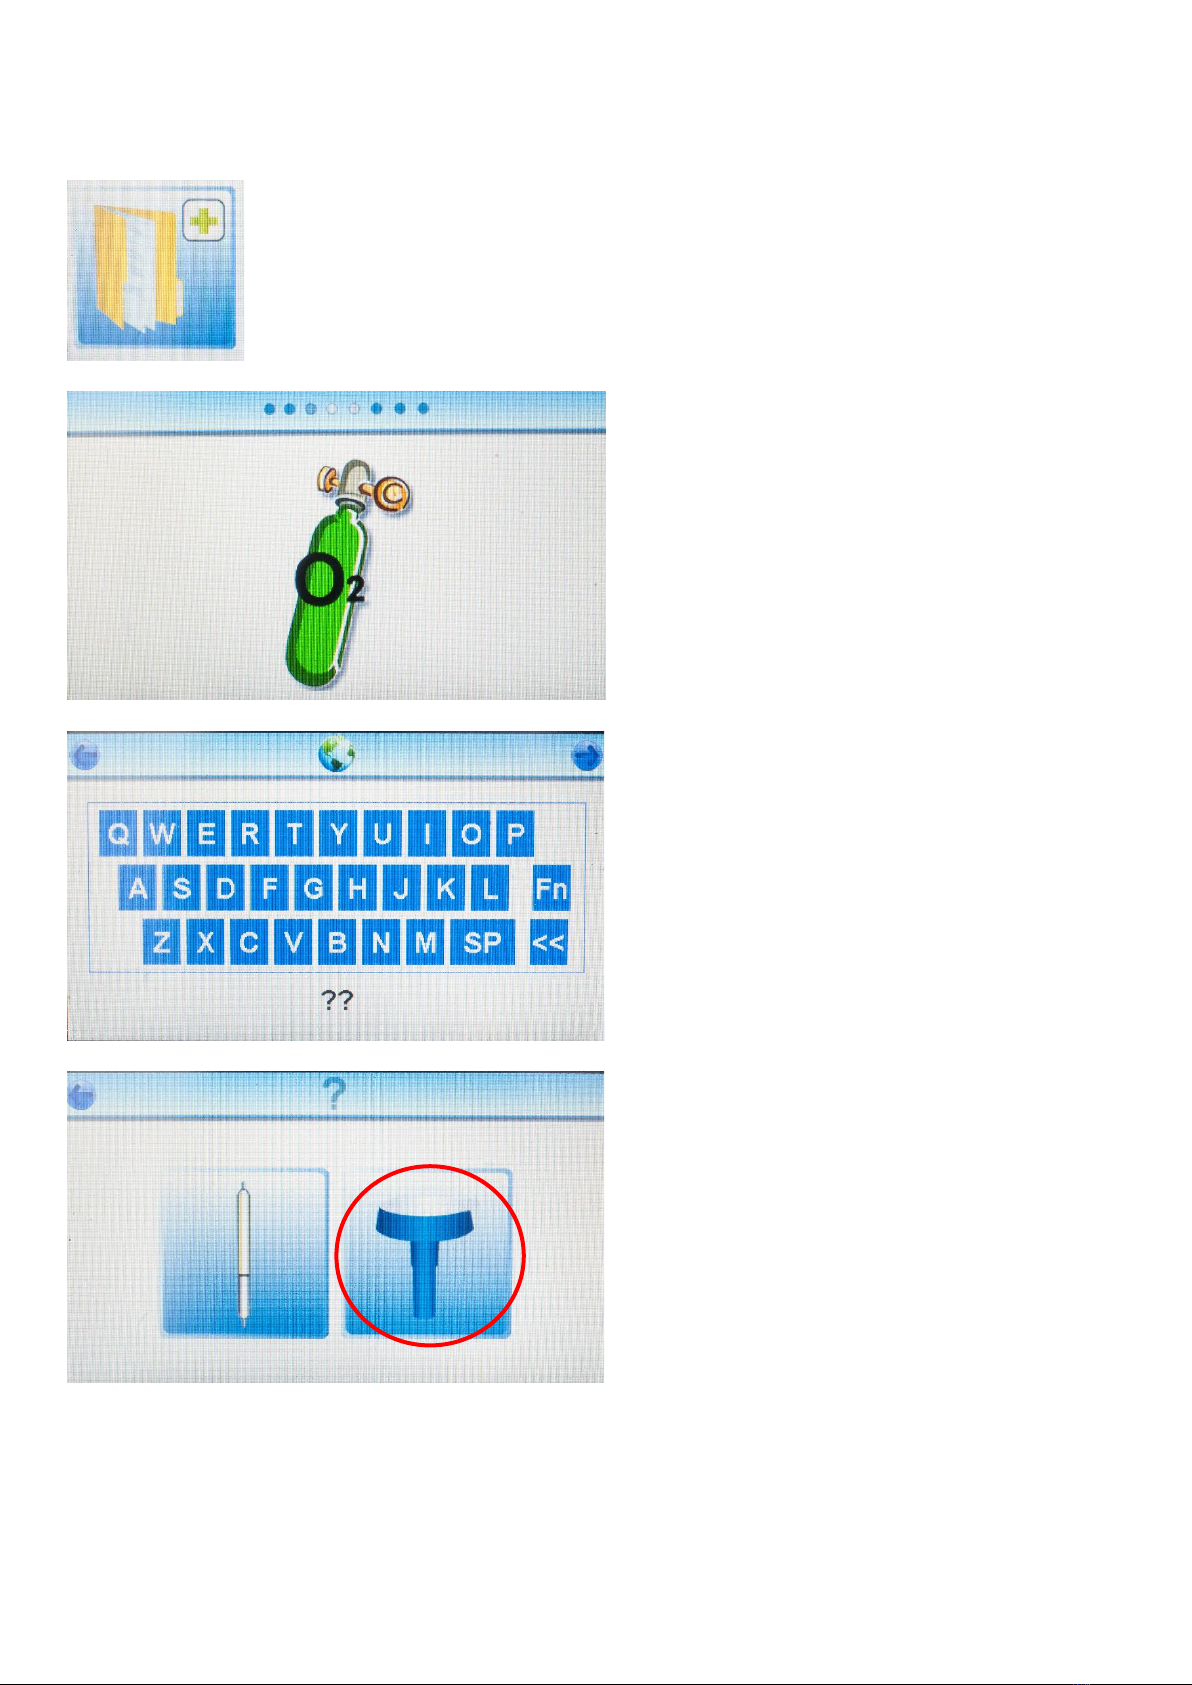
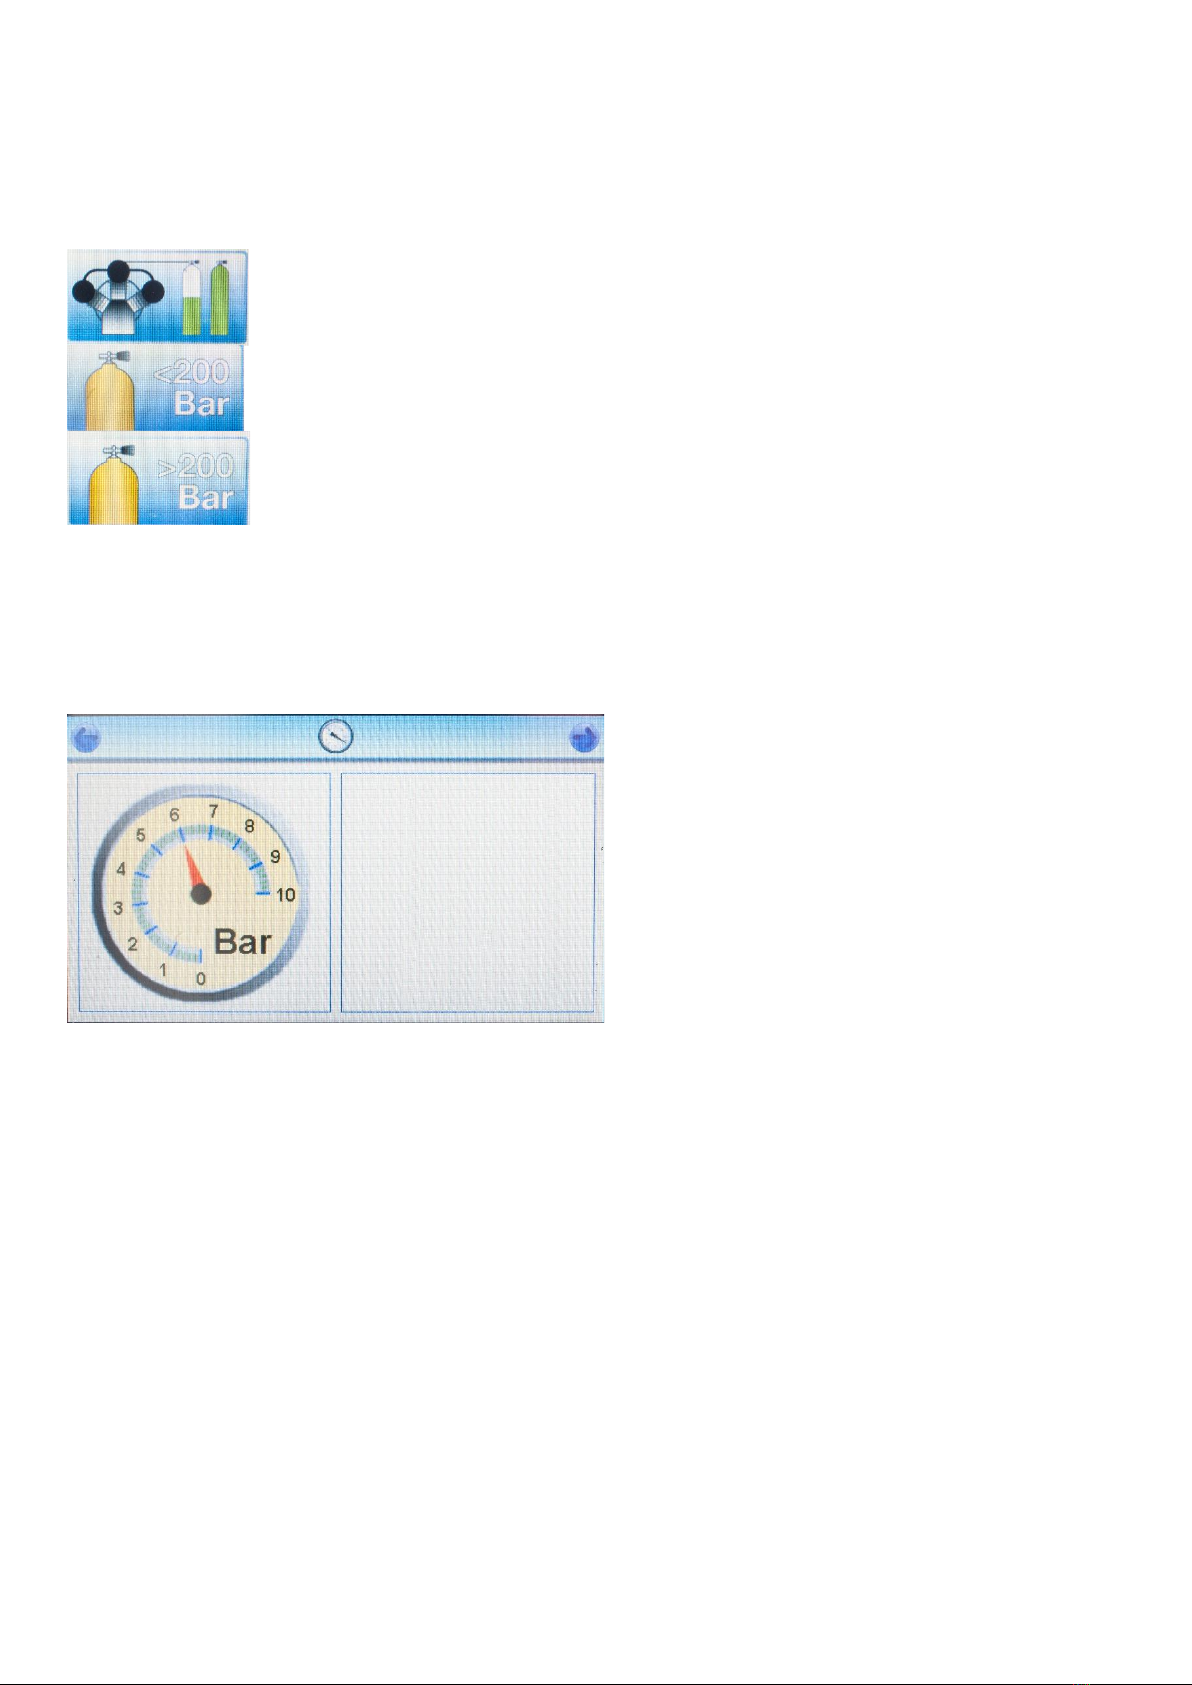
Safe-Air Testers are designed to provide a quick and easy method for carrying out accurate periodic
testing of breathing-air supplies. From the touch screen display the appropriate breathing-air standard
can be selected for your test.
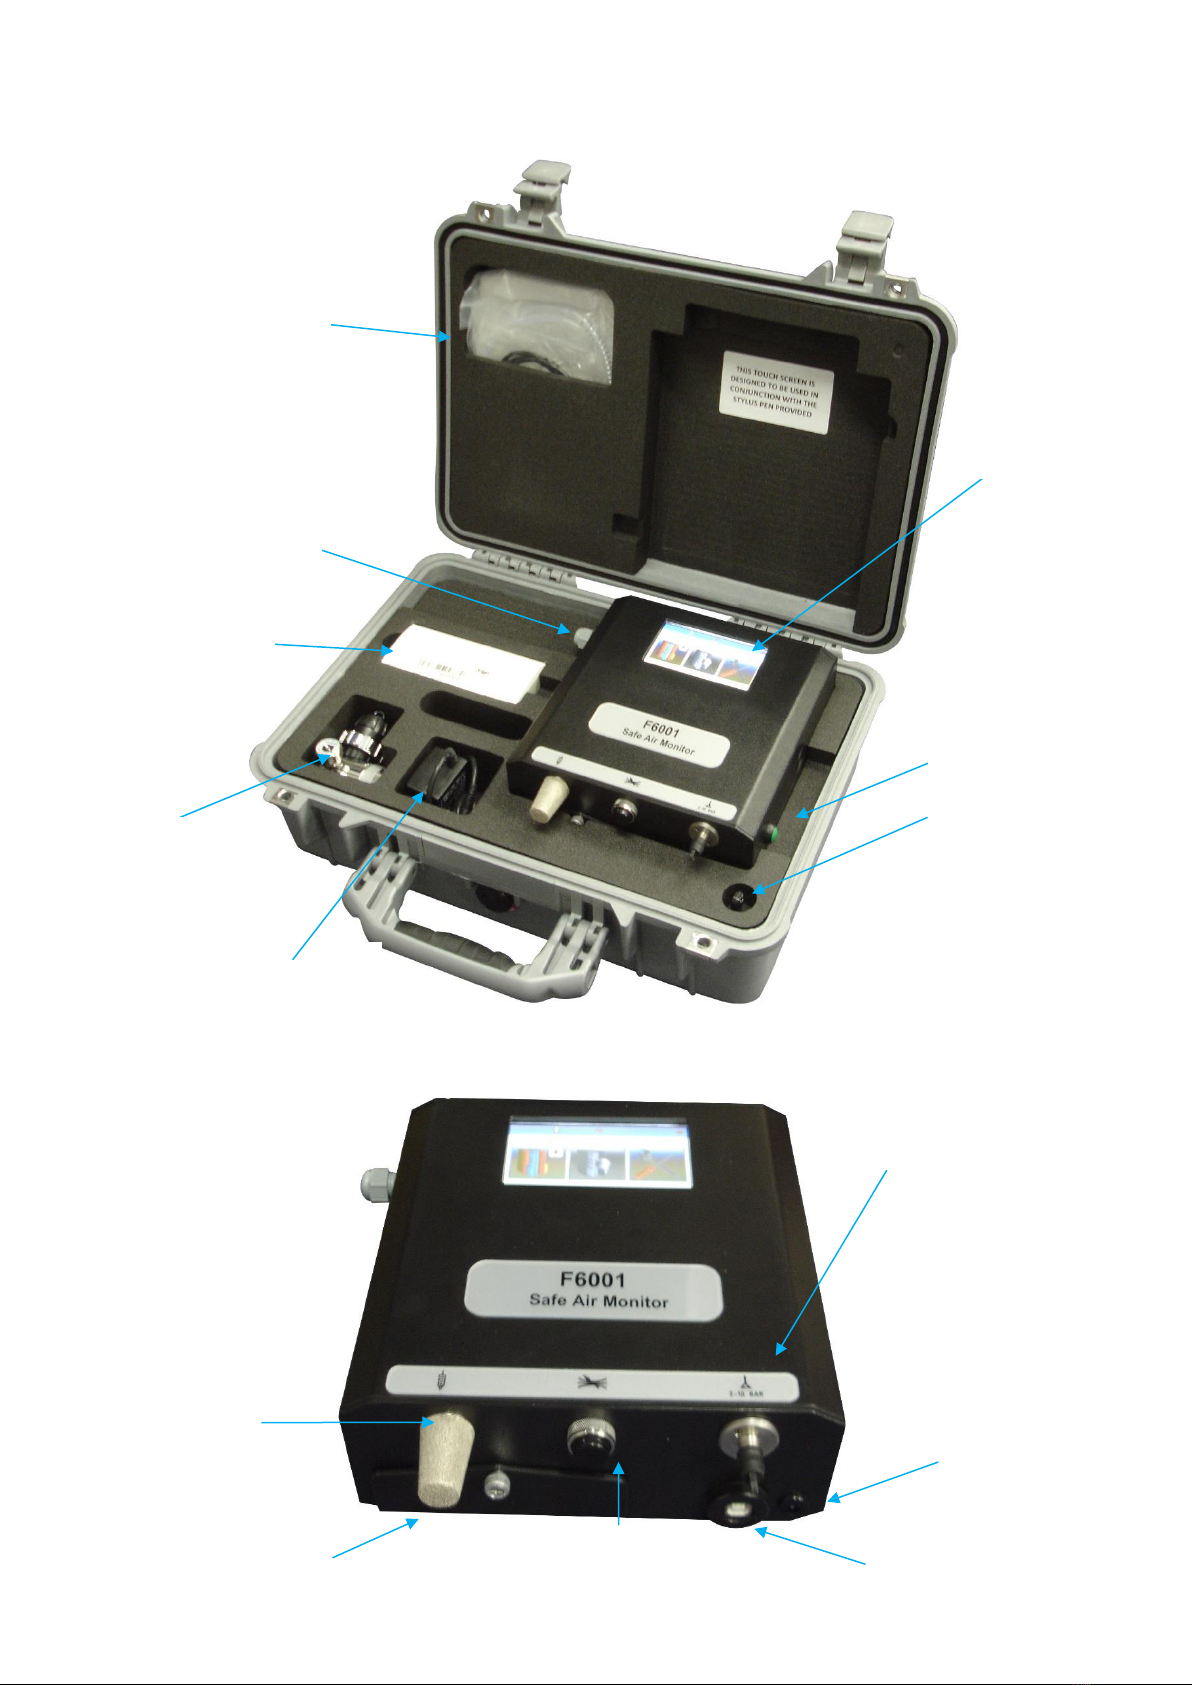
The F6001, is designed specifically to test high pressure air breathing air cylinders and high pressure
charging systems up to 300bar.
It is supplied in a hard weatherproof case with storage provision for a wide range of accessories and
equipment.
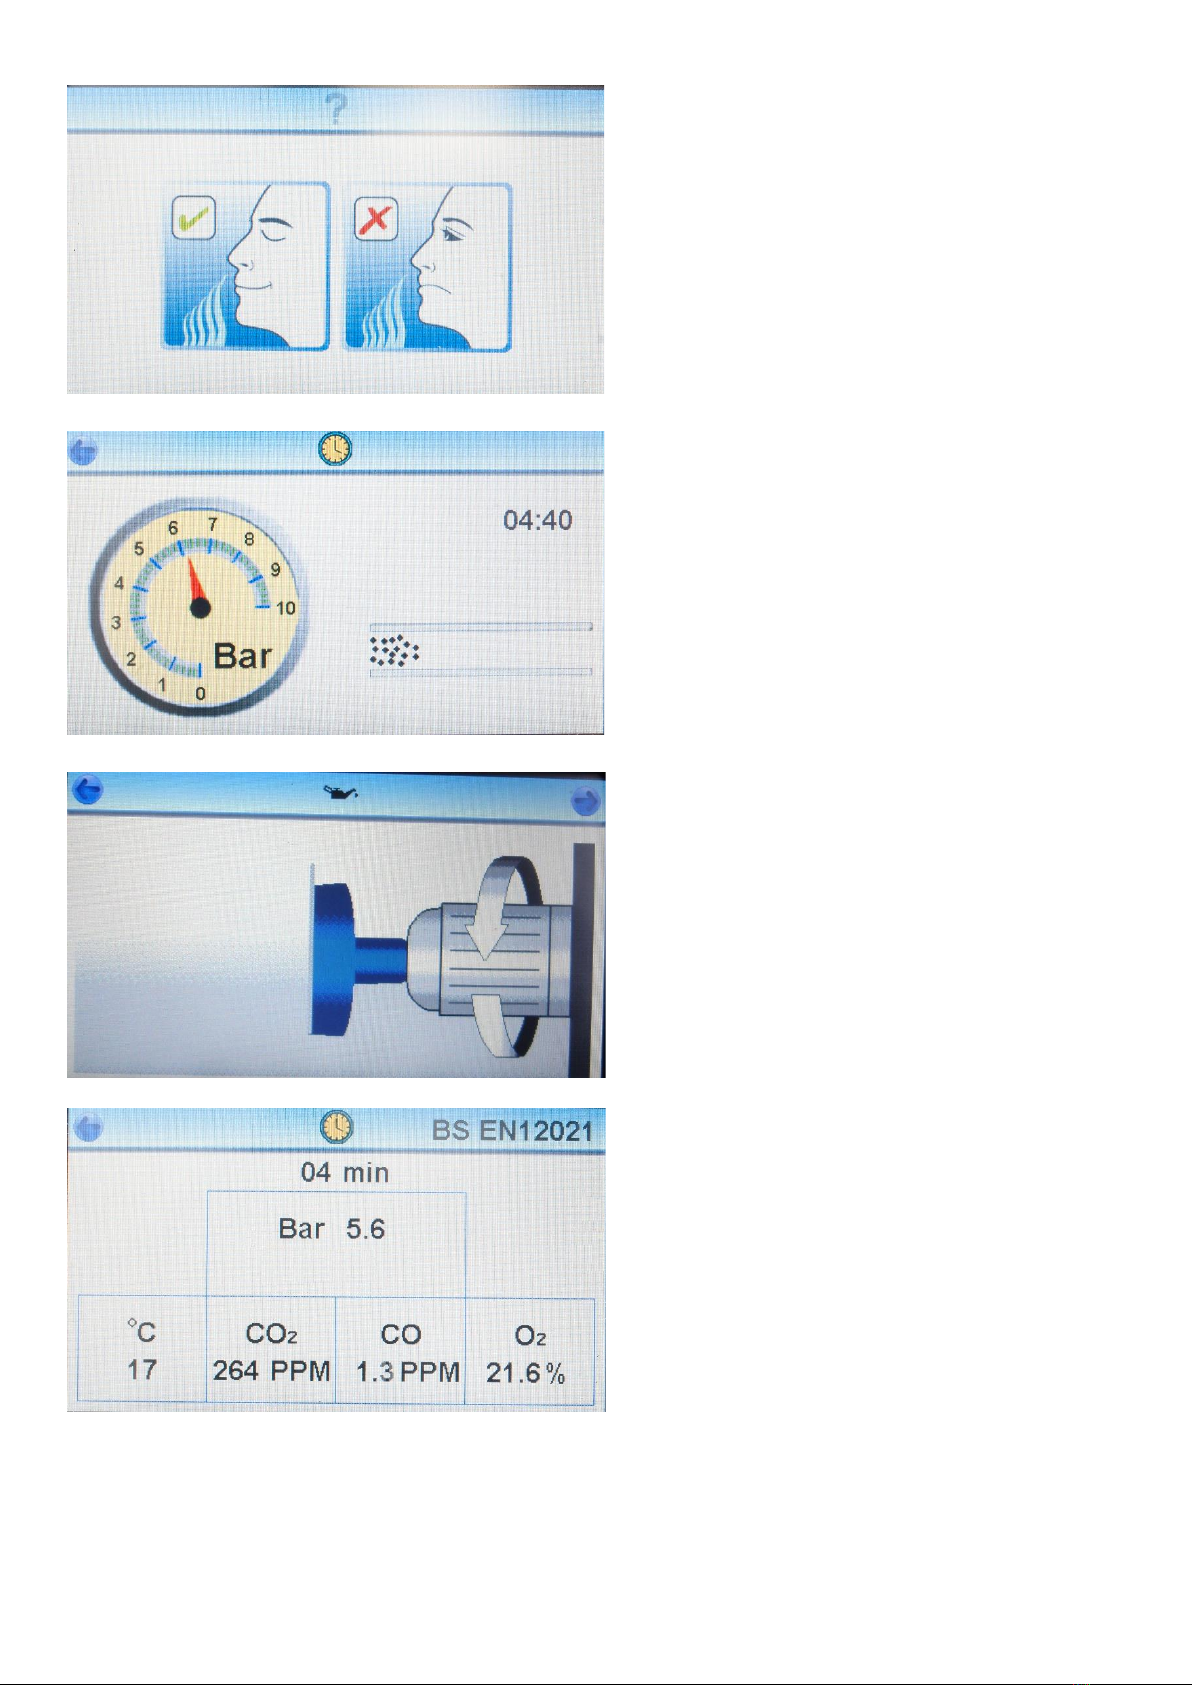
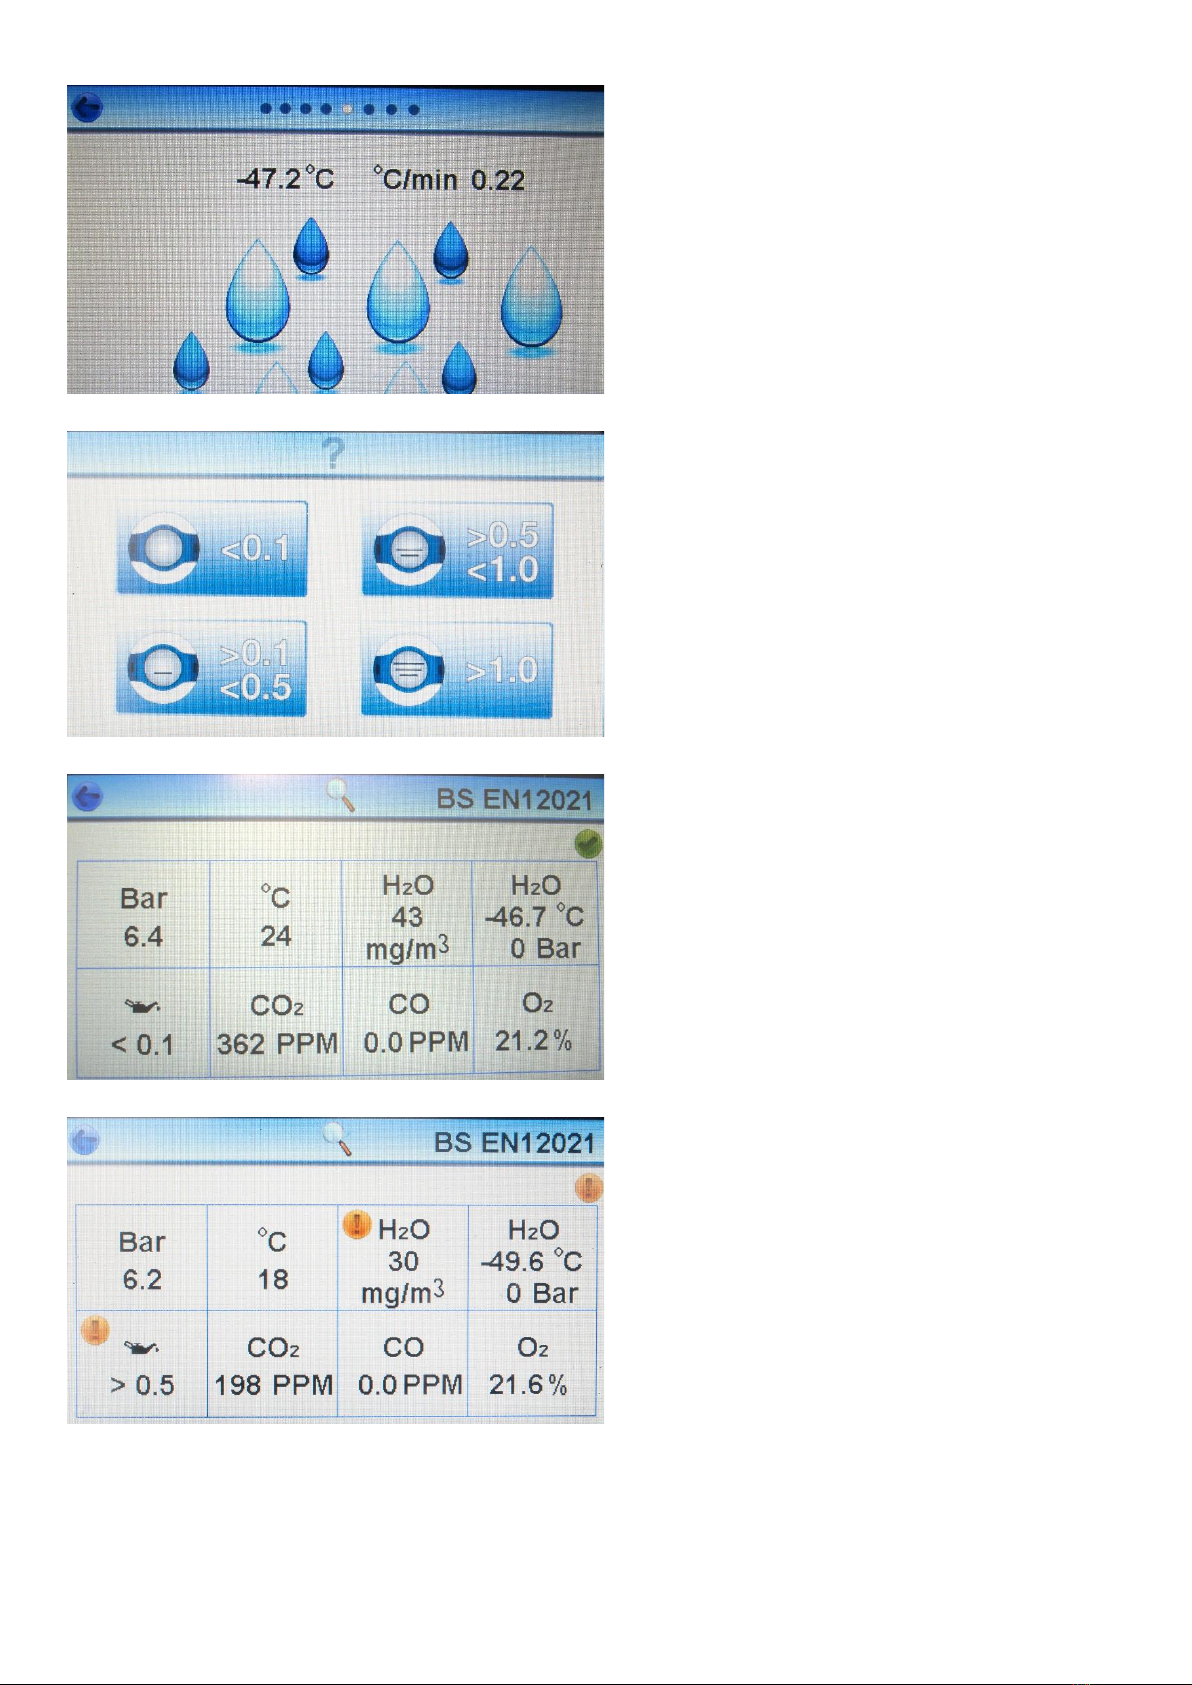
The test is carried out using built in electrochemical cells for carbon monoxide and the oxygen and an
infrared LED sensor for the carbon dioxide. The moisture is measured with an electronic dewpoint
meter and the instrument also records test pressure and ambient temperature. For measuring oil
aerosols Draeger Impactors are connected through a test port and this can also be used for testing a
number of other Draeger chemical reagent tubes detailed below. The Draeger Impactors are supplied
in packs of 10 and show the degree of oil contamination on a screen.
Calibration and Warranty
Safe-Air Testers leave our factory with a 12-month warranty and calibration certificate. Our standard
turnaround on annual calibration is 10-15 working days providing there is no major damage that
requires an extensive rebuild. Note:- Please download all stored data before returning the Tester to
Factair.
Temperature Parameters
Storage: -10/+50°C Operating Range: +5/+35°C
This tester is calibrated for the following approved reagent tubes/Impactor.
Test
Draeger ref.
Factair Part
No:
Sensitivity
Oil (Impactor)
8103560
TUB0053
0.1 mg/m3
Oil (chemical reagent
tube)*
6728371
TUB0003
0.1 mg/m3
Nitrous Fumes
NOx
8103661
TUB0068
0.2-6 ppm
Sulphur Dioxide
SO2
6728491
TUB0014
1-25 ppm
Polytest
CH28401
TUB0017
Sensitivity dependant on
compound present
The tester can also be used with the old type Draeger reagent tube for oil, ref.6728371. (Refer to
Appendix 2 at the rear of the manual for instructions.)
IMPORTANT –IT IS RECOMMENDED THAT YOUR SAFE-AIR TESTER IS RETURNED FOR
RECALIBRATION AND SERVICING WITHIN 12 MONTHS FROM THE ISSUE DATE OF ITS CALIBRATION
CERTIFICATE

3
USB Connection
Power On
Stylus pen
Touch Screen
Display
Draeger
Impactor and
tube test port
Air Inlet
F3002 HP
Regulator
(optional extra)
Storage for
manual and
F3002 HP
regulator hose
Mains power
adaptor
TUB0053 - 8103560
Draeger Oil Impactors
(optional extra)
Mains input
Odour Test Button
Battery Tray
Sintered Outlet

4
Equipment List:
F6001 Safe-Air Tester
Hard Case
Mains Power Supply
USB Download Cable
6 x AA Alkaline Batteries
F3002 High-Pressure Regulator
Stylus Pen
Optional Extras
TUB0053 –8103560 Draeger Oil Impactor –Box of 10
F1946 Connection ¼ BSP inlet adaptor
F2193 Safe-air Tester to Draeger/Scott compatible plug adaptor
F2194 Connection adaptor terminating in a Rectus Plug
F2195 Connection adaptor terminating in an Instantair Plug
1. Pre-Use
Testers are supplied with 6 off, size AA, alkaline type batteries packed separately and stored
underneath the tester within the case. Please note rechargeable batteries are not suitable for use with
this instrument.
Batteries must be installed prior to use unless it is the intention to power the unit solely from a mains
supply. To install the batteries lift the tester out of its case, open the battery drawer at the front of the
unit and place the batteries inside.
Note: - It is important to strictly observe polarity when fitting batteries and ensure that they are correctly
located.
If on start up the battery level is too low a warning will be displayed on the screen; the test cannot
continue until the batteries are replaced or the unit is operated from the mains power supply. During
use the battery condition is displayed on the screen.
If the Tester is to be used adjacent to a power socket, the mains adaptor may be used. Please note the
unit should be switched off prior to connection or disconnection of the mains supply.

5
2. Start-Up
To carry out a test first switch on the machine by pressing and holding the green “on” button, located
on the right-hand side of the unit, for approximately 3 seconds.
A splash screen will be displayed which shows the
instruments hardware and firmware versions.
Periodically the firmware is upgraded as part of
the recalibration process as improvements are
identified.
A Stylus pen is provided for use with the touch
screen. The display will show the, date last
calibrated, serial number and a tick or cross
symbol will indicate whether it is within the
recommended calibration period.
Press the arrow key to progress to the main menu.
The main menu has 3 options available from left to
right these are:
Begin test, Review Previous Tests and Set-Up
Menu.
Each of these sub-menus are described in further
detail below
The instrument can also be turned off from this
menu by pressing the red power symbol in the top
right hand corner.
Note –If the begin test icon is in grey this will be
because the instrument’s memory is full (20 tests
maximum) and you need to remove at least 1 test
before you can proceed. See Section 4 –Reviewing
Test Results for further details.

6
3 Beginning a New Test
To carry out a test press the “begin test” icon on
the main menu
The unit will automatically calibrate the oxygen
cell against the surrounding atmosphere; the unit
therefore needs to be in a well ventilated area.
Note:- If the temperature is greater than 40°C
inside the instrument the calibration will operate
for an extended period to stabilise the Oxygen cell.
You now have the option of entering a description
for the test location, if you wish to use numbers
press the “function” button. Push the right arrow
button when you are ready to proceed.
Choose between using a Draeger chemical reagent
tube or Draeger oil Impactor in the test port.
For further details on alternative chemical reagent
tubes see appendices 2 and 3.
For breathing-air tests the standard option is to
select a Draeger oil Impactor.

7
For high pressure tests there are 3 different test options available. All of the high-pressure tests require
the use of the F3002 regulator which has a DIN connector which can accept input pressures of up to
300 bar.
High-pressure charging compressors
High-pressure cylinder less than 200bar
High-pressure cylinder greater than 200bar
Note: For cylinder tests please ensure the test is carried out on a recently filled, fully charged cylinder.
Note: For the high-pressure charging compressor test a DIN to DIN adaptor ref: F2158 is required to
connect the F3002 high-pressure regulator to a charging hose.
To carry out a test press the appropriate button.
Ensure that the flow control valve is fully closed
and then connect the F3002 high-pressure
regulator assembly to the cylinder or charging
hose to be tested, ensuring that the regulator has
the correct type of connector for the cylinder.
Connect the regulator hose coupling to both the
regulator and the inlet of the Tester.
Open the cylinder valve and check that the cylinder is fully charged by reading the contents gauge on
the regulator. (A partially discharged cylinder can give an incorrect water result.) The pressure
displayed on the tester will be that of the regulated supply from the cylinder and must not exceed
10 bar. Press the button in the top right hand corner to proceed.
Note:- if the unit is over-pressurised it will automatically shut down and display an overpressure
warning; it will then need to be returned to the manufacturer for checking and resetting.

8
Carry out the odour test by depressing the odour
test button and smelling the air exhausted from
the sintered outlet, then release the button. If
there is a serious odour problem, fail the sample
at this point of the test. Initiating flows of
seriously contaminated air through the tube ports
could result in damage to the unit. If the odour
test is satisfactory, press the ‘pass’ icon.
The instrument will now commence a 7-minute
purge sequence, during which time an airflow will
be passed through the test port and across the
electronic cells. This clears contaminants from
previous tests and ensures that a representative
sample is being tested.
Once the purge has finished, the Draeger Impactor
should be inserted into the test port and tightened
firmly; ensure the Impactor has an intact
protective seal. This seal must remain in place for
the duration of the test. Press the button in top
right hand corner to start the test.
The test will now commence and the duration will
be displayed as a countdown, together with
pressure, ambient temperature, carbon dioxide,
carbon monoxide and oxygen content.
The unit can be left until the test time has elapsed.

9
If the instrument detects that the dewpoint
meter’s rate of change is still too high (>0.2 dec C
per minute) it will automatically continue the test
until this stabilises (maximum test time 15
minutes).
The Impactor can now be removed and evaluated.
To enter the results press the corresponding icon
on the screen.
Note:- Instructions on reading the Impactor can be
found in Appendix 3 at the back of the manual.
The “test complete” screen displays all the
measurements recorded during the test. And
automatically determines whether the test was a
pass or fail against the standard displayed in the
top right corner of the screen. For water content
on high pressure tests both the measured value in
mg/m3and the atmospheric dewpoint are
provided.
If the test was a fail an orange exclamation mark
would be indicating those criteria which did not
meet the standard. The photograph opposite is an
example of a failed test where the F6001 was
testing a high pressure charging compressor and
the air quality for water and oil did not meet the
requirements of breathing-air standard BS EN
12021.
The test result is automatically recorded in the instrument’s memory, which can store up to 20 previous
tests. To disconnect the Tester from the cylinder firstly turn off the cylinder valve, open the flow control

10
valve until all the air is exhausted then close the valve. It is now safe to disconnect the connection hose
and cylinder regulator.
4. Reviewing Test Results
From the main menu button press the review test
button.
The F6001 can store up to 20 test results and each
individual test is titled by the date and time when
the test was completed.
To review a previous test select it then press the
right hand arrow.
To delete a test highlight it then press the trash
can button. All tests can be deleted by selected the
multiple trash can icon.
Note: Once the instrument has saved 20 results you will unable to complete further tests until you have
removed at least 1 of the stored tests.
5. Exporting Test Results and PC Software.
To transfer test results from the Safe-Air Tester to the PC software you must first install the software
on your PC. This is available in the download section of Factair’s website:
http://www.factair.co.uk/air-quality-testing/safe-air-testers/

11
To transfer test results from the Safe-Air Tester to the PC software, connect the USB cable between the
F6001 and your PC and open the Safe-Air Tester Results F4000/F6000 series software.
Then click on the File drop down menu and select
import test results from F6000 via USB
connection.
You will then be able to choose the location
where you would like test results to be stored.
Individual test records can be opened from the
file drop down menu by selecting “Open an
F6000 test results file”.

12
Once loaded further information can be added
about the following:-
Test location.
Date next test due.
Test engineer and relevant address. Note:- These
details can be saved as default.
When complete you can save the test result file and if required print off a certificate. In the UK, Health
and Safety Executive guideline HSG53 recommends test results should be retained for a minimum of 5
years.

13
Appendix 1 - Configuring the Safe-Air Tester
From the main menu press the configure icon.
In the configuration sub menu there are 3 icons
available, from left to right these are:
Set Date
Set Time (the instrument uses a 24 hour clock)
Set units of measure and test standard
The date and time are set prior to the unit being
supplied but they can be adjusted as necessary.
To select the units of measure and test standard
press the right hand icon.
In this menu you can then choose date format;
pressure and temperature units of measure and
the breathing-air test standard.
Once you have made your selection press the
arrow in the top right corner to exit. To then exit
from the configuration sub menu to the main
menu press the arrow at the top left of the screen.

14
Appendix 2 - Using the test port for other Draeger tubes
As well as the Draeger oil Impactor the F6001 test port can also be used a range of other tubes listed
below:
Test
Draeger ref.
Factair Part
No:
Sensitivity
Oil (chemical reagent tube)
6728371
TUB0003
0.1 mg/m3
Nitrous Fumes
NOx
8103661
TUB0068
0.2-6 ppm
Sulphur Dioxide
SO2
6728491
TUB0014
1-25 ppm
Polytest
CH28401
TUB0017
Sensitivity dependant on
compound present
To prepare the tubes Factair recommends the F2187 Draeger tube tip cutter.
If you have another Draeger tube, which you wish to use with the instrument, contact Factair for
technical advice on its suitability.
To complete a tube test commence a new test and
after the unit had calibrated the oxygen cell and
you have input the test location details you will
have the option to select a tube test as shown,
press the button to proceed.
In this sub menu you will then be able to choose
from oil, sulphur dioxide, nitrous fumes or the
polytest tube.
If you are intending to complete an oil tube test
then you will need to input the test time. If you can
determine with a high degree of certainty the
specific compressor lubricant being used, then
refer to the “test times” chart provided on
Factair’s website marked for the F6000.
If you have no knowledge of the type of compressor lubricant being used in the breathing-air system
then Factair recommends 15 minutes as this covers the vast majority of lubricants. Once you have
selected the tube to tested follow the testing process as described earlier in the manual.

15
Once you have selected which tube you wish to
test the instrument will complete its purge
sequence after which you will be prompted to
insert the appropriate tube into the test port and
tighten firmly.
Note: Both ends of the tube should only be cut
immediately prior to the test. Ensure the arrow
printed on the tube is pointing away from the
instrument.
Press the arrow in the top right corner to proceed.
The test will proceed as described in section 3 and
at the end of it you will be prompted to enter the
result from the tube.
For the Nitrous fumes and Sulphur dioxide tubes
enter the result using the numeric pad. Then press
the arrow in the top right hand corner.
For the oil and polytest tubes select the
appropriate pass or fail icons.
The result will then be displayed on the final test
result screen and stored in the instrument’s
memory. In the example opposite a sulphur
dioxide tube has been used.
Appendix 3 - Reading the Draeger Oil Impactor and Chemical Reagent Tubes

16
Oil Impactor
The Oil Impactor’s protective seal must be kept in place for the duration of the test and only
removed after the test has been completed.
With a standard measurement range of 0.1 to 1.0 mg/m3the Impactor has a limit of detection of
0.05 mg/m3. The Impactor can detect all mineral and synthetic oil mists, it features a series of 3
horizontal lines, each formed by a series of precision manufactured nozzles. These horizontal lines of
nozzles are calibrated to a different concentration of oil. When air is passed through these nozzles any
oil present in the air is deposited on the glass plate prior to the air being exhausted by vents around its
circumference, this allows the user to easily and quickly identify minute quantities of oil.
For tests that pass with an oil concentration of less than 0.05mg/m3, the screen will remain blank. For
tests above that read as follows:
The bottom line represents an oil concentration of 0.1 mg/m3. When the oil deposited forms a
continuous line then the concentration is in excess of 0.1 mg/m3. The middle line represents a
concentration of 0.5 mg/m3, again when the oil deposited forms a continuous line the concentration is
in excess of 0.5 mg/m3. The top line represents a concentration of 1.0 mg/m3, again when this forms a
continuous line the concentration is in excess of 1.0 mg/m3.
* –The above pass and fail criteria is based on breathing-air standard EN12021
Using the Draeger tube tip cutter
Pass* -
greater
than
0.05mg/m3
but less
than
0.1mg/m3
Pass* -
greater
than
0.1mg/m3
but less
than
0.5mg/m3
Fail* -
greater than
0.5mg/m3
but less than
1.0mg/m3
Fail* -
greater
than
1.0mg/m3

17
The F2187 Draeger Tube Tip Cutter is an optional extra not provided with the F6001 as standard and
is especially designed for cutting the ends of the tube. It has been designed to prevent glass from
falling out of the opener by accident. The reservoir for the broken-off tips is easy to empty.
1. Place the end of the
tube between the 3
blades, and turn to
score the end.
2. Push the tube at an
angle to break the tip.
3. Repeat steps 1 and 2
with the other end of the
tube
Using the tube tip cutter with the Draeger oil tube
1. Using the Tube Tip Cutter,
place the ampoule section in the
platform at the bottom. Note:
Make sure the tube is against
the back wall of the cutter. Line
up the black dot nearest the end
of the tube with dot on the
cutter.
2. With one hand holding the
cutter, the other holding the
tube and with your thumb
against the base of the cutter,
apply pressure to the tube,
this should break the inner
tube.
3. Place your used detector
tubes in a safe container
until they can be disposed of
properly as “sharps” or
glass.
Each pack of tubes has its own instruction leaflet but the following notes should help you take
readings after the tests have been completed.
Each tube has an expiry date which is located on the back of its storage box.

18
Oil (6728371) -
REQUIREMENT
-
FOR BREATHING-AIR STANDARD EN12021 THE AIR SHOULD HAVE A
MAXIMUM OIL CONTENT OF 0.5 MG/M³ AND SHOULD BE WITHOUT
SIGNIFICANT ODOUR OR TASTE.
FOR HTM02-01 THE AIR SHOULD HAVE A MAXIMUM OIL CONTENT OF
0.1 MG/M3
Ensure the oil tube is kept vertical throughout this process.
Satisfactory test:
-
The white crystals will turn translucent and show at worst a slight discoloration.
Failed test:
-
(Mineral oil) - The white crystals will show a light brown or darker
discoloration.
-
(Synthetic oil) - The white crystals will show a yellow discoloration [Note: best
seen by comparing with an unused tube].
Nitrous Fumes (NOx) (810661)
REQUIREMENT
-
NOT REQUIRED AS A STANDARD TEST FOR BREATHING-AIR BUT
MAXIMUM READING OF 2 PPM FOR HTM02-01
The media in the detector tube will discolour to show the presence of nitrous fumes. The total length of the
discoloration is the measure of concentration read directly from the 0.2-6ppm scale in parts per million.

19
Sulphur Dioxide (SO2) (67 28491)
REQUIREMENT
-
NOT REQUIRED AS A STANDARD TEST FOR BREATHING-AIR BUT MAXIMUM
READING OF 1 PPM FOR HTM02-01.
The media in the detector tube will change from grey blue to white to show the presence of sulphur dioxide. The
total length of the white section is the measure of concentration read directly from the 1-25ppm scale in parts
per million.
Polytest (CH 28401)
REQUIREMENT
-
NOT REQUIRED AS A STANDARD TEST FOR BREATHING-AIR BUT FOR HTM02-
01 - NO DISCOLORATION.
The media in the detector tube will discolour to provide qualitative determination of easily oxidizable
substances in air. Refer to Polytest data sheets for more specific information. If discoloration occurs further
investigation will be required to determine the source of the contamination.
Disposal of Draeger-Tubes
When Draeger tubes have been used, or unopened tubes have exceeded their expiry date, they should
be disposed of using one of the following methods:
Used Tubes
Submerge the tube(s) in a beaker or metal container filled with water and allow to soak for 24 hours.
Treat the residual water in accordance with local authority waste regulations (some tube aqueous
waste may require neutralisation prior to disposal). Place the tubes in a “sharps” or glass bin wearing
protective gloves and safety spectacles. Dispose of the bin via the company’s normal industrial waste
disposal method(s) i.e. landfill or incineration.
OR
Place the tubes in a “sharps” or glass bin wearing protective gloves and safety spectacles. Dispose of
the bin via the company’s normal hazardous waste disposal method(s) i.e. landfill or incineration.
This manual suits for next models
1
Table of contents
Other Factair Test Equipment manuals
Popular Test Equipment manuals by other brands

CDI
CDI 511-4017 Installation and troubleshooting guide

SIGLENT TECHNOLOGIES
SIGLENT TECHNOLOGIES SDS1000CFL Series Service manual

Agilent Technologies
Agilent Technologies N4413A user guide

TRAMEX
TRAMEX PROFESSIONAL PTM 2.0 quick start guide

Tektronix
Tektronix TCP0150 instruction manual

Nagman
Nagman 650-H manual