6.清洁与维护
6.1产品内部和外部清洁维护
清洁维护前,请务必断开电源。⽤温⽔和少量洗涤剂清洗内外壁。
不要使⽤研磨剂或酸性清洗剂或化学溶剂。
使⽤玻璃清洗剂清洗玻璃表⾯,并使⽤市售不锈钢清洗剂清洗不锈钢
表⾯。
不可以使⽤带磨损的清洁⼯具,否则会造成不锈钢表⾯划痕。
确保没有清洗⽔渗⼊电⽓组件或通⻛格栅。
不要损坏或拆下设备内部的铭牌。
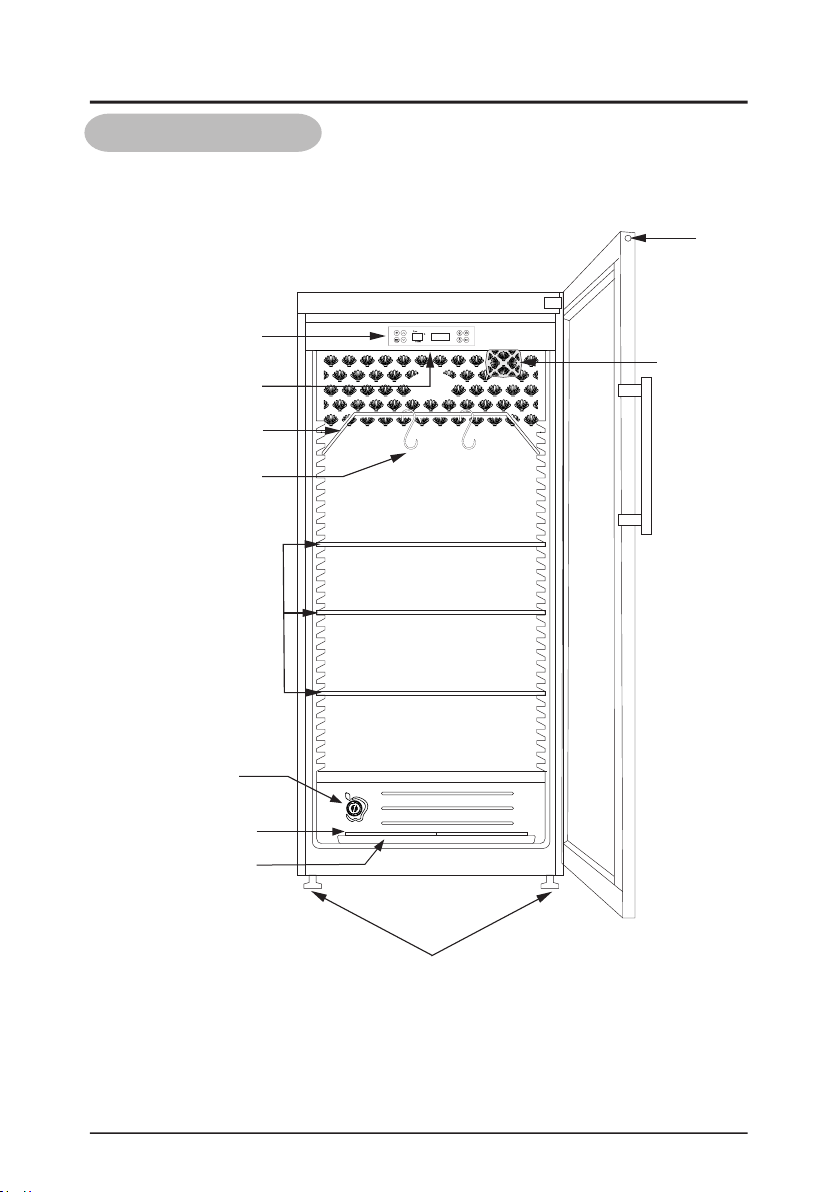
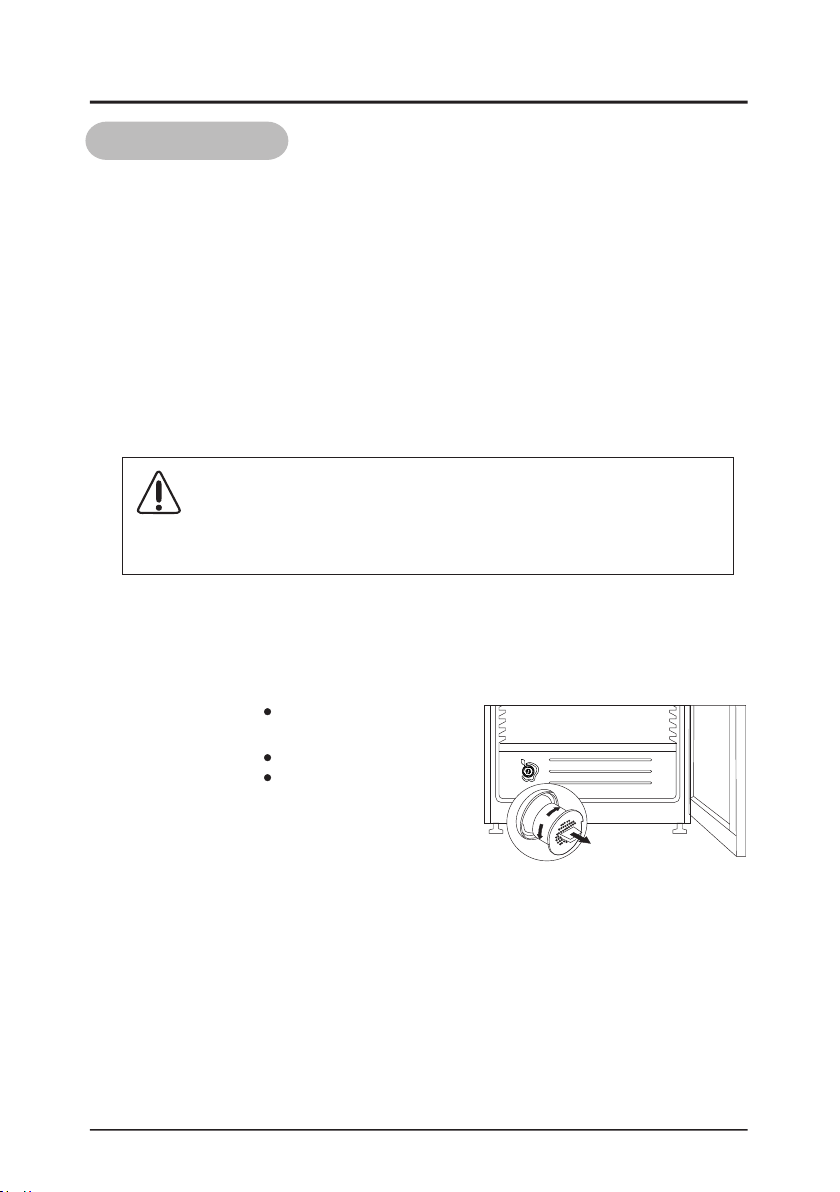
6.2更换活性碳
为获得最佳性能,活性炭过滤器建议每三个⽉更换⼀次活性炭。
更换过滤器:抓住过滤器的把⼿,向左或向右转动90度,然后拆下。
插⼊过滤器:将把⼿垂直插⼊。
向左或向右转动
90度,直⾄卡⼊
到位。如图(F7)
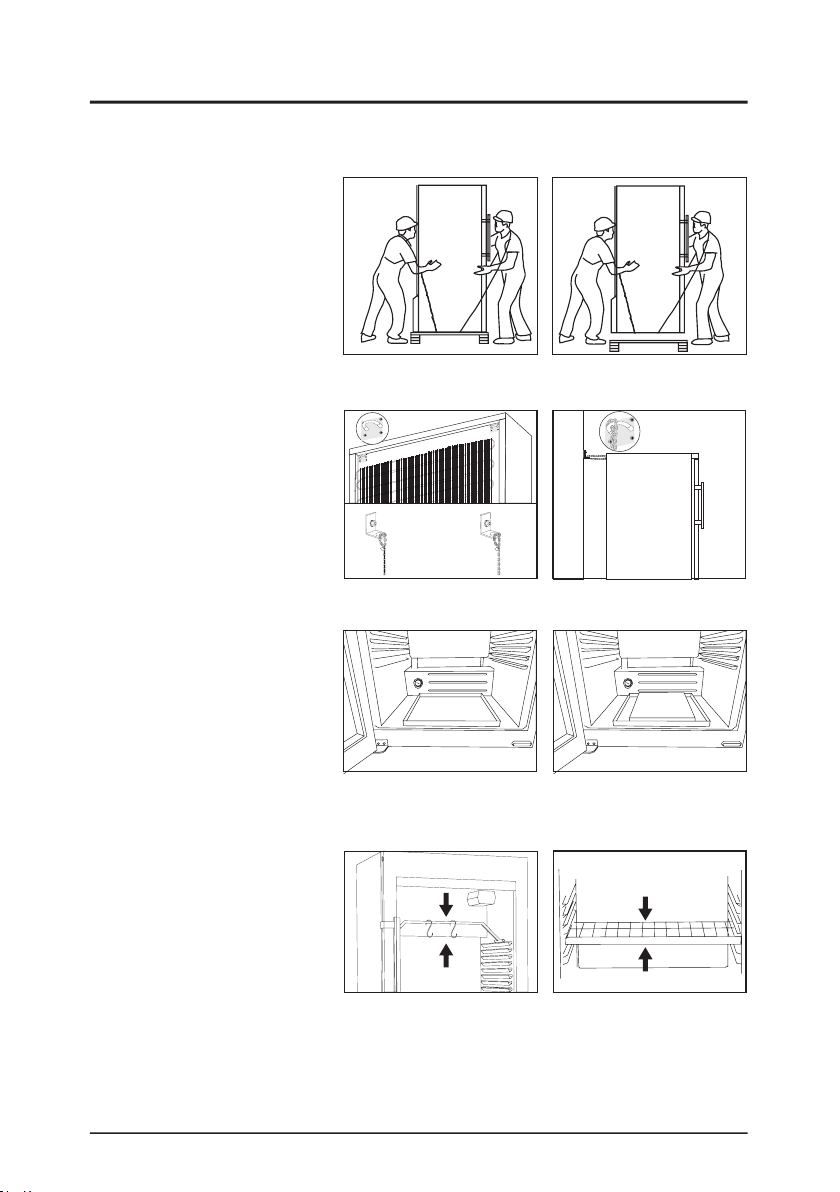
6.3冷凝器清洁
为了更好的维护机器的制冷效果,冷凝器必须定期清洁以防⽌灰尘
或者油脂的积累,每三个⽉⾄少清洁⼀次或⼯作环境⽽定。
⽤硬刷清除冷凝器和⻛扇上堆积的灰尘等脏物。
6.4⻔封条清洁
为确保机器更好的密封,⻔封条需要时常清洁。
6.5UVC灯应每年更换⼀次。
- 9 -
F7
Warning:Do not use any organic solvents (petrol, alcohol, etc ) for
cleaning the machine The case of the machine may be damaged
and explosive vapours may developed.
Do not use any sharp edged objects for cleaning, water After
cleaning the machine make sure that it will be dried completely.
Cleaning
•Before carrying out cleaning, remove the power plug. Clean the inside
and outer walls with lukewarm water and a little detergent.
•Do not use abrasive or acid cleaners or chemical solvents.
•Use a glass cleaner to clean the glass surfaces and a commercially
available stainless-steel cleaning agent for the stainless-steel surfaces.
•Do not use abrasive cleaning tools, otherwise it will cause scratches on
the stainless steel surface.
•Ensure that no cleaning water penetrates into the electrical components
or ventilation grill.
•Do not damage or remove the type plate on the inside of the appliance.
It is very important for servicing purposes.
vertical position
Turn left or right
90 degrees until it clicks
into place.. As fig(F7)
Maintenance:
Change the charcoal filter
We recommend that you replace the filter every three months for optimum
performance.
Replace the filters: Take the filter by the handle. Turn it 90° to the left or right
and remove.
Inserting the filter: Insert with the handle in a
Clean the condenser
In order to better maintain the refrigeration effect of the machine, the condenser
must be cleaned regularly in order to prevent the accumulation of dust or grease.
It is recommended cleaning the machine at least every three months or
depending on the working environment.
Use a hard brush to remove dust and other dirt accumulated on the condenser
and fan.
Clean the door seals
To ensure better machine sealing, the door seals need to be cleaned frequently.
UVC light should be replaced annually at least.