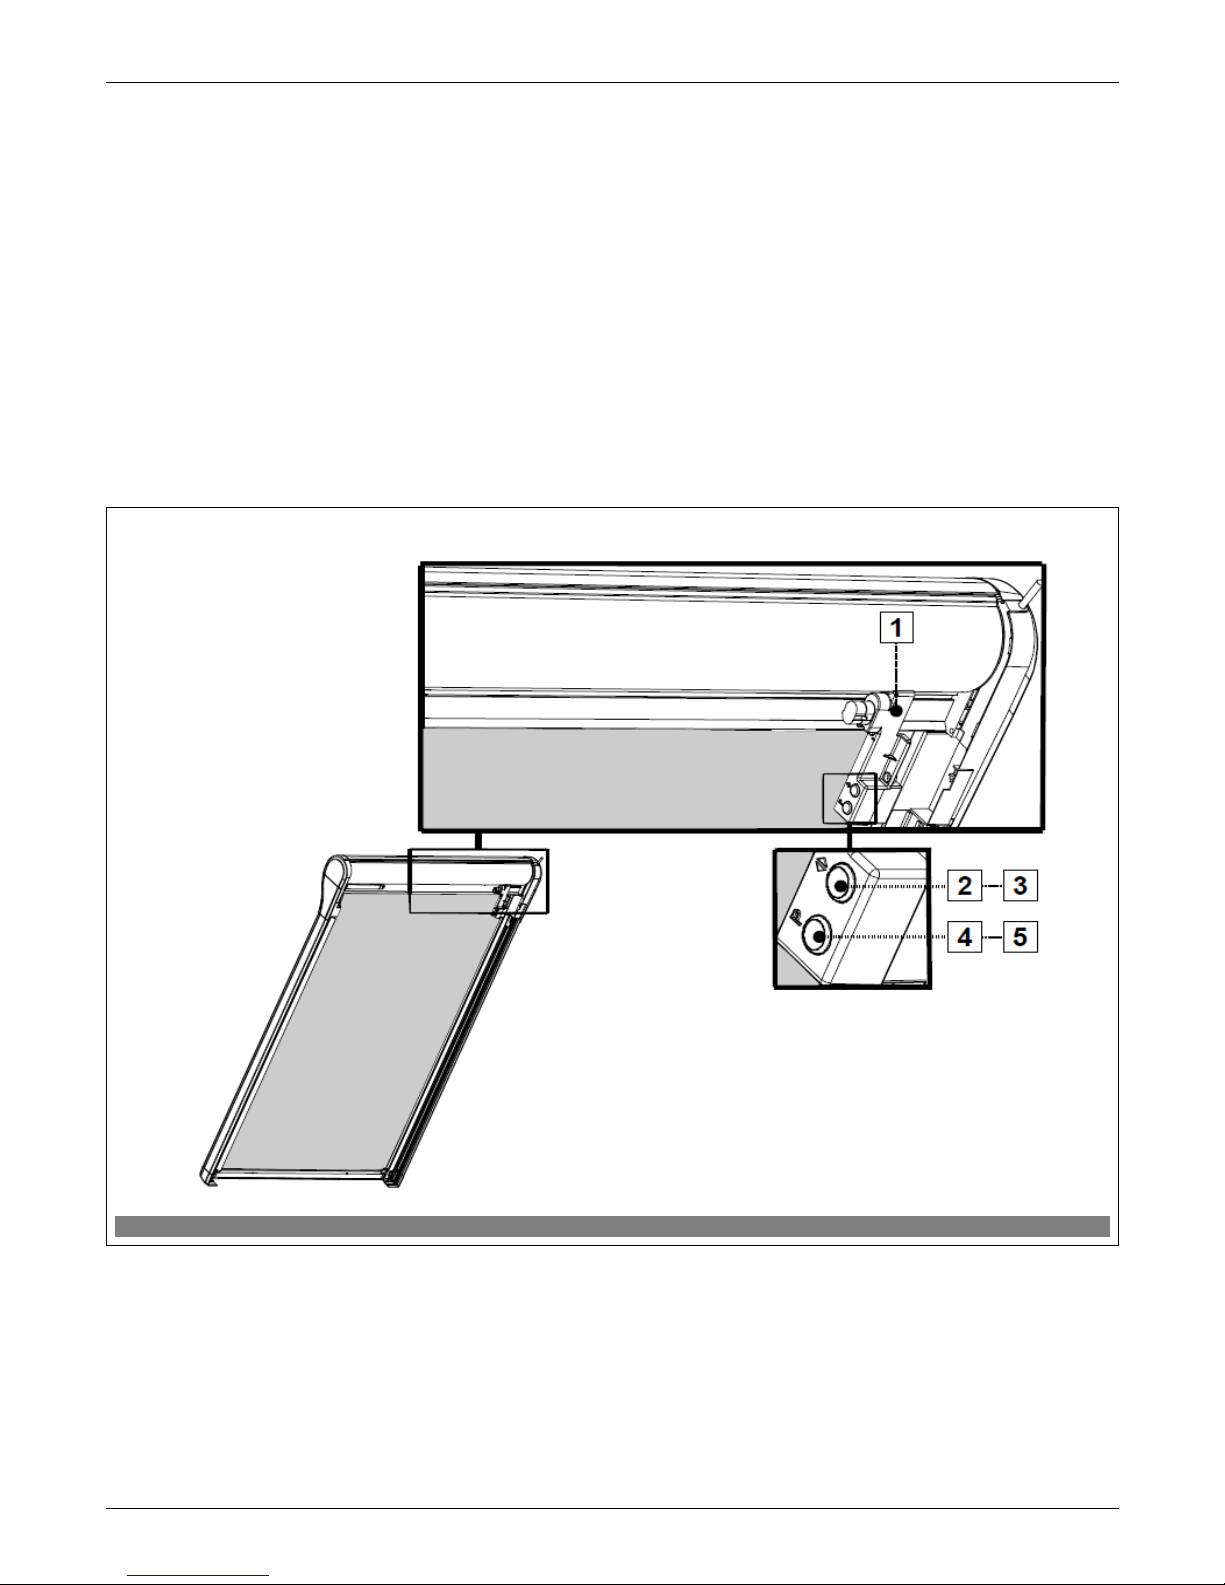
3. Programming t e appliance.
In order for the appliance to communicate with the Z-Wave network, it is essential to connect to the network and give
the appliance a special num er (Node ID). The appliance can e added to a network, as long as it does not elong to another one. In
order to add the appliance to a network, it should firstly e deleted from any network it elongs to, or restored to factory settings. This
can e done with the use of any primary controller. The network status diode indicates when the appliance is ready to e linked to the
network. This diode does not elong to any network.
In some cases (changing the location of an installation, or changing a damaged appliance), it is necessary to delete the
appliance from the controllers’ memory, as well as from the network in order to avoid errors and save the atteries of porta le
controllers.
Do not physically remove the appliance until it has been deleted from the controller’s memory. Improper usage can cause
delays when trying to use the appliance and will cause the batteries of portable controllers to run out quickly.
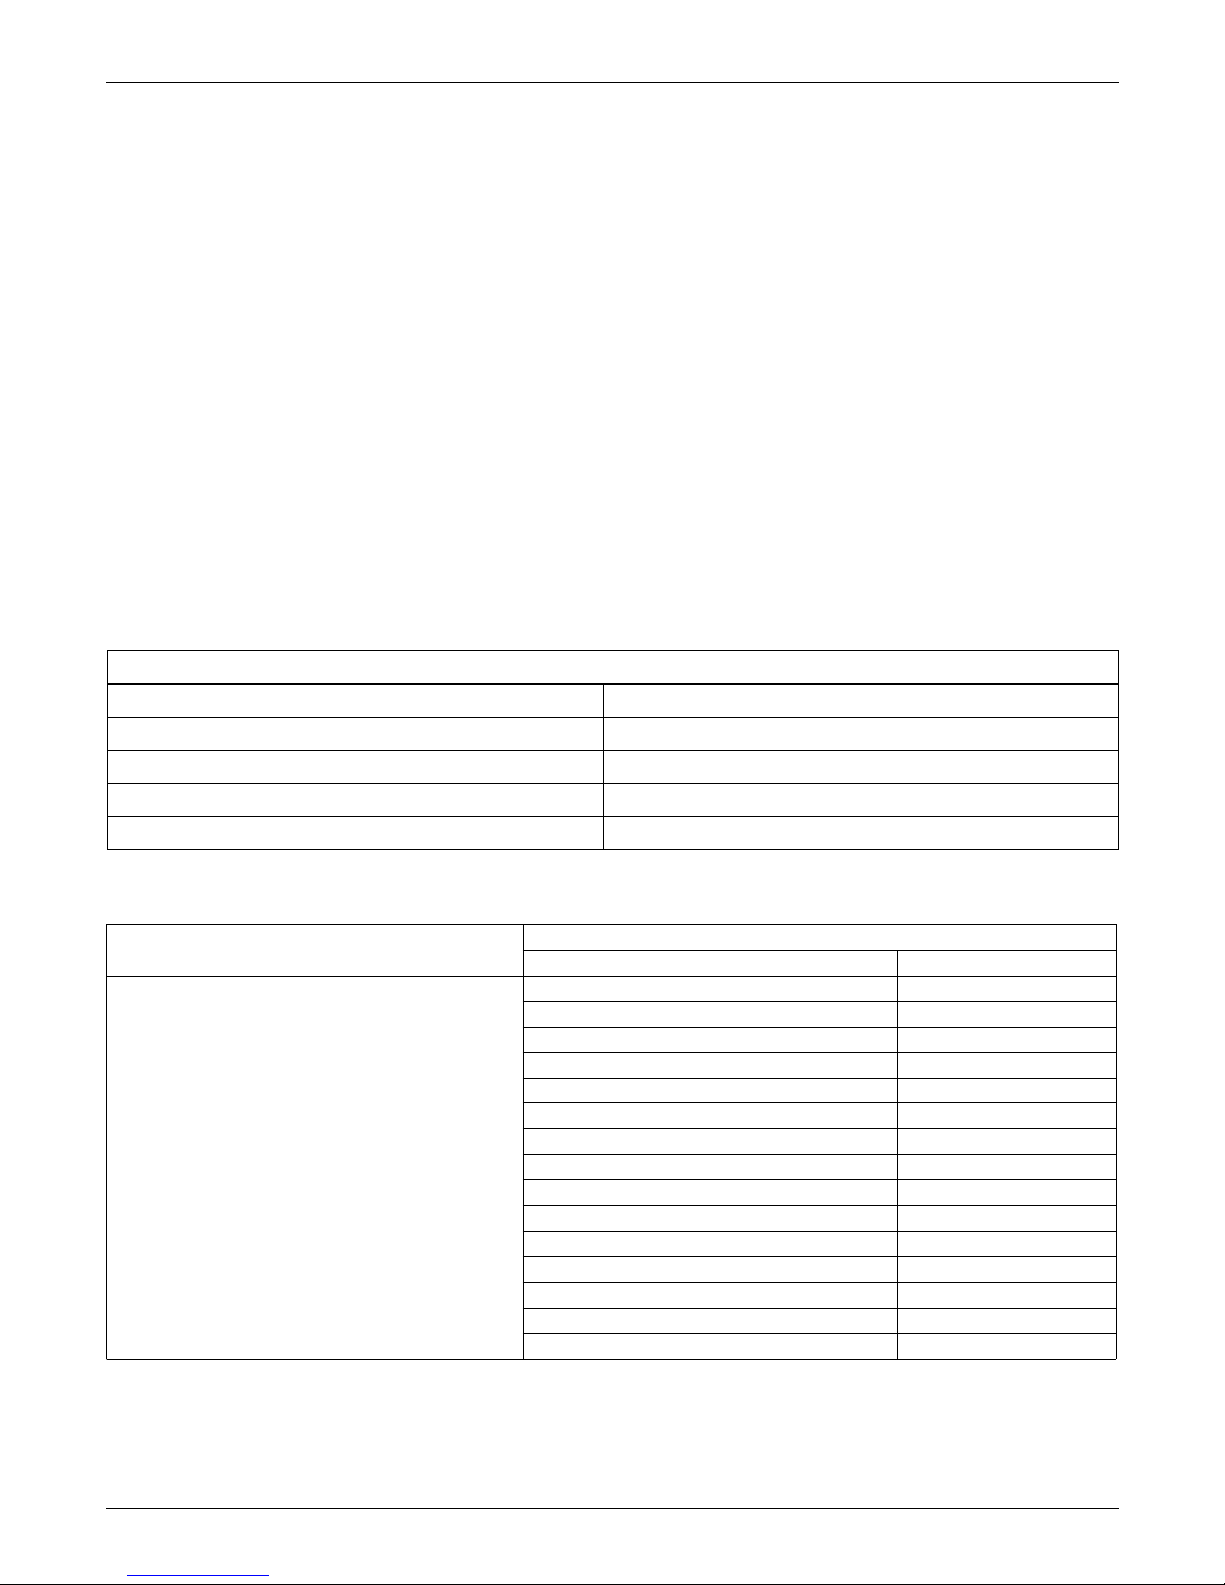
Function Description
Led indication
Motor operating status Z-Wave operating status
Autoinclusion & Include
(Add a new node)
Autoinclusion - This feature allow you to add hard to reach devices to Z-
Wave network. 3-times ON and OFF the power awning lind (OFF-ON-
OFF-ON-OFF-ON) causes the introduction of awning lind to
Autoinclusion mode. Please note that the procedure has een started the
time etween on and off can not exceed 20s. Autoinclusion mode is
activated for a maximum of 10 minutes. During this time, we can add an
awning to any Z-Wave controller running in the Include procedure.
-flashing for up to 10 minutes
Include - This function allow you to add awning lind to the network Z-
Wave. Follow the procedur adding device to the network Z-Wave according
to user manual supplied with the product. Then, press the programming
utton P on the awning lind for 1 second.
-
Before: Light ON
After: Light OFF
Association
(Add node to group)
Associate – function allow you to add awning lind to the group of
controller. Follow the procedur adding device to the selected group
according to user manual supplied with the product. Then, press the
programming utton P on the awning lind for the 1 second.
- -
Exclude (Remove an
existed node)
Exclude - This function allow you to remove awning lind from the
network Z-Wave. Follow the procedur removing device from the network Z-
Wave according to user manual supplied with the product. Then, press the
programming utton P on the awning lind for 1 second. Function removes
information only a out newtork Z-Wave.
-light
Delete
(Remove node from
group)
Delete – function allow you to remove awning lind from the group of
controller. Follow the procedur removing device from the selected group
according to user manual supplied with the product. Then, press the
programming utton P on the awning lind for the 1 second.
- -
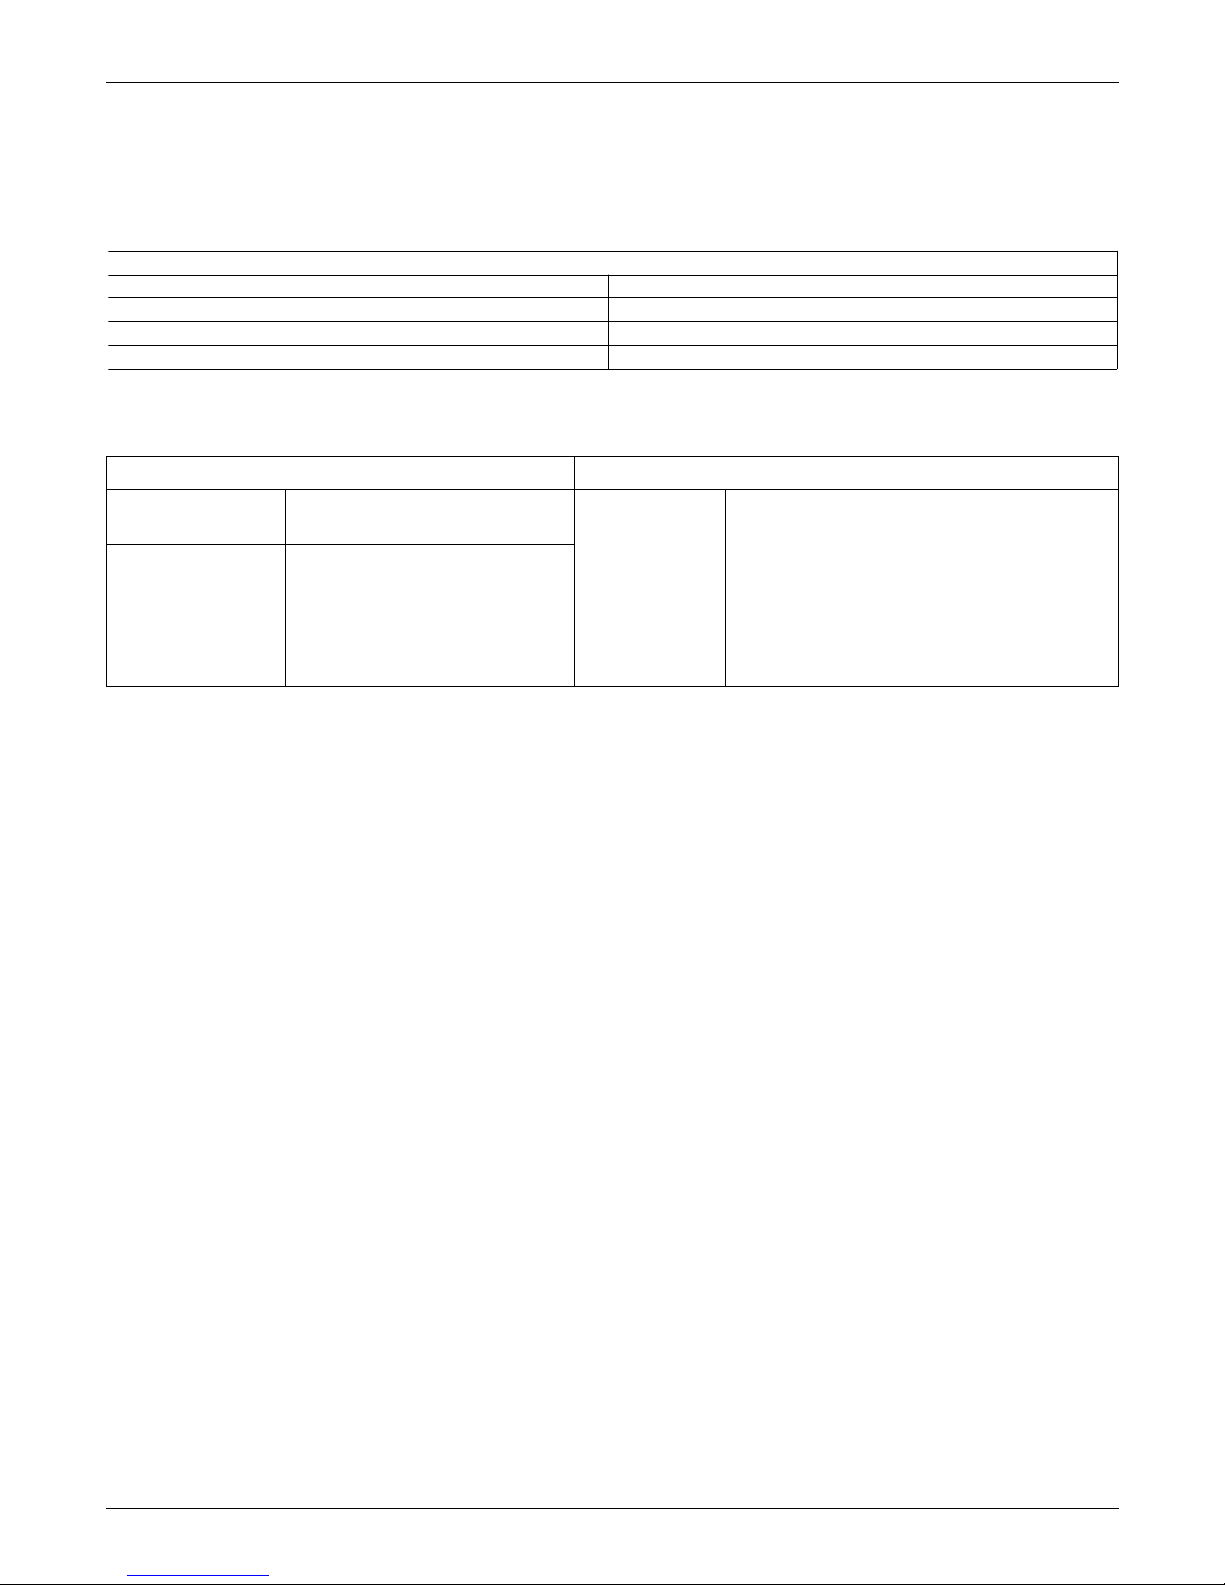
Factory Default Reset
Device Reset Locally – This function allows you to reset the Z-Wave
network without the use of Z-Wave controller. Press 5 times the
programming utton P fast, the awning lind was removed from the Z-Wave
network, restore the default parameters, name and locations.
Please use this procedure only when the network primary controller is
missing or otherwise inopera le.
-light
Parameter Reset Locally – Press fast 3 times P utton on the Awning
Blind. Function removes information a out parameters. -Flashing 5 times
Calibration Manual - Factory end positions
awning lind are cali rated.
Cali ration possi le without
necessity for prior recali ration of
the device. It is performed using
uttons availa le on the control
panel of the AMZ Solar awning
lind. Warning!!! For the proper
cali ration of the device requires two
end positions set correctly.
1. Press P utton and manual control
utton in the same time on the
control panel.
Flashing... -
2. Press and hold manual control
utton until reach first end position. Flashing... -
3. Press P utton to confirm first end
position.
Stop flashing and lit
cointinously within 2 sec. -
4. Led motor status linking again.
Press and hold manual control utton
until reach second end position.
Flashing... -
5. Press P utton to confirm second
end position.
Stop linking and lit
cointinously within 2 sec. -
02.03.18 NC97B-GB 4/8 ©2018, FAKRO