manuals.online logo
Brands
  1. Home
  2. •
  3. Brands
  4. •
  5. Falcon
  6. •
  7. Grill
  8. •
  9. Falcon G2625 User manual

Falcon G2625 User manual

T100565 Ref. 7
G2625, G2925, G21225
G21525 and G21825 CHARGRILLS
G2625B, G2925B, G21225B
G21525B and G21825B CHARGRILLS
USERS INSTRUCTIONS
SECTION 1 - GENERAL DESCRIPTION
SECTION 2 - LIGHTING and OPERATIONS
SECTION 3 - COOKING HINTS
SECTION 4 - CLEANING and MAINTENANCE
These appliances have been CE-marke on the basis of compliance with the Gas Appliance Directive, for the
Countries, Gas Types an Pressures as state on the Data Plate.
These appliances MUST BE installe by a qualifie person in compliance with the INSTALLATION AND
SERVICING INSTRUCTIONS an National Regulations in force at the time. Particular attention MUST be pai
to the following:
Gas Sa ety (Installation & Use) Regulations
Health and Sa ety at Work Act
Furthermore, if a nee arises to convert the appliance for use with another gas, a qualifie person must be
consulte . Those parts which have been protecte by the manufacturer MUST NOT be a juste by the User.
Users shoul be conversant with the appropriate provisions of the Fire Precautions Act an the requirements of
the Gas Safety Regulations. In particular, the nee for regular servicing by a competent person to ensure the
continue safe an efficient performance of the Appliance.
WARNING - TO PREVENT SHOCKS, ALL APPLIANCES WHETHER
GAS OR ELECTRIC, MUST BE EARTHED
Upon receipt of the User's Instruction manual, the installer shoul instruct the responsible person(s) of the
correct operation an maintenance of the Appliance.
This equipment is ONLY FOR PROFESSIONAL USE, an shall be operate by QUALIFIED persons. It is the
responsibility of the Supervisor or equivalent to ensure that users wear SUITABLE PROTECTIVE CLOTHING
an to raw attention to the fact that, some parts will, by necessity, become VERY HOT an will cause burns if
touche acci entally.
WEEE Directive Registration No. WEE/DC0059TT/PRO
At en of unit life, ispose of appliance an any replacement parts
in a safe manner, via a licence waste han ler.
Units are esigne to be ismantle easily an recycling of all
material is encourage whenever practicable.
Falcon Foodservice Equipment
HEAD OFFICE AND WORKS
Wallace View, Hillfoots Roa , Stirling FK9 5PY
SERVICELINE CONTACT -
PHONE - 01438 363 000 FAX - 01438 369 900
Locate ra iants
over lugs
OFF
PILOT
HIGH LOW
SECTION 1 - GENERAL DESCRIPTION
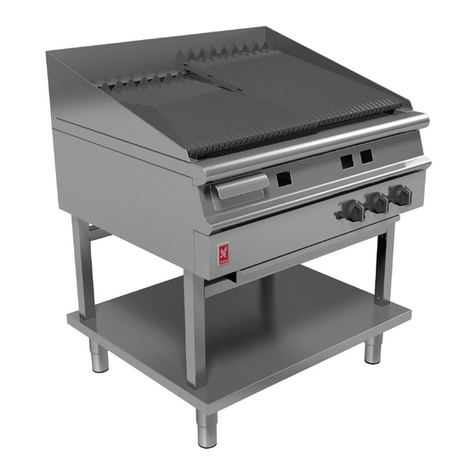
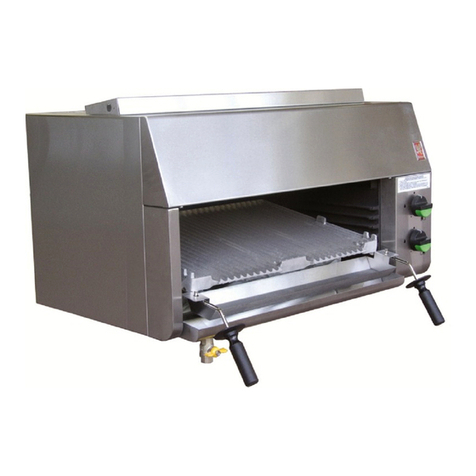
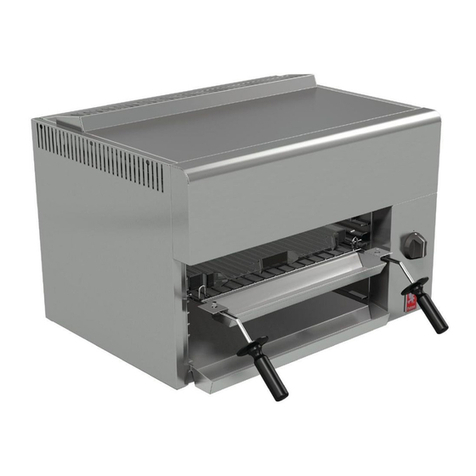
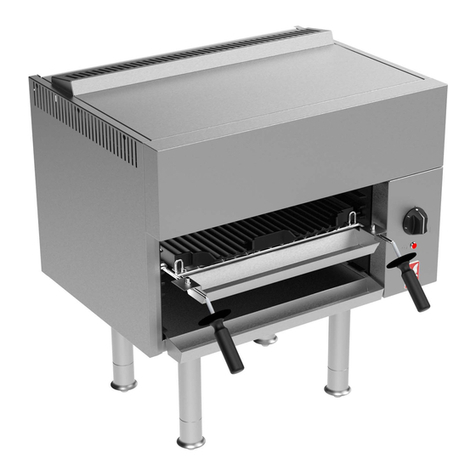
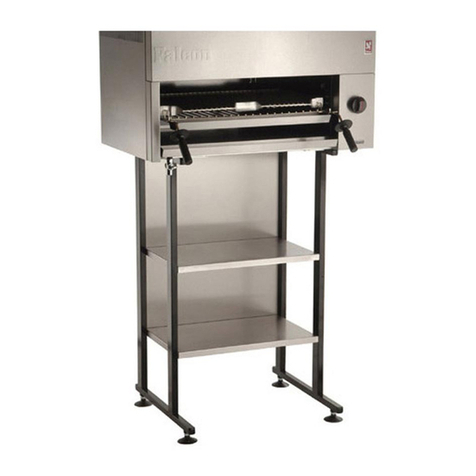
The chargrills, part of the Dominator Series, are
supplie on a stan . They can also be installe upon
a counter or table using a bench mounting kit
supplie by Falcon.
G2625, G2925, G21225, G21525 an G21825
chargrills are controlle by a combine on/off tap
an flame failure evice. Stan ar burner ignition is
by pilot, lit manually using a han hel gas lighter.
G2625B, G2925B, G21225B, G21525B an
G21825B chargrills are controlle by a combine
on/off tap an flame failure evice. Stan ar burner
ignition is by pilot, lit by piezo ignition. Back-up
ignition is by gas lighter.
The control tap(s) on all mo els have in ente
positions for HIGH (large flame) an LOW (small
flame).
Figure 1 - Radiant Positions
SECTION 2 - LIGHTING and OPERATIONS
2.1 SETTING THE RADIANTS
Before using unit each ay, ensure ra iants are set in
the proper positions as shown above. If ra iants are
not in position shown, bran ing iron temperatures will
not be sprea evenly over cooking area. To reposition
a ra iant, simply remove irons an a just to ensure
ra iants are positione correctly. See Figure 1.
2.2 BRANDING IRONS
Bran er bars are fitte in sets of six (600mm),
nine (900mm), twelve (1200mm), fifteen (1500mm)
an eightteen (1800mm).
Bars have integral rain channels on both si es an
are reversible. Lifting tool is supplie to reverse bars if
require .
2.3 GRIDDLE PLATE ACCESSORY
Ensure plate is locate in position before lighting.
The plate may require to be oile before use with
some foo items.
The unit has been teste to ensure optimum safety
an performance is achieve using just one gri le
plate. As with all equipment, optimum performance
will epen upon foo type, quality an quantity with
cooking times a juste to suit.
2.4 LIGHTING THE BURNERS
2.4.1 Manual Ignition o Pilot (All Models)
See Figures 2, 3, 4, 5, 6 an 7. Procee as follows:
a) Push tap in an turn anti-clockwise to pilot position.
b) Hol tap fully in. Insert han -hel gas lighter in hole
relative to tap being operate . Repeat proce ure
until pilot flame ignites.
c) When pilot is lit, continue to hol tap fully in for
20 secon s before release. If pilot goes out,
wait 3 minutes an repeat from (b).
) Repeat for remaining burners using other ports an
respective gas taps.
2.4.2 G2625, G2925, G21225, G21525,
G21825 "B" Models - Piezo Ignition
a) Push tap in an turn anti-clockwise to pilot position.
b) Hol tap fully in an press igniter button.
c) Observe, through the slots, that pilot is lit.
) If not, press ignition button repeate ly until pilot
oes light.
e) When pilot is lit, continue to hol tap fully in for
20 secon s before release. If pilot goes out,
wait 3 minutes an repeat from (b).
f) Repeat for remaining burners using other ports an
respective gas taps.
If piezo igniter is non-functional, then back up ignition
is achieve by manual ignition (See 2.4.1).
Figure 2 - Control Knob Details
2.4.3 Lighting o Main Burner
a) When pilot is establishe , push tap in an turn
anti-clockwise to HIGH position: (large symbol) to
light burner.
b) The tap can be a juste between HIGH an LOW
epen ing upon requirements.
If a burner extinguishes intentionally or otherwise,
NO ATTEMPT to re-light it shoul be ma e until at
least 3 minutes have elapse .
2.5 TURNING THE BURNER OFF
Refer to Figure 2. Procee as follows -
For Short Periods
To turn off burner leaving pilot lit, push in knob an
turn it clockwise to pilot position.
For Long Periods e.g. Overnight
To turn off burner an pilot, push in knob an turn
clockwise to OFF position.
Note
Every turn of the tap has to be prece e by control
being pushe in.
Sa ety Precautions
A stopcock must be fitte in pipe which supplies gas
to appliance. The user must be familiar with the
location an operation of this to enable gas to be
turne OFF in an emergency.
LH lighting hole RH lighting holeCentre lighting hole
LH control RH controlCentre control
LH lighting hole RH lighting hole
LH control RH control
enotes spark ignition button (B mo els only)enotes spark ignition button (B mo els only)
LH lighting hole
LH outer lighting hole
RH lighting hole
RH outer lighting hole
LH outer control
LH control
RH control
RH outer control
LH lighting hole
Centre lighting holeLH outer lighting hole
RH lighting hole
RH outer lighting hole
LH outer control
LH control Centre control
RH control
RH outer control
LH lighting hole LH centre lighting hole
RH Centre lighting hole
LH outer lighting hole
RH lighting hole
RH outer lighting hole
LH outer control RH outer control
LH centre control RH centre control
LH control RH control
enotes spark ignition button (B mo els only) enotes spark ignition button (B mo els only)
enotes spark ignition button (B mo els only)enotes spark ignition button (B mo els only)
enotes spark ignition button (B mo els only)
Figure 3 - G2625 Panel Layout Figure 4 - G2925 Panel Layout
Figure 5 - G21225 Panel Layout
Figure 6 - G21525 Panel Layout
Figure 7 - G21825 Panel Layout
Beef
APPROXIMATE
WEIGHT TIME IN
MINUTES
Sirloin Steak 150g 7
Fillet Steak 150g 8
Rump Steak 150g 8-9
T-Bone Steak 400g 15
Lamb
APPROXIMATE
WEIGHT TIME IN
MINUTES
Loin Chop 140g 12
Noisettes 80g 4-5
Fillet 110g 5-6
Cutlet 110g 8
Pork
APPROXIMATE
WEIGHT TIME IN
MINUTES
Chop 160g 14
Gammon Steak 150g 8-9
Bacon Rasher 30g 2
Chicken
APPROXIMATE
WEIGHT TIME IN
MINUTES
Half Poussin 120g 18 - 20
Supreme (off the bone) 145g 10
Leg (off the bone) 110g 8-9
Offal
APPROXIMATE
WEIGHT TIME IN
MINUTES
Lamb's Liver 80g 3-4
Lamb's Ki ney 70g 5-6
Fish
APPROXIMATE
WEIGHT TIME IN
MINUTES
Salmon Steak 150g 8
Rainbow Trout 180g 8
Halibut Steak 170g 9
Monkfish Tail 150g 8
Miscellaneous
APPROXIMATE
WEIGHT TIME IN
MINUTES
Burgers 100g 9
Kebabs 150g 8
Mushrooms 20g 3
Quarter Peppers 30g 4-5
SECTION 3 - COOKING HINTS
When cooking, the operator has three options which
can effect the cooking performance of the foo .
These are:-
Temperature Setting
HIGH (maximum power) to LOW (minimum power)
Position o Branding Bars
The rear of the bars can be set low or can be raise to
rest on le ge locate approximately 50mm above
low position.
Branding Pattern Design
Both si es have a continuous bar with a bran ing
esign of approximately 2mm wi e.
These three options are very much base on
personal preference.
The cooking chart that follows shoul be consulte as
a gui e only. Timings will vary ue to a number of
variances, these inclu e:-
Cut of meat, size an weight of portion, fat content of
foo , foo temperature, temperature setting an
personal opinion.
When bar height has been eci e , these can be
safely move by using grip tool provi e . It is goo
practice to locate bars at preferre position before
lighting burners. This will avoi them having to be
move when they are extremely hot.
The cooler area at the front is an i eal resting place
for foo to be hel prior to serving.
This section is cool enough to arrest the cooking
process yet hot enough to keep foo palatable.
It is always best to preheat bars using HIGH flame
(maximum) setting for 30 minutes. Once heate ,
controls may be turne own if preferre .
We recommen cooking the majority of foo stuff at
HIGH flame setting in low bran ing bar position.
During quiet perio s, unit can be turne own to LOW
flame or pilot settings.
Chargrilling is a ry metho of cooking.
Due to excessive ry heat, certain types of foo are
particularly suitable for chargrilling. Some foo stuffs
may benefit from being marinate prior to being
cooke . Some form of lubrication is require as the
majority of foo will stick to the bran ing bars.
There are TWO choices:-
Lightly oil bars
or
lightly oil the oodstu .
The ra iant system eliminates unnecessary emission
of smoke. However, some users may prefer to create
a
"front of house"
theatre effect. This can be
achieve by using a little extra oil or marina e.
However such a practice is iscourage , foo cooke
using this metho with extra flames will look burne . It
will also have an unpleasant aci ic taste.
Description No. Off
Gri Bars (G2625/G2625B) 6
Gri Bars (G2925/G2925B) 9
Gri Bars (G21225/G21225B) 12
Gri Bars (G21525/G21525B) 15
Gri Bars (G21825/G21825B) 18
Ra iants (G2625/G2625B) 4
Ra iants (G2925/G2925B) 6
Ra iants (G21225/G21225B) 8
Ra iants (G21525/G21525B) 10
Ra iants (G21825/G21825B) 12
Splash Guar 1
SECTION 4 - CLEANING and MAINTENANCE
Dismantle, clean an re-assemble as follows -
Turn unit OFF an allow to cool.
Remove the following components in this or er,
These may now be cleane in a sink.
Facia, ials, han les, flue, splashback an si es
must also be cleane at regular intervals.
1. Turn unit OFF an allow to cool own.
2. When col , remove bran er bars. Also remove
gri le plate if fitte .
3. Remove excess burnt-on foo particles using
scraper supplie .
4. Remove any remaining ebris from grooves using
a amp cloth.
5. Dry thoroughly an brush lightly with vegetable oil
to prevent rusting.
6. Remove metal surroun . This can be washe
using hot soapy water an a scouring pa .
7. Remove pyrami ra iants. Clean in sink as Item 6.
8. Remove jug an front rip tray an wash in sink.
9. The burners can be cleane by wiping them with a
amp cloth.
10. The internal area may require occasional cleaning
using a chemical spray. If so, spray affecte area
an leave for recommen e uration.
11. Clean away chemical cleaner an ebris using a
amp cloth.
12. Drip tray can now be remove by pulling it
forwar s. Remove foil. Wash rip tray in sink.
Dry thoroughly, re-line with foil an replace tray.
SPARES
When or ering spares, please quote the following
information:-
Appliance type
Serial Number, Gas Type
This information can be foun on the ata plate
locate at rear of unit. An appliance i entity label is
provi e on front frame.

Other manuals for G2625

2

This manual suits for next models

9

Other Falcon Grill manuals

Falcon E2522 User manual

Falcon

Falcon E2522 User manual

Falcon STEAKHOUSE PLUS G1528 User manual

Falcon

Falcon STEAKHOUSE PLUS G1528 User manual

Falcon G3425 User manual

Falcon

Falcon G3425 User manual

Falcon G2625 User manual

Falcon

Falcon G2625 User manual

Falcon G2522 User manual

Falcon

Falcon G2522 User manual

Falcon G350/10 Manual

Falcon

Falcon G350/10 Manual

Falcon G2522 User guide

Falcon

Falcon G2522 User guide

Falcon Dominator Plus E3625 User guide

Falcon

Falcon Dominator Plus E3625 User guide

Falcon DOMINATOR PLUS G3512 User manual

Falcon

Falcon DOMINATOR PLUS G3512 User manual

Falcon E9460 Manual

Falcon

Falcon E9460 Manual

Falcon Elan U109645 - 02 Installation and maintenance instructions

Falcon

Falcon Elan U109645 - 02 Installation and maintenance instructions

Falcon G2522 User manual

Falcon

Falcon G2522 User manual

Falcon G1532 User guide

Falcon

Falcon G1532 User guide

Falcon G1532 User guide

Falcon

Falcon G1532 User guide

Falcon DOMINATORPLUS E3512 User guide

Falcon

Falcon DOMINATORPLUS E3512 User guide

Falcon G350/9 User manual

Falcon

Falcon G350/9 User manual

Falcon G2522 User guide

Falcon

Falcon G2522 User guide

Falcon G2625 User manual

Falcon

Falcon G2625 User manual

Falcon STEAKHOUSE PLUS G1518 User guide

Falcon

Falcon STEAKHOUSE PLUS G1518 User guide

Falcon G350/9 User guide

Falcon

Falcon G350/9 User guide

Falcon SREAKHOUSE PLUS G1518 User guide

Falcon

Falcon SREAKHOUSE PLUS G1518 User guide

Falcon DOMINATORPLUS E3512 User guide

Falcon

Falcon DOMINATORPLUS E3512 User guide

Falcon E600 Manual

Falcon

Falcon E600 Manual

Falcon G2522 User manual

Falcon

Falcon G2522 User manual

Popular Grill manuals by other brands

DS Produkte Z 05599 instruction manual

DS Produkte

DS Produkte Z 05599 instruction manual

Onward ANSI Z28.58a-2006 / CSA 1.6a-2006 owner's manual

Onward

Onward ANSI Z28.58a-2006 / CSA 1.6a-2006 owner's manual

Livoo DOC272 instruction manual

Livoo

Livoo DOC272 instruction manual

Adler Europe AD 3051 user manual

Adler Europe

Adler Europe AD 3051 user manual

Wolf IG15/S Use & care guide

Wolf

Wolf IG15/S Use & care guide

Masterbuilt MB20042119 manual

Masterbuilt

Masterbuilt MB20042119 manual

HAPPY LIVING G9206A-SB-02 owner's manual

HAPPY LIVING

HAPPY LIVING G9206A-SB-02 owner's manual

Smoke hollow 7000CGS Assembly & operation

Smoke hollow

Smoke hollow 7000CGS Assembly & operation

Broil King 9866-44 Assembly manual

Broil King

Broil King 9866-44 Assembly manual

Mak Grills EP-380-1G owner's manual

Mak Grills

Mak Grills EP-380-1G owner's manual

Tesco KS16013 Assembly instructions

Tesco

Tesco KS16013 Assembly instructions

Perel BB100112 user manual

Perel

Perel BB100112 user manual

Toya 99641 manual

Toya

Toya 99641 manual

Char-Broil 2600 Assembly instructions

Char-Broil

Char-Broil 2600 Assembly instructions

Fiesta EZT40040-P407 Assembly manual

Fiesta

Fiesta EZT40040-P407 Assembly manual

Grill Zone SRGG21201 user manual

Grill Zone

Grill Zone SRGG21201 user manual

Kingsford Bandit CG2065301-KF owner's manual

Kingsford

Kingsford Bandit CG2065301-KF owner's manual

G21 California manual

G21

G21 California manual

manuals.online logo
manuals.online logoBrands
  • About & Mission
  • Contact us
  • Privacy Policy
  • Terms and Conditions

Copyright 2025 Manuals.Online. All Rights Reserved.