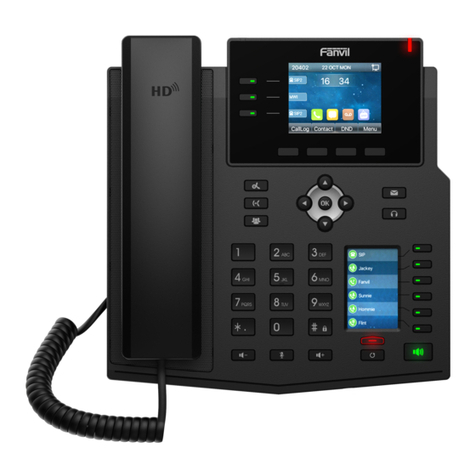
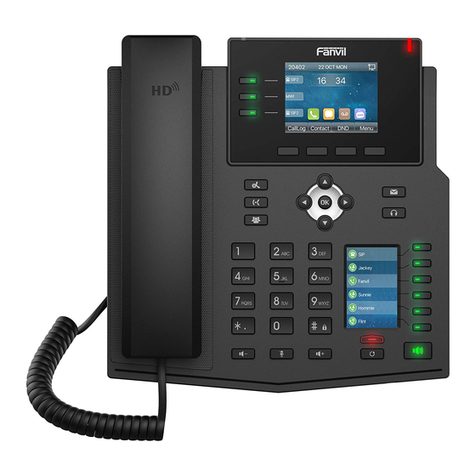
Fanvil X4 User manual

<文档标题>
User Manual
X4
1Using the Phone....................................................................................................................................
1.1 Making Phone Calls....................................................................................................................
1.1.1 Make / Receive Second Call.......................................................................................................
1.1.2 Call Transfer................................................................................................................................
1.2 Using Phonebook........................................................................................................................
1.3 Voice Message............................................................................................................................
1.4 Do-Not-Disturb...........................................................................................................................
1.5 Call Forward................................................................................................................................

<文档标题>
Keypad
Figure 6 - Vertical Scroll Bar
Using the Phone
Making Phone Calls
Default Line
The device provides 4 line services. If both lines are configured, user canmake or receive phone calls
on either line. If default line is configured by user, there will be a default line to be used for making
outgoing call which is indicated on the top left corner. To change the default line, user can press
left/right navigation buttons to switch between four lines. Enable or disable default line, usercan press

<文档标题>
[Menu] - > [Features] -> [Default Line] or configure from Web Interface (Web / Phone settings /
Features ).
Figure 32 - Default Line
Dialing Methods
User can dial a number by,
Entering the number directly
Selecting a phone number from phonebook contacts (Refer to 6.2 Using Phonebook)
Selecting a phone number from cloud phonebook contacts (Refer to 6.3 Using Cloud
Phonebook)
Selecting a phone number from call logs (Refer to 6.4 Call Logs)
Redialing the last dialed number
Dialing Number then Opening Audio
To make a phone call, user can firstly dial a number by one of the above methods. When the dialed
number is completed, user can press [Dial] button on the soft-menu, or press hand-free button to turn
on the speaker or headset, or lift the handset to call out with the current line, or user can press line
key(Configured by DSS Keys) to call out with specified line.

<文档标题>
Figure 33 - Dialing a Number before Audio Channel Opened
Opening Audio then Dialing the Number
Another alternative is the traditional wayto firstly open the audio channel by lifting the handset, turning
on the hands-free or headset by pressing hands-free button, or line key, and then dial the number
with one of the above methods. When number dialed completed, user can press [Dial] button or [OK]
button to call out, or the number will be dialed out automatically after timeout.
Figure 34 - Dial a Number after Audio Channel Opened
NOTICE! For some users who get used to dial a number immediately by pressing # key, the
user must login to the web to enable ‘Press "#" to invoke dialing’option in page [Line] -> [Dial
Plan] -> “Basic Settings” and apply it.

<文档标题>
Cancel Call
While calling the number, user can press [End] button or close the audio channel by put back the
handset or press the hands-free button to drop the call.
Figure 35 - Calling Remote Party
Answering Incoming Call
When there is an incoming call while the device is idle, user will see the following incoming call alerting
screen
Figure 36 - Incoming Call Screen
User can answer the call by lifting the handset, open headset or speaker phone by pressing the
handsfree button, or the [OK] / [Answer] button. To divert the incoming call, user should press [Divert]
button.

<文档标题>
To reject the incoming call, user should press [Reject] button.
Talking
When the call is connected, user will see a talking mode screen as the following figure,
Call Holding /Resuming
User can hold the remote party by pressing [Hold] button and the button will be changed to [Resume]
icon. User can press the [Resume] button to resume the call.
Figure 38 - Call Holding Screen
Call Ended
When user finished the call, user can put the handset back to the device to hang up the call or press
the hands-free button to close the audio channel to hang up.
Make / Receive Second Call
The device supports multiplex calls concurrently (up to 10). When there is already a call established,
user can still answer another incoming call on either lines or make a second call on either lines.

<文档标题>
Second Incoming Call
When there is another incoming call during talking a phone call, this call will be waiting for user to
answer it. User will see the call message in the middle of current screen. The device will not be ringing
but playing call waiting tone in the audio channel of the current call and the LED will be flashing in
green. User can accept or reject the call same as normal incoming call. When the waiting call is
answered, the first call will be put on hold automatically.
Figure 39 –Second Incoming Call Screen
Second Outgoing Call
To make a second call, user may press [XFER] / [Conf] button to make a new call with the default line
or press the line key to make new call with other line. Another alternative for making second call is to
pressing DSS Keys dial out from the configured Keys (BLF/Speed Dial). When user is making a
second call with the above methods, the first call could be place on hold manually first or will be put
on hold automatically at second dial.
Switching between Two Calls
When there are two calls established, user will see a dual calls screen as the following picture,

<文档标题>
Figure 40 - Dual Calls
User can press up/down navigation buttons to switch screen page, and switch call focus by pressing
[Hold] / [Resume] button.
Ending One Call
User may hang up the current talking call by closing the audio channel or press [End] button. The
device will return to single call mode in holding state.
Call Transfer
When the user is talking with a remote party and wish to transfer the call to another remote party,
there are two way to transfer the call, attended and unattended.
Attended Transfer
The attended call transfer is also known as the ‘polite mode’ which is to dial through the other remote
party, wait for the remote party to answer the call and then transfer the call.
This is the same procedure as making two concurrent calls. In the dual call mode, press the [XFER]
button to transfer the first party to the second one.
Unattended / Blind Transfer
Unattended transfer is also known as ‘Fire and Forget’ mode. Instead of connecting to the second
party first and confirming the second call is established, user press [XFER] button first then dial the
second party number. When the number is dialed, user can press[XFER] button again and the first
party will be transfer to the second.

<文档标题>
This is like helping the first party to dial to the second one. However, the transfer could be successful
if the second party answered it, or could be failed if the second party is busy or rejected it.
NOTICE! More advanced transfer configuration, please refer to 8.14 LINES / Dial Plan.
Using Phonebook
User can save contacts’ information in the phonebook and dial the contact’s phone number(s) from
the phonebook. To open the phonebook, user can press soft-menu button [Dir] in the default standby
screen or keypad.
By default the phonebook is empty, user may add contact(s) into the phonebook manually or from call
logs .
Figure 42 - Phonebook screen
NOTICE! The device can save up to total 500 contact records.

<文档标题>
Figure 43 - Phonebook is Empty
When there are contact records in the phonebook, the contactrecords will be arranged in the alphabet
order. User may browse the contacts with up/down navigation keys. User may fast scroll the contact
list by holding the up/down navigation keys. The record indicator tells user which contact is currently
focused. User may check the contact’s information by pressing [OK] button.
Figure 44 - Browsing Phonebook
Voice Message
If the service of the lines supports voice message feature, when the user is not available to answer
the call, the caller can leave a voice message on the server to the user. User will receive voice

<文档标题>
message notification from the server and device will prompt a voice message waiting icon on the
standby screen,
Figure 54 - New Voice Message Notification
To retrieve the voice messages, user must configure the voice message number first. Once the voice
message number is configured, user can retrieve the voice message of a line by pressing the [Dial]
button in the voice message screen.
When the device is in the default standby mode,
Click the [MWI] button.(As default , there is a configured MWI DSSKEY, You can also press
[Menu] / [Applications] / [Voice Massage] to enter MWI interface]))
Open voice message configuration interface, select the line to be configured with up/down
navigation keys.
Press [Edit] button to enable and edit the voice message number, when done,press [OK] / [Save]
button to save the configuration.

<文档标题>
Figure 55 - Voice Message Screen
Figure 56 - Configure the Voice Message Number
Do-Not-Disturb
User may enable Do-Not-Disturb (DND) feature on the device to reject incoming calls (including call
waiting). The DND can be enabled on line basis.
To quickly enable or disable the DND on all lines,
When the device is in the default standby mode,
Press [DND] button to enable DND on all line and icon will be displayed on the screen.

<文档标题>
Press [DND] button again to disable DND on all line and icon will be disappeared.
Figure 57 - DND Enabled on All Lines
If user wishes to enable or disable DND on a specific line, user could change the DND mode in DND
configurations.
Press soft-button [Menu] till you find the [Features] item.
Enter [Features] item till you find the [DND] item.
Enter DND edit page
Press left/right navigation key to change the DND mode or DND state on specific line. When
done, press [Save] button to save the changes.
User will see icon
Figure 58 - Configure DND on Line
‘
Do
Not
Disturb
’
against
the
enabled
line.

<文档标题>
Call Forward
Call forward is also known as ‘Call Divert’ which is to divert the incoming call to a specific number
based on the conditions and configurations. User can configure the call forward settings of each line.
There are three types,
Unconditional Call Forward –Forward any incoming call to the configured number.
Call Forward on Busy –When useris busy, the incoming call will beforwarded to the configured
number.
Call Forward on No Answer –When user does not answer theincoming call after theconfigured
delay time, the incoming call will be forwarded to the configured number.
To configure call forward, when the device is in the default standby mode, Press
soft-button [Menu] till you find the [Features] item.
Enter [Features] item till you find the [Call Forward] item.
Press [Call Forward] button to open call forward configuration screen, select the line to be
configured with up/down navigation keys.
Press [Enter] button to edit the call forward settings.
Select the call forward type with up/down navigation keys. Click [Enter] button to configure the
call forward number and delay time, if applicable.
Enable or Disable call forward with left/right navigation buttons against specific lines and types.
If select ‘Enable’, browse the setting parameters with up/down navigation keys and enter required
information. When done, press [Save] / [OK] button to save the changes.
Figure 61 - Select Line for Call Forward Configuration

<文档标题>
Figure 62 - Select Call Forward Type
Figure 63 - Activate Call Forward and configure Call Forward Number

<文档标题>
Table 11 - Keypad Icons
Redial
Handsfree (HF)
Phone lock=long-pressed key(#)
Mute microphone (during a Call)
+
Volume up
-
Volume down
Table 12 - Status Prompt and Notification Icons
Call out
Call in
Call hold
Network disconnected
Keypad locked
Missed calls
SMS
New voice message waiting
Do-Not-Disturb activated on phone

<文档标题>
Auto-answering activated
Call forward activated
Handsfree (HF) mode
headset (HP) mode
Handset (HS) mode
Microphone muted
Mixed type input
Lower Case input
Upper Case input
Numeric input
Other manuals for X4
1
Table of contents
Other Fanvil Telephone manuals

Fanvil
Fanvil C600 User manual

Fanvil
Fanvil H3 User manual

Fanvil
Fanvil X3 User manual

Fanvil
Fanvil X1SG User manual

Fanvil
Fanvil X4U User manual

Fanvil
Fanvil X1S User manual

Fanvil
Fanvil X3S Basic User manual

Fanvil
Fanvil X3 Assembly instructions

Fanvil
Fanvil X5U User manual

Fanvil
Fanvil X4U Reference manual