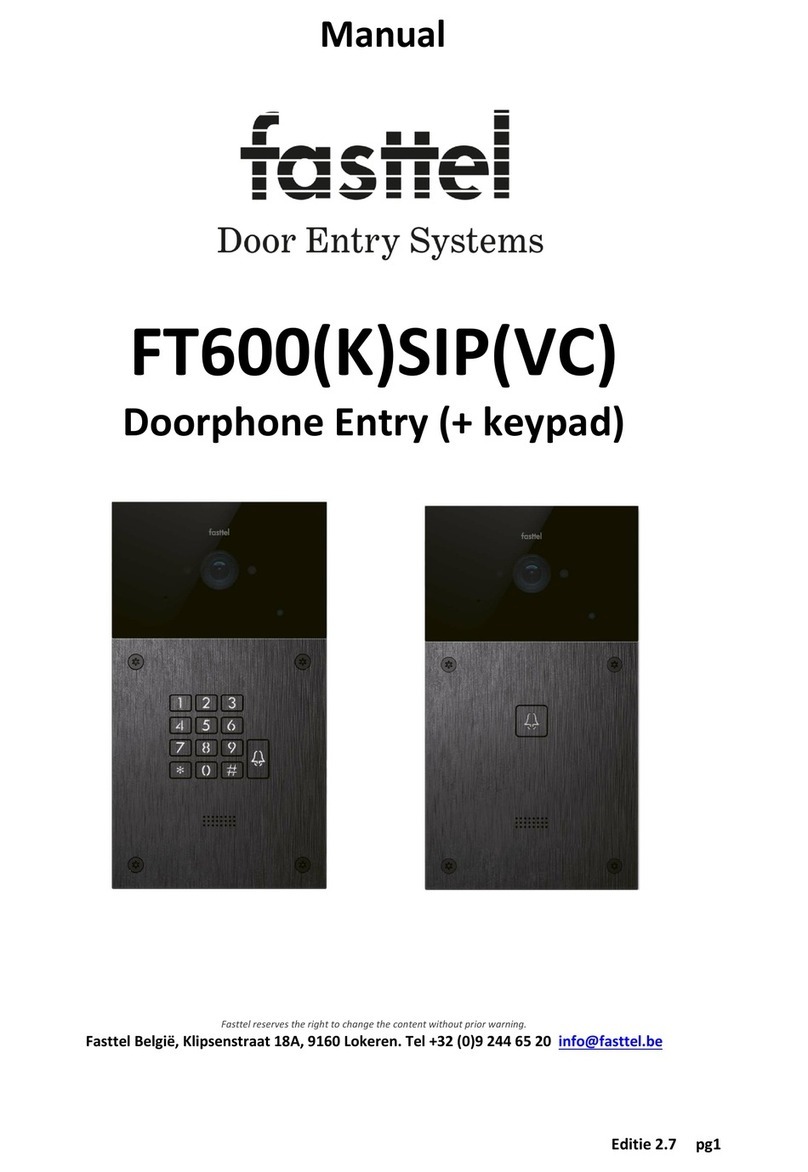
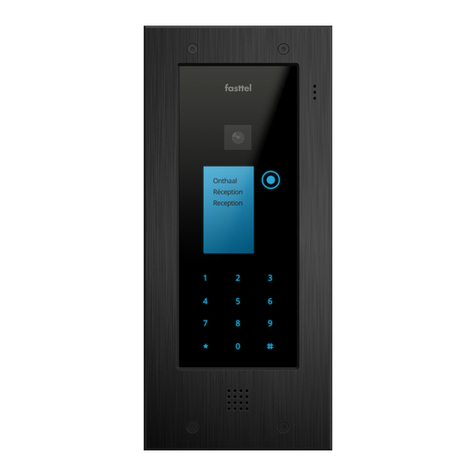
Fasttel FT600KSIP User manual

FT600KSIP FT600SIP
Version: 2.0 | Date: Okt. 2022

About This Manual
Thank you for choosing Fasttel FT600(K)SIP series door phone. This manual is
intended for the administrators who need to properly configure the door phone.
This manual applies to 220.78.103.1 version, and it provides all the
configurations for the functions and features of Fasttel door phone. Please visit
Fasttel web or consult technical support for any new information or latest
firmwares.
Connections:
Ethernet (POE): Ethernet (POE) connector which it can provide both power and
network connection.
12V/GND: External power supply terminal if POE connector is not available.
RS485-A/B: RS485 terminal.
WG_D0/WG_D1: Wiegand terminal.
DOORA/B: Trigger signal input terminal.
RelayA/B (NO/NC/COM): Relay control terminal.
Figure 1.2.1 Connector Introduction

Table of Contents
1. Product Overview...................................................................................... 6
2. Model Specification.................................................................................. 7
3. Introduction to Configuration Menu ....................................................... 8
4. Access the Device..................................................................................... 9
4.1. Obtain Device IP Address .................................................................. 9
4.2. Access the Device Setting on the Web Interface............................. 9
5. Language and Time Setting................................................................... 10
5.1. Language Setting.............................................................................. 10
5.2. Time Setting...................................................................................... 10
6. LED Setting .............................................................................................. 11
6.1. Infrared LED Setting ......................................................................... 11
6.2. LED Settings on Keypad................................................................... 12
7. Volume and Tone Configuration............................................................ 12
7.1. Volume Configuration ...................................................................... 12
7.1.1. Open Door Tone Configuration................................................ 14
7.1.2. Upload Tone Files ..................................................................... 14
8. Network Setting ...................................................................................... 15
8.1. Network Status ................................................................................. 15
8.2. Device Network Configuration......................................................... 16
8.3. Device Deployment in Network ....................................................... 17
8.4. Device Local RTP configuration ...................................................... 18
8.5. NAT Setting ....................................................................................... 18
8.6. SNMP Setting.................................................................................... 19
8.7. VLAN Setting..................................................................................... 20
8.8. TR069 Setting ................................................................................... 21
8.9. Device Web HTTP Setting................................................................ 22
9. Intercom Call ........................................................................................... 23
9.1. IP call & IP Call Configuration.......................................................... 23
9.2. SIP Call &SIP Call Configuration...................................................... 24
9.2.1. SIP Account Registration ......................................................... 24
9.2.2. SIP Server Configuration.......................................................... 25
9.2.3. Configure Outbound Proxy Server........................................... 26
9.2.4. Configure Data Transmission Type......................................... 27
9.3. Configure Calling Feature ................................................................ 27
9.3.1. DND............................................................................................ 28
9.3.2. Speed Dial Call.......................................................................... 29
9.3.3. Robin Call .................................................................................. 29
9.3.4. Web Call..................................................................................... 30
9.3.5. Dial Option................................................................................. 30

9.3.6. Auto Answer.............................................................................. 31
9.3.7. Multicast.................................................................................... 31
9.3.8. Configure Maximum Call Duration.......................................... 32
9.3.9. Maximum Dial Duration ........................................................... 33
9.3.10. Hang Up After Open Door ....................................................... 34
10. Audio& Video Codec Configuration ...................................................... 34
10.1. Audio Codec Configuration.............................................................. 34
10.2. Video Codec Configuration.............................................................. 35
10.3. Video Codec Configuration for IP Direct Calls ............................... 36
10.4. Configure DTMF Data Transmission............................................... 37
11. Relay Setting ........................................................................................... 37
11.1. Relay Switch Setting......................................................................... 37
11.2. Select Speed Dial triggered Relay ................................................... 39
11.3. Web Relay Setting............................................................................. 40
11.4. Configure White List for Door Relay................................................ 41
12. Door Access Schedule Management.................................................... 42
12.1. Configure Door Access Schedule ................................................... 42
12.1.1. Manage Relay Schedule.......................................................... 42
12.1.2. Create Door Access Schedule................................................ 43
12.2. Door Unlock Configuration .............................................................. 44
12.3. Configure Open Relay via HTTP for Door Unlock........................... 44
12.4. Configure Exit Button for Door Unlock............................................ 45
12.5. Configure PIN Code for Door Unlock .............................................. 46
12.6. Configure Public Code for Door Unlock.......................................... 46
12.6.1. Configure Private PIN Code on the Web Interface ............... 47
13. Security.................................................................................................... 48
13.1. Tamper Alarm Setting ...................................................................... 48
13.2. Client Certificate Setting.................................................................. 49
13.2.1. Configure Action of Input........................................................ 49
13.2.2. Web Server Certificate ............................................................ 50
13.2.3. Client Certificate...................................................................... 50
13.3. Security Notification Setting............................................................ 51
13.3.1. Email Notification Setting....................................................... 51
13.3.2. FTP Notification Setting ......................................................... 52
13.3.3. SIP Call Notification Setting ................................................... 53
13.3.4. Call Event Notification............................................................. 53
13.3.5. HTTP URL Notification Configuration.................................... 54
13.4. Security Action Configuration.......................................................... 54
13.4.1. Configure Action of Call.......................................................... 54
13.5. Voice Encryption............................................................................... 55
13.6. User Agent......................................................................................... 55
14. Monitor and Image.................................................................................. 56
14.1. RTSP Stream Monitoring.................................................................. 56
14.1.1. RTSP Basic Setting.................................................................. 56

14.1.2. RTSP Stream Setting............................................................... 57
14.2. MJPEG Image Capturing.................................................................. 58
14.2.1. NACK ........................................................................................ 59
14.3. ONVIF ................................................................................................ 60
14.4. Live Stream ....................................................................................... 61
15. Logs.......................................................................................................... 61
15.1. Call Logs............................................................................................ 61
15.2. Door Logs.......................................................................................... 62
16. Debug ....................................................................................................... 64
16.1. System Log ....................................................................................... 64
16.2. Remote Debug Server ...................................................................... 65
16.3. PCAP.................................................................................................. 65
17. Firmware Upgrade................................................................................... 67
18. Backup ..................................................................................................... 67
19. Auto-provisioning ................................................................................... 68
19.1. Provisioning Principle....................................................................... 68
19.2. Configuration Files for Auto-provisioning....................................... 69
19.3. AutoP Schedule ................................................................................ 70
19.4. PNP Configuration............................................................................ 70
19.5. Static Provisioning Configuration ................................................... 71
20. Integration with Third Party Device ...................................................... 73
20.1. Integration via Wiegand ................................................................... 73
20.2. Integration via HTTP API.................................................................. 74
20.3. Integration with Milestone ............................................................... 76
21. Password Modification .......................................................................... 76
21.1. Modifying Device Web Interface Password ................................... 76
21.2. Configure Web Interface Automatic Logout .................................. 77
22. System Reboot&Reset ........................................................................... 78
22.1. Reboot ............................................................................................... 78
22.2. Reset.................................................................................................. 78
23. Abbreviations .......................................................................................... 79
24. FAQ ........................................................................................................... 81
25. Contact us................................................................................................ 81

FT600(K)SIP Door Phone Administrator Guide
www.fasttel.com FT600(K)SIP
6
1.Product Overview
The security that comes with being able to control who comes into your
building along with the ability to verbally and visually confirm their identity is
immeasurable. Fasttel FT600(K)SIP is a SIP-compliant, hands-free and video
door phone. It can be connected with Fasttel indoor monitors for remote
access controlling and monitoring. Users can communicate with visitors via
audio and video calls, and unlock the door if they need. The door phone
enables you to easily monitor an entrance door or gate and gives you peace
of mind knowing that your facility is more secure.

FT600(K)SIP Door Phone Administrator Guide
www.fasttel.com FT600(K)SIP
7
2.Model Specification
Model
&
Feature
FT600(K)SIP
Button
Physical Numeric Keypad
Housing Material
Brushed black Aluminum/Glass
Camera
2 Mega pixels, automatic lighting
Relay In
2
Relay Out
2
RS485
√
PoE
√
RAM
128MB
ROM
16MB
Card Reader
no
IP Rating
IP65
IK Rating
X
Wall Mounting
√
Flush Mounting
√
Wall Mounting Dimension
216x116x36mm
Recess flush Mounting Dimension
202x102x31mm

FT600(K)SIP Door Phone Administrator Guide
www.fasttel.com FT600(K)SIP
8
3.Introduction to Configuration Menu
⚫Status: this section gives you basic information such as product
information, Network Information, and account information, etc.
⚫Intercom: this section covers RTSP, MJPEG, ONVIF, Live stream, access
codes
⚫Account: this section concerns SIP account, SIP server, proxy server,
transport protocol type, audio&video codec, DTMF, session timer, etc.
⚫Network: this section mainly deals with DHCP&Static IP setting, RTP port
setting, and device deployment, etc.
⚫Phone: this section covers Intercom settings, Call Log, etc.
⚫Upgrade: this section covers Firmware upgrade, device reset&reboot,
configuration file auto-provisioning, fault Diagnosis.
⚫Security: this section is for Password modification.
⚫Mode selection :
1. Discovery mode: It is a plug and play configuration mode. Fasttel devices
will configure themselves automatically when users power on the devices
and connect them to the network. It is a super time-saving mode and it will
greatly bring users convenience by reducing manual operations. This mode
requires no prior configurations previously by the administrator.
2. Cloud mode: Fasttel Cloud is an all-in-one management system. Fasttel
Cloud is a mobile service that allows audio, video, remote access control
between smart phones and Fasttel intercoms. All configurations in the
device will be issued automatically from cloud. If users decide to use
Fasttel cloud, please contact Fasttel technical support, and they will help
you configure the related settings before using it.
3. SDMC mode: SDMC (SIP Device Management Controller) is a simple and
comprehensive software for building management. It provides a
topography for a community while offering you a graphical configuration

FT600(K)SIP Door Phone Administrator Guide
www.fasttel.com FT600(K)SIP
9
interface for the door access, intercom, monitoring, alarm, etc. It is a
convenient tool for property managers to manage, operate and maintain
the community.
4. None: for connection on external third party sip server
4.Access the Device
FT600(K) SIP series system setting can be accessed on the device web
interface.
4.1. Obtain Device IP Address
Searching the device IP by the IP scanner in the same LAN network. Just click
Scan tab in the IP scanner to check the device IP. Search for its mac address or
as manufacturer “Smart Doorphones”.
Alternative:
FT600SIP: press the call button for about 5 seconds and a voice will announce
the ip address through loudspeaker.
FT600KSIP: press *3258* and a voice will announce the ip address through
loudspeaker.
4.2. Access the Device Setting on the Web
Interface
Enter the device IP address on the web browser in order to log in to the device
web interface where you can configure and adjust parameters, etc. The initial
user name is “admin” and password “Fasttel123!” and please be case-sensitive
to the user names and passwords entered.

FT600(K)SIP Door Phone Administrator Guide
www.fasttel.com FT600(K)SIP
10
5.Language and Time Setting
5.1. Language Setting
When you first set up the device, you might need to set the language to your
need or you can do it later if needed. And the language can be set up on the
device web Phone > Time/Lang > Web Language interface according to your
preference.
Parameter Set-up:
⚫Type: choose a suitable web language. Normally, English is the default web
language.
5.2. Time Setting
The set-up on the device web Phone > Time/Lang > Type/NTP interface is
identical with the setting on the device, it however allows you to set up the NTP
server address that you obtained to automatically synchronize your time and
date. And when your time zone is selected, the device will automatically notify
the NPT server of its time zone in order that the NTP server can synchronize
the time zone set-up with your device.
Parameter Set-up:
⚫Time Zone: Select the specific time zone depending on where the device is
used and then press Confirm tab for the confirmation. The default time
zone is GMT GMT+1.00.

FT600(K)SIP Door Phone Administrator Guide
www.fasttel.com FT600(K)SIP
11
⚫Primary/Secondary Server: The time zone server, normally will
automatically obtain the time when connecting to the network. The
secondary server will take effect when the primary server is invalid.
⚫Update Interval: it is available when you choose Auto. To configure interval
between two consecutive NTP requests.
6.LED Setting
6.1. Infrared LED Setting
Infrared LED is applied in a dark environment in which a resident might not be
able to see a visitor clearly via the video from the door phone. If the infrared
LED is turned off, the door phone will turn to night mode so that you can have a
clear view of the visitor. You can set up it on the device web Intercom >
Advanced interface.
Parameter Set-up:
⚫Photoresistor Setting: set the triggering points for disabling the infrared
LED and enabling the infrared LED. For example, if you set the triggering
points at 1500-1600, the infrared LED will be enabled when the
photoresistor value gets higher than 1600 (the video image you see from
the door phone will become black and white) and if the value gets lower
than 1500, then the infrared light will be disabled ( the video image you see
will have color).
⚫Now: click Obtain to obtain the current environment brightness and use it
as a reference to set up the photoresistor setting.

FT600(K)SIP Door Phone Administrator Guide
www.fasttel.com FT600(K)SIP
12
6.2. LED Settings on Keypad
You can enable or disable the LED lighting of keypad as needed on the web
interface. Meanwhile, If you prefer not to have the LED light of keypad stay on,
you can also set the timing for the exact time span during which the LED light
can be enabled in order to reduce the electrical power consumption, etc. To do
this configuration on the web Intercom > LED Setting interface.
Parameter Set-up:
⚫Keypad LED Enable: Click to enable or disable the keypad LED lighting.
⚫Start Time (H): Enter the time span for the LED lighting to be valid. Eg. If
the time span is from 18-22 it means LED light will stay on during the time
span from 6:00 pm to 22:00 pm during a day.
7.Volume and Tone Configuration
Volume and tone configuration in Fasttel door phone refers to the microphone
volume, speaker volume, temper alarm volume, ringback tone and open door
tone configuration. Moreover, you can upload the tone you like to enrich your
personalized user experience.
7.1. Volume Configuration
To set up the volumes, you can set up on device web Phone > Voice interface.

FT600(K)SIP Door Phone Administrator Guide
www.fasttel.com FT600(K)SIP
13
Parameters Set-up:
⚫Mic Volume: adjust the mic volume as needed.
⚫Volume Level: control the volume of all speakers. The default is 1, the first
level of volume, the volume range is roughly 80-95, and 2 is the second level
of volume, the volume range is roughly 95-109.
⚫Speaker Volume: adjust the speaker volume as needed.
⚫Tamp Alarm Volume: adjust the volume for the tamper alarm.
⚫Keypad volume: adjust the volume of the keypad.

FT600(K)SIP Door Phone Administrator Guide
www.fasttel.com FT600(K)SIP
14
7.1.1.Open Door Tone Configuration
You can not only enable or disable the Open Door Tone but also controls the
prompt words that accompany the tone on the web Phone > Voice > Open Door
Warning interface.
Parameters Set-up:
⚫Open Door Success Warning: click the field Enabled or Disabled depending
on if you want to hear the prompt words that accompany that Open Door
Success tone.
⚫Open Door Failed Warning: click the field Enabled or Disabled depending
on if you want to hear the prompt words that accompany that Open Door
Failed tone.
7.1.2.Upload Tone Files
You can configure door phone ringback tone and other tones related to the door
opening.
7.1.2.1. Upload Ringback Tone
You can customize the ringback tone if you need. Please follow the prompt
about the file size and format. On the web, navigate to Phone > Voice >
Ringback Tone.

FT600(K)SIP Door Phone Administrator Guide
www.fasttel.com FT600(K)SIP
15
7.1.2.2. Upload Open Door Tone
You can customize the tone of door open successful/failed if you need. On the
web, navigate to Phone > Voice.
8.Network Setting
8.1. Network Status
To check the network status on the web Status > Network Information interface.

FT600(K)SIP Door Phone Administrator Guide
www.fasttel.com FT600(K)SIP
16
8.2. Device Network Configuration
You can check for the door phone’s network connection info and configure the
default DHCP mode (Dynamic Host Configuration Protocol) and static IP
connection for the device on the device web Network > Basic interface.
Parameter Set-up:
⚫DHCP: select the DHCP mode by moving the toggle switch to the right.
DHCP mode is the default network connection. If the DHCP mode is turned
on, then the door phone will be assigned by the DHCP server with IP
address, subnet mask, default gateway and DNS server address
automatically.
⚫Static IP: select the static IP mode by checking off the DHCP check box.
When static IP mode is selected, then the IP address, subnet mask, default
gateway, and DNS servers address have to be manually configured
according to your actual network environment.
⚫IP Address: set up the IP Address if the static IP mode is selected.
⚫Subnet Mask: set up the subnet Mask according to your actual network
environment.
⚫Default Gateway: set up the correct gateway default gateway according to
the IP address of the default gateway.
⚫LAN DNS1/2: set up preferred or alternate DNS Server (Domain Name
Server)according to your actual network environment. Preferred DNS
server is the primary DNS server address while the alternate DNS server is
the secondary server address and the door phone will connect to the

FT600(K)SIP Door Phone Administrator Guide
www.fasttel.com FT600(K)SIP
17
alternate server when the primary DNS server is unavailable.
8.3. Device Deployment in Network
Door phones should be deployed before they can be properly configured in the
network environment in terms of their location, operation mode, address and
extension numbers as opposed to other devices for device control and the
convenience of the management. So you can do it on web Network > Advanced >
Connect Setting interface.
Parameter Set-up:
⚫Server Type: it is automatically set up according to the actual device
connection with a specific server in the network such as SDMC or Cloud
and None. None is the default factory setting indicating the device is not in
any server type, therefore you are allowed to choose Cloud, SMDC in
discovery mode.
⚫Discovery Mode: click “Enable” to turn on the discovery mode of the device
so that it can be discovered by other devices in the network, and click
“Disable” if you want to conceal the device so as not to be discovered by
other devices.
⚫Device Address: specify the device address by entering device location
information from the left to the right: Community, Unit, Stair, Floor, Room
in sequence. (not for FT600(K)SIP)
⚫Device extension: enter the device extension number for the device you
installed. (not for FT600(K)SIP)
⚫Device Location: enter the location in which the device is installed and used.

FT600(K)SIP Door Phone Administrator Guide
www.fasttel.com FT600(K)SIP
18
8.4. Device Local RTP configuration
For the device network data transmission purpose, the device needs to be set
up with a range of RTP ports (Real-time Transport Protocol) for establishing an
exclusive range of data transmission in the network. Path: Network > Advanced >
Local RTP interface.
Parameter Set-up:
⚫Min RTP Port: enter the Port value in order to establish the start point for
the exclusive data transmission range.
⚫Max RTP port: enter the Port value in order to establish the end point for
the exclusive data transmission range.
8.5. NAT Setting
NAT (Network Address Translation) allows hosts in an organization’s private
intranet to transparently connect to hosts in the public domain. There is no need
for internal hosts to have registered Internet addresses. It is a way to translate
the internal private network IP address into a legal network IP address
technology. The NAT in the device web is limited to maintaining a connection
with the remote SIP server. The principle is to send a heartbeat message to the
remote SIP server at a set interval after the function is turned on. Otherwise,
the server may judge that the device is offline and allocate the SIP assigned to
other devices, resulting in failure to connect to it in the future. To do this
configuration on web Account > Advance > NAT interface.

FT600(K)SIP Door Phone Administrator Guide
www.fasttel.com FT600(K)SIP
19
Parameter Set-up:
⚫UDP Keep Alive Messages: if enabled, the device will send out the message
to the SIP server so that SIP server will recognize if the device is in online
status.
⚫UDP Alive Msg Interval: set the message sending time interval from 5-60
seconds, the default is 30 seconds.
⚫RPort: enable the RPort when the SIP server is in WAN (Wide Area Network).
8.6. SNMP Setting
SNMP (Simple Network Management Protocol) is an Internet-standard
protocol for managing devices on IP networks. SNMP is widely used in network
management system to monitor network-attached devices for conditions that
may draw network administrative attention. SNMP exposes management data
in the form of variables on the managed systems, which describe the system
configuration. These variables can then be queried by managing applications.
These variables accessible via SNMP are organized in hierarchies, which are
described by Management Information Bases (MIBs). To do the configuration
on the web Network > Advanced > SNMP interface.
Parameter Set-up:

FT600(K)SIP Door Phone Administrator Guide
www.fasttel.com FT600(K)SIP
20
⚫Active: to enable or disable SNMP feature.
⚫Port: to configure SNMP server’s port.
⚫Trusted IP: to configure allowed SNMP server address. It could be an IP
address or any valid URL domain name.
8.7. VLAN Setting
Virtual Local Area Network is a logical grouping of two or more nodes that are
not necessarily on the same physical network segment but which share the
same logical IP domain. To be specific, the purpose of VLAN is to separate the
layer 2 broadcast domain. Within trunk links, the tagged packet will only be sent
to those ports with the same VLAN ID. This is usually achieved by switch or
router. User can benefit from deployed VLAN, such as: *Security: if without
VLAN, all hosts will be included in unique broadcast domain. Therefore, the
consequence of ARP attack will affect all end devices in the organization.
*Performance: The nature of network broadcast is to flood frames among the
network. In certain conditions, it is unnecessary to receive the broadcast frame.
To save bandwidth for high efficiency, it will be better to separate broadcast
domain by deploying VLAN. To do the configuration on the web Network >
Advanced > VLAN interface.
Parameter Set-up:
⚫Active: To enable or disable VLAN feature for designated port.
⚫VID: To configure VLAN ID for designated port.
⚫Priority: To select VLAN priority for designated port.
This manual suits for next models
1
Table of contents
Other Fasttel Intercom System manuals

Fasttel
Fasttel Wizard Classic User manual

Fasttel
Fasttel WIZARD ELEGANCE IP User manual

Fasttel
Fasttel FT600(K)SIP(VC) User manual

Fasttel
Fasttel FT600W User manual

Fasttel
Fasttel FT600VKK User manual

Fasttel
Fasttel FT20CC User manual

Fasttel
Fasttel WIZARD ELITE IP User manual

Fasttel
Fasttel WIZARD CLASSIC IP User manual

Fasttel
Fasttel FLEXITALK User manual

Fasttel
Fasttel FLEXRING User manual