manuals.online logo
Brands
  1. Home
  2. •
  3. Brands
  4. •
  5. Fayat Group
  6. •
  7. Construction Equipment
  8. •
  9. Fayat Group BOMAG BW 80 AD-5 User manual

Fayat Group BOMAG BW 80 AD-5 User manual

Service - Manual
Catalogue number.
008 917 37 12/2013
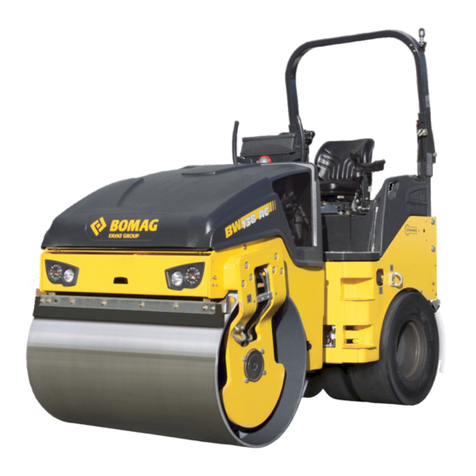
BW 80 AD-5/BW 90 AD-5/BW 100 ADM-5
BW 90 SC-5 / BW 100 SC-5
BW 100 ACM-5/BW 100 SCC-5
S/N 101 462 00 .... > / S/N 101 462 01 .... > / S/N 101 462 03 .... >
S/N 101 462 05 .... > / S/N 101 462 07 .... >
S/N 101 462 04 .... > / S/N 101 462 06 .... >
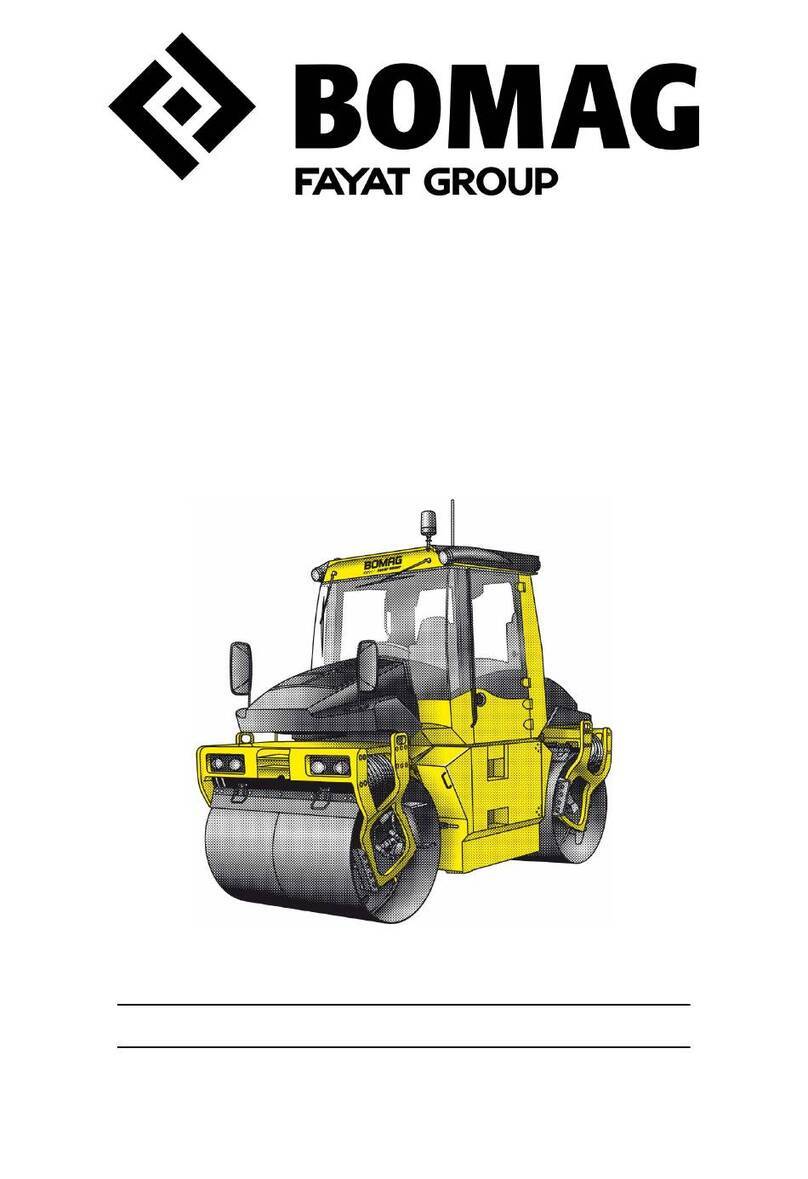
Tandem Vibratory Roller
Combination Roller
Find manuals at https://best-manuals.com
Table of Contents
BOMAG 3008 917 37
General 7
1.1 Introduction 8
1.2 Safety regulations 9
1.3 General repair instructions 13
1.4 Tightening torques 23
The series 5 27
2.1 The series 5 28
Technical data 31
3.1 Technical data 32
Maintenance 49
4.1 General notes on maintenance 50
4.2 Fuels and lubricants 52
4.3 Table of fuels and lubricants 55
4.4 Running-in instructions 56
4.5 Maintenance table 57
Overall view of machine 61
5.1 Overview 62
Electrics 67
6.1 Battery service 68
6.2 Starting with jump wires 69
6.3 Main battery switch 70
6.4 Generator repair 71
6.5 Repair of starter 76
6.6 Instrument cluster (A15), overview 82
6.7 Seat contact switch 84
6.8 Switching the vibration on 85
6.9 Switching on the pressure sprinkler system 86
6.10 Level sensor in diesel tank (R03) 86
6.11 Water in fuel filter, sensor B124 (optional) 87
6.12 Charge control lamp and operating hour meter 88
6.13 Engine oil pressure monitoring 88
6.14 Coolant temperature monitoring 89
6.15 Glow plugs, R81 89
6.16 Engine solenoid, Y13 90
6.17 Inductive proximity switch, B63 91
6.18 Angle sensor on travel control lever, B39 92
6.19 Central electrics 94
6.20 Fuses 100
6.21 Control elements 101
6.22 Machine related electrics 103
Engine 109
7.1 Fuel supply 110
7.2 Kubota diesel engine 111
7.3 Checking the engine oil level 114
7.4 Changing engine oil and oil filter 115
7.5 Checking the coolant level 116
Find manuals at https://best-manuals.com
Table of Contents
BOMAG4008 917 37
7.6 Changing the coolant 117
7.7 Check radiator hoses and hose clamps 118
7.8 Cleaning radiator and hydraulic oil cooler 119
7.9 Checking, tensioning, replacing the V-belt 120
7.10 Checking, cleaning the air filter, replacing if necessary 120
7.11 Check the air intake lines 122
7.12 Checking, cleaning the water separator 122
7.13 Change the fuel filter 123
7.14 Checking fuel lines and clamps 124
7.15 Changing fuel lines 124
7.16 Checking the engine oil pressure 125
7.17 Checking the thermostat in disassembled state 125
7.18 Check the injection valves 126
7.19 Checking the start of commencement 128
7.20 Checking the fuel injection pump 129
7.21 Checking the compression 130
7.22 Checking, adjusting the valve clearance 131
7.23 Engine problems 133
Hydraulics 135
8.1 Hydraulic circuit 136
8.2 Travel pump, A10VG18 HW 138
8.3 Drum drive motor MK04 145
8.4 Wheel motor MSE02 148
8.5 External gear motors 151
8.6 External gear pumps 152
8.7 Pump assembly 154
8.8 Travel circuit 156
8.9 Towing 166
8.10 Vibration circuit 169
8.11 Steering circuit 174
8.12 Checking the hydraulic oil level 180
8.13 Changing the hydraulic oil 181
8.14 Checking the hydraulic oil filter element 182
8.15 Change the hydraulic oil filter 183
Tests and adjustments 185
9.1 Special tools, tests and adjustments 186
9.2 Checking the rotation speeds 190
9.3 Pressure tests in the travel circuit 192
9.4 Checking / adjusting the neutral positions of the travel pump 194
9.5 Pressure test in the vibration circuit 197
9.6 Checking the leakage rate of the vibration motor 199
Trouble shooting 201
10.1 Perform trouble shooting 202
10.2 Trouble shooting chart, diesel engine 203
10.3 Troubleshooting axial piston pumps 205
10.4 Fault detection via instrument cluster, A15 208
10.5 The machine does not drive 208
10.6 Insufficient travel power 210
Find manuals at https://best-manuals.com
Table of Contents
BOMAG 5008 917 37
Flushing and bleeding 213
11.1 Special tools for flushing 214
11.2 Flushing - general 219
11.3 Flushing schematic for travel system, AD/SC-machine 221
11.4 Travel system, flushing AD/SC-machine 222
11.5 Flushing schematic for travel system, AC-machine 226
11.6 Travel system, flushing AC-machine 227
11.7 Bleeding the travel circuit 231
Drum 233
12.1 Repair overview for drums 234
12.2 Removing and installing the AD-drum 240
12.3 Dismantling the AD-drum 242
12.4 Assembling the AD-drum 248
Oscillating articulated joint 255
13.1 Repair overview oscillating articulated joint 256
13.2 Removing and installing the oscillating articulated joint 258
13.3 Repairing the oscillating articulated joint 259
Suppliers documentation 265
14.1 Drum drive 267
14.2 Wheel drive 285
14.3 Steering valve 361
Circuit diagrams 377
15.1 Hydraulic diagram 121 379
15.2 Wiring diagram 76 391
Find manuals at https://best-manuals.com
Table of Contents
BOMAG6008 917 37
Find manuals at https://best-manuals.com
BOMAG 7008 917 37
1 General
Find manuals at https://best-manuals.com
1.1 Introduction
BOMAG8008 917 37
1.1 Introduction
This manual addresses the professionally qualified
personnel or the after sales service of BOMAG, and
should be of help and assistance in correct and effi-
cient repair and maintenance work.
This manual describes the disassembly, dismantling,
assembly, installation and repair of components and
assemblies. The repair of components and assem-
blies is only described as this makes sense under due
consideration of working means and spare parts sup-
ply.
Documentation
For the BOMAG machines described in this manual
the following documentation is additionally available:
1 Operating and maintenance instructions
2 Spare parts catalogue
3 Service information
4 Fundamental electrics
Use only genuine BOMAG spare parts.
Spare parts needed for repairs can be taken from the
spare parts catalogue for the machine.
This manual is not subject of an updating service; for
this reason we would like to draw your attention to our
additional "Technical Service Bulletins".
In case of a new release all necessary changes will be
included.
In the course of technical development we reserve the
right for technical modifications without prior notifica-
tion.
Information and illustrations in this manual must not
be reproduced and distributed, nor must they be used
for the purpose of competition. All rights according to
the copyright law remain expressly reserved.
!Danger
These safety regulations must be read and ap-
plied by every person involved in the repair /main-
tenance of this machine. The applicable accident
prevention instructions and the safety regulations
in the operating and maintenance instructions
must be additionally observed.
BOMAG GmbH
Printed in Germany
Copyright by BOMAG
Find manuals at https://best-manuals.com
Safety regulations
BOMAG 9008 917 37
1.2
1.2 Safety regulations
Important notes
These safety regulations must be read and ap-
plied by every person involved in the repair /main-
tenance of this machine. The applicable accident
prevention instructions and the safety regulations
in the operating and maintenance instructions
must be additionally observed.
Repair work shall only performed by appropriately
trained personnel or by the after sales service of
BOMAG.
Workshop equipment and facilities as well as the
use and waste disposal of fuels and lubricants,
cleaning agents and solvent as well as gases and
chemicals are subject to legal regulations, which
are intended to provide a minimum on safety. It is
obviously your own responsibility to know and
adhere to these regulations.
This manual contains headers like "Note", "Attention",
"Danger" and "Environment", which must be strictly
complied with in order to inform about and avoid dan-
gers to persons, property and the environment.
i
Note
Paragraphs marked like this contain technical infor-
mation for the optimaleconomical use of the machine.
!
Caution
Paragraphs marked like this highlight possible
dangers for machines or parts of the machine.
!Danger
Paragraphs marked like this highlight possible
dangers for persons.
Environment
Paragraphs marked like this point out practices
for safe and environmental disposal of fuels and
lubricants as well as replacement parts.
Observe the regulations for the protection of the
environment.
General
lFor repair and maintenance work move the ma-
chine on a firm base and shut it down.
lAlways secure the machine against unintended roll-
ing.
lSecure the engine reliably against unintentional
starting.
lMark a defective machine and a machine under re-
pair by attaching a clearly visible warning label to
the dashboard.
lBlock the articulated joint with the articulation lock.
lUse protective clothes like hard hat, safety boots
and gloves.
lKeep unauthorized persons away from the machine
during repair work.
lTools, lifting gear, lifting tackle, supports and other
auxiliary equipment must be fully functional and in
safe condition.
lUse only safe and approved lifting gear of sufficient
load bearing capacity to remove and install parts or
components from and to the machine.
lDo not use easily inflammable or harmful substanc-
es, such as gasoline or paint thinners for cleaning.
lDo not smoke or use open fire and avoid sparks
when cleaning or repairing a tank.
lWhen performing welding work strictly comply with
the respective welding instructions.
Transport work with cranes and lifting
tackle
i
Note
Cranes must only be operated by instructed persons
who had been trained in handling cranes.
lFollow the operating instructions of the manufactur-
er when working with cranes.
lFollow the operating instructions of the operator
when working with cranes.
lAlways comply with the applicable accident preven-
tion instructions when working with cranes and lift-
ing tackle.
Precautions and codes of conduct for
welding work
Welding work must only be carried out by properly
trained personnel.
!Danger
Electric shock!
Sparks, fire hazard, burning of skin!
Infrared or ultraviolet radiation (arc), flashing of
eyes!
Health hazard caused by welding work on highly
alloyed work pieces, metal coatings, paint coat-
ings, plastic coatings, oil containing dirt deposits,
grease or solvent residues, etc.!
lCheck welding equipment and cables for damage
before use (also the validity of inspection stickers).
lEnsure good conductivity between ground cable
and workpiece, avoid joints and bearings.
Find manuals at https://best-manuals.com
1.2 Safety regulations
BOMAG10 008 917 37
lStart the extraction fan before starting work and
guide with the progressing work as required.
lAlways isolate the burner when laying it down (re-
move possible electrode residues).
lProtect cables from being damaged, use cables
with insulated couplings.
lEnsure sufficient fire protection, keep a fire extin-
guisher at hand.
lWelding work in areas where there is a risk of fire or
explosion, must only be carried out with welding
permission.
lRemove any combustible materials from the weld-
ing area or cover such items appropriately.
lName a fire watch during and after welding work.
lPlace welding rod holders and inert gas welding
guns only on properly insulated bases.
lPlace the inert gas bottles in a safe place and se-
cure them against falling over.
lUse a protective screen or hand shield with welding
filter, wear welding gloves and clothes.
lSwitch the welding unit off before connecting weld-
ing cables.
lCheck electrode holders and electric cables at reg-
ular intervals.
Behaviour in case of faults
lIn case of faults on the welding unit switch of the
welding unit immediately and have it repaired by ex-
pert personnel.
lIn case of failure of the extraction system switch the
system off and have it repaired by expert personnel.
Maintenance; waste disposal
lReplace damaged insulating jaws and welding rod
holders immediately.
lReplace the welding wire reels only in de-energized
state.
What to do in case of accidents; First Aid
lKeep calm.
lCall first air helpers.
lReport the accident.
lIn case of an electric accident: Interrupt the power
supply and remove the injured person from the
electric circuit. If breathing and heart have stopped
apply reactivation measures and call for an emer-
gency doctor.
Operation of high-voltage systems
i
Note
The rules and statutory regulations valid in the corre-
sponding do apply in addition to the notes given here.
!
Caution
The high-voltage system must only be operated
and serviced by qualified and authorized person-
nel.
Before starting operation the operator must check
the proper condition of the system.
!Danger
Possibility of injury or even death caused by elec-
tric shock:
lif persons come into contact with live parts,
lin case of faulty insulation of live parts,
linadequate, unsuitable insulation,
lif melted parts flake off in case of short circuits.
Old oils
Prolonged and repetitive contact with mineral oils will
remove the natural greases from the skin and causes
dryness, irritation and dermatitis. Moreover, used en-
gine oils contain potentially hazardous contaminants,
which could cause skin cancer. Appropriate skin pro-
tection agents and washing facilities must therefore
be provided.
lWear protective clothes and safety gloves, if possi-
ble.
lIf there is a risk of eye contact you should protect
your eyes appropriately, e.g. chemistry goggles or
full face visor; a facility suitable for rinsing the eyes
should also be available.
lAvoid longer and repetitive contacts with oils. In
case of open incisionsand injuries seek medical ad-
vice immediately.
lApply protective cream before starting work, so that
oil can be easier removed from the skin.
lWash affected skin areas with water and soap (skin
cleansers and nail brushes will help). Lanolin con-
taining agents will replace natural skin oils that were
lost.
lDo not use gasoline, kerosene, diesel, thinner or
solvents to wash the skin.
lDo not put oil soaked cloths into your pockets.
lAvoid clothes getting soiled by oil.
lOveralls must be washed at regular intervals. Dis-
pose of non-washable clothes environmentally.
lIf possible degrease components before handling.
Find manuals at https://best-manuals.com
Safety regulations
BOMAG 11008 917 37
1.2
Environment
It is strictly prohibited to drain off oil into the soil,
the sewer system or into natural waters. Old oil
must be disposed of according to applicable envi-
ronmental regulations. If in doubt you should con-
sult your local authorities.
Hydraulics
lAlways relieve the pressure in the hydraulic system
before disconnecting any lines. Hydraulic oil escap-
ing under pressure can penetrate the skin and
cause severe injury.
lAlways make sure that all screw fittings have been
tightened properly and that hoses and pipes are in
mint condition before pressurizing the system
again.
lHydraulic oil leaking out of a small opening can
hardly be noticed, therefore please use a piece of
cardboard or wood when checking for leaks. When
injured by hydraulic oil escaping under pressure
consult a physician immediately, as otherwise this
may cause severe infections.
lDo not step in front of or behind the drums, wheels
or crawler tracks when performing adjustment work
in the hydraulic system while the engine is running.
Block drums, wheels or crawler tracks with wedges.
Reattach all guards and safety installations after
all work has been completed.
Environment
It is strictly prohibited to drain off oil into the soil,
the sewer system or into natural waters. Oil oil
must be disposed of according to applicable envi-
ronmental regulations. If in doubt you should con-
sult your local authorities.
Fuels
!Danger
Repair work shall only performed by appropriately
trained personnel or by the after sales service of
BOMAG.
Follow the valid accident prevention instructions when
handling fuels.
The following notes refer to general safety precau-
tions for danger free handling of fuel.
Fuel vapours not only are easily inflammable, but also
highly explosive inside closed rooms and toxic; dilu-
tion with air creates an easily inflammable mixture.
The vapours are heavier than air and therefore sink
down to the ground. Inside a workshop they may eas-
ily become distributed by draft. Even the smallest por-
tion of spilled fuel is therefore potentially dangerous.
lFire extinguishers charged with FOAM, CO2GAS
or POWDER must be available wherever fuel is
stored, filled in, drained off, or where work on fuel
systems is performed.
lThe vehicle battery must always be disconnected,
BEFORE work in the fuel system is started. Do not
disconnect the battery while working on the fuel
system. Sparks could cause explosion of the fuel
fumes.
lWherever fuel is stored, filled, drained off or where
work on fuel systems is carried out, all potential ig-
nition sources must be extinguished or removed.
Search lights must be fire proof and well protected
against possible contact with running out fuel.
Hot fuels
Please apply the following measures before draining
of fuel to prepare for repair work:
lAllow the fuel to cool down, to prevent any contact
with a hot fluid.
lVent the system, by removing the filler cap in a well
ventilated area. Screw the filler cap back on, until
the tank is finally emptied.
Synthetic rubber
Many O-rings, hoses, etc. are made of synthetic ma-
terial, a so-called fluorocarbon elastomer. Under nor-
mal operating conditions this material is safe and does
not impose any danger to health.
However, if this material becomes damaged by fire or
extreme heat, it may decompose and form highly
caustic hydrofluoric acid, which can cause severe
burns in contact with skin.
lIf the material is in such a state it must only be
touched with special protective gloves. The protec-
tive gloves must be disposed of according to appli-
cable environmental regulations immediately after
use.
lIf the material has contacted the skin despite these
measures, take off the soiled clothes and seek
medical advice immediately. In the meantime cool
and wash the affected area of skin over a sufficient
time with cold water or lime water.
Poisonous substances
Some of the fluids and substances used are toxic and
must under no circumstances be consumed.
Skin contact, especially with open wounds, must be
avoided.
These fluids and substances are, amongst others,
anti-freeze agents, hydraulic oils, fuels, washing addi-
tives, refrigerants, lubricants and various bonding
agents.
1.2 Safety regulations
BOMAG12 008 917 37
Engine
!Danger
Do not work on the fuel system while the engine is
running. (Danger to life!)
Once the engine has stopped wait approx. 1 min-
utes for the system to depressurize. The systems
are under high pressure. (Danger to life!)
Keep out of the danger zone during the initial test
rung. Danger caused by high pressure in case of
leaks. (Danger to life!)
When performing work on the fuel system make
sure that the engine cannot be started uninten-
tionally during repair work. (Danger to life!)
lMaintenance and cleaning work on the engine must
only be performed with the engine stopped and
cooled down. Make sure that the electric system is
switched off and sufficiently secured against being
switched on again (e.g. pull off ignition key, attach a
warning label).
lObserve the accident prevention regulations for
electric systems (e.g. -VDE-0100/-0101/-0104/-
0105 Electric precautions against dangerous con-
tact voltages).
lCover all electric components properly before wet
cleaning.
Battery
lAlways wear goggles and protective clothing to
service or clean batteries! Battery acid can cause
severe injury by cauterization when coming in con-
tact with skin.
lWork only well ventilated rooms (formation of oxy-
hydrogen gas).
lDo not lean over the battery while it is under load,
being charged or tested (danger of explosion).
lKeep ignition sources away from the battery. Burn-
ing cigarettes, flames or sparks can cause explo-
sion of the battery
lUse battery chargers etc. only in strict compliance
with the operating instructions.
lAfter an accident with acid flush the skin with a suf-
ficient amount of water and seek medical advice.
lDo not allow children access to batteries.
lWhen mixing battery fluid always pour acid into wa-
ter, never vice-versa.
Special safety regulations
lUse only genuine BOMAG spare parts for repair
and maintenance work. Genuine spare parts and
original accessories were specially developed, test-
ed and approved for the machine.
lThe installation and use of non-genuine spare parts
or non-genuine accessories may therefore have an
adverse effect on the specific characteristics of the
machine and thereby impair the active and/or pas-
sive driving safety. The manufacturer explicitly ex-
cludes any liability for damage caused by the use of
non-original parts or accessories.
lUnauthorized changes to the machine are prohibit-
ed for safety reasons.
lDo not perform any cleaning work while the engine
is running.
lIf tests on the articulated joint need to be performed
with the engine running, do not stand in the articu-
lation area of the machine (danger of crushing!).
lIf tests must be performed with the engine running
do not touch rotating parts of the engine (danger of
injury!).
lAlways ensure an adequate supply of fresh air
when starting in closed rooms. Exhaust gases are
highly dangerous!
lRefuel only with the engine shut down. Ensure strict
cleanliness and do not spill any fuel.
lAlways ensure an adequate supply of fresh air
when refuelling in closed rooms.
lDispose of used filters in accordance with applica-
ble environmental regulations.
lWhen performing repair and maintenance work col-
lect oils and fuels in suitable containers anddispose
of in compliance with applicable environmental reg-
ulations.
lDo not heat up oils higher than160 °C becausethey
may ignite.
lWipe off spilled or overflown oil using suitable
cleaning means and dispose of in accordance with
applicable environmental regulations.
lDispose of old batteries according to applicable en-
vironmental regulations.
lThere is a danger of scalding when draining off en-
gine or hydraulic oil at operating temperature! Allow
engine and hydraulic system to cool down to a suf-
ficient level.
lDo not exceed the max. permissible tire pressure.
General repair instructions
BOMAG 13008 917 37
1.3
1.3 General repair instructions
General
lBefore removing or disassembling parts, assem-
blies, components or hoses mark these parts for
easier assembly.
lBefore assembling and installing parts, assemblies
or components oil or grease all movable parts or
surfaces as required and in compliance with the
compatibility of materials.
Electrics
General
Due to the fast technical development electric and
electronic vehicle systems become more intelligent
and more comprehensive day by day, and can hardly
be dispensed with in hydraulic and mechanical vehicle
systems.
Diagnostics according to plan
Well structured trouble shooting procedures can save
time and money.
Random tests have revealed that purely electronic
components or control units only very rarely are the
actual cause of failures:
lIn approx. 10 % of the examined cases the prob-
lems were caused by control units.
lIn approx. 15 % sensors and actuators were the
cause of the problems.
By far the highest proportion of all faults could be
traced back to wiring and connections (plugs, etc.).
General:
lBefore changing any expensive components, such
as control units, you should run a systematic trouble
shooting session to eliminate any other possible
fault sources. Knowledge in basic electrics is re-
quired for this purpose. If a fault was diagnosed
without having pulled the plug of the control unit or
inspected the wiring, this should be done before
changing any parts.
lCheck for good cable and ground contacts, there-
fore keep all mechanical transition points between
electric conductors (terminals, plugs) free of oxide
and dirt, as far as this is possible.
lAlways use the machine related wiring diagram for
testing. If one or more faults were detected, these
should be corrected immediately.
lDo not disconnect or connect battery or generator
while the engine is running.
lDo not operate the main battery switch under load.
lDo not use jump leads after thebattery has been re-
moved.
lSensors and electric actuators on control units must
never be connected individually or between exter-
nal power sources for the purpose of testing, but
only in connection with the control unit in question.
lIt is not permitted to pull plugs off while the voltage
supply is switched on (terminal 15 "ON")! Switch the
voltage supply "OFF" first and pull out the plug.
lEven with an existing polarity reversal protection in-
correct polarity must be strictly avoided. Incorrect
polarity can cause damage to control units!
1.3 General repair instructions
BOMAG14 008 917 37
lPlug-in connectors on control units are only dust
and water tight if the mating connector is plugged
on! Control units must be protected against spray
water, until the mating connector is finally plugged
on!
lUnauthorized opening of control electronics (Micro-
controller MC), modifications or repairs in the wiring
can cause severe malfunctions.
lDo not use any radio equipment or mobile phones
in the vehicle cabwithout a proper aerial orin the vi-
cinity of the control electronics!
Electrics and welding
!
Caution
Before starting welding work you should discon-
nect the negative battery pole or interrupt the
electric circuit with the main battery switch, dis-
connect the generator and pull the plugs off all
control units in order to protect the electrical sys-
tem of the machine.
lDisconnect the minus pole of thebattery or interrupt
the electric circuit with the main battery switch.
lIsolate the generator and all control units from the
electric circuit.
lAlways fasten the earth clamp of the welding unit in
the immediate vicinity of the welding location.
lWhen choosing the location for the earth clamp
make sure that the welding current will not pass
through joints or bearings.
Battery
Rules for the handling of batteries
When removing a battery always disconnect the mi-
nus pole before the plus pole. When installing the bat-
teryconnectthe minus poleafter theplus poleto avoid
short circuits.
Fasten the terminal clamps with a little force as possi-
ble.
Always keep battery poles and terminal clams clean to
avoid high transition resistances when starting and
the related development of heat.
Make sure the battery is properly fastened in the vehi-
cle.
General repair instructions
BOMAG 15008 917 37
1.3
Generator
Before removing the generator you must disconnect
the ground cable from the minus pole of the battery
while the ignition is switched off. Do not disconnect
the generator while the engine is running, because
this may cause extremely high voltage peaks in the
vehicle wiring system ("Load Dump"), which could
possibly damage control units, radios or other elec-
tronic equipment.
When disassembling thebattery cable, the B+-nut un-
derneath on the generator side may also be loosened.
This nut must in this case be retightened.
When connecting e.g. the battery cable to the terminal
of the generator you must make sure that the polarity
is correct (generator B+ to the + pole of the battery).
Mixing up the polarities by mistake causes short cir-
cuit and damage to the rectifier elements - the gener-
ator will be out of function.
The generator can only be operated with the battery
connected. Under special conditions emergency op-
eration without battery is permitted, the lifetime of the
generator is in such cases especially limited.
Plus and minus cables must be disconnected during
rapid charging of the battery or electric welding on the
vehicle.
When cleaning the generator with a steam or water jet
make sure not to direct the steam or water jet directly
on or into the generator openings or ball bearings. Af-
ter cleaning the generator should be operated for
about 1 - 2 minutes to remove any deposits of water
from the generator.
Starter motor
So-called jump starting (using an additional external
battery) without the battery connected is dangerous.
When disconnecting the cables from the poles high in-
ductivities (arcs, voltage peaks) may occur and de-
stroy the electrical installation.
For purposes like e.g. purging the fuel systems, start-
ers may be operated for maximum 1 minute without
interruption. Then you should wait for at least 30 min-
utes (cooling down) until trying again. During the 1
minute starting period this process should not be inter-
rupted.
Starter motors must not be cleaned with high pressure
steam cleaning equipment.
The contacts on starter terminals 30, 45, 50 must be
protected against unintended shorting (jump protec-
tion).
When replacing the starter the ring gear on the engine
flywheel must be checked for damage and its number
of teeth - if necessary replace the ring gear.
Always disconnect the battery before starting assem-
bly work in the starter area of the engine or on the
starter itself.
1.3 General repair instructions
BOMAG16 008 917 37
Hydraulic system
!
Caution
Repair work on hydraulic elements shall only per-
formed by appropriately trained personnel or by
the after sales service of BOMAG.
Please note
i
Note
Cleanliness is of utmost importance. Dirt and other
contaminations must strictly be kept out of the system.
lConnections and screw fittings, filler neck covers
and their immediate surrounding areas must be
cleaned before removal.
lBefore loosening hoses, pipe lines etc. relieve all
pressure from the system.
lDuring repair work keep all openings closed with
clean plastic plugs and caps.
lNever run pumps, motors and engines without oil or
hydraulic oil.
lWhen cleaning hydraulic components take care not
to damage any fine machine surfaces.
lChemical and rubber soluble cleansing agents may
only be used to clean metal parts. Do not let such
substances come in contact with rubber parts.
lRinse of cleaned parts thoroughly, dry them with
compressed air and apply anti-corrosion oil immedi-
ately. Do not install parts that show traces of corro-
sion.
lAvoid the formation of rust on fine machined caused
by hand sweat.
lUse new O-rings or seal rings for reassembly.
lUse only hydraulic oil as sliding agent when reas-
sembling. Do not use any grease!
lUse only the specified pressure gauges. Risk of
damaging the pressure gauges under too high pres-
sure.
lCheck the hydraulic oil level before and after the
work.
lFill in only clean oil as specified in the maintenance
instructions.
lCheck the hydraulic system for leaks, if necessary
find and rectify the cause.
lBefore taking new hydraulic components into oper-
ation fill these with hydraulic oil as specified in the
operating and maintenance instructions.
lAfter changing a hydraulic component thoroughly
flush, refill and bleed the complete hydraulic sys-
tem.
lPerform measurements at operating temperature of
the hydraulic oil (approx. 40 ¯C).
lAfter changing a component perform a high and
charge pressure test, if necessary check the speed
of the exciter shaft.
lThe operating pressure of the exciter shaft to a
great extent depends on the base under the vibrat-
ingdrum. On hardground placethe drums on a suit-
able base and check the drum pressure. Do not
activate the vibration on a hard, concreted base,
danger of bearing damage.
lAfter the completion of all tests perform a test run
and then check all connections and fittings for leaks
with the engine still stopped and the hydraulic sys-
tem depressurized.
Before commissioning
lFill the housings of hydraulic pumps and motors
with hydraulic oil. Use only hydraulic oils according
to the specification in the maintenance instructions.
lAfter changing a component flush the hydraulic sys-
tem as described in the flushing instructions.
Taking into operation
lBleed the hydraulic circuits.
lStart up the hydraulic system without load.
lCheck the hydraulic oil level in the tank, if neces-
sary top up with hydraulic oil as specified in the op-
erating and maintenance instructions or drain oil off
into a suitable container.
After taking into operation
lCheck fittings and flanges for leaks.
lAfter each repair check all adjustment data, system
pressures, rotational speeds and nominal values in
the hydraulic system, adjust if necessary.
lDo not adjust pressure relief valves and control
valves to values above their specified values.
General repair instructions
BOMAG 17008 917 37
1.3
Fuel hoses
Fig. 1
!
Caution
All fuel hoses have two layers of material, a rein-
forced rubber coating outside and an internal Vi-
ton hose. If a fuel hose has come loose one must
make absolutely sure that the internal Viton layer
has not been separated from the reinforced outer
layer. In case of a separation the hose needs to be
replaced.
Gaskets and mating surfaces
Leaking sealing faces can mostly be traced back to in-
correct assembly of seals and gaskets.
lBefore assembling a new seal or gasket make sure
that the sealing surface is free of pitting, flutes, cor-
rosion or other damage.
lInappropriately stored or handled seals (e.g. hang-
ing from hooks or nails) must under no circumstanc-
es be used.
lAssemble seals and gaskets only with sealing com-
pound, grease or oil, if this is specifically specified
in the repair instructions.
lIf necessary remove any old sealing compound be-
fore assembling. For this purpose do not use any
tools that could damage the sealing surfaces.
lSealing compound must be applied thin and evenly
on the corresponding surfaces; take care that the
compound does not enter into oil galleries or blind
threaded bores.
lExamine the contact faces for scratches and burrs,
remove these with a fine file or an oilstone; take
care that no grinding dust and dirt enters into
tapped bores or enclosed components.
lBlow out lines, ducts and gaps with compressed air,
replace any O-rings and seals that have been dis-
lodged by the compressed air.
Assembly of radial seals
Fig. 2
lLubricate the sealing lips (2) (Fig. 2) with clean
grease; in case of double seals fill the space be-
tween the sealing lips with a generous amount of
grease.
lSlide the seal over the shaft, with the lip facing to-
wards the fluid to be sealed.
i
Note
If possible, use an assembly sleeve (1 (Fig. 2)), to
protect the lip from being damaged by sharp edg-
es, threads or splines. If no assembly sleeve is avail-
1.3 General repair instructions
BOMAG18 008 917 37
able, you should use a plastic tube or adhesive tape
to prevent the sealing lip from being damaged.
lLubricate the outer rim (arrow 3 (Fig. 2)) of the seal
and press it flat on the housing seat.
Fig. 3
lPress or knock the seal into the housing, until it is
flush with the housing surface.
i
Note
If possible, use a "bell" (1 (Fig. 3)), to make sure that
the seal will not skew. In some cases it may be ad-
visable to assemble the seal into the housing first, be-
fore sliding it over the shaft. Under no circumstances
should the full weight of the shaft rest on the seal.
If you have no proper service tools at hand, use a suit-
able drift punch with a diameter which is about 0,4 mm
smaller than the outer diameter of the seal. Use VERY
LIGHT blows with the hammer if no press is available.
Feather keys and keyways
!
Caution
Feather keys may only be reused if they are free of
damage.
Fig. 4
lClean and thoroughly examine the feather key.
lDeburr and thoroughly clean the edges of the key-
way with a fine file before reassembling.
General repair instructions
BOMAG 19008 917 37
1.3
Ball and roller bearings
!
Caution
Ball and roller bearings may only be reused if they
are free of damage and do not show any signs of
wear.
Fig. 5
lIf a ball or roller bearing of a bearing pair shows de-
fects, both ball or roller bearings need to be re-
placed.
lRemove any lubricant residues from the ball or roll-
er bearing to be examined by washing it with gaso-
line or any other appropriate degreasing agent.
Ensure strict cleanliness.
lCheck balls or rollers, running surfaces, outer faces
of outer races and inner faces of inner races for vis-
ible damage. Replace the ball or roller bearing if
necessary.
lCheck the ball or roller bearing for clearance and re-
sistance between the inner and outer races, replace
if necessary.
lLubricate the ball or roller bearing with the recom-
mended type of grease before assembly or reas-
sembly.
lOn greased bearings (e.g. wheel bearings) fill the
space between ball or roller bearing and outer seal
with the recommended type of grease before as-
sembling the seal.
lCheck shaft and bearing housing for discolouration
or other signs of movement between ball or roller
bearing and seats.
lMake sure that shaft and housing are free of burrs
before assembling the ball or roller bearing.
lAlways mark the individual parts of separable ball or
roller bearings (e.g. taper roller bearings) to enable
correct reassembling. Never assemble the rollers to
an outer race that has already been used, replace
the complete ball or roller bearing instead.
Fig. 6
!
Caution
When assembling the ball or roller bearing to the
shaft load must only be applied to the inner race 1
(Fig. 6).
When fitting the bearing into the housing load
must only be applied to the outer race (2).
1.3 General repair instructions
BOMAG20 008 917 37
Screws and nuts
Tightening torque
!
Caution
Tighten nuts or screws with the tightening tor-
ques specified in the following tables of tighten-
ing torques. Tightening torques deviating from
the ones in the table are specially mentioned in
the repair instructions.
Damaged screws must under no circumstances
be used any longer. Recutting threads with thread
cutters or taps adversely affects the strength and
leak tightness of the screw joint. Damaged or cor-
roded thread pitches can cause incorrect torque
value readings.
Self-locking nuts must generally be replaced after
disassembly.
The use of screws with too high strength can
cause damage!
lNut of a higher strength can generally be used in-
stead of nuts of a lower strength classification.
lWhen checking or retightening screw joints to the
specified tightening torque you should first relieve
by a quarter turn and then tighten to the correct
torque.
lBefore tightening you should lightly oil the thread, in
order to ensure low friction movement. The same
applies for self-locking nuts.
lMake sure that no oil or grease will enter into blind
tapped bores. The hydraulic power generated when
turning in the screw could cause breakage of theef-
fected part.
Strength classes, metric screws
The strength classes (from 3.6 to 12.9) are specified
for all strength classes from a nominal diameter of
5mm. The corresponding identification can be found
where allowed for by the shape of the screw.
Fig. 7 Identification of screws
Example: A screw is identified with 12.9.
The first number corresponds with 1/100 of the nomi-
nal tensile strength (minimum tensile strength) in N/
mm2.
lThe nominal tensile strength is 12 X 100 N/mm2=
1200 N/mm2.
The second number specifies 10-times the ration be-
tween lower yield point and nominal tensile strength
(yield point ratio).
i
Note
When exceeding the lower yield point, the material will
return to its original shape when being relieved (plas-
tic deformation).
When exceeding the upper yield point the material will
not restore its original shape after being relieved.
lThe lower tensile strength is 9/10 X 1200 N/mm2=
1080 N/mm2.
i
Note
However, these values are by no means identical with
the tightening torques, which are to be set on a torque
wrench. The corresponding calculation requires a
higher effort and, in the end, depends on the materials
to be bolted together.

This manual suits for next models

6

Other Fayat Group Construction Equipment manuals

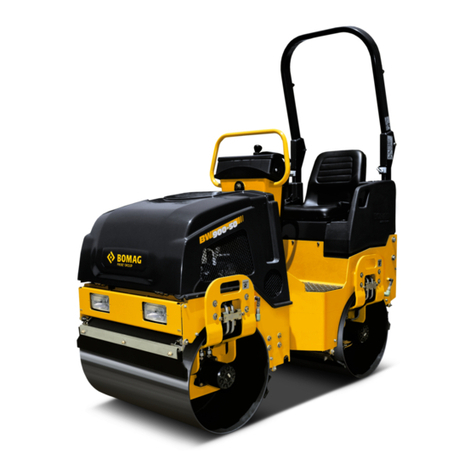
Fayat Group BOMAG BC 573 RB-4 User manual

Fayat Group

Fayat Group BOMAG BC 573 RB-4 User manual

Fayat Group DYNAPAC F1250CS Troubleshooting guide

Fayat Group

Fayat Group DYNAPAC F1250CS Troubleshooting guide

Fayat Group BOMAG BMF 2500 M User manual

Fayat Group

Fayat Group BOMAG BMF 2500 M User manual

Fayat Group CP1200 User manual

Fayat Group

Fayat Group CP1200 User manual

Fayat Group BOMAG BW 226 BVC-5 User manual

Fayat Group

Fayat Group BOMAG BW 226 BVC-5 User manual

Fayat Group BOMAG BW 174 APO-4i User manual

Fayat Group

Fayat Group BOMAG BW 174 APO-4i User manual

Fayat Group Bomag BW 138 AD-5 Instructions for use

Fayat Group

Fayat Group Bomag BW 138 AD-5 Instructions for use

Fayat Group Dynapac SD2500C Troubleshooting guide

Fayat Group

Fayat Group Dynapac SD2500C Troubleshooting guide

Fayat Group BOMAG BW 900-50 User manual

Fayat Group

Fayat Group BOMAG BW 900-50 User manual

Fayat Group BOMAG BC 573 RB-3 User manual

Fayat Group

Fayat Group BOMAG BC 573 RB-3 User manual

Fayat Group BOMAG BW 191/206 AD-5 User manual

Fayat Group

Fayat Group BOMAG BW 191/206 AD-5 User manual

Fayat Group BOMAG BW177D-50 Instructions for use

Fayat Group

Fayat Group BOMAG BW177D-50 Instructions for use

Fayat Group BOMAG BF 700 C-2 User manual

Fayat Group

Fayat Group BOMAG BF 700 C-2 User manual

Fayat Group BOMAG BW 27 RH-4i User manual

Fayat Group

Fayat Group BOMAG BW 27 RH-4i User manual

Fayat Group DYNAPAC CC234C User manual

Fayat Group

Fayat Group DYNAPAC CC234C User manual

Fayat Group BOMAG BF 800-P Series User manual

Fayat Group

Fayat Group BOMAG BF 800-P Series User manual

Fayat Group BOMAG BM 500/15 User manual

Fayat Group

Fayat Group BOMAG BM 500/15 User manual

Fayat Group BOMAG BC 972 RB-2 User manual

Fayat Group

Fayat Group BOMAG BC 972 RB-2 User manual

Fayat Group BOMAG BW 213 DH-4 BVC User manual

Fayat Group

Fayat Group BOMAG BW 213 DH-4 BVC User manual

Fayat Group DYNAPAC F80W Product guide

Fayat Group

Fayat Group DYNAPAC F80W Product guide

Fayat Group BOMAG BM 1000/35 User manual

Fayat Group

Fayat Group BOMAG BM 1000/35 User manual

Fayat Group BOMAG BW 28 RH User manual

Fayat Group

Fayat Group BOMAG BW 28 RH User manual

Fayat Group DYNAPAC DRP25D User manual

Fayat Group

Fayat Group DYNAPAC DRP25D User manual

Fayat Group BOMAG BW 226 DH-4i BVC User manual

Fayat Group

Fayat Group BOMAG BW 226 DH-4i BVC User manual

Popular Construction Equipment manuals by other brands

Altrad BELLE MPC 300 Operator's manual

Altrad

Altrad BELLE MPC 300 Operator's manual

Komatsu D85EX-15 Operation & maintenance manual

Komatsu

Komatsu D85EX-15 Operation & maintenance manual

Bomag BT 60/4 operating instructions

Bomag

Bomag BT 60/4 operating instructions

FMG TLN370 Operator's manual

FMG

FMG TLN370 Operator's manual

HSM EASY LINE MIX operating manual

HSM

HSM EASY LINE MIX operating manual

stellar labs EC Series General manual

stellar labs

stellar labs EC Series General manual

Thern 548 owner's manual

Thern

Thern 548 owner's manual

Graco LineLazer IV 3900 Operation

Graco

Graco LineLazer IV 3900 Operation

Graco Reactor 3 E-20 Elite Operation

Graco

Graco Reactor 3 E-20 Elite Operation

Atlas Copco SmartROC D65 T4F Operation

Atlas Copco

Atlas Copco SmartROC D65 T4F Operation

Auto Crane NEXSTAR HC-7X owner's manual

Auto Crane

Auto Crane NEXSTAR HC-7X owner's manual

Hyundai HL970A Operator's manual

Hyundai

Hyundai HL970A Operator's manual

POP UP MI TOWER+ Assembly guide

POP UP

POP UP MI TOWER+ Assembly guide

probst FTZ-UNI-15 operating instructions

probst

probst FTZ-UNI-15 operating instructions

Dynapac CA 251 maintenance

Dynapac

Dynapac CA 251 maintenance

MetalTech I-CIS04 OPERATIONAL SAFETY AND ASSEMBLY INSTRUCTIONS

MetalTech

MetalTech I-CIS04 OPERATIONAL SAFETY AND ASSEMBLY INSTRUCTIONS

Eddy TB-3 Operation and Safety Guide

Eddy

Eddy TB-3 Operation and Safety Guide

Eddy FLOOR SCRAPER Operational & Safety Guide

Eddy

Eddy FLOOR SCRAPER Operational & Safety Guide

manuals.online logo
manuals.online logoBrands
  • About & Mission
  • Contact us
  • Privacy Policy
  • Terms and Conditions

Copyright 2025 Manuals.Online. All Rights Reserved.