manuals.online logo
Brands
  1. Home
  2. •
  3. Brands
  4. •
  5. Fein
  6. •
  7. Power Tools
  8. •
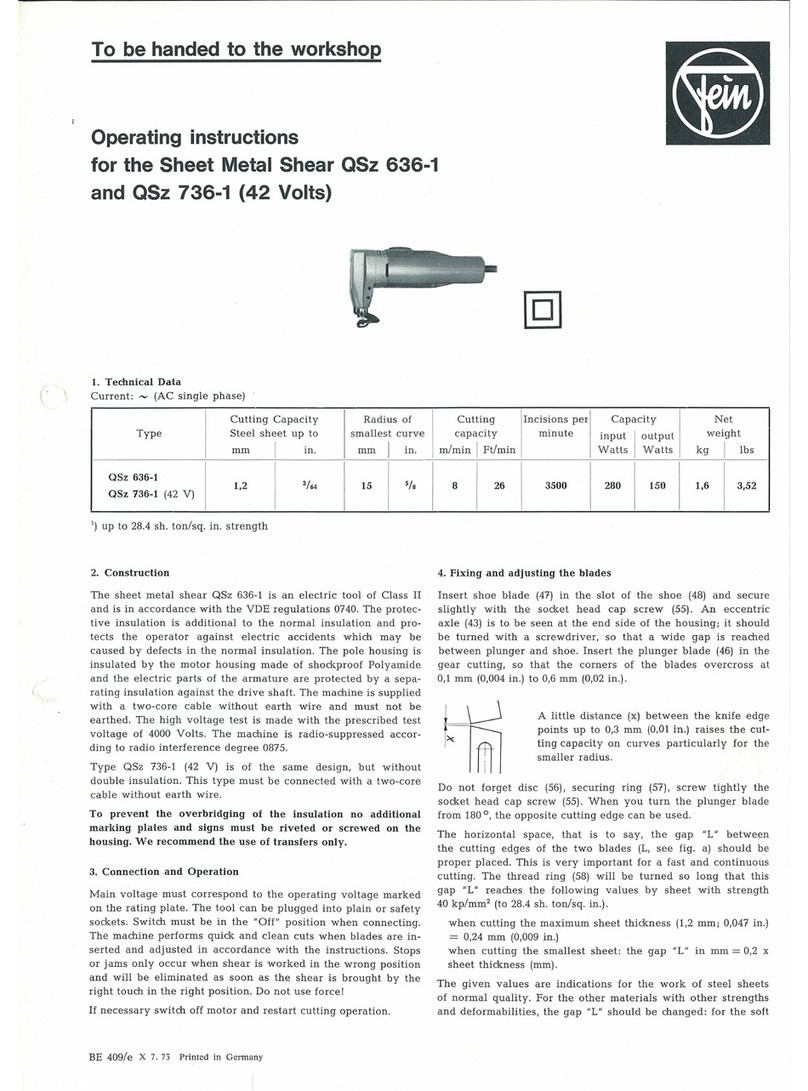
  9. Fein QSz 636 User manual

Fein QSz 636 User manual

QSz
636
To
be
handed
to
the
workshop
Operating
instructions
for
the
double
insulated
and
radio
suppressed
Sheet
Metal
Shear
QSz
636,
and
type
QSz
736
(42
Volts)
1.
Technical
Data
Current:
~
(AC
single
phase)
for
sheet
metal
up
to
Radius
of
Cutting
Incisions
per
Capacity
Net
Type
Steel
I
Stainless
steel
smallest
curve
capacity
minute
.
input
I
outpu
t
weight
mm
I
in
.
mm
I
in
.
mm
I
in
.
QSz
636 I I
2
I
5
/64
1,6 1
(16
I 20
I
0,8
QSz
736
(42
V)
2.
Construction
The
sheet
metal
shear
QSz
636
is
an
electric
tool
of
Class
II
and
is
in
accordance
with
the
VDE
regulations
0740.
The
protective
insulation
is
additional
to
the
normal
insulation
and
p
ro
tects
the
operator
against
electric
accidents
which
may
be
caused
by
de-
fects
in
the
normal
insulation
.
The
pole
housing
is
insulat
ed
by
the
motor
housing
made
of
shockproof
Polyamide
and
the
elec-
tric
parts
of
the
armature
are
protected
by
a
separating
insula-
tion
against
the
drive
shaft.
The
machine
is
supplied
with
a
two-
core
cable
without
earth
wire
and
must
not
be
earthed.
The
high
voltage
test
is
made
with
·
the
pre
sc
ribed
test
voltage
of 4000
Volts.
The
machine
is
radio-suppressed
according
to
radio
inter-
ference
degree
N.
Type
QSz
736
(42
V)
is
of
the
same
design
but
without
double
insulation.
This
type
must
also
be
connected
with
a
two-core
cable
without
earth
wire.
To
prevent
the
overbridging
of
the
insulation
no
additional
marking
plates
and
signs
must
be
riveted
or
screwed
on
the
housing.
We
recommend
the
use
of
transfers
only.
3.
Connection
and
Operation
Main
voltage
must
correspond
to
the
operating
voltage
marked
on
the
rating
plate.
The
tool
can
be
plugged
into
plain
or
safety
sockets.
Switch
must
be
in
the
"Off"
position
when
connecting
.
The
machine
performs
quick
and
clean
c
uts
when
blades
are
in-
serted
a~d
adj
usted
in
accordance
with
the
instru
ctions.
Stops
or
jams
only
occur
when
shear
is
worked
in
the
wrong
position
BE
195
/e
X 8.69
Printed
in
German
y
m/
min
I
Ft
/
min
Watts
Watts
kg
I
lbs
I I I
I
3 I 9,8 1700 280 150 2,3 I 5
and
will
be
eliminated
as
soon
as
the
shear
is
brought
by
the
right
to
uch
in
the
right
position.
Use
no
force!
If
necessary
switch
off
motor
a
nd
restart
cutting
opera
tion.
4.
Maintenance
and
Lubrication
Before
carryi
ng
out
any
maintenance
work
always
remember
to
pull
out
the
plug
.
Every
100
duty
hours
the
tool
should
be
.
cleaned
thoro
ughly
in
order
to
guarantee
the
safet
y
given
by
the
protec
tiv
e
insulation.
For
thi
s
purpose
carbon
holders
and
insul
ated
par
ts
must
be
cleaned
of
carbon
and
grinding
dust.
This
is
done
by
means
of
a
brush
or
by
blowing
o
ut
the
t
ool
with
dry
pne
um
atic
air
or
a
hand
blower.
For
checking
the
carbon
brushes
the
carbon
holde
rs
(10)
can
be
taken
out
after
unscre
w
ing
the
screws
(12).
Make
sure
that
the
carbon
brus
h
es
are
refitt
ed
in t
heir
original
place
a
nd
that
th
ey
mo
ve
easily
in
their
holder.
They
should
be
replaced
at
the
latest
when
they
have
worn
down
to
7
mm
(1
/
4"
).
Please,
onl
y
.
use
original
Fein
carbon
br
u
she
s
(Order
Reference
EZ 11-62).
After
fit
ting
,
new
brush
es,
run
tool
unloaded
for
abo
ut
15
minu-
tes
to
allow
brush
es
to
bed
in
.
One
pair
of
spare
carbon
brushes
will
be
found
in
the
motor
housing;
please,
do
not
forget
to
reorder
them
in
time.
In
order
to
prevent
accidents
check
cable
at
regula
r
intervals.
To
re
place
the
cable
unscre
w
th
e
screws
(22)
and
(2
3)
and
re
-
mo
ve
the
cover
(21)
.
Clamp
off
cab
le
from
switch
(14),
unscrew
screws
(20)
at
cabl
e
clamping
bridge
(1
9)
and
ta
ke
out
cab
le.
Use
Universal
Grease
type
Sst
1
instead
of
other
types
of
grease!
I
77
62 5
60
74
-
-~
I~
40
~~
-
48
51
68
I
~,
-
49
75
r----
45
G:)
,___
73
I
46
I
1
I
53
---
-
®)
Oa=iO
- 1 l I
54
41
54
H5
~
~~~
H7
69
1
43
44
50
H3
72
r
57
l J J ! L
~
-~-
47
76
78
34
9':
:m::
j -
if>
..
®A
I
I
&
...
...
,,
I l t I -j
79
59
36
37 35
-------~
____
__.
[;:
®
I
~
~
-1
8)oz
@J
I
10
---
~
13
-~~
~
-,
12
-
--
~
1
dt
I
14
11
16
22
21
I
23
.......:..._..,
Component Parts
ci
z
Order
;....
.....
Description
.....
a
'-<
Reference
<0
p..
ci
z
Order
;....
....
a
Description
'-<
Reference
<0
p..
1-23
MK
1-17-2 1
motor
housing,
assembled
42
Q3-32
1
housing
1-16
MK
1-17-1 1
motor
housing,
assembled
43 Q 3-33 1
connecting
rod
1
MK
1-17 1
motor
housing
44 Q 3-34 1
eccentric
axle
2
SA
16-25 1
control
rod
45 Q 3-35 1
bush
3
SA
16-24 1
trigger
46 Q 3-36 1
adjusti
ng
screw
4
SA
5-48 1
switch
handle
47 Q 3-37 1
sc
r
ew
5 SR 3-M4x6. 1
fillister
screw
48 z37-29 1
blade
{plunger)
6
state
f
ype
1
pole
housing,
assembled
and
voltage
with
winding
49 z37-30 1
blade
(shoe)
50 Q 3-40 1
ke
y
7
PT
6-M3,5 2
spring
was
h
er
51 Q 3-41 1
disc
8 SR2-M3,5x50 2
cylindrica
l
screw
52
Q3-42
1
clamping
ring
9
JS
28-7 1
grease
retaining
ring
53 Q 3-43 1
shoe
10
EZ 12-45-1 2
carbon
holder,
assembled
54
RJ
16-37 2
secur
ing
ring
11
EZ 11-62 2
carbon
brush
55
Q 3-45 1
distance
sleeve
12
SR3-M3,5x20 2
fillister
screw
57 ZR15-26x0,75 1
gear
wheel,
36
teeth
13
SR3-M3,5x15 2
fillister
screw
59 LK
1-1
1 gr
oove
ball
bearing
14 EZ 1-60 1
switch
(2
poles)
60 Q 3-47 1
needle
cag
e
15
EZ 22-37 1
capacitor
62 LK 16-23 1
groove
ball
bearing
16 SR 3-M3,
5x6
1
fillister
screw
63 LK 16-5 1
groove
ball
bearing
17
EZ 7-101 1
cable
65 Q 3-50 2
cylindr
ical
pin
18
JS
13-7 1
cable
protecting
sleeve
67 SR35-M5x10 1
hexagon
socket
scre
w
19
PT
31-21 1
clamping
bridge
68 SR35-M5x12 1
hexagon
socket
sc
rew
20 SR3-M3,5x10 2
fillister
screw
69
SR
35-M!Ox35 1
hexagon
socket
screw
21
PT
27-28 I 1
motor
housing
cover
71
Q 3-54 1
threaded
pin
22 SR6k-M3,5x8 1
fillister
countersunk
screw
72
RJ
16-1 1
securing
ring
23
SR3-M3,5x32 1 1
fillister
screw
73
Q3
-56 1
square
ring
26 s
tat
e
type
I 1
armature
with
winding,
com-
74
MZ
31
-1
1
lubricatin
g
nipple
a
nd
voltage
mutator
and
fan
75
RJ
12-56 1
sea
li
ng
ring
30
ZR
4-42 1
pinion,
6
teeth
76 SR2-M3,5x40 4
cylindrical
screw
31
SR 2-M3,5x6 3
cylindrical
screw
77 SR35-M5x20 2
hexagon
socket
screw
32
PT
5d-M3,5 3
securing
plate
78 BF 1-4x12 1 cyli
ndrical
pin
33 LK 16-35 I 2
groove
ball
bearing
79 SR 33-M5x22 2
hexagon
socket
screw
34-74
GH
9-6-3 I 1
shear
head,
assembled
I
35-74
GH
9-6-2 I 1 I
shear
head,
assembled
without
intermediate
bearing
40-74
GH
9-6-1 1
shear
head,
assembled
Parts
for
low
tension
(42 V)
1-23 1
MK
1-17-3 I : I
motor
housing,
assembled
17 EZ 6-126
cab
le
without
intermediate
bearing
and
countershaft
Accessories
34
LA
6-161 1
in
t
ermediate
bearing
11
EZ 11-62 2
spar
e
carbon
brush
35 LK
1-1
1
groove
ball
bearing
MZ
18-14 1
holding
pin
36 ZR16-15x0,75 1
pinion,
20
teeth
LE
1-2 1
gauge
for
sharpening
37 ZR15-11x0,75 1
countershaft
gear
wheel.
30
teeth
z 10-15 1
hexagon
socket
wrench
40 Q 3-30 1
plunger
z10-10 1 h
ex
agon
socket
wrench
4,1 Q 3-31 1
bolt
I
After
approx.
900
duty
hours
clean
the
machine
thoroughly.
For
this
purpose
dismantle
the
tool
according
to
paragraph
5.
The
ball
bearings
are
to
be
rinsed
in
clean
solvent
and
packed
with
new
grease.
In
order
to
prevent
overheating
of
the
bearings,
the
space
between
inner
and
outer
ring
is
to
be
filled
one
third
with
grease.
For
this
purpose
we
recommend
our
ball
bearing
grease
FK 3
(tube
of
approx.
10 g
C/3
oz),
Order
Reference:
MZ
60-2/
FK 3).
No
claims
can
be
entertained
for
damage
due
to
negligent
main-
tenance
and
inadequate
lubrication.
The
shear
head
being
the
power
transmitting
element
requires
a
good
lubrication.
It
is
recommended
to
renew
the
gear
grease
after
approximately
300
working
hours.
Please
only
use
special
FEIN
gear
grease
FG
12. A
mixing
of
this
grease
with
other
greases
endangers
the
greasing
capacities
and
therefore
also
use
FG
12
grease
for
the
roller
bearings
in
the
shear
head.
After
about
50
working
hours
regrease
the
plunger
guide
by
the
lubricating
nipple
(74).
Attention!
Never
work
with
blunt
blades!
For
resharpening
the
blades,
they
can
be
removed
after
unscrewing
the
two
screws.
When
sharpening,
use
plenty
of
coolant
and
strictl
y
observe
the
pre-
scribed
cutting
angles.
If
blades
are
resharpened
in
time,
break-
ing
out
is
avoided.
Attention!
Do
not
cut
welding
seams
~
.
ut-Uc--,
'> i
; I
I .
. I
i
i
I
I
--
--
12"
i--.,
. I
L_
-+.t:_
_J
r--::J
:
'(
Jl \
I
I
:::.
o·
L,
I
-it'r
!
L _
____
_j
Fitting
and
adjusting
of
the
blades
Insert
fixed
blade
(49)
and
plunger
blade
(48)
and
secure
slightly
with
screws
(67,
68).
Turn
set
screw
(46)
until
the
corners
of
the
blades
at
highest
plunger
position
overcross
at
about
0.6
mm
(0.2 in)
(Dimension
F).
Screw
and
plunger
blade
should
then
be
t
ightened.
L
lowest
position
Hereafter
the
fixed
blade
should
finally
be
adjusted
by
set
screw
(71)
so
that
the
gap
"L"
is
1110
of
the
sheet
thickness
to
be
cut.
(e. g.
sheet
metal
of
2
mm
thickness-
0.2 mm).
Grease
chart for
the
shear
head
type
I·
quantity
I
tubes
order
I
contents
g I
oz
reference
g I
oz
FG
12 I
f,fi
l
a:i
IMZ 60-3/FG 12 1 80 I 26/s
I I
;r;:
I
25 5 .
5.
Dismantling
The
machine
must
only
be
taken
apart
by
an
expert
working
in
the
following
sequence:
1.
Unscrew
screws
(22)
.
and
(23)
and
remove
motor
housing
cover
(21).
2.
Clamp
off
connections
to
pol
e
housing
(6),
capacitor
(15)
and
cable
(17)
at
switch
(14)
and
take
out
switch.
Unscrew
sc
re
w
(16)
and
remove
capacitor
(15)
.
3.
Remove
screws
(12),
then
take
out
carbon
holder
(10).
4.
Remove
screws
(77,
79)
and
take
off
shear
head.
5.
Unscrew
scre
ws
(76)
and
remove
intermediate
bearing.
Take
out
gr
ease
retaining
ring
(9)
and
armature
(26).
Attention!
To
maintain
true
running
conditions
never
us
e
force.
6.
Unscrew
screw
(47),
take
off
gear
wheel
(57)
and
remove
securing
ring
(72).
7.
Dismantle
eccentric
shaft
(44).
8.
Remove
shoe
and
take
out
plunger
(40).
Re-assembl
e
in
reverse
sequ
e
nce
.
6. Repair
and
Spare Parts
We
recommend
our
Fein
Service
Stations
to
carry
out
all
over-
haul
and
repair
work
quickly
and
expertly.
When
ord
e
ring
spare
parts,
please,
quote
Order
Ref
erence
or
send
in
sample
p
art,
stating
the
type
of
the
machine.
We
draw
yo
ur
attention
to
th
e n
ee
d
to
carry
out
a
high
voltage
test
in
accordance
with
your
local
regulations
(or
VDE
regula-
tion
0740)
before
taking
a
tool
into
service
after
any
repair
carri-
ed
out
by
your
own
staff.
(

This manual suits for next models

1

Other Fein Power Tools manuals

Fein ASg 636 User manual

Fein

Fein ASg 636 User manual

Fein ASb 636 User manual

Fein

Fein ASb 636 User manual

Fein FSC1.6X User manual

Fein

Fein FSC1.6X User manual

Fein AFMM14 User manual

Fein

Fein AFMM14 User manual

Fein RS 12-70 E User manual

Fein

Fein RS 12-70 E User manual

Fein Universal Sheet Metal Shear UBs 1.6 / 1.6c User manual

Fein

Fein Universal Sheet Metal Shear UBs 1.6 / 1.6c User manual

Fein AFSC18Q User manual

Fein

Fein AFSC18Q User manual

Fein BLs 1.6 User manual

Fein

Fein BLs 1.6 User manual

Fein ASW 10-6-2ST User manual

Fein

Fein ASW 10-6-2ST User manual

Fein BLK1.3TE Setup guide

Fein

Fein BLK1.3TE Setup guide

Fein KFH17-8 Series User manual

Fein

Fein KFH17-8 Series User manual

Fein MULTIMASTER FMM 250 User manual

Fein

Fein MULTIMASTER FMM 250 User manual

Fein GWP10 User manual

Fein

Fein GWP10 User manual

Fein FMM350Q User manual

Fein

Fein FMM350Q User manual

Fein AFMT12 User manual

Fein

Fein AFMT12 User manual

Fein GSZ4-280EL User manual

Fein

Fein GSZ4-280EL User manual

Fein AFMM14 User manual

Fein

Fein AFMM14 User manual

Fein MM 500 Plus User manual

Fein

Fein MM 500 Plus User manual

Fein ASse 636II-28bT Kinetik Setup guide

Fein

Fein ASse 636II-28bT Kinetik Setup guide

Fein 7 229 43 User manual

Fein

Fein 7 229 43 User manual

Fein KBM 50 auto Setup guide

Fein

Fein KBM 50 auto Setup guide

Fein JHM Magforce User manual

Fein

Fein JHM Magforce User manual

Fein MM 300 Plus User manual

Fein

Fein MM 300 Plus User manual

Fein MOtlx 6-25 User manual

Fein

Fein MOtlx 6-25 User manual

Popular Power Tools manuals by other brands

Jet IDP-15BV operating instructions

Jet

Jet IDP-15BV operating instructions

Iso-Tip QUICK CHARGE 7740 quick start guide

Iso-Tip

Iso-Tip QUICK CHARGE 7740 quick start guide

Makita DHR263 instruction manual

Makita

Makita DHR263 instruction manual

Michelin 12264 user guide

Michelin

Michelin 12264 user guide

Makita HM1200 instruction manual

Makita

Makita HM1200 instruction manual

SCHUNK VERO-S NSE mini 90-25 Assembly and operating manual

SCHUNK

SCHUNK VERO-S NSE mini 90-25 Assembly and operating manual

Ammann APR 4920 Translation of the original operating instructions

Ammann

Ammann APR 4920 Translation of the original operating instructions

Ledah 11222 operating instructions

Ledah

Ledah 11222 operating instructions

Baileigh DP-15VSF Operator's manual

Baileigh

Baileigh DP-15VSF Operator's manual

Craftsman CMCE030 instruction manual

Craftsman

Craftsman CMCE030 instruction manual

Jet JPB-60 owner's manual

Jet

Jet JPB-60 owner's manual

Ingersoll-Rand QS110P4 Maintenance information

Ingersoll-Rand

Ingersoll-Rand QS110P4 Maintenance information

Makita DTW104 instruction manual

Makita

Makita DTW104 instruction manual

EINHELL TC-JS 60/1 operating instructions

EINHELL

EINHELL TC-JS 60/1 operating instructions

Sealey SD1530 instructions

Sealey

Sealey SD1530 instructions

Bostitch P50 Operation and maintenance manual

Bostitch

Bostitch P50 Operation and maintenance manual

Narex ASR 600-3HTB BASIC Original operating manual

Narex

Narex ASR 600-3HTB BASIC Original operating manual

Black & Decker JS660 instruction manual

Black & Decker

Black & Decker JS660 instruction manual

manuals.online logo
manuals.online logoBrands
  • About & Mission
  • Contact us
  • Privacy Policy
  • Terms and Conditions

Copyright 2025 Manuals.Online. All Rights Reserved.