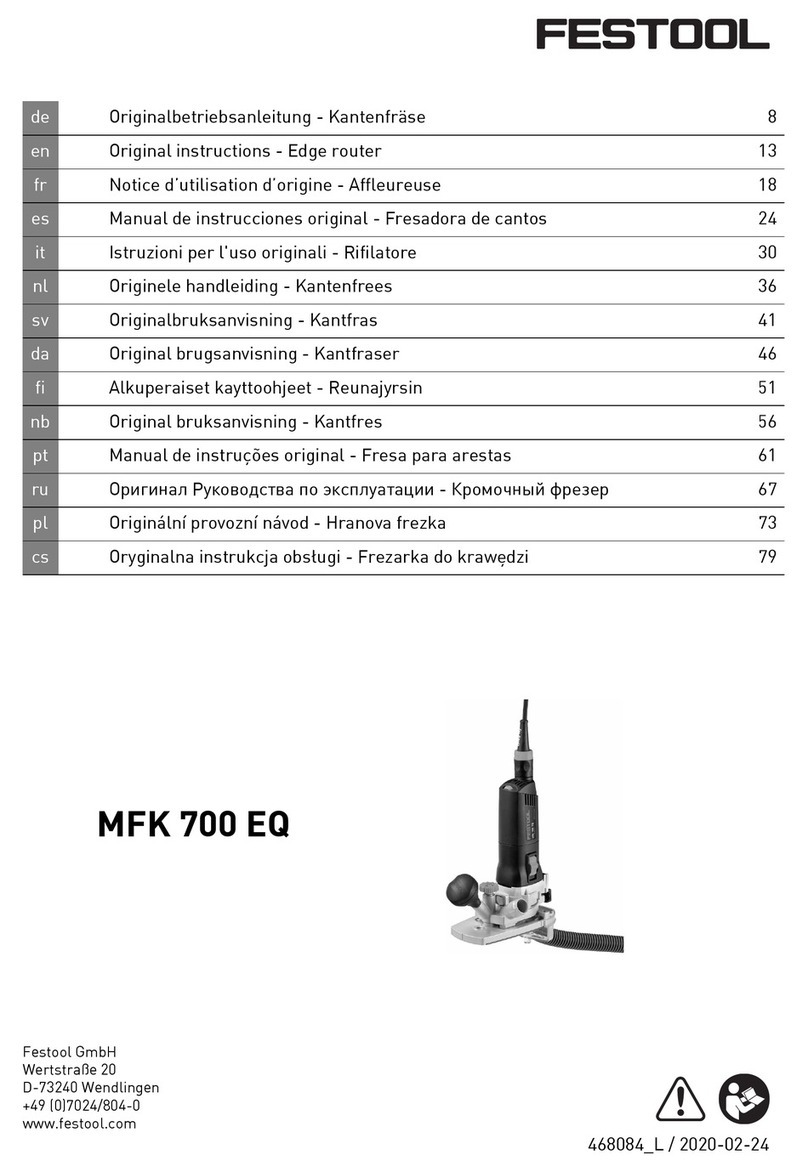
Festool OF 1010 EQ Installation instructions

Originalbetriebsanleitung - Oberfräse 7
Original operating manual - Router 13
Notice d’utilisation d’origine - Défonceuse 18
Manual de instrucciones original - Fresadora 23
Istruzioni per l’uso originali - Fresatrici verticali 28
Originele gebruiksaanwijzing - Bovenfrezen 33
Originalbruksanvisning - Handöverfräsarna 38
Alkuperäiset käyttöohjeet - Yläjyrsin 43
Original brugsanvisning - Overfræserne 48
Originalbruksanvisning - Overfresene 53
Manual de instruções original - Fresadora superior 58
Оригинал Руководства по эксплуатации - Вертикальный фрезер 63
Originál návodu k obsluze - Horní frézka 69
Oryginalna instrukcja eksploatacji - Frezarka górnowrzecionowa 74
468039_K / 2019-06-18
OF 1010 EQ
OF 1010 EBQ
Festool GmbH
Wertstraße 20
73240 Wendlingen
Germany
www.festool.com

0
1
1.10
1.15
1.2
1.5
1.16
1.17
1.6
2.1
2.2
1.1
1.4
1.7
1.9
1.8
1.3
1.12
1.11
1.14
1.13
1 A
2

3
3.2
3.4
3.1
4.3
4.2
4.1
5.1
5.2
3.3
3.5
3.6
3.7
4.5
4.6
3.1
3.3
3.5
4.4
4
5
x
Y

6
8.3
9.2
6.1
8.1
8.2
9.1
6.36.7 6.2
7.3 7.27.4 7.1
7.6 7.77.5
6.5 6.66.4
7
9
8

Oberfräse
Router
Défonceuse
Seriennummer *
Serial number *
N° de série *
(T-Nr.)
OF 1010 EQ 491991
OF 1010 EBQ 490174
EG-Konformitätserklärung. Wir erklären in
alleiniger Verantwortung, dass dieses Produkt
allen ein-schlägigen Bestimmungen der folgenden
Richtlinien einschließlich ihrer Änderungen ent-
spricht und mit den folgenden Normen überein-
stimmt:
EC-Declaration of Conformity. We declare
under our sole responsibility that this product is in
conformity with all relevant provisions of the follo-
wing directives including their amendments and
complies with the following standards:
CE-Déclaration de conformité communau-
taire. Nous déclarons sous notre propre responsa-
bilité que ce produit est conforme aux normes ou
documents de normalisation suivants:
CE-Declaración de conformidad. Declaramos
bajo nuestra exclusiva responsabilidad que este
producto corresponde a las siguientes normas o
documentos normalizados:
CE-Dichiarazione di conformità. Dichiariamo
sotto la nostra esclusiva responsabilità che il
presente prodotto e conforme alle norme e ai
documenti normativi seguenti:
EG-conformiteitsverklaring. Wij verklaren op
eigen verantwoordelijkheid dat dit produkt voldoet
aan de volgende normen of normatieve documen-
ten:
EG-konformitetsförklaring. Vi förklarar i eget
ansvar, att denna produkt stämmer överens med
följande normer och normativa dokument:
EY-standardinmukaisuusvakuutus. Va-
kuutamme yksinvastuullisina, etta tuote on seu-
raavien standardien ja normatiivisten ohjeiden
mukainen:
EF-konformitetserklæring Vi erklærer at
have alene ansvaret for, at dette produkt er i over-
ensstemmelse med de følgende normer eller
normative dokumenter:
CE-Konformitetserklæring Vi erklærer på
eget ansvar at dette produktet er i overensstem-
melse med følgende normer eller normative
dokumenter:
CE-Declaração de conformidade: Declara-
mos, sob a nossa exclusiva responsabilidade, que
este produto corresponde às normas ou aos docu-
mentos normativos citados a seguir:
Декларация соответствия ЕС: Мы заявляем
с исключительной ответственностью, что данный
продукт соответствует следующим нормам или
нормативным документам:
ES prohlašeni o shodě: Prohlašujeme s veške-
rou odpovědnosti, že tento vyrobek je ve shodě s
nasledujicimi normami nebo normativnimi doku-
menty:
Deklaracja o zgodności z normami UE: Ninie-
jszym oświadczamy na własną odpowiedzialność,
że produkt ten spełnia następujące normy lub
dokumenty normatywne:
________________________________________
2006/42/EG, 2014/30/EU, 2011/65/EU
EN60745-1: 2009 + A11: 2010, EN60745-2-
17: 2010, EN55014-1: 2016, EN55014-2: 2015,
EN61000-3-2: 2015, EN61000-3-3: 2014,
EN50581:2012
________________________________________
Festool GmbH
Wertstr. 20, D-73240 Wendlingen
GERMANY
Wendlingen, 2017-08-08
Wolfgang Zondler
Head of Research, Development and Technical
Documentation
Ralf Brandt
Head of Standardization & Approbation
* im definierten Seriennummer-Bereich (S-Nr.) von 40000000 -
49999999
in the specified serial number range (S-Nr.) from 40000000 -
49999999
dans la plage de numéro de série (S-Nr.) de 40000000 - 49999999
709387_B

13
Symbols
Warning of general danger
Wear ear protection!
Wear protective goggles!
Wear a dust mask.
Read the Operating Instructions/Notes!
1 Intended use
The routers are designed for routing wood, plas-
tics and similar materials.
Aluminium and plasterboard can also be pro-
cessed with corresponding cutters such as are
listed in the Festool catalogues.
The user is liable for damage and injury
resulting from incorrect usage!
2 Safety instructions
2.1 Rules
WARNING! Read all safety warnings and
all instructions. Failure to follow the warn-
ings and instructions may result in electric shock,
fire and/or serious injury.
Save all warnings and instructions for future
reference.
The term „power tool“ in the warnings refers
to your mains-operated (corded) power tool or
battery-operated (cordless) power tool.
2.2 Tool-specific safety rules
- Hold power tool by insulated gripping surfaces,
because the cutter may contact its own cord.
Cutting a „live“ wire may make exposed metal
parts of the power tool “”live”” and could give
the operator an electric shock.
- Use clamps or another practical way to secure
and support the workpiece to a stable platform.
Holding the work by your hand or against the
body leaves it unstable and may lead to loss of
control.
- Do not exceed the maximum speed specified on
the tool and/or keep to the speed range.
- The clamping collet should only be used to
clamp tools with a shank diameter appropriate
for the collet.
- Check that the cutter is firmly fitted and runs
freely.
- The clamping collet and union nut must show
no signs of damage.
- Cracked or distorted cutters must not be used.
Wear suitable protection such as
ear protection, safety goggles, a
dust mask for work which gener-
ates dust, and protective gloves
when working with raw materials
and when changing tools.
- Festool electric power tools should only be
installed in work benches specially designed
by Festool. The electric power tool may become
unsafe and cause serious accident if installed
in benches from other manufacturers or self-
manufactured work benches.
- Only for AS/NZS: The tool shall always be sup-
plied via residual current device with a rated
residual current of 30 mA or less.
Router
Technical data OF 1010 EBQ OF 1010 EQ
Power 1010 W 1010 W
Speed (no load) 10000 - 24000 rpm 9500 - 23000 rpm
Quick height adjustment 55 mm 55 mm
Fine height adjustment 8 mm 8 mm
Drive shaft connection of the spindle
M16x1.5 M16x1.5
Router diameter max. 35 mm max. 35 mm
Weight (excluding cable) 2.7 kg 2.7 kg
Degree of protection / II / II
The specified illustrations can be found at the beginning of the operating instructions.

14
3 Noise and vibration information
The typical values determined in accordance with
EN 60745 are:
Sound-pressure level/sound-power level
OF 1010 EBQ, OF 1010 EQ 79/90 dB(A)
Measuring uncertainty allowance K = 3 dB
Wear ear protection!
Overall vibration levels (vector sum for three di-
rections) measured in accordance with EN 60745:
Vibration emission level (3-axis) ah= 5,5 m/s2
Front handle ah= 8,0 m/s2
Uncertainty K = 2,0 m/s²
The specified emissions values (vibration, noise)
– are used to compare machines.
– They are also used for making preliminary
estimates regarding vibration and noise loads
during operation.
– They represent the primary applications of the
power tool.
Increase possible for other applications, with oth-
er insertion tools or if not maintained adequately.
Take note of idling and downtimes of machine!
4 Power supply and start-up
The mains voltage must correspond to
the specification on the rating plate.
Switch (1.2) serves as an On/Off switch (I = On/0
= Off). It may be latched with the locking knob on
the side (1.1) for continuous operation. Pressing
the switch again releases the lock. See Fig. 1A for
connection and disconnection of the power cable.
5 Machine settings
Always remove the power supply plug from the
socket before carrying out any work on the ma-
chine.
5.1 Electronics
(OF 1010 EBQ/OF 1010 EQ)
Do not operate the tool if the electronics are faulty
as this can lead to the tool operating at excessive
speeds. If the start-up is not smooth or speed
adjustment is not possible, this indicates that the
electronics are faulty.
The OF 1010 EBQ, OF 1010 EQ features
full-wave electronics with the following
properties:
Smooth start-up
The smooth start-up ensures the router starts
up jolt-free.
Speed adjustment
You can regulate the speed steplessly between
10000 and 24000 min-1 (OF 1010 EQ: 9500 - 23000
min-1) using the adjusting wheel (1.16). This ena-
bles you to optimise the cutting speed to suit the
material:
Material
Cutterdiameter
[mm] Recom-
mended
cutter
material
3 - 14 15 - 25 26 - 35
Rotary control setting
Hardwood 6 - 4 5 - 3 3 - 1 HW (HSS)
Softwood 6 - 5 6 - 3 4 - 1 HSS (HW)
Laminated
chipboard 6 - 5 6 - 3 4 - 2 HW
Plastic 6 - 4 5 - 3 2 - 1 HW
Aluminium 3 - 1 2 - 1 1 HSS (HW)
Plaster-
board 2 - 1 1 1 HW
Constant speed
The pre-selected speed remains constant whether
the machine is in operation or in neutral position.
Temperature control
To prevent overheating, the safety electronics
switches the machine off when it reaches a critical
motor temperature. Let the machine cool down
for approx. 3-5 minutes before using it again. The
machine requires less time to cool down if it is
running, i.e. in neutral position.
Brake (OF 1010 EBQ)
The OF 1010 EBQ has an electronic brake which
brings the spindle with tool to a standstill within
approx. 2 seconds of the tool being switched off.
5.2 Changing tools
You can turn the machine upside down when
changing the tool.
a) Inserting the tool
- Insert the router into the open clamping collet
as far as possible, but at least up to the mark (
) on the router shank.
- Turn the spindle until the spindle stop (1.14)
catches when pressed and the spindle is locked
in place.
- Tighten the locking nut (1.13) with a 19 mm
open-end spanner.

15
b) Removing the tool
- Turn the spindle until the spindle stop (1.14)
catches when pressed and the spindle is locked
in place.
- Loosen the locking nut (1.13) using a 19 mm
open-ended spanner until a resistance is felt.
Overcome this resistance by turning the open-
ended spanner even further.
- Remove the cutter.
5.3 How to change the clamping collet
Clamping collets are available for following shank
diameters: 6.0 mm, 6.35 mm, 8 mm (order num-
bers see Festool catalogue or Internet „www.
festool.com“.
- Fully unscrew the nut (1.13) and remove from
spindle together with the clamping collet.
- Only insert a new clamping collet in the spindle
when the nut is attached and engaged, then
tighten the nut slightly. Do not tighten the nut
until a milling cutter has been fitted.
5.4 Adjusting the milling depth
The milling depth is adjusted in three stages:
a) Setting the zero point
- Open the clamping lever (1.6) so that the stop
cylinder (1.7) can move freely.
- Place the router with router table (1.11) onto a
smooth surface. Open the rotary knob (1.15) and
press the machine down until the milling cutter
rests on the base.
- Clamp the machine in this position by tightening
the rotary knob (1.15).
- Press the stop cylinder against one of the three
sensing stops of the pivoted turret stop (1.9).
The individual height of each sensing stop can be
adjusted with a screwdriver:
Sensing stop min. height/max. height
A 38 mm/44 mm
B 44 mm/54 mm
C 54 mm/67 mm
- Push the pointer (1.4) down so that it shows 0
mm on the scale (1.5).
b) Setting the milling depth
The desired milling depth can be set either with
the quick depth adjustment or with the fine depth
adjustment.
• Quick depth adjustment: Pull the stop cylinder
(1.7) up until the pointer shows the desired
milling depth. Clamp the stop cylinder in this
position with the clamping lever (1.6).
• Fine depth adjustment: Clamp the stop cyl-
inder with the clamping lever (1.6). Set the
desired milling depth by turning the adjusting
wheel (1.3) in. Turn the adjusting wheel to the
next mark on the scale to adjust the milling
depth by 0.1 mm. One full turn adjusts the
milling depth by 1 mm. The maximum adjust-
ment range with the adjusting wheel is 8 mm.
c) Increasing the milling depth
- Open the rotary knob (1.15) and press the tool
down until the stop cylinder touches the sensing
stops.
- Clamp the machine in this position by tightening
the rotary knob (1.15).
5.5 Dust extraction
Always connect the machine to a dust
extractor. A connection for extracting dust
and chips (1.8) is a standard feature on
the routers.
At the same time a chip guard (2.2) on the side
stop prevents flying chips.
With edge routing, the best extraction effect is
obtained with the extractor hood AH-OF, available
as an accessory.
KSF-OF chip catcher
Using the KSF-OF chip catcher (9.1) (sometimes
included in the scope of delivery), the efficiency
of the extraction can be increased when routing
edges. Installation is similar to that of the copy-
ing ring.
The hood can be cut off along the grooves (9.2)
using a hacksaw and can thus be reduced in size.
The chip catcher can then be used for interior
radiuses up to a minimum radius of 40 mm.
6 Working with the machine
Always secure the workpiece in such a
manner that it cannot move while being
sawed.
The machine must always be held with
both hands by the designated handles
(1.15, 1.17).
You should wear a dust mask for work
which produces dust.
Always advance the router in the direction op-
posite to the direction of rotation of the cutter
(counter-routing)!
When routing (ensure feed direction of power tool
is the same as cutting direction of tool, Fig. 5).

16
6.1 Aluminium processing
When processing aluminium, the follow-
ing measures must be taken for safety
reasons:
- Pre-connect a residual current circuit-breaker
(FI, PRCD).
- Connect the machine to a suitable dust extractor.
- Clean tool regularly of dust accumulations in
the motor housing.
Wear protective goggles.
6.2 Freehand routing
Freehand routing is the method normally used for
lettering or shapes, and for routing edges using
cutters with a guide pin or ring.
6.3 Routing with the parallel guide
The parallel guide (3.2) supplied can be used for
routing parallel to the edge of the workpiece (not
supplied with „Module 5A):
- Secure both guide rods (3.7) with the two rotary
knobs (3.3) on the side stop.
- Insert the guide rods into the grooves (1.10) on
the router base to the required distance and
secure them by turning the rotary knob (3.1).
This distance can be adjusted faster and more
precisely with the fine precision adjustment (3.6),
available as an accessory:
- Turn the adjusting screw (3.4) in the plastic part
of the guide,
- clamp the guide rods with the rotating knobs
(3.5) in the precision adjustment,
- loosen the rotating knobs (3.3) of the parallel
guide,
- set the desired distance with the adjusting screw
and retighten the rotating knobs.
6.4 Routing with the TV-OF extension table
The extension table TV-OF, available as an acces-
sory, can be used to enlarge the support area of
the router and thus improve guidance, e.g. when
routing close to edges.
The extension table is fitted in the same way as
the parallel guide.
6.5 Routing with the FS guide system
The guide system, available as an accessory, fa-
cilitates routing straight grooves.
- Fasten the guide stop (4.1) to the platen with the
guide rails (3.7) of the parallel guide.
- Fasten the guide rail (4.3) with FSZ screw clamps
(4.4) to the workpiece. Make sure that the safety
distance X (Fig. 4) of 5 mm between the front
edge of the guide rail and cutter or groove is
observed.
- Place the guide stop onto the guide rail as shown
in Fig. 4. To ensure a backlash-free guidance of
the router stop you can adjust two guide cheeks
with a screwdriver through the side openings
(4.2).
- Screw the height-adjustable support (4.6) of the
router table’s threaded bore (6.6) in such a way
that the underside of the router table is parallel
to the surface of the workpiece.
When working with marking-up lines, the marks
on the platen (4.5) and the scale on the support
(4.6) show the centre axis of the cutter.
6.6 Routing with the SZ-OF 1000 beam com-
passes
With the SZ-OF 1000 beam compasses, which are
available as an accessory, you can make circular
cuts or segments of circles with diameters from
153 to 760 mm.
- The beam compasses are pushed into the front
groove of the platen until the desired radius is
set.
- Lock the beam compasses with the rotating
knob (1.12).
Practical hint
To prevent the tip of the compasses from making a
hole in the workpiece, fix a thin board at the centre
point by means of double-sided adhesive tape.
6.7 Copy cutting
A copying ring or the copying device is used to
exactly reproduce existing workpieces (both avail-
able as accessories).
a) Copying ring
Fasten the copying rings to the platen instead of
the cover ring (2.1) from below.
When choosing the size of the copying ring (5.1)
make sure that the cutter used (5.2) fits through
the ring’s opening.
The distance Y (Fig. 5) between the workpiece and
template is calculated by
Y = (Ø copying ring - Ø cutter)
2
The copying ring can be centred exactly with the
centring cone ZF-OF (Order No. 486035).
b) Copying device
The angle arm WA-OF (6.5) and copier scanning
set KT-OF, consisting of roller holder (6.2) and
three copying rollers (6.1), are required for the
copying device.
- Screw the angle arm at the desired height in the


17
platen’s threaded bore (6.6) with the rotating
knob (6.4).
- Fit a copying roller in the roller holder and bolt
this to the angle arm with the rotating knob (6.3).
Make sure that the copying roller and cutter have
the same diameter!
- Turn the adjusting wheel (6.7) to adjust the dis-
tance between the copying roller and cutter axis.
6.8 Edge band trimming
Protruding edge bands can be flush trimmed with
the angle arm WA-OF (7.6) in connection with the
guide plate UP-OF (7.3).
- Screw the angle arm into the platen’s threaded
bore (7.7) with the rotating knob (7.5).
- Bolt the guide plate to the angle arm with the
rotating knob (7.4).
- Adjust the milling depth so that this is equal to
the thickness of the edge band + 2 mm.
- Move the guide plate (8.1) as close as possible to
the cutter by loosening the rotating knob (8.3).
- Adjust the depth of the guide plate with the
adjusting wheel (8.2) so that during trimming
a few decimillimetres of the edge band are left
protruding which can then be sanded down by
hand.
The chip guard SF-OF (7.2), available as an ac-
cessory, improves dust extraction when trimming
edge bands. It is fastened to the side of the platen
with the rotating knob (7.1) and cover the cutter
from above during work (Fig. 8).
7 Accessories
For your own safety, use only original
Festool accessories and spare parts.
The accessory and tool order number can be found
in the Festool catalogue or on the Internet under
„www.festool.com“.
8 Maintenance and care
Always remove the power supply plug
from the socket before carrying out any
work on the machine.
All maintenance and repair work which
requires the motor casing to be opened
may only be carried out by an authorised
service centre.
Customer service and repair. Only
through manufacturer or service work-
shops: Please find the nearest address
at: www.festool.com/Service
EKAT
1
235
4
Use only original Festool spare parts!
Order No. at: www.festool.com/Service
Always keep the machine and the ventilation slots
clean.
The tool is fitted with special motor brushes with
an automatic cut-out. When the brushes become
worn the power supply is shut off automatically
and the tool comes to a standstill.
9 Environment
Do not throw the power tool in your household
waste! Dispose of machines, accessories and
packaging at an environmentally-responsible
recycling centre. Observe the valid national regu-
lations.
EU only: In accordance with European Directive on
waste electrical and electronic equipment and im-
plementation in national law, used electric power
tools must be collected separately and handed in
or environmentally friendly recycling.
Information on REACh:
www.festool.com/reach

468 015_015
Sicherheitshinweise 3Turvallisuusohjeet 17
Safety instructions 5Sikkerhedsinstruktioner/ 19
Instructions de sécurité 7Sikkerhetsveiledning 21
Instrucciones de seguridad 9Instruções de segurança 23
Indicazioni per la sicurezza 11 Общие указания по технике без-
опасности 25
Veiligheidsvoorschriften 13 Bezpečnostní pokyny 27
Säkerhetsföreskrifter 15 Wskazówki bezpieczeñstwa 29
Sicherheitshinweise - Safety instructions - Instructions de sécu-
rité - Instrucciones de seguridad - Indicazioni per la sicurezza -
Veiligheidsvoorschriften - Säkerhetsföreskrifter - Turvallisuus-
ohjeet - Sikkerhedsinstruktioner - Sikkerhetsveiledning -
Instruções de segurança - Общие указания по технике без-
опасности - Bezpečnostní pokyny - Wskazówki bezpieczeñstwa
WICHTIG - IMPORTANT

7
INDICATIONS GÉNÉRALES DE SÉ
CURITÉ
ATTENTION ! Lire toutes les consignes
de sécurité et indications. Le non-respect
des avertissements et instructions indiqués ci-
après peut entraîner un choc électrique, un in-
cendie et/ou de graves blessures.
Conserver tous les avertissements et toutes les
instructions pour pouvoir s’y reporter ultérieu-
rement.
Le terme « outil » dans les avertissements fait
reference à votre outil électrique alimenté par
le secteur (avec cordon d’alimentation) ou votre
outil fonctionnant sur batterie (sans cordon d’ali-
mentation).
1 PLACE DE TRAVAIL
a) Maintenez l’endroit de travail propre et bien
éclairé. Un lieu de travail en désordre ou mal
éclairé augmente le risque d’accidents.
b) N’utilisez pas l’appareil dans un environ-
nement présentant des risques d’explosion
et où se trouvent des liquides, des gaz ou
poussières inflammables. Les outils élec-
troportatifs génèrent des étincelles risquant
d’enflammer les poussières ou les vapeurs.
c) Tenez les enfants et autres personnes éloi-
gnés durant l’utilisation de l’outil électro-
portatif. En cas d’inattention vous risquez de
perdre le contrôle sur l’appareil.
d) Ne laissez pas l‘outil électrique fonctionner
sans surveillance. Ne vous éloignez de l‘outil
électrique que lorsque l‘accessoire est com-
plètement immobilisé.
2 SÉCURITÉ RELATIVE AU SYSTÈME ÉLEC
TRIQUE
a) La fiche de secteur de l’outil électroportatif
doit être appropriée à la prise de courant.
Ne modifiez en aucun cas la fiche. N’utilisez
pas de fiches d’adaptateur avec des appa-
reils avec mise à la terre. Les fiches non mo-
difiées et les prises de courant appropriées
réduisent le risque de choc électrique.
b) Evitez le contact physique avec des surfaces
mises à la terre tels que tuyaux, radiateurs,
fours et réfrigérateurs. Il y a un risque élevé
de choc électrique au cas où votre corps se-
rait relié à la terre.
c) N’exposez pas l’outil électroportatif à la
pluie ou à l’humidité. La pénétration d’eau
dans un outil électroportatif augmente le ris-
que d’un choc électrique.
d) N’utilisez pas le câble à d’autres fins que
celles prévues, n’utilisez pas le câble pour
porter l’appareil ou pour l’accrocher ou en-
core pour le débrancher de la prise de cou-
rant. Maintenez le câble éloigné des sources
de chaleur, des parties grasses, des bords
tranchants ou des parties de l’appareil en
rotation. Un câble endommagé ou torsadé
augmente le risque d’un choc électrique.
e) Au cas où vous utiliseriez l’outil électropor-
tatif à l’extérieur, utilisez une rallonge auto-
risée homologuée pour les applications exté-
rieures. L’utilisation d’une rallonge électrique
homologuée pour les applications extérieures
réduit le risque d’un choc électrique.
f) Si l’usage d’un outil dans un emplacement
humide est inévitable, utiliser une alimen-
tation protégée par un dispositif à courant
différentiel résiduel (RCD). L’usage d’un RCD
réduit le risque de choc électrique.
3 SÉCURITÉ DES PERSONNES
a) Restez vigilant, surveillez ce que vous faites.
Faites preuve de bon en utilisant l’outil élec-
troportatif. N’utilisez pas l’appareil lorsque
vous êtes fatigué ou après avoir consommé
de l’alcool, des drogues ou avoir pris des
médicaments. Un moment d’inattention lors
de l’utilisation de l’appareil peut entraîner de
graves blessures sur les personnes.
b) Portez des équipements de protection. Por-
tez toujours des lunettes de protection. Le
fait de porter des équipements de protection
personnels tels que masque anti-poussières,
chaussures de sécurité antidérapantes, cas-
que de protection ou protection acoustique
suivant le travail à effectuer, réduit le risque
de blessures.
c) Evitez une mise en service par mégarde.
Assurez-vous que l’interrupteur est effecti-
vement en position d’arrêt avant de retirer la
fiche de la prise de courant. Le fait de porter
l’appareil avec le doigt sur l’interrupteur ou de
brancher l’appareil sur la source de courant
lorsque l’interrupteur est en position de fonc-
tionnement, peut entraîner des accidents.
d) Enlevez tout outil de réglage ou toute clé
avant de mettre l’appareil en fonctionne-
ment. Une clé ou un outil se trouvant sur une
partie en rotation peut causer des blessures.
e) Ne surestimez pas vos capacités. Veillez à
garder toujours une position stable et équi-
librée. Ceci vous permet de mieux contrôler
l’appareil dans des situations inattendues.
f) Portez des vêtements appropriés. Ne portez

8
pas de vêtements amples, ni de bijoux. Gar-
dez les cheveux et les vêtements à distance
des pièces mobiles. Des vêtements amples,
des bijoux ou des cheveux longs peuvent être
happés par les pièces en mouvement.
g) Si des dispositifs servant à aspirer ou à re-
cueillir les poussières doivent être utilisés,
vérifiez que ceux-ci soient effectivement
raccordés et qu’ils sont correctement utili-
sés. L’utilisation de tels dispositifs réduit les
dangers dus aux poussières.
h) Ne devenez pas trop sûr de vous, par ha-
bitude suite à une utilisation fréquente de
l’appareil, de manière à ne pas respecter les
principes de sécurité de base de l’appareil.
Une action imprudente peut occasionner de
graves blessures en l’espace d’une fraction
de seconde.
4 UTILISATION ET EMPLOI SOIGNEUX DE
L’OUTIL ÉLECTROPORTATIF
a) Ne surchargez pas l’appareil. Utilisez l’outil
électroportatif approprié au travail à effec-
tuer. Avec l’outil électroportatif approprié,
vous travaillerez mieux et avec plus de sécu-
rité à la vitesse pour laquelle il est prévu.
b) N’utilisez pas un outil électroportatif dont
l’interrupteur est défectueux. Un outil élec-
troportatif qui ne peut plus être mis en ou
hors fonctionnement est dangereux et doit
être réparé.
c) Retirer la fiche de la prise de courant avant
d’effectuer des réglages sur l’appareil, de
changer les accessoires, ou de ranger l’ap-
pareil. Cette mesure de précaution empêche
une mise en fonctionnement par mégarde.
d) Gardez les outils électroportatifs non utilisés
hors de portée des enfants. Ne permettez pas
l’utilisation de l’appareil à des personnes qui
ne se sont pas familiarisées avec celui-ci ou
qui n’ont pas lu ces instructions. Les outils
électroportatifs sont dangereux lorsqu’ils sont
utilisés par des personnes non initiées.
e) Prenez soin des outils électroportatifs. Vé-
rifiez que les parties en mouvement fonc-
tionnent correctement et qu’elles ne soient
pas coincées, et contrôlez si des parties sont
cassées ou endommagées de telle sorte
que le bon fonctionnement de l’appareil s’en
trouve entravé. Faites réparer les parties
endommagées avant d’utiliser l’appareil.
De nombreux accidents sont dus à des outils
électroportatifs mal entretenus.
f) Maintenez les outils de coupe aiguisés et
propres. Des outils soigneusement entrete-
nus avec des bords tranchants bien aiguisés
se coincent moins souvent et peuvent être
guidés plus facilement.
g) Utilisez les outils électroportatifs, les acces-
soires, les outils à monter etc. conformé-
ment à ces instructions et aux prescriptions
en vigueur pour ce type d’appareil. Tenez
compte également des conditions de travail
et du travail à effectuer. L’utilisation des
outils électroportatifs à d’autres fins que
celles prévues peut entraîner des situations
dangereuses.
h) Gardez les poignées dans un état sec, propre
et exempt d'huile et de graisse. Des poi-
gnées glissantes ne permettent pas une prise
en main sûre et le contrôle de l'outil électri-
que dans des situations inattendues.
5 UTILISATION ET EMPLOI SOIGNEUX DES
APPAREILS SANS FIL
a) Ne chargez les accumulateurs que dans des
chargeurs recommandés par le fabricant.
Un chargeur approprié à un type spécifique
d’accumulateur peut engendrer un risque
d’incendie lorsqu’il est utilisé avec d’autres
accumulateurs.
b) Dans les outils électroportatifs, n’utilisez
que les accumulateurs spécialement prévus
pour celui-ci. L’utilisation de tout autre accu-
mulateur peut entraîner des blessures et des
risques d’incendie.
c) Tenez l’accumulateur non-utilisé à l’écart
de toutes sortes d’objets métalliques tels
qu’agrafes, pièces de monnaie, clés, clous,
vis ou autres, étant donné qu’un pontage
peut provoquer un court-circuit. Un court-
circuit entre les contacts d’accu peut provo-
quer des brûlures ou un incendie.
d) En cas d’utilisation abusive, du liquide peut
sortir de l’accumulateur. Evitez tout contact
avec ce liquide. En cas de contact par mé-
garde, rincez soigneusement avec de l’eau.
Au cas où le liquide rentrerait dans les yeux,
consultez en plus un médecin. Le liquide qui
sort de l’accumulateur peut entraîner des ir-
ritations de la peau ou causer des brûlures.
e) Vérifiez que l’appareil est effectivement en
position d’arrêt avant de monter l’accumula-
teur. Le fait de monter un accumulateur dans
un outil électroportatif en position de fonc-
tionnement peut causer des accidents.
6 SERVICE
a) Ne faites réparer votre outil électroportatif
que par un personnel qualifié et seulement

9
avec des pièces de rechange d’origine. Ceci
permet d’assurer la sécurité de l’appareil.
b) Pour la réparation et l‘entretien, n‘utilisez
que des pièces d‘origine Festool. L‘utilisation
d‘accessoires ou de pièces de rechange non
adaptés risque de provoquer une électrocu-
tion ou des blessures.
Instrucciones generales de se-
guridad
¡ATENCIÓN! Lea íntegramente las ins-
trucciones e indicaciones de seguridad.
El incumplimiento de dichas instrucciones e in-
dicaciones puede dar lugar a descargas eléctri-
cas, incendios o lesiones graves.
Guardar todas las advertencias de peligro e ins-
trucciones para futuras consultas.
El término herramienta eléctrica empleado en
las siguientes advertencias de peligro se refiere
a herramientas eléctricas de conexión a la red
(con cable de red) y a herramientas eléctricas
accionadas por acumulador (o sea, sin cable de
red).
1 PUESTO DE TRABAJO
a) Mantenga limpio y bien iluminado su puesto
de trabajo. El desorden y una iluminación de-
ficiente en las áreas de trabajo pueden provo-
car accidentes.
b) No utilice la herramienta eléctrica en un
entorno con peligro de explosión, en el que
se encuentren combustibles líquidos, gases
o material en polvo. Las herramientas eléc-
tricas producen chispas que pueden llegar a
inflamar los materiales en polvo o vapores.
c) Mantenga alejados a los niños y otras perso-
nas de su puesto de trabajo al emplear la he-
rramienta eléctrica. Una distracción le puede
hacer perder el control sobre el aparato.
d) Vigile siempre la herramienta eléctrica
mientras esté en funcionamiento. Mantenga
vigilada la herramienta eléctrica hasta que
ésta pare por completo.
2 SEGURIDAD ELÉCTRICA
a) El enchufe del aparato debe corresponder a
la toma de corriente utilizada. No es admi-
sible modificar el enchufe en forma alguna.
No emplear adaptadores en aparatos dota-
dos con una toma de tierra. Los enchufes sin
modificar adecuados a las respectivas tomas
de corriente reducen el riesgo de una descar-
ga eléctrica.
b) Evite que su cuerpo toque partes conectadas
a tierra como tuberías, radiadores, cocinas y
refrigeradores. El riesgo a quedar expuesto a
una sacudida eléctrica es mayor si su cuerpo
tiene contacto con tierra.
c) No exponga las herramientas eléctricas a
la lluvia y evite que penetren líquidos en su
interior. Existe el peligro de recibir una des-
carga eléctrica si penetran ciertos líquidos en
la herramienta eléctrica.
d) No utilice el cable de red para transportar
o colgar el aparato, ni tire de él para sacar
el enchufe de la toma de corriente. Manten-
ga el cable de red alejado del calor, aceite,
esquinas cortantes o piezas móviles. Los
cables de red dañados o enredados pueden
provocar una descarga eléctrica.
e) Al trabajar con la herramienta eléctrica en
la intemperie utilice solamente cables de
prolongación homologados para su uso en
exteriores. La utilización de un cable de pro-
longación adecuado para su uso en exteriores
reduce el riesgo de una descarga eléctrica.
f) Si fuese imprescindible utilizar la herra-
mienta eléctrica en un entorno húmedo, es
necesario conectarla a través de un fusible
diferencial. La aplicación de un fusible dife-
rencial reduce el riesgo a exponerse a una
descarga eléctrica.
3 SEGURIDAD DE PERSONAS
a) Esté atento a lo que hace y emplee la herra-
mienta eléctrica con prudencia. No utilice la
herramienta eléctrica si estuviese cansado,
ni tampoco después de haber consumido
alcohol, drogas o medicamentos. El no estar
atento durante el uso de una herramienta
eléctrica puede provocarle serias lesiones.
b) Utilice un equipo de protección y en todo
caso unas gafas de protección. El riesgo a
lesionarse se reduce considerablemente si,
dependiendo del tipo y la aplicación de la
herramienta eléctrica empleada, se utiliza
un equipo de protección adecuado como una
mascarilla antipolvo, zapatos de seguridad
con suela antideslizante, casco, o protectores
auditivos.
c) Evite una puesta en marcha fortuita del apa-
rato. Cerciorarse de que el aparato esté des-
conectado antes conectarlo a la toma de co-

Kundendienst und Reparatur nur durch
Hersteller oder durch Servicewerkstätten:
Nächstgelegene Adresse unter:
www.festool.com/Service
Nur original Festool Ersatzteile verwenden! Be-
stell-Nr. unter:
www.festool.com/Service
Customer service and repair only through
manufacturer or service workshops: Please
find the nearest address at:
www.festool.com/Service
Use only original Festool spare parts! Order No.
at:
www.festool.com/Service
Seuls le fabricant et un atelier homologué
sont habilités à effectuer toute réparation ou
service. Les adresses à proximité sont disponibles
sur :
www.festool.com/Service
Utilisez uniquement des pièces de rechange Fe-
stool d‘origine. Référence sur :
www.festool.com/ Service
El Servicio de atención al cliente y repara-
ciones solo está disponible por parte del fa-
bricante o de los talleres de reparación: encuentre
la dirección más próxima a usted en:
www.festool.com/Service
Utilice únicamente piezas de recambio Festool ori-
ginales. Referencia en:
www.festool.com/Service
Servizio e riparazione solo da parte del co-
struttore o delle officine di servizio autoriz-
zate. Le officine più vicine sono riportate di seguito:
www.festool.com/Service
Utilizzare solo ricambi originali Festool! Cod. pro-
dotto reperibile al sito:
www.festool.com/Service
Klantenservice en reparatie alleen door
producent of servicewerkplaatsen: Dichtst-
bijzijnde adressen op:
www.festool.com/Service
Alleen originele Festool-reserveonderdelen gebru-
iken! Bestelnr. op:
www.festool.com/Service
Service och reparation ska endast utföras
av tillverkaren eller serviceverkstäder. Se
följande adress:
www.festool.com/Service
Använd bara Festools originalreservdelar! Art.nr
nedan:
www.festool.com/Service
Huolto ja korjaus vain valmistajan tehtaalla
tai huoltokorjaamoissa: katso sinua lähinnä
oleva osoite kohdasta:
www.festool.com/Service
Käytä vain alkuperäisiä Festool-varaosia! Tilaus-
numero kohdassa:
www.festool.com/Service
Kundeservice og reparationer må kun
udføres af producenten eller serviceværk-
steder: Nærmeste adresse finder De på:
www.festool.com/Service
Brug kun originale Festool-reservedele! Best.-nr.
finder De på:
www.festool.com/Service
Kundeservice og reparasjoner skal kun ut-
føres av produsenten eller serviceverksteder:
Du finner nærmeste adresse under:
www.festool.com/Service
Bruk kun originale Festool-reservedeler! Best.nr.
finner du under:
www.festool.com/Service
Serviço Após-venda e Reparação apenas
através do fabricante ou das oficinas de ser-
viço: endereço mais próximo em:
www.festool.com/Service
Utilizar apenas peças sobresselentes originais da
Festool! Referência em:
www.festool.com/Service
Сервисное обслуживание и ремонт только
через фирмуизготовителя или в наших
сервисных мастерских: адрес ближайшей
мастерской см. на
www.festool.com/Service
Используйте только оригинальные запасные
части Festool! № для заказа на:
www.festool.com/Service
Servis a opravy smí provádět pouze výrobce
nebo servisní dílny: nejbližší adresu najdete
na:
www.festool.com/Service
Používejte jen originální náhradní díly Festool! Obj.
č. na:
www.festool.com/Service
Obsługa serwisowa i naprawy wyłącznie u
producenta lub w warsztatach autoryzowa-
nych: prosimy wybrać najbliższe miejsce spośród
adresów zamieszczonych na stronie:
www.festool.com/Service
Należy stosować wyłącznie oryginalne części za-
mienne firmy Festool.Nr zamówienia pod:
www.festool.com/Service
www.festool.com/service EKAT
1
235
4
Festool Group GmbH & Co. KG · Wertstraße 20 · 73240 Wendlingen · Germany
Other manuals for OF 1010 EQ
5
This manual suits for next models
1
Table of contents
Other Festool Wood Router manuals