ADJUSTMENT AND
INSPECTION MR60 65/75/85
Doc. 10023982
Emesso Giugno 2011
Ver. AB
Pag. 3 di 16
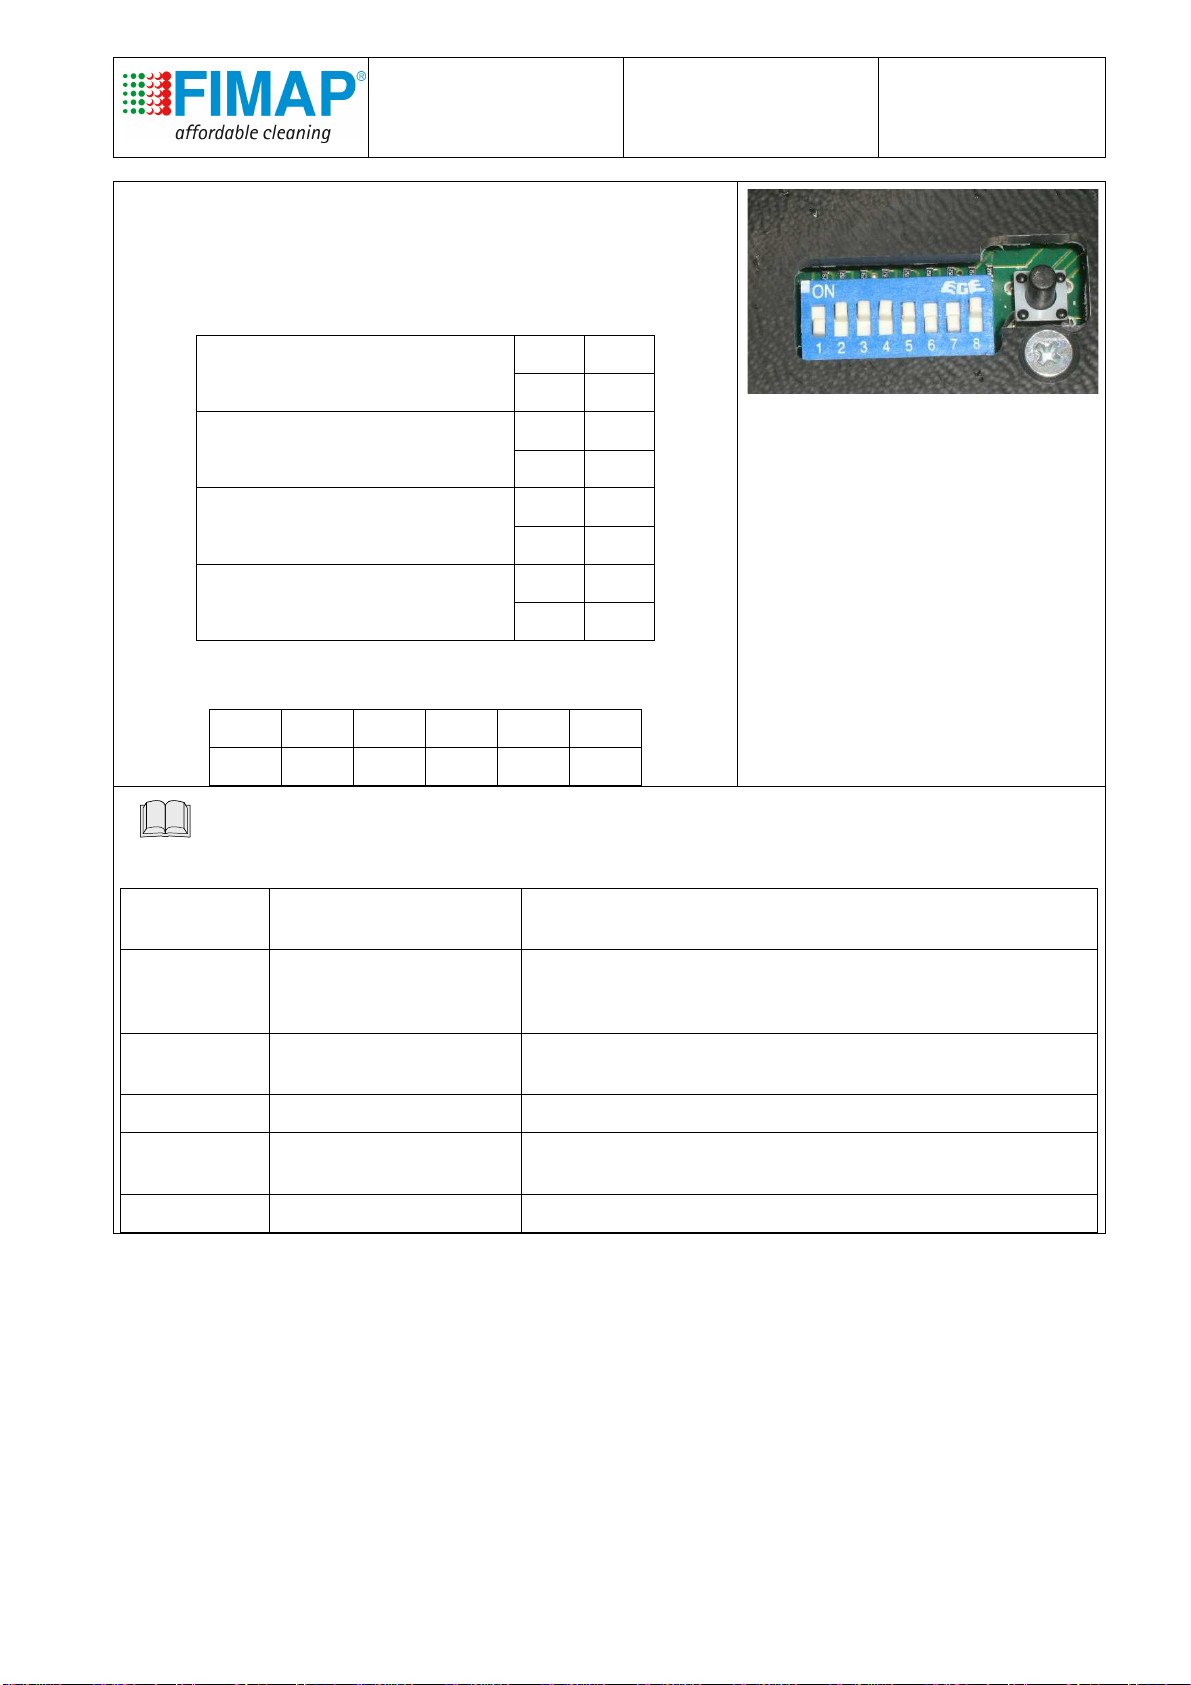
ALARM TABLE
Message Alarm What to do
ALARM A1
FW Switch ON Forward micro-switch on
in turning on.
Put the potentiometer in idle position and
check that the forward micro-switch is
open.
ALARM A2
BW Switch ON Backward micro-switch
on in turning on. Let the pedal stay in idle position and
open the backward micro-switch.
ALARM A3
Pot. FAULT Potentiometer error Check the potentiometer harness.
ALARM A4
Ref OUT Neutral Potentiometer not
correclty positioned
Put the potentiometer in the idle position
or if it already is in the right position,
adjust the potentiometer program.
ALARM A5
Over temperature Thermal protection Wait for 5 minutes and then check the
traction motor absorption rate.
ALARM A6
POWER STAGE Damaged power stage Replace the chopper card.
ALARM A7
OVERCURRENT Overcurrent Check the motor cables: If connections
are regular and repeat the alarm, replace
the chopper card.
ALARM A8 POWER
FUSE/RELAY Power fuse or internal
contactor damaged
Check the fuse on the + battery and
wiring, replace the chopper card if it
persists (General relay damaged).
ALARM A9
UNDERVOLTAGE Undervoltage Check the batteries for poor voltage.
ALARM A10
OVERVOLTAGE Overvoltage Battery voltage greater than 45V: check
battery status
Overload Current Current protection Check the motor current and possibly trim
the electronic current control
ALARM A12
DISABLE ON Disabling active Check the status of the disabled.
ALARM A13
KEY-OFF Turn off sequence active Check the wiring on the ignition power
key.
ALARM A14
EEPROM FAIL E²prom data reading
failed Check the settings: if the alarm is
repeated, replace the chopper card.