10
1
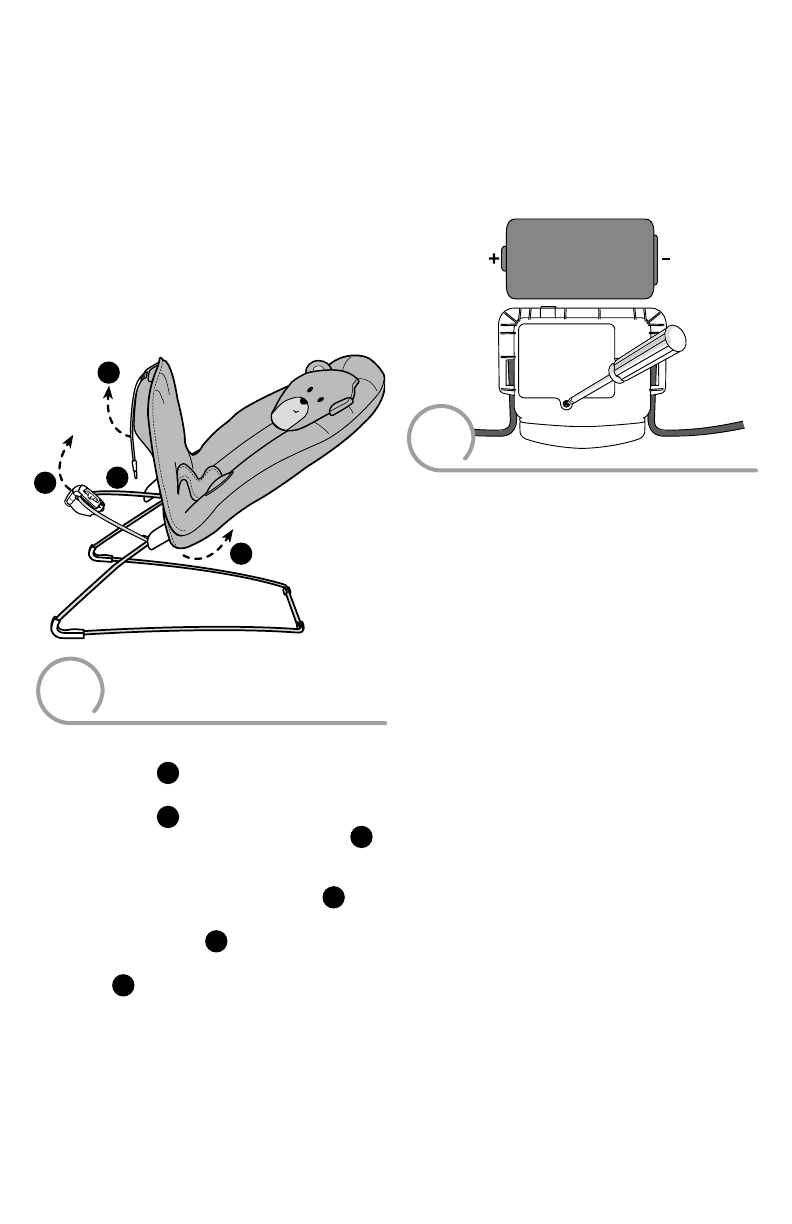
Battery Installation Colocación de las pilas
IMPORTANT! Low battery power causes this product
to operate erratically: no vibrations and the product
may not turn off. Remove and properly dispose of the
batteries and replace with three new C (LR14)
alkaline batteries.
¡IMPORTANTE! Si las pilas están gastadas, el producto
no funcionará correctamente (sin vibraciones ni función
de apagado). Sacar y desechar las pilas y sustituirlas por
3 pilas nuevas alcalinas C (LR14) x 1,5V.
Hint: We recommend using alkaline batteries for longer
battery life.
Atención: Se recomienda usar pilas alcalinas para una
mayor duración.
1,5V x 3
C (LR14)
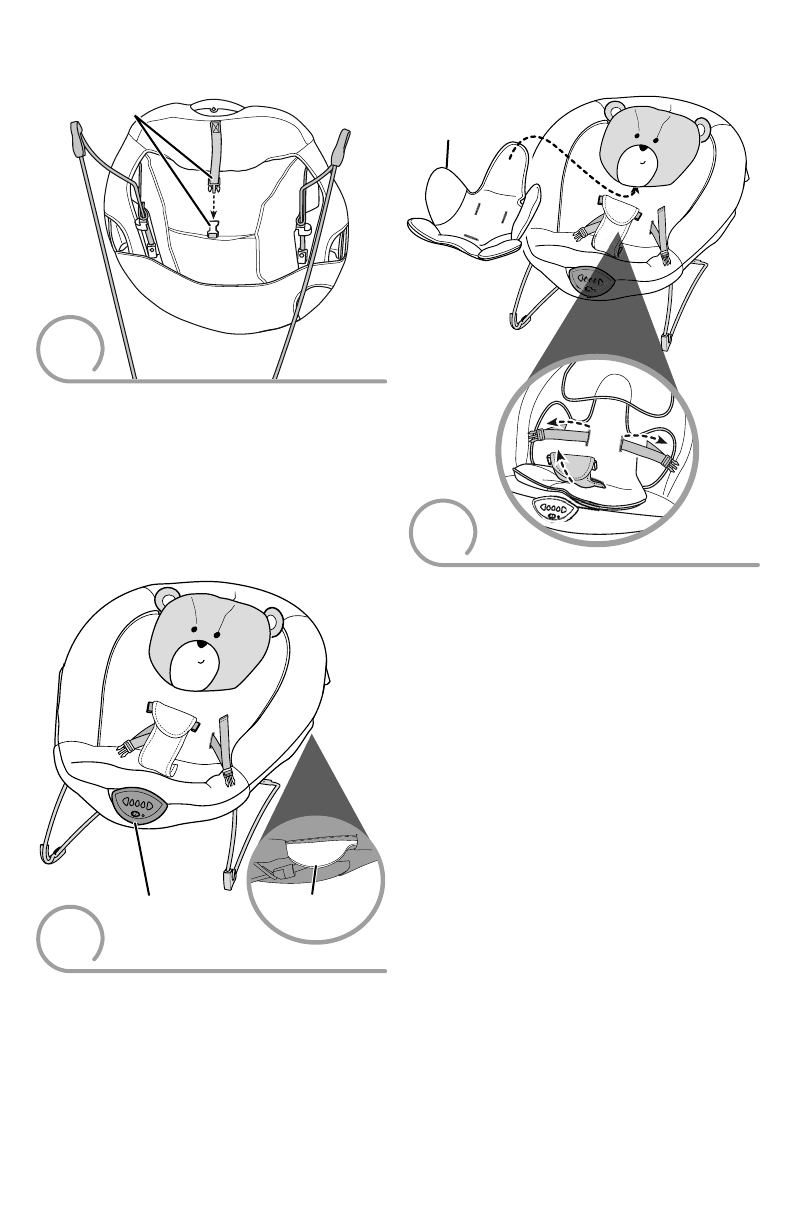
• Unfasten the pad straps on the back of the pad around
the soothing unit A.
• Pull to remove the pad from around the handles and
the soothing unit B.
• Remove the pad bottom pocket from the footrest C.
• Desabrochar los cinturones de la parte de atrás de la
almohadilla alrededor de la unidad relajante A.
• Jalar para desprender la almohadilla alrededor de las
asas y la unidad relajante B.
• Retirar la funda de la parte de abajo de la almohadilla del
reposapiés C.
B
C
A
B
2
• Loosen the screw in the battery compartment door.
Remove the battery compartment door.
• Insert three C (LR14) alkaline battery into the battery
compartment.
• Replace the battery compartment door and tighten
the screw.
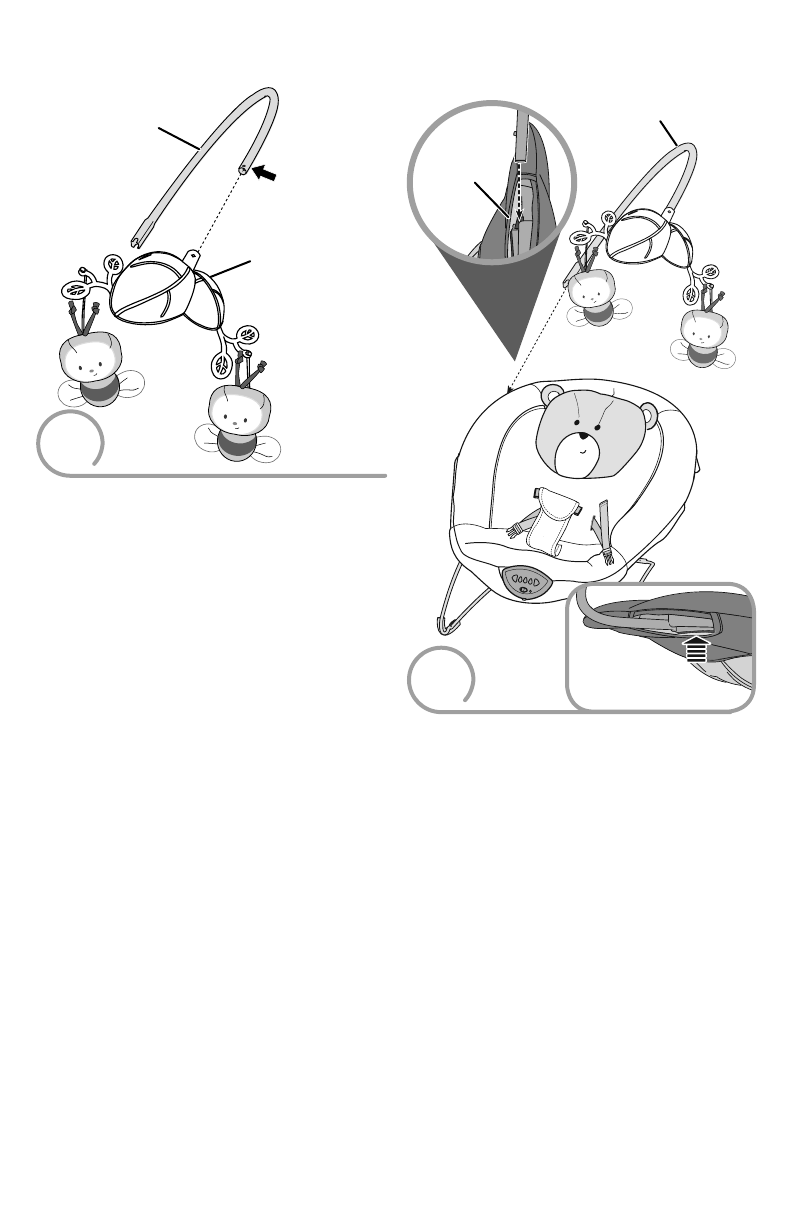
• Pull and fit the pad seat bottom pocket around the
soothing unit and footrest.
• Fasten the pad straps on the back of the pad around
the soothing unit. Make sure you hear a "click".
• If this product begins to operate erratically, you may
need to reset the electronics. Slide the power switch off
and then back on.
• Aflojar el tornillo de la tapa del compartimento de las
pilas. Retirar la tapa.
• Insertar 3 pilas alcalinas C (LR14) x 1,5V en el
compartimento.
• Cerrar la tapa del compartimento de pilas y apretar
el tornillo.
• Jalar y ajustar la funda de la parte de abajo de
la almohadilla alrededor de la unidad relajante y
el reposapiés.
• Ajustar los cinturones del dorso de la almohadilla
alrededor de la unidad relajante. Asegurarse de oír
un clic.
• Si este producto no funciona correctamente, restablecer el
circuito electrónico. Poner el interruptor de encendido en
apagado y nuevamente en encendido.