manuals.online logo
Brands
  1. Home
  2. •
  3. Brands
  4. •
  5. Fisher-Price
  6. •
  7. Toy
  8. •
  9. Fisher-Price 73479 User manual

Fisher-Price 73479 User manual

Other manuals for 73479

1

Other Fisher-Price Toy manuals

Fisher-Price 74878 User manual

Fisher-Price

Fisher-Price 74878 User manual

Fisher-Price Y3630 User manual

Fisher-Price

Fisher-Price Y3630 User manual

Fisher-Price HCF59 User manual

Fisher-Price

Fisher-Price HCF59 User manual

Fisher-Price Nickelodeon Blaze and the Moster Machines Animal Island Stunts... User manual

Fisher-Price

Fisher-Price Nickelodeon Blaze and the Moster Machines Animal Island Stunts... User manual

Fisher-Price wonder makers GFJ13 User manual

Fisher-Price

Fisher-Price wonder makers GFJ13 User manual

Fisher-Price P2803 User manual

Fisher-Price

Fisher-Price P2803 User manual

Fisher-Price CMW62S User manual

Fisher-Price

Fisher-Price CMW62S User manual

Fisher-Price GCR67 User manual

Fisher-Price

Fisher-Price GCR67 User manual

Fisher-Price C5221 User manual

Fisher-Price

Fisher-Price C5221 User manual

Fisher-Price Rescue Heroes Action Trackers Jake Justice with Police... User manual

Fisher-Price

Fisher-Price Rescue Heroes Action Trackers Jake Justice with Police... User manual

Fisher-Price M5749 User manual

Fisher-Price

Fisher-Price M5749 User manual

Fisher-Price P7680 User manual

Fisher-Price

Fisher-Price P7680 User manual

Fisher-Price BIB-BOP BUILDIN 73540 User manual

Fisher-Price

Fisher-Price BIB-BOP BUILDIN 73540 User manual

Fisher-Price imaginext FPM26 User manual

Fisher-Price

Fisher-Price imaginext FPM26 User manual

Fisher-Price BGC44 User manual

Fisher-Price

Fisher-Price BGC44 User manual

Fisher-Price N1880 User manual

Fisher-Price

Fisher-Price N1880 User manual

Fisher-Price smart cycle User manual

Fisher-Price

Fisher-Price smart cycle User manual

Fisher-Price STRIDE-TO-RIDE WALKER 73499 User manual

Fisher-Price

Fisher-Price STRIDE-TO-RIDE WALKER 73499 User manual

Fisher-Price Laugh & Learn J2462 User manual

Fisher-Price

Fisher-Price Laugh & Learn J2462 User manual

Fisher-Price POWERMAX RESCUE HEROES Aries Flyer B0331 User manual

Fisher-Price

Fisher-Price POWERMAX RESCUE HEROES Aries Flyer B0331 User manual

Fisher-Price THOMAS & FRIENDS HHV21 User manual

Fisher-Price

Fisher-Price THOMAS & FRIENDS HHV21 User manual

Fisher-Price Color Me Gemz Necklace Set User manual

Fisher-Price

Fisher-Price Color Me Gemz Necklace Set User manual

Fisher-Price 77616 User manual

Fisher-Price

Fisher-Price 77616 User manual

Fisher-Price W2047 User manual

Fisher-Price

Fisher-Price W2047 User manual

Popular Toy manuals by other brands

FUTABA GY470 instruction manual

FUTABA

FUTABA GY470 instruction manual

LEGO 41116 manual

LEGO

LEGO 41116 manual

Little Tikes LITTLE HANDIWORKER 0920 Assembly instructions

Little Tikes

Little Tikes LITTLE HANDIWORKER 0920 Assembly instructions

Eduard EF-2000 Two-seater exterior Assembly instructions

Eduard

Eduard EF-2000 Two-seater exterior Assembly instructions

USA Trains EXTENDED VISION CABOOSE instructions

USA Trains

USA Trains EXTENDED VISION CABOOSE instructions

Modellbau Laffont Z1601 Assembly instructions

Modellbau Laffont

Modellbau Laffont Z1601 Assembly instructions

NOCH 12905 instruction manual

NOCH

NOCH 12905 instruction manual

Eduard Ki-61-Id quick start guide

Eduard

Eduard Ki-61-Id quick start guide

Viessmann Vollmer 45616 Mounting instruction

Viessmann

Viessmann Vollmer 45616 Mounting instruction

Vollmer 42004 Mounting instruction

Vollmer

Vollmer 42004 Mounting instruction

Phoenix Model CLASSIC-EP instruction manual

Phoenix Model

Phoenix Model CLASSIC-EP instruction manual

H-KING Sopwith Camel British WW1 Fighter instruction manual

H-KING

H-KING Sopwith Camel British WW1 Fighter instruction manual

MODSTER Predator 4x4 Crawler user manual

MODSTER

MODSTER Predator 4x4 Crawler user manual

DHK Hobby 8136 User instruction manual

DHK Hobby

DHK Hobby 8136 User instruction manual

THUNDER TIGER Raptor 50 V2 kit manual

THUNDER TIGER

THUNDER TIGER Raptor 50 V2 kit manual

Timberkits Skateboarder instructions

Timberkits

Timberkits Skateboarder instructions

Hangar 9 Funtana 125 Assembly manual

Hangar 9

Hangar 9 Funtana 125 Assembly manual

QModeling XP Series instruction manual

QModeling

QModeling XP Series instruction manual

manuals.online logo
manuals.online logoBrands
  • About & Mission
  • Contact us
  • Privacy Policy
  • Terms and Conditions

Copyright 2025 Manuals.Online. All Rights Reserved.

G
Instructions
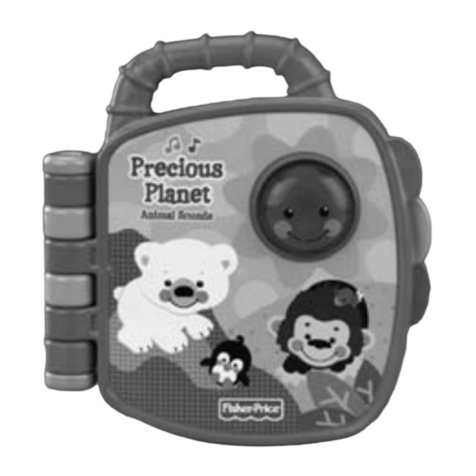
Product Number: 73479
F
Instructions
Numéro de produit : 73479
D
Anleitung
Produktnummer 73479
N
Gebruiksaanwijzing
Artikelnummer: 73479
I
Istruzioni
Numero Prodotto: 73479
E
Instrucciones
Número de referencia: 73479
Fisher-Price, Inc., a subsidiary of Mattel, Inc.,
East Aurora, New York 14052, U.S.A.
©2001 Mattel, Inc. All Rights Reserved.
® and ™ designate U.S. trademarks of Mattel, Inc.
Fisher-Price, Inc., une filiale de Mattel, Inc.,
East Aurora, New York 14052, É. -U.
©2001 Mattel, Inc. Tous droits réservés.
® et ™ désignent des marques déposées de
Mattel, Inc. aux É. -U.
Printed in China/Imprimé en Chine
73479pr-0728
G• Please keep this instruction sheet
for future reference, as it contains
important information.
• Requires three “AAA” batteries
(included).
• Adult assembly is required for
battery replacement.
• Tool required for battery replacement:
Phillips screwdriver (not included).
F• Conserver ces instructions car elles
contiennent des renseignements
importants.
• Fonctionne avec 3 piles AAA (fournies).
• Les piles doivent être remplacées par
un adulte.
• Outil requis pour le remplacement
des piles : tournevis cruciforme
(non fourni).
D• Diese Anleitung bitte für mögliche
Rückfragen aufbewahren. Sie enthält
wichtige Informationen.
• Drei Mikrozellen AAA erforderlich
(enthalten).
• Das Auswechseln und Einlegen
muss von einem Erwachsenen
vorgenommen werden.
• Zum Auswechseln der Batterien ist
ein Kreuzschlitzschraubenzieher
erforderlich (nicht enthalten).
2
N• Bewaar deze gebruiksaanwijzing.
Kan later nog van pas komen.
• Werkt op drie “AAA” batterijen
(inbegrepen).
• Batterijen dienen door een volwassene
vervangen te worden.
• Benodigd gereedschap: kruiskop-
schroevendraaier (niet inbegrepen).
I• Conservare queste istruzioni per
eventuale riferimento. Contengono
importanti informazioni.
• Richiede tre pile formato micro
stilo (incluse).
• E’ richiesta l’assistenza da parte di un
adulto per la sostituzione delle pile.
• Attrezzo richiesto per la sostituzione
delle pile: cacciavite a stella
(non incluso).
E• Sírvanse guardar estas instrucciones
para futura referencia, ya que
contienen información de importancia
acerca de este juguete.
• Funciona con 3 pilas “AAA”, incluidas.
• La sustitución de las pilas debe ser
realizada por un adulto.
• Herramienta necesaria para la
sustitución de las pilas: destornillador
de estrella (no incluido).
3
G• Always attach all provided
fasteners (strings) tightly to
a crib or playpen according
to the instructions. Check
frequently.
• Do not add additional strings
or straps to attach to a crib
or playpen.
F• Toujours fixer toutes les
attaches (cordons) solidement
à un lit ou à un parc d’enfant
en suivant les instructions.
Vérifier l’installation
fréquemment.
• Ne pas ajouter de ficelles
ou de courroies pour fixer
le produit à un lit ou à un
parc d’enfant.
D• Bitte befestigen Sie, laut
der Beschreibung, immer
zuerst die vorgesehenen
Verschlüsse (Verstrebungen)
gemäß der Anleitung am
Kinderbett oder am Laufstall.
Überprüfen Sie regelmäßig,
ob sie noch sicher
befestigt sind.
• Keine zusätzlichen Schnüre
oder Schlaufen an der
Wiege oder dem Laufstall
befestigen.
GCAUTION
FMISE EN GARDE
DVORSICHT
4
NWAARSCHUWINHG
IAVVRTTENZA
EPRECAUCIÓN
N• Gebruik altijd al het
bijgeleverde bevestigingsma-
teriaal (touwtjes) en maak
het stevig volgens de
gebruiksaanwijzing vast
aan de wieg of box.
Regelmatig controleren.
• Geen extra koordjes of
riempjes aan wieg of box
vastmaken.
I• Agganciare sempre tutte
le fascette (stringhe) attorno
al lettino o al box seguendo
le istruzioni. Esaminarle
regolarmente.
• Non aggiungere stringhe
o fascette addizionali per
agganciare il giocattolo
al lettino o al box.
E• Fijar bien las sujeciones
incorporadas (cintas) a la
cuna o el parque, siguiendo
atentamente las instrucciones
y comprobarlas periódica-
mente para asegurarse de
que están bien fijadas.
• No añadir ningún sistema
de sujeción adicional al
juguete para fijarlo a la
cuna o al parque.
5
GBefore Use
FAvant l’utilisation
DVor der Benutzung
NVoor het gebruik
IPrima dell’Uso
EAntes de utilizarlo
GCAUTION
FMISE EN GARDE
DVORSICHT
G• Please keep small parts such
as the plastic tab out of
children’s reach. Throw the
plastic tab away.
F• Tenir hors de la portée des
enfants les petites pièces,
comme la patte de plastique.
La jeter.
D• Kleinteile wie die Kunst-
stofflasche außer Reichweite
von Kindern halten. Die
Kunststofflasche entsorgen!
6
NWAARSCHUWING
IAVVERTENZA
EPRECAUCIÓN
N• Houd kleine onderdelen zoals
het plastic palletje buiten
bereik van kinderen. Gooi het
plastic palletje weg.
I• Tenere i pezzi di piccole
dimensioni come la linguetta
di plastica fuori dalla portata
del bambino. Eliminare la
linguetta di plastica con la
dovuta cautela.
E• Mantener las piezas
pequeñas, como la lengüeta
de plástico, fuera del alcance
del bebé. Desechar la
lengüeta de plástico.
7
GNote: A plastic tab is attached to the toy
for in-store demonstration purposes.
• Open the fasteners on the back of
the toy.
• Pull and remove the plastic tab from
the toy. Throw the plastic tab away.
FRemarque : Une patte en plastique
est fixée au jouet pour le mode
démonstration.
• Défaire les attaches à l’arrière du jouet.
• Tirer et enlever la patte de plastique du
jouet. La jeter.
DHinweis: Zu Vorführzwecken im
Geschäft ist eine Kunststofflasche an
diesem Produkt befestigt.
• Den Klettverschluss auf der Rückseite
des Produkts öffnen.
• Ziehen Sie die Kunststofflasche
heraus, und entsorgen sie sie.
NN.B.: Aan dit product zit een plastic
palletje voor demonstratiedoeleinden
in de winkel.
• Open de bandjes aan de achterkant
van het speelgoed.
• Trek het plastic palletje los en gooi
het weg.
INota: Una linguetta di plastica è stata
agganciata al giocattolo per la
dimostrazione.
• Aprire le fascette sul retro del giocattolo.
• Tirare e rimuovere la linguetta dal
giocattolo. Eliminare la linguetta con
la dovuta cautela.
EAtención: este juguete incorpora una
lengüeta de plástico a efectos de
demostración del producto en tienda.
• Abrir los cierres de la parte posterior
del muñeco.
• Tirar de la lengüeta de plástico
y desecharla.
8
GBattery Replacement
FRemplacement des piles
DErsetzen der Batterien
NHet vervangen van
de batterijen
ISostituzione delle Pile
ESustitución de las pilas
G Battery Compartment Door
F Couvercle du compartiment de la pile
D Batteriefachabdeckung
N Batterijklepje
I Sportello Scomparto Pile
E Tapa del compartimento de las pilas
G Shown Actual Size
F Dimensions réelles
D In Originalgröße abgebildet
N Op ware grootte
I Dimensione Reale
E Mostrada a tamaño real
1.5V x 3 “AAA” (LR03)
9
GFor best performance, we recommend
replacing the batteries that came with
this toy with three, new alkaline
“AAA” (LR03) batteries.
• Open the fasteners on the back of
the toy.
• Loosen the screw in the battery
compartment door with a Phillips
screwdriver. Remove the battery
compartment door.
• Insert three, “AAA” (LR03) alkaline
batteries, as indicated inside the
battery compartment.
Hint: We recommend using alkaline
batteries for longer battery life.
• Replace the battery compartment door
and tighten the screw with a Phillips
screwdriver. Do not over-tighten.
• Close the fasteners on the toy
• When sounds or lights from this toy
become faint or stop, it’s time for an
adult to change the batteries!
FPour de meilleurs résultats, il est
recommandé de remplacer les piles
fournies avec ce produit par 3 piles
alcalines AAA neuves.
• Défaire les attaches à l’arrière du jouet.
• Dévisser la vis du couvercle du com-
partiment des piles avec un tournevis
cruciforme. Enlever le couvercle du
compartiment des piles.
• Insérer 3 piles alcalines AAA (LR03)
comme indiqué à l’intérieur du
compartiment.
Remarque : Il est recommandé d’utiliser
des piles alcalines, car elles durent
plus longtemps.
• Remettre le couvercle en place et
serrer la vis à l’aide d’un tournevis
cruciforme. Ne pas trop serrer.
• Refermer les attaches du jouet.
• Lorsque les lumières ou les sons du
jouet s’affaiblissent ou cessent, un
adulte doit remplacer les piles.
10