Flo CN-IC2-15 Quick start guide
Technical Guide
CN-IC2-15
Title:
i-Controller 2.0 BACnet Communication Settings
EXTERNAL 1 1-22AUG2022
Overview
For proper data transfer to occur between the Building Management System (BMS) and the Flōi-Controller 2.0, the BACnet
communication connection must be properly configured. If the two controllers are not communicating and if the BMS
Communication Status displays ‘Offline’ in the BMS Status screen of the i-Controller, verify the following information.
CAUTION: Before connection, ensure there is no earth ground on the wires used for the RS485 connection.
Do not ground any of the wires connected to the RS485 terminal blocks inside the unit. Doing so will result in damage to
the i-Controller hardware.
i-Controller 2.0 BACnet Network Configuration
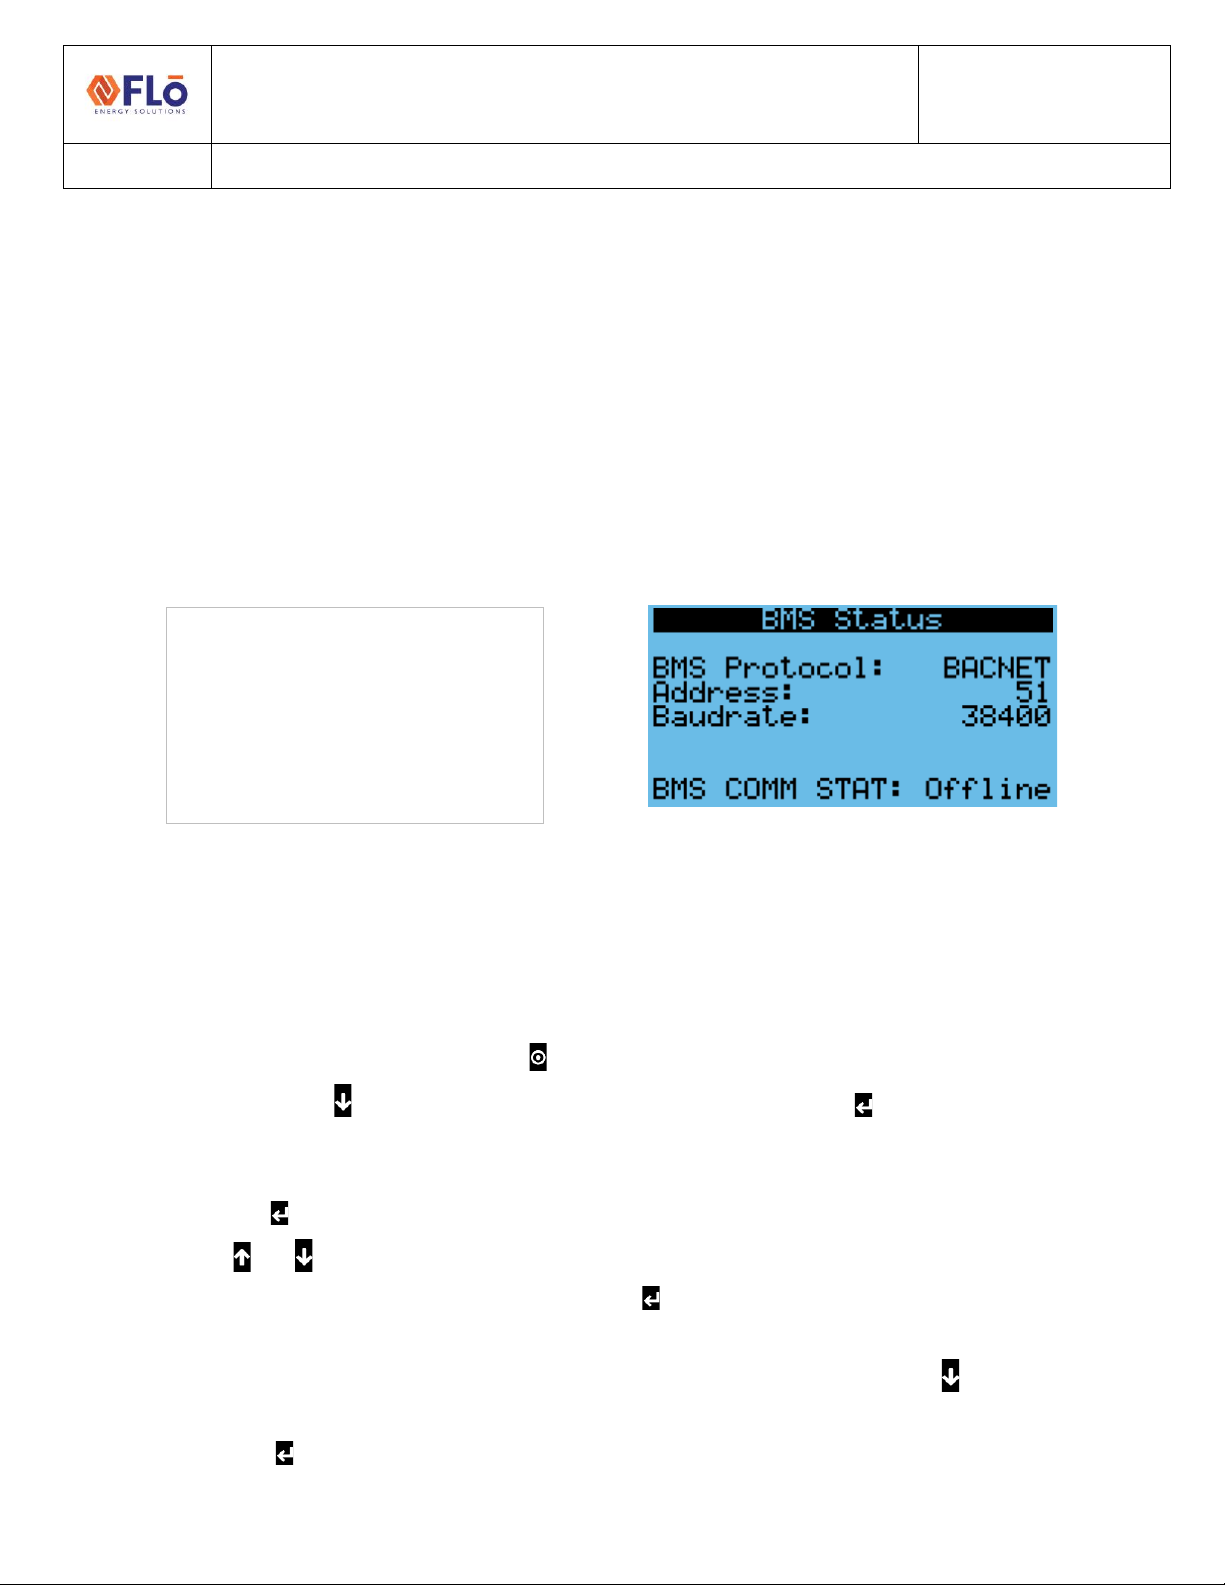
Verify the i-Controller protocol, address, and baud rate.
Figure 1. i-Controller BMS Status screen
The “BMS Status” screen displays the current Flōi-Controller BMS protocol, BACnet address, baud rate and the status of
the connection to the BMS. If the Flōi-Controller is connected, the BMS status will display “Online”. The BMS status will
display “Offline” if the BMS is offline or the Flōi-Controller is not connected or properly configured.
To change the communications protocol, address, perform the following steps:
1. From the Home Screen, press the program button three times to navigate to the settings menu.
2. Use the down arrow button to highlight “Communications” and press enter button twice to navigate to the
BMS Configuration Screen.
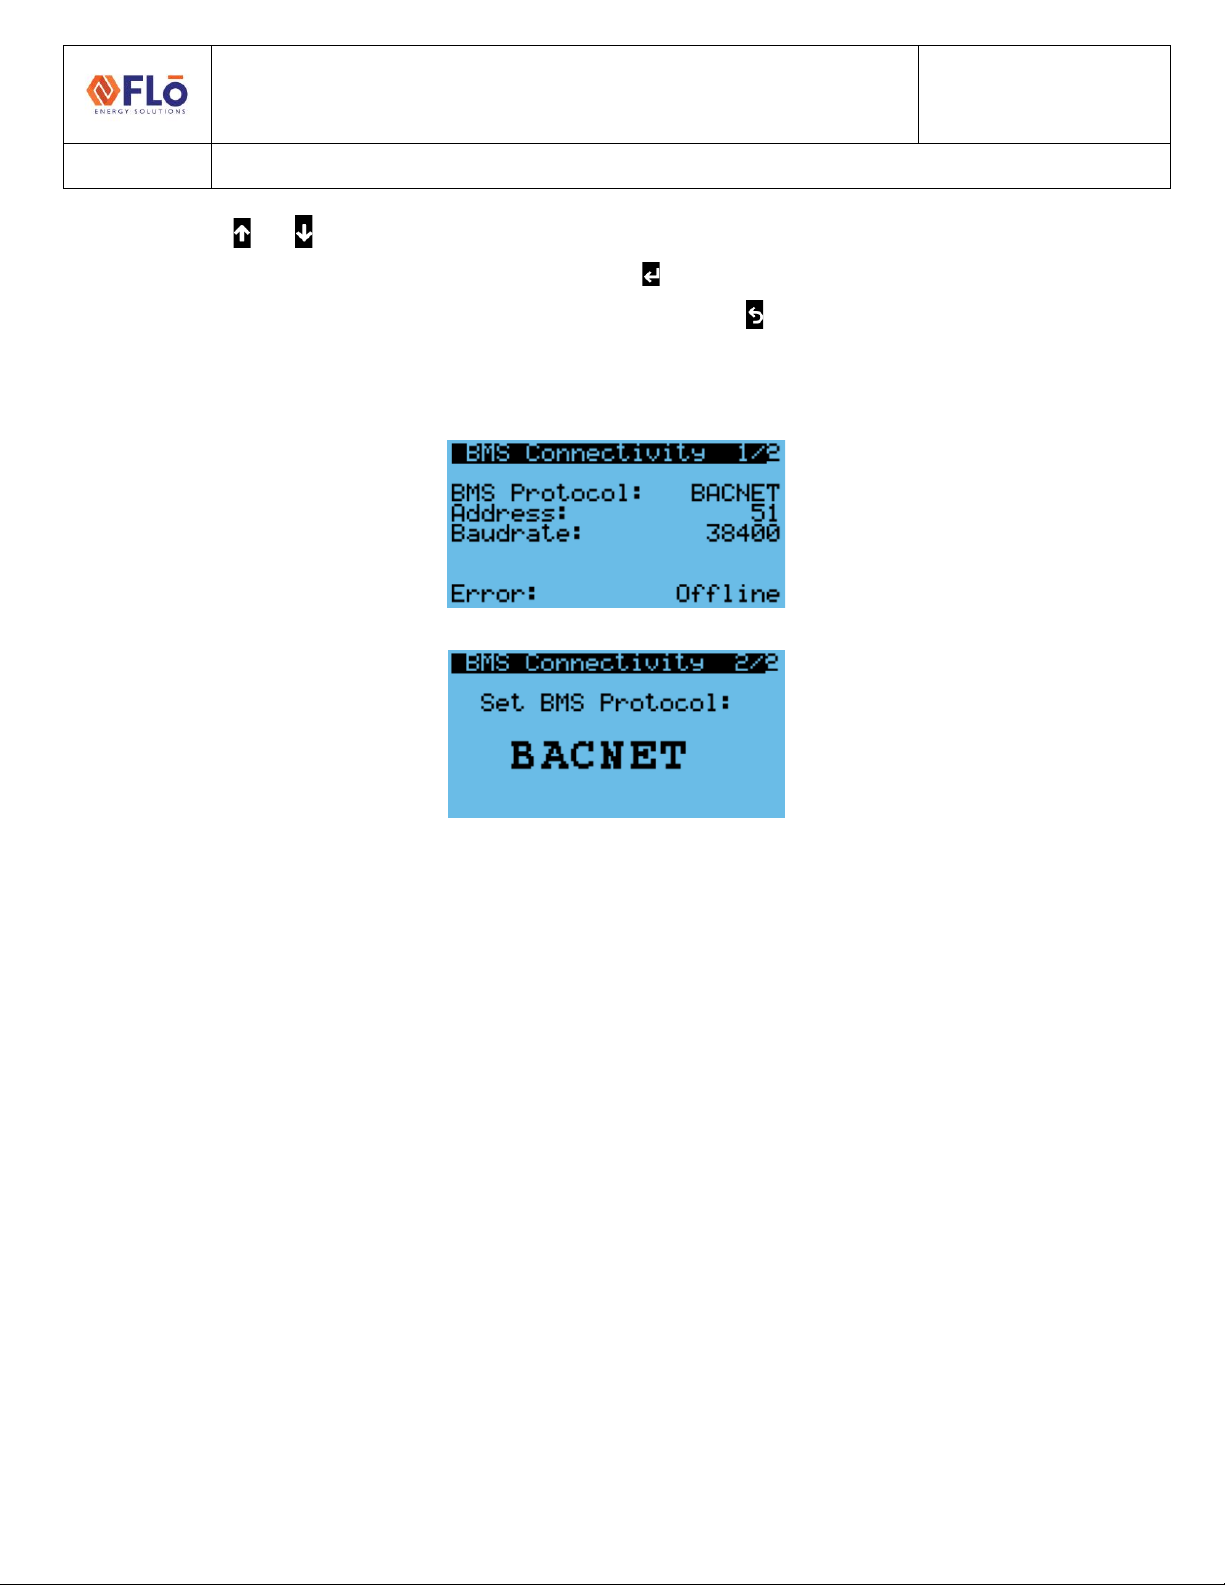
3. On BMS Connectivity page 1, you can set the controller address and baud rate.
4. Use the enter button to navigate to the address field.
5. Using the and buttons increase and decrease the value as desired.
6. Once the desired value has been reached press the enter button to set the value.
7. On BMS Connectivity page 2, you can set the communication protocol.
8. With the cursor back in the home position, at top right of screen, Use the down arrow button to navigate to
page2.
9. Use the enter button to navigate to the value that you wish to change.
i-Controller 2.0 Settings
BMS Protocol: BACNET
Address: xx
Baud rate: 38400
BMS COMM STAT: Online
Technical Guide
CN-IC2-15
Title:
i-Controller 2.0 BACnet Communication Settings
EXTERNAL 2 1-22AUG2022
10. Using the and buttons increase and decrease the value as desired.
11. Once the desired value has been reached press the enter button to set the value.
12. Once all changes have been completed, press, and hold the escape button to return to the Home Screen.
Note: The BACnet baud rate is fixed at 38.4k baud.
Figure 2. i-Controller BMS Configuration Screen 1
Figure 3. i-Controller BMS Configuration Screen 2
i-Controller 2.0 BACnet Network Connection
Verify the physical connection between the BMS network and the Flōi-Controller 2.0. Ensure there is a signal on the
communication cable, the correct polarity is maintained between devices and the RS485 BACnet cable is connected to the
port on the controller.
If all connections and settings are correct, but communication cannot be established between the two controllers, please
contact the sites BMS provider.
Note: The i-Controller 2.0 BACnet port shares the network with the AAON VCCX controller. Once a Flōi-Controller 2.0 is
connected to a BACnet network and an auto discovery is preformed, two BACnet devices will be discovered per Flōunit.
Only map the device for the Flōi-Controller 2.0 to the building management system.
Note: If multiple Flō units are connected to the same BACnet network, the system integrator will need to account for the
configured MAC address and Device IDs of the Flōunits during their network design. See recommended addressing below.
Technical Guide
CN-IC2-15
Title:
i-Controller 2.0 BACnet Communication Settings
EXTERNAL 3 1-22AUG2022
i-Controller 2.0 BACnet Network Connection to VCCX For Multiple Flō Units
The Flōi-Controller 2.0 and AAON VCCX will come preconfigured with default addressing for the MAC address and Device
ID set from the factory. The i-Controller 2.0 default MAC address and Device ID are set to the same number. Ex. Unit-1
will be MAC address = 1, Device ID = 1 and addressed consecutively for additional units. The VCCX default MAC address
and Device ID are set to: MAC address = 121, Device ID = 16001 and need to be addressed consecutively for additional
units on the network. See tables below.
Default addressing for Single Flō unit:
Unit Tag
Flōi-Controller 2.0 MAC and Device ID*
VCCX MAC
VCCX Device ID
RTU-xx
51
121
16001
Table 1. Default addressing for unit controllers
Addressing for multiple Flō units:
Unit Tag
Flōi-Controller 2.0 MAC and Device ID*
VCCX MAC
VCCX Device ID
RTU-1
51
121
16001
RTU-2
52
122
16002
RTU-3
53
123
16003
RTU-4
54
124
16004
RTU-5
55
125
16005
Table 2. Addressing for multiple unit controllers
* The Flōi-Controller 2.0 MAC address and Device ID are adjustable. Refer to section above for instructions.
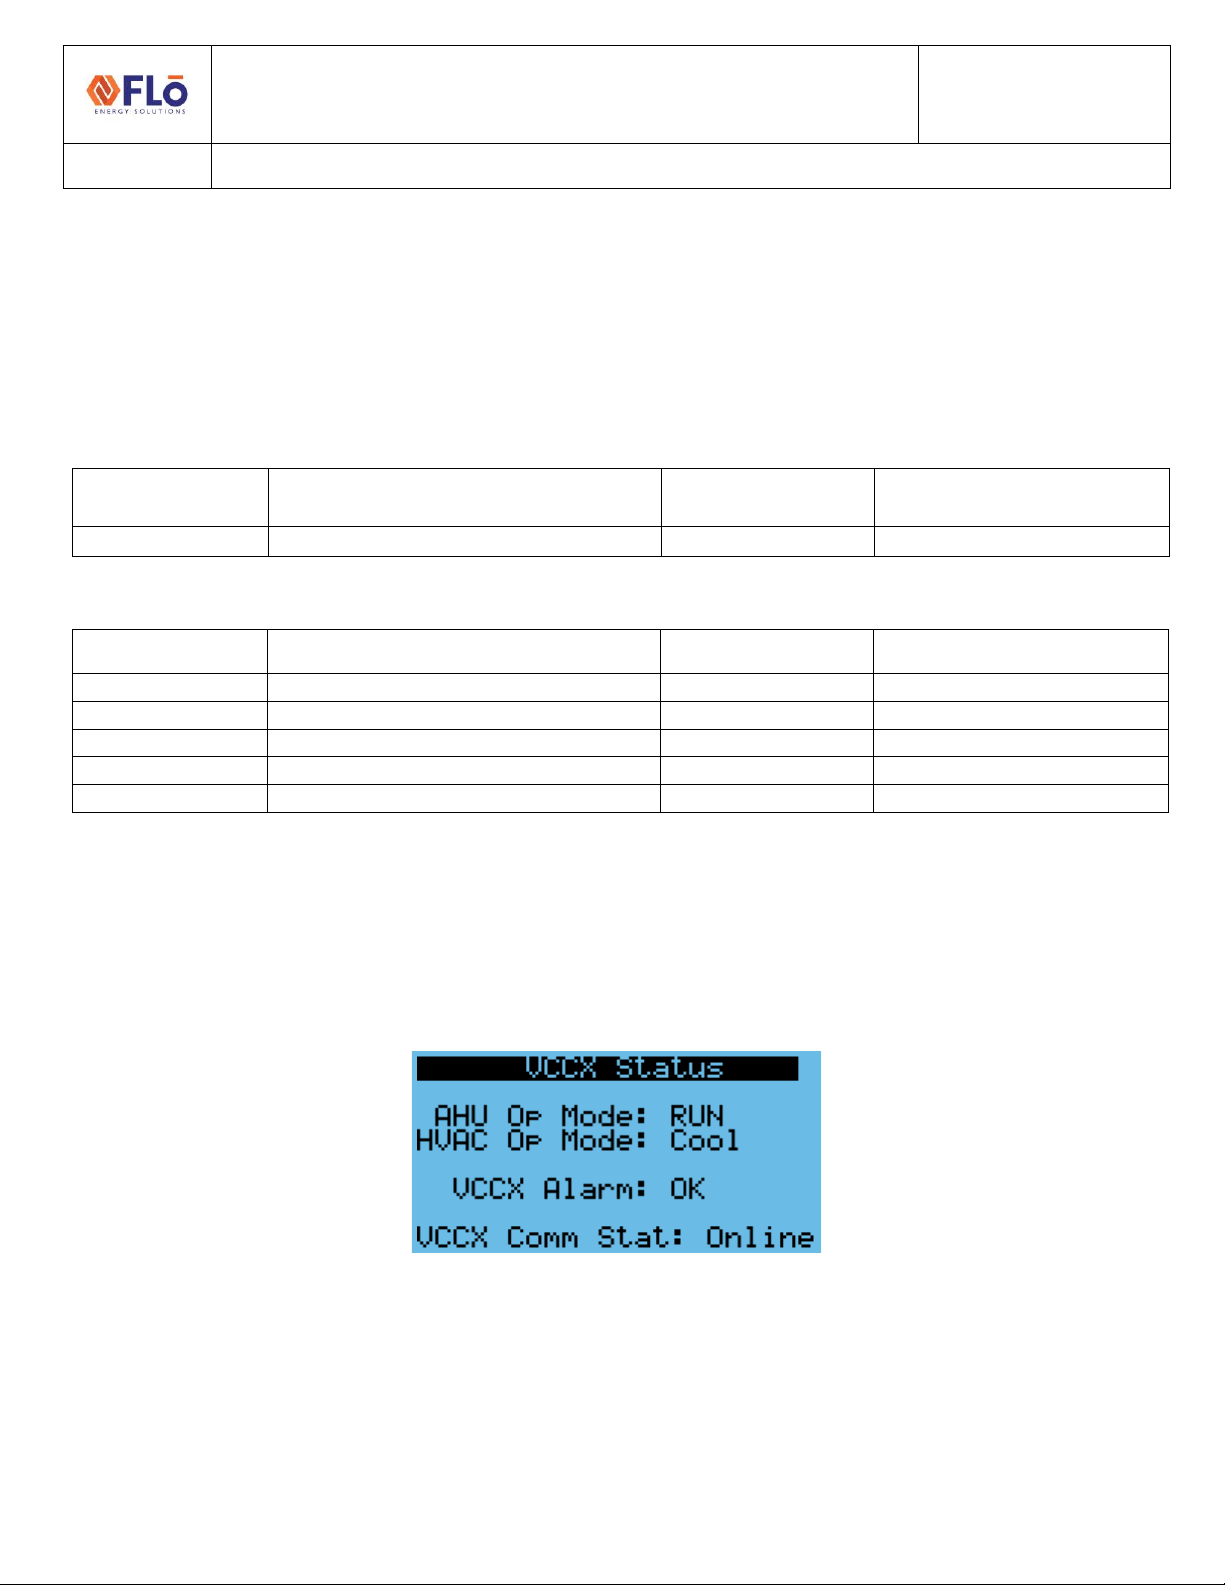
Communications verification between i-Controller and VCCX For Multiple Flō Units
Verify the VCCX communications on the VCCX Status screen of the i-Controller 2.0. When communicating, VCCX Comm
Stat will be “Online”. If “Offline”, addressing verification on both the VCCX and i-Controller 2.0 will be required.
Figure 4. i-Controller VCCX Status screen
Technical Guide
CN-IC2-15
Title:
i-Controller 2.0 BACnet Communication Settings
EXTERNAL 4 1-22AUG2022
i-Controller to VCCX addressing For Multiple Flō Units
Navigate to the “Settings Menu” on the i-Controller 2.0 controller and verify the Device ID set for the VCCX controller.
Refer to Table 2 for VCCX addressing information.
To verify or change the VCCX Device ID set in the i-Controller 2.0:
1. From the Home Screen, press the program button three times to navigate to the settings menu.
2. Use the down arrow button to highlight “Communications” and press enter button.
3. Use the down arrow button to highlight “BACnet” and press enter button.
4. Use the down arrow button to highlight “Communications” and press enter button.
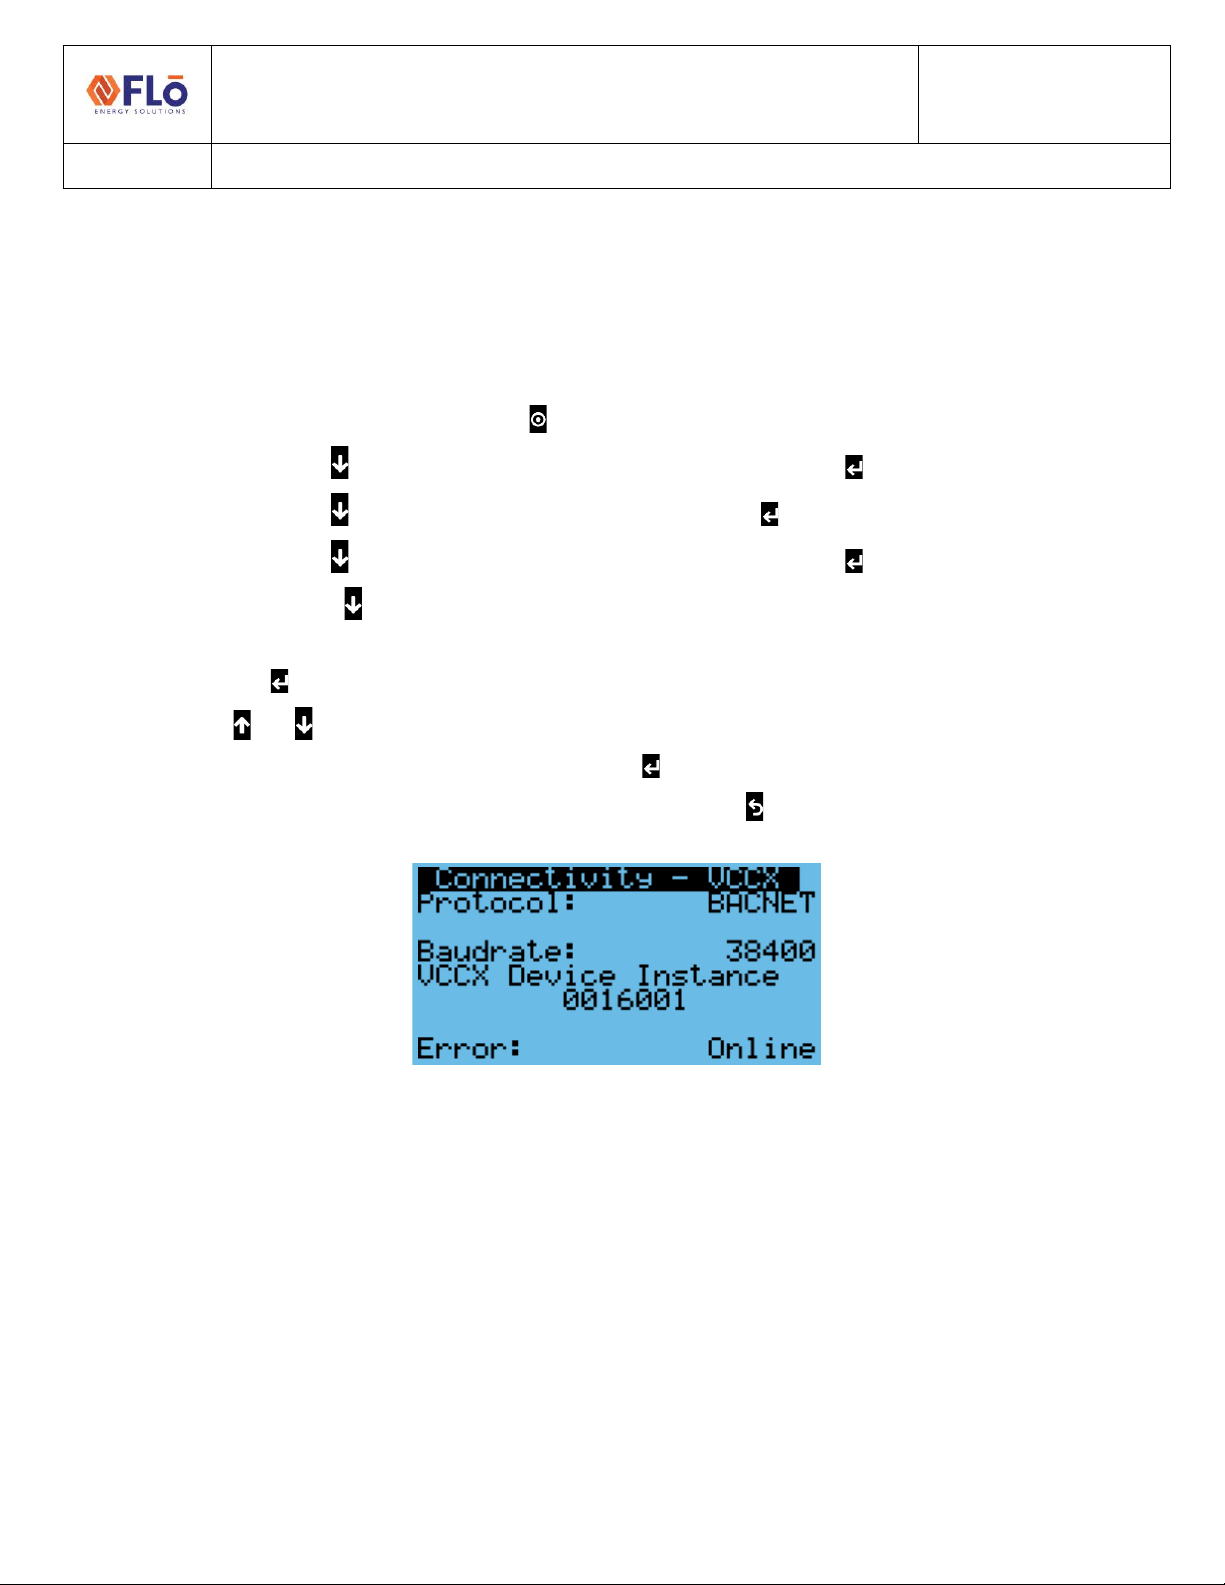
5. Press the down arrow button to navigate to the “Connectivity - VCCX” page.
6. On the “Connectivity - VCCX” page, you can set the expected Device ID of the VCCX.
7. Use the enter button to navigate to the address field.
8. Using the and buttons increase and decrease the value. See Table 2 for address.
9. Once the desired value has been reached press the enter button to set the value.
10. Once all changes have been completed, press, and hold the escape button to return to the Home Screen.
Figure 5. i-Controller Connectivity -VCCX screen
Technical Guide
CN-IC2-15
Title:
i-Controller 2.0 BACnet Communication Settings
EXTERNAL 5 1-22AUG2022
VCCX addressing For Multiple Flō Units
Navigate to the “Settings” screen on the VCCX to verify / change MAC address and Device ID. Refer to Table 2 for VCCX
addressing information.
To verify or change the VCCX MAC address and Device ID:
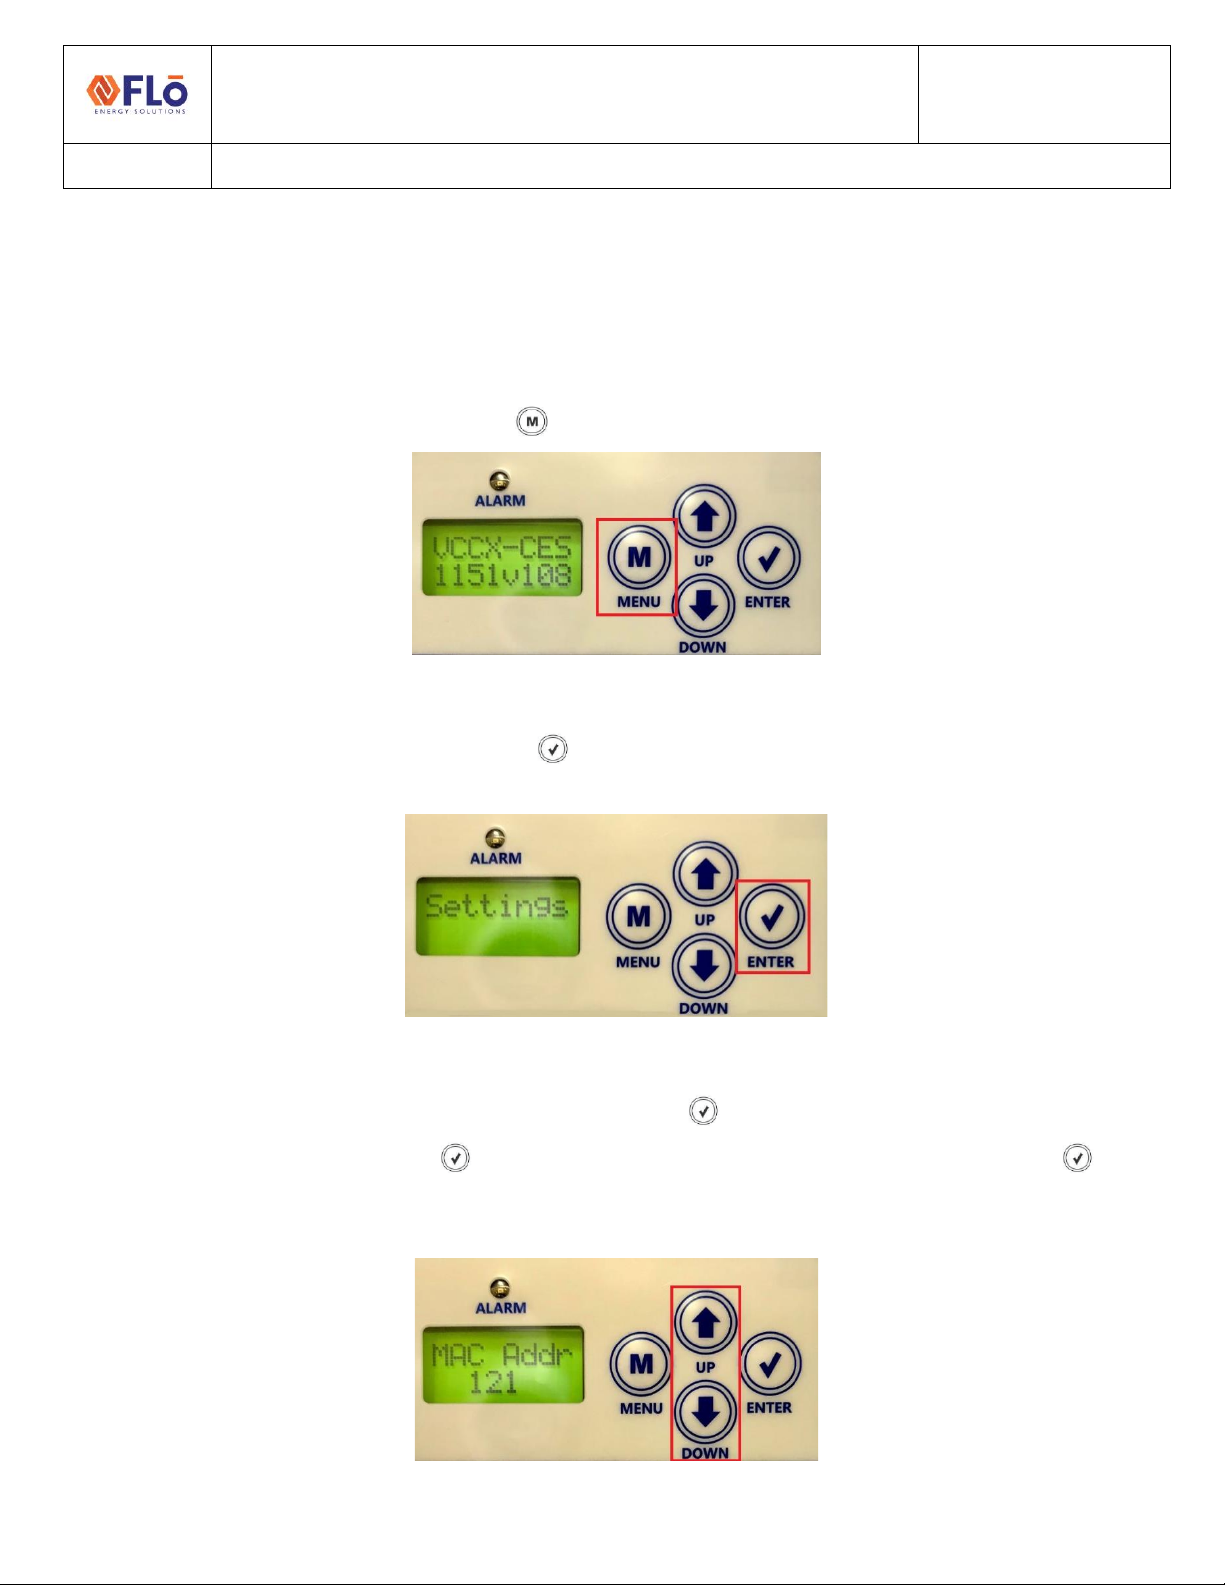
1. From the Main screen, press the “Menu” button once to navigate to the settings screen.
Figure 6. VCCX Main screen
2. From the Settings Screen, press the “Enter” button twice to display the MAC address.
Figure 7. VCCX Settings screen
3. Use the “Up / Down”arrows to adjust address. Press “Enter” button to move the cursor to the next field. When
last field is edited, press “Enter” to save address and the cursor will disappear. Press the “Enter” button
again to go to the Device ID setting.
Figure 8. VCCX MAC address screen
Technical Guide
CN-IC2-15
Title:
i-Controller 2.0 BACnet Communication Settings
EXTERNAL 6 1-22AUG2022
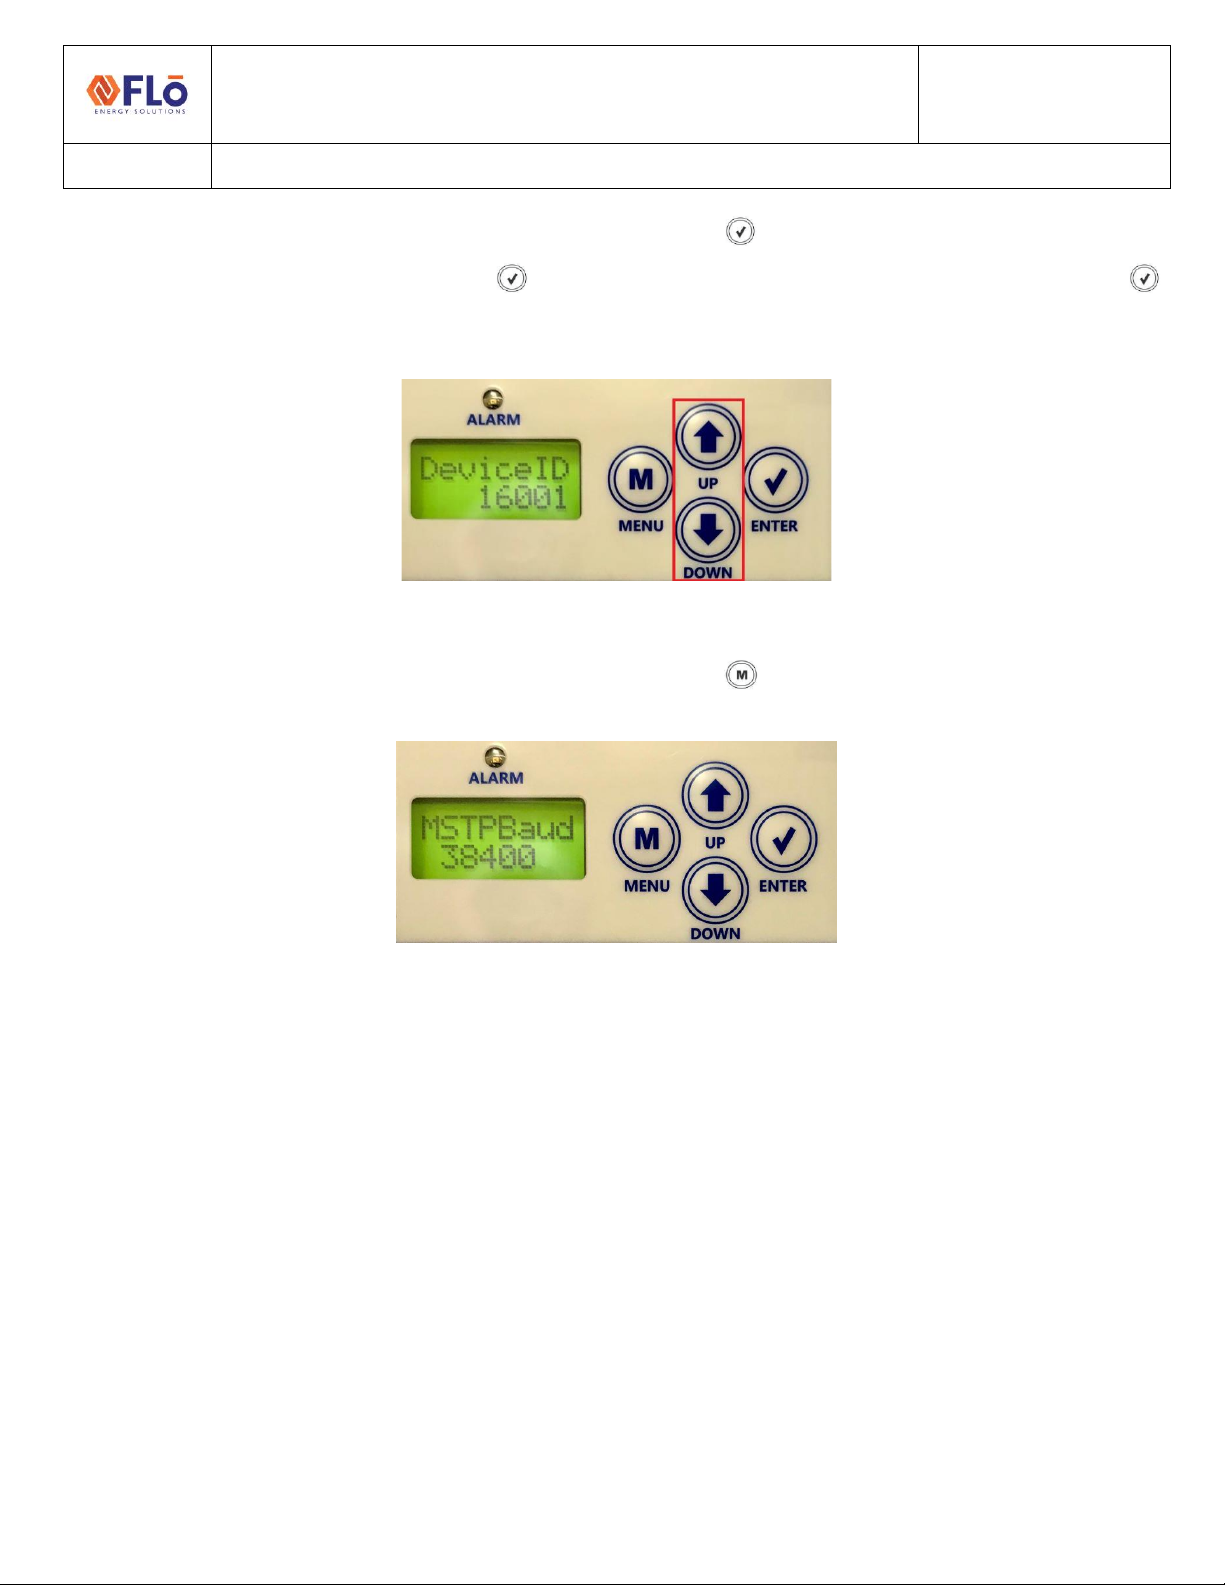
4. Use the “Up / Down” arrows to adjust Device ID. Press “Enter” button to move the cursor to the next field.
When last field is edited, press “Enter” to save Device ID and the cursor will disappear. Press the “Enter”
button again to go to the baud rate setting.
Figure 9. VCCX Device ID screen
5. Verify baud rate is 38,400 baud. Once verified, press the “Menu”button until you are back to the main screen.
Figure 10. VCCX baud rate screen
Table of contents
Other Flo Automobile Accessories manuals


Popular Automobile Accessories manuals by other brands


Accessory Power
Accessory Power ReVIVE series quick start guide

Panasonic
Panasonic ELSEEV hekia S Mode3 quick start guide

BrandMotion
BrandMotion SUTV-1040 installation instructions

Billien
Billien OBU 5050 user guide

Auto Styling
Auto Styling Truckman 8HTCL00AATOH6E Fitting instructions

Bestop
Bestop 52406 installation instructions