FLOS WIRERING F9513009 User manual

REV. 1
DATE 19/08/2021
1
WIRERING
Designed by Formafantasma, 2018
F9513009
©2021 Flos -All rights reserved -www.flos.com
Flos reserves the right to introduce any changes to its own models, without prior notice.

EN
2
©2021 Flos -All rights reserved -www.flos.com
Flos reserves the right to introduce any changes to its own models, without prior notice.
01. RF9510100
–Kit with screws, nuts and components
02. RF26674
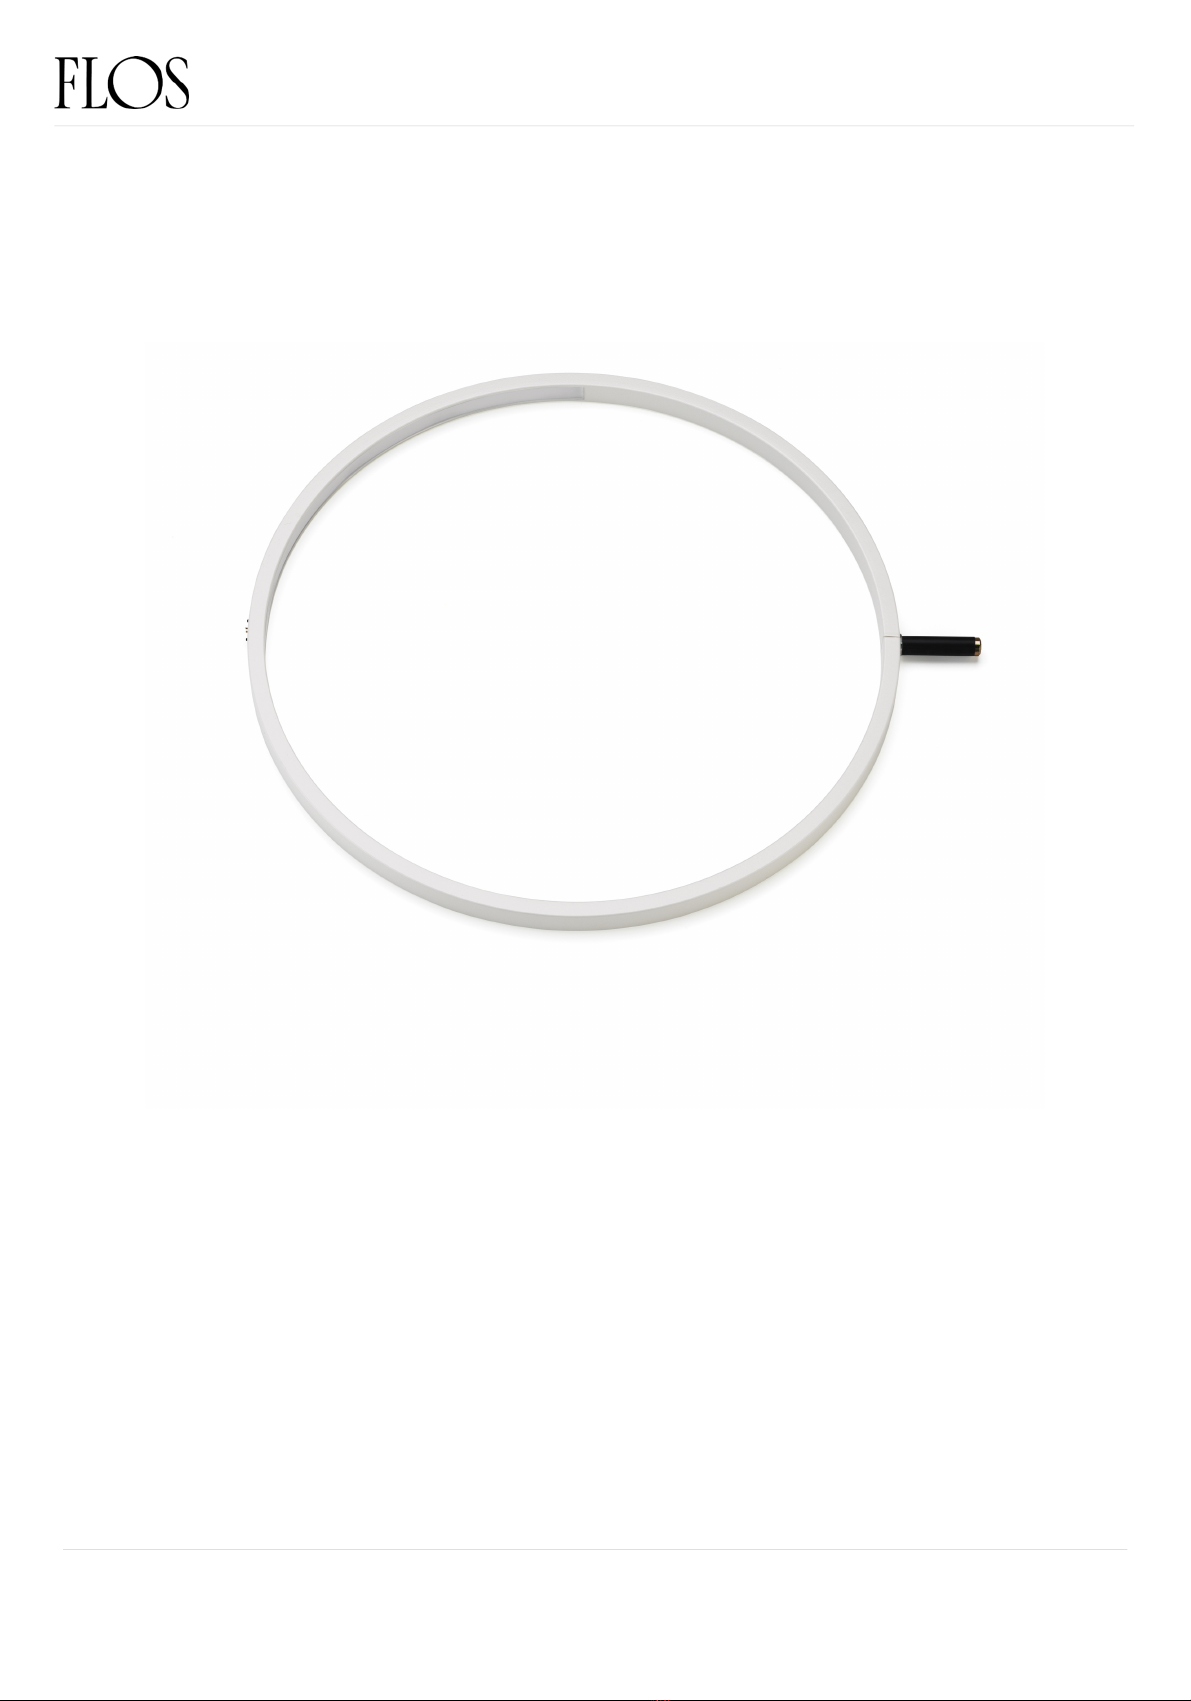
–Ring assembly
03. RF26649
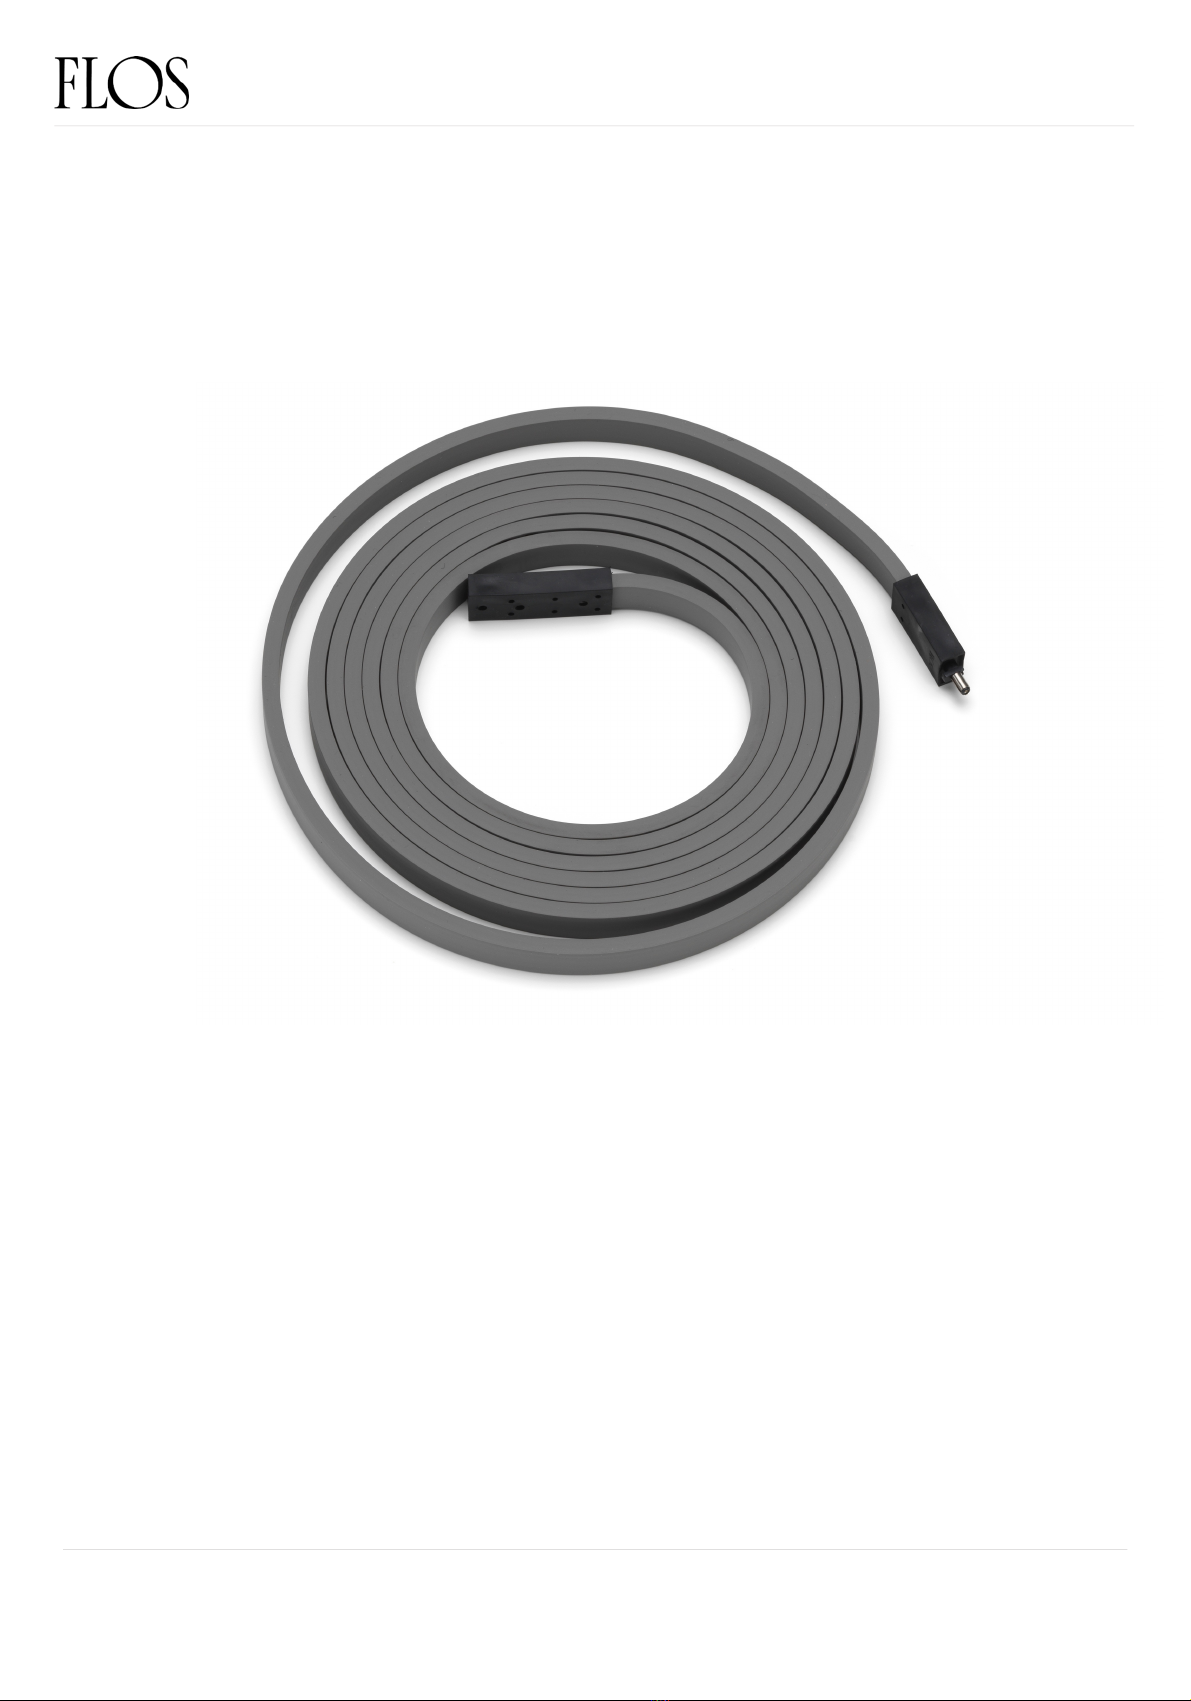
–Electrical mounting assembly with dimmer
04. RF26645
–Electrical mounting body assembly
05. RF3320100
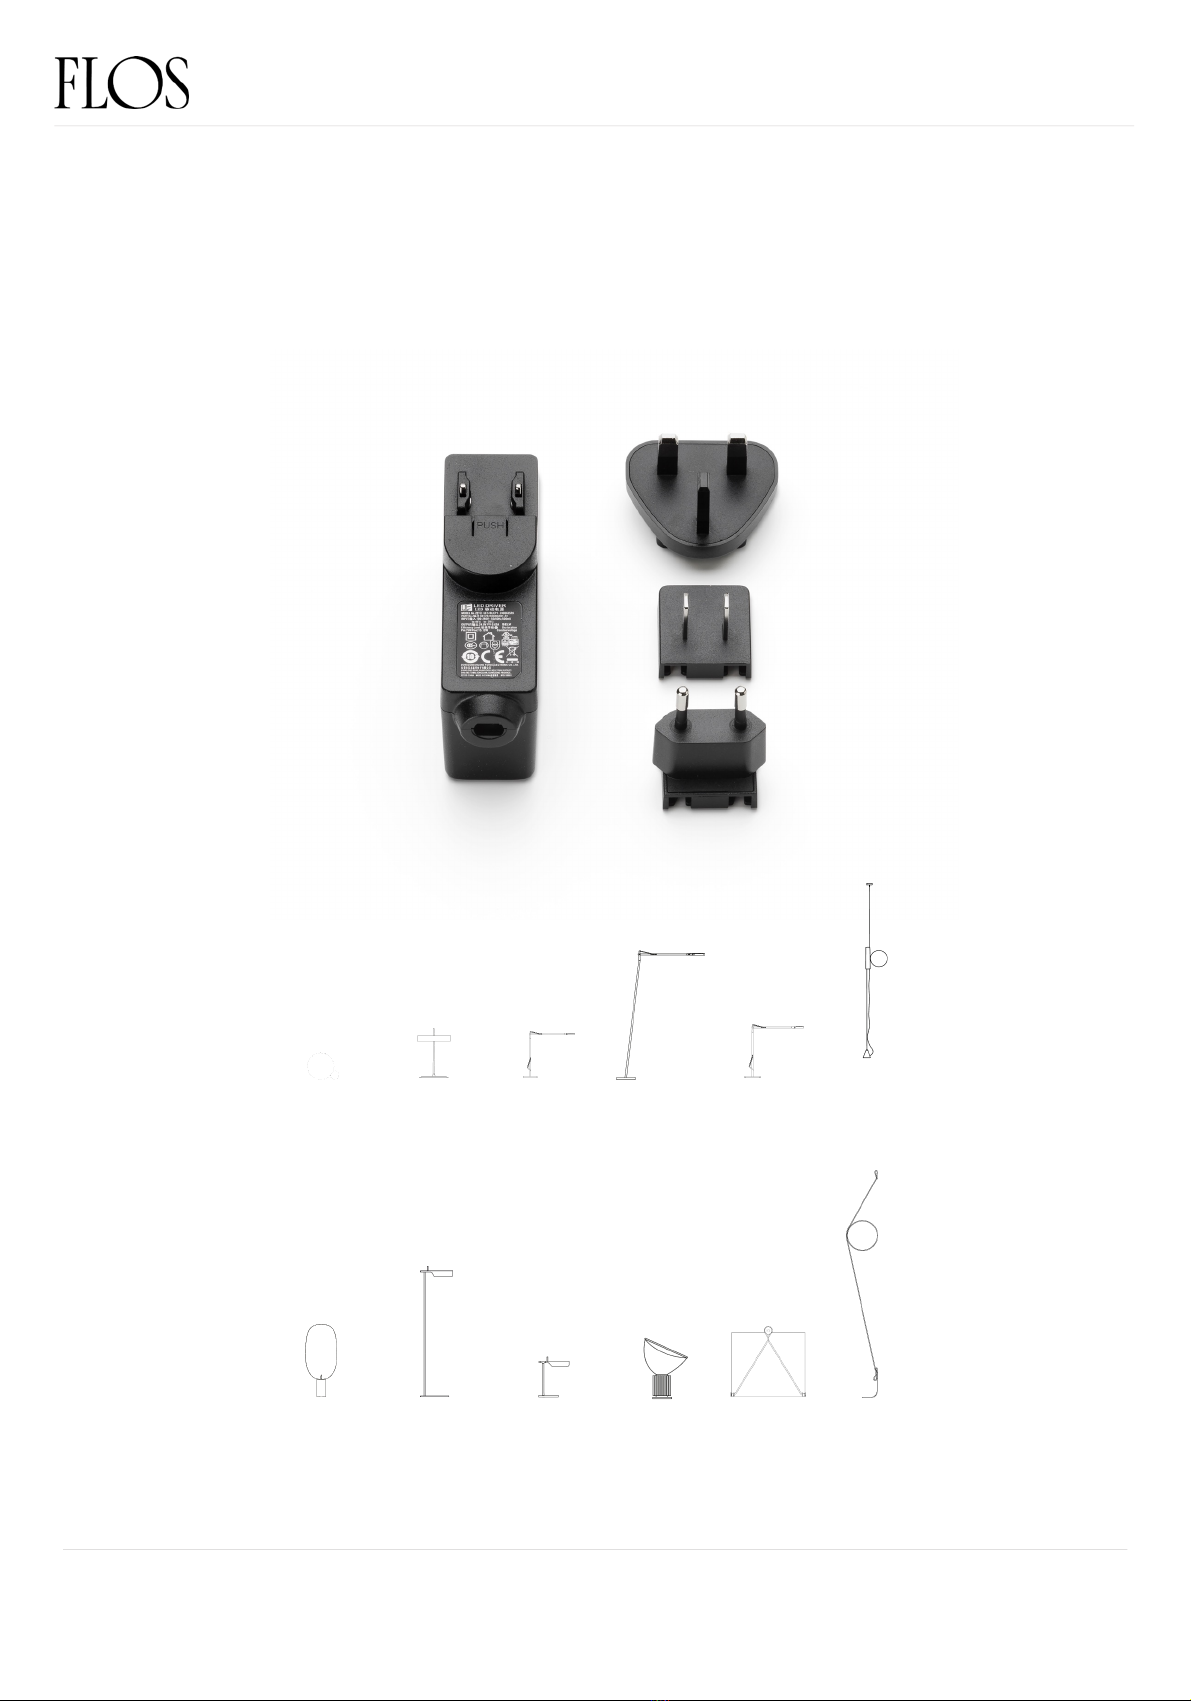
–Plug kit + black driver
WIRERING
F9513009
REV. 1
DATE 19/08/2021

EN
3
RF9510100
KIT WITH SCREWS, NUTS AND COMPONENTS
WARNING! When installing and whenever acting on the appliance, ensure that the power supply has been switched off.
For the installation of the spare-part, it is necessary to consult a qualified electrician.
©2021 Flos -All rights reserved -www.flos.com
Flos reserves the right to introduce any changes to its own models, without prior notice.
WIRERING F9513009
REV. 1
DATE 19/08/2021
EN
4
WARNING! When installing and whenever acting on the appliance, ensure that the power supply has been switched off.
For the installation of the spare-part, it is necessary to consult a qualified electrician.
©2021 Flos -All rights reserved -www.flos.com
Flos reserves the right to introduce any changes to its own models, without prior notice.
RF26674
RING ASSEMBLY
REV. 1
DATE 19/08/2021
WIRERING F9513009

5
WARNING! When installing and whenever acting on the appliance, ensure that the power supply has been switched off.
For the installation of the spare-part, it is necessary to consult a qualified electrician.
©2021 Flos -All rights reserved -www.flos.com
Flos reserves the right to introduce any changes to its own models, without prior notice.
Disconnect the body lamp from the old ring.
EN
Fig.1
REV. 1
DATE 19/08/2021
RF26674
RING ASSEMBLY
WIRERING F9513009

6
WARNING! When installing and whenever acting on the appliance, ensure that the power supply has been switched off.
For the installation of the spare-part, it is necessary to consult a qualified electrician.
©2021 Flos -All rights reserved -www.flos.com
Flos reserves the right to introduce any changes to its own models, without prior notice.
EN
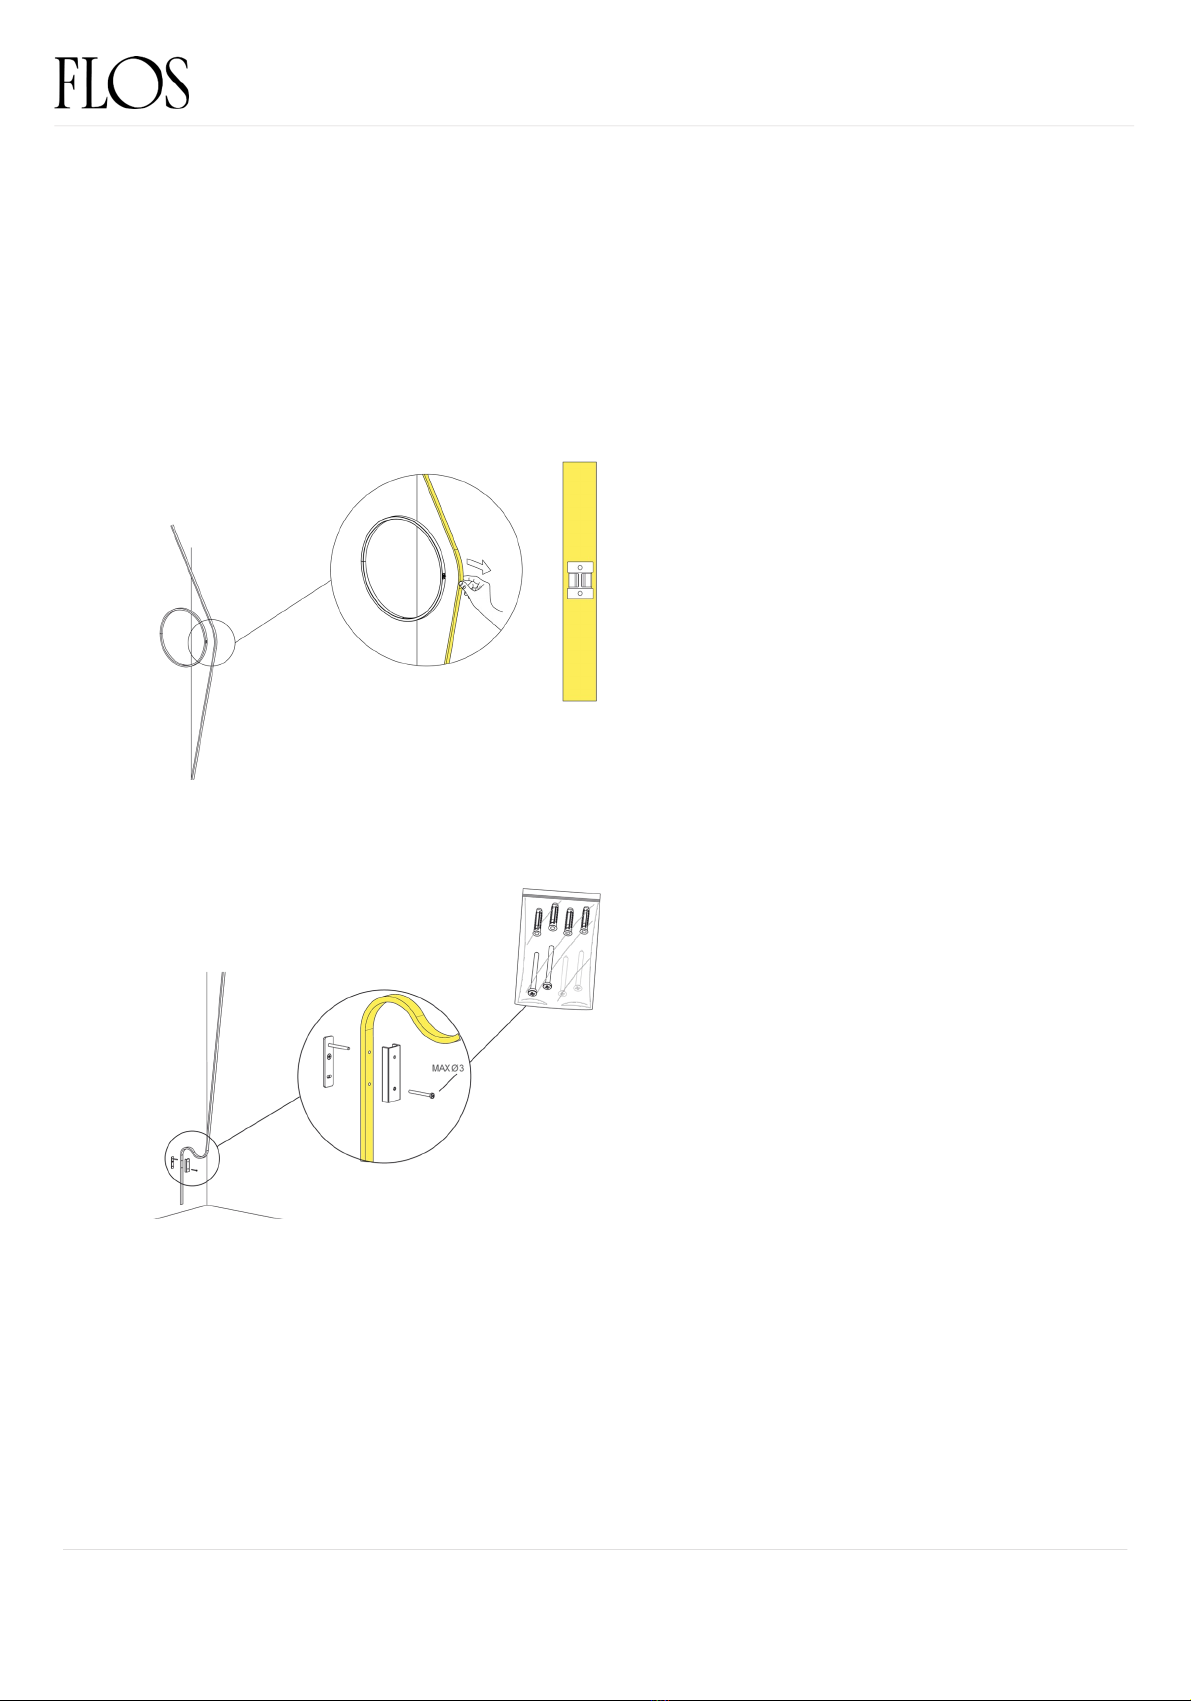
Remove the old ring from the wall.
Insert the new ring in the hole into the wall.
Fig.2
Fig.3
REV. 1
DATE 19/08/2021
RF26674
RING ASSEMBLY
WIRERING F9513009
7
WARNING! When installing and whenever acting on the appliance, ensure that the power supply has been switched off.
For the installation of the spare-part, it is necessary to consult a qualified electrician.
©2021 Flos -All rights reserved -www.flos.com
Flos reserves the right to introduce any changes to its own models, without prior notice.
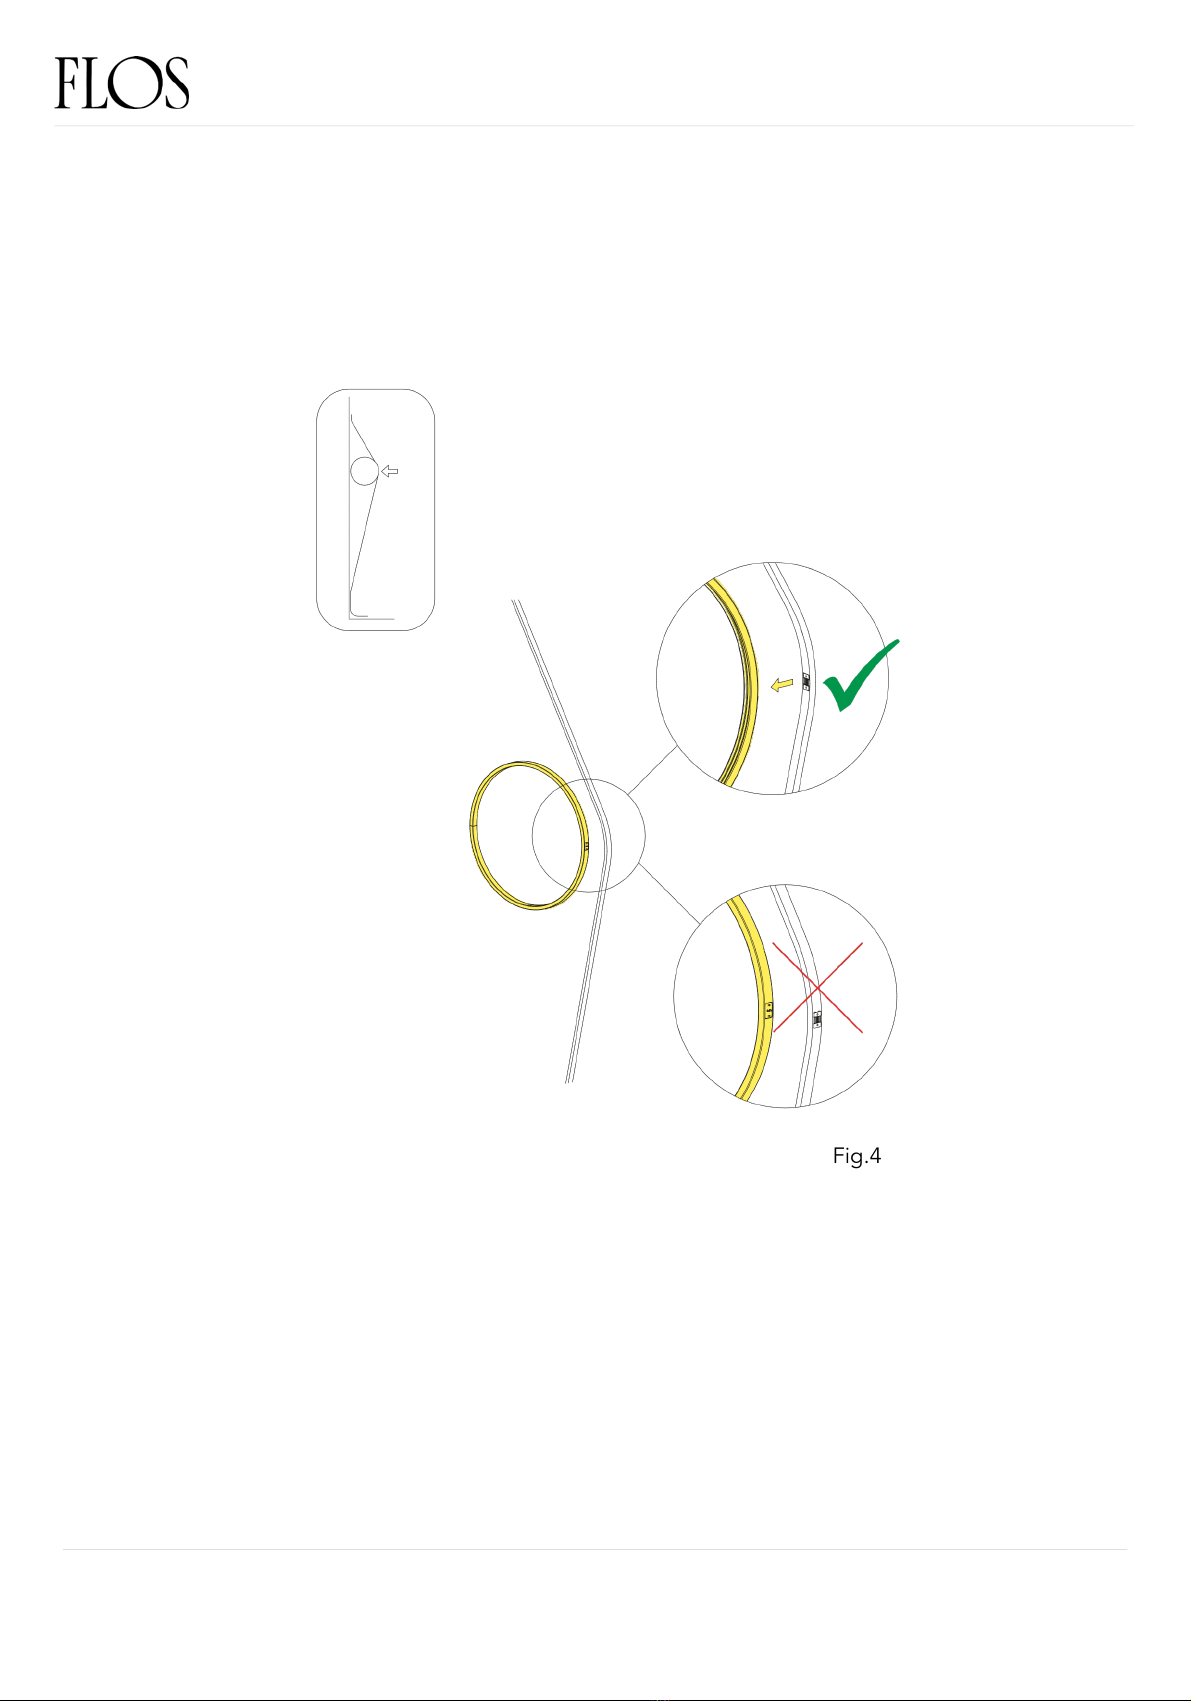
Connect the body lamp to the new ring respecting the correct installation
direction.
EN
Fig.4
REV. 1
DATE 19/08/2021
RF26674
RING ASSEMBLY
WIRERING F9513009
EN
8
WARNING! When installing and whenever acting on the appliance, ensure that the power supply has been switched off.
For the installation of the spare-part, it is necessary to consult a qualified electrician.
©2021 Flos -All rights reserved -www.flos.com
Flos reserves the right to introduce any changes to its own models, without prior notice.
RF26649
ELECTRICAL MOUNTING BODY ASSEMBLY
REV. 1
DATE 19/08/2021
WIRERING F9513009
9
WARNING! When installing and whenever acting on the appliance, ensure that the power supply has been switched off.
For the installation of the spare-part, it is necessary to consult a qualified electrician.
©2021 Flos -All rights reserved -www.flos.com
Flos reserves the right to introduce any changes to its own models, without prior notice.
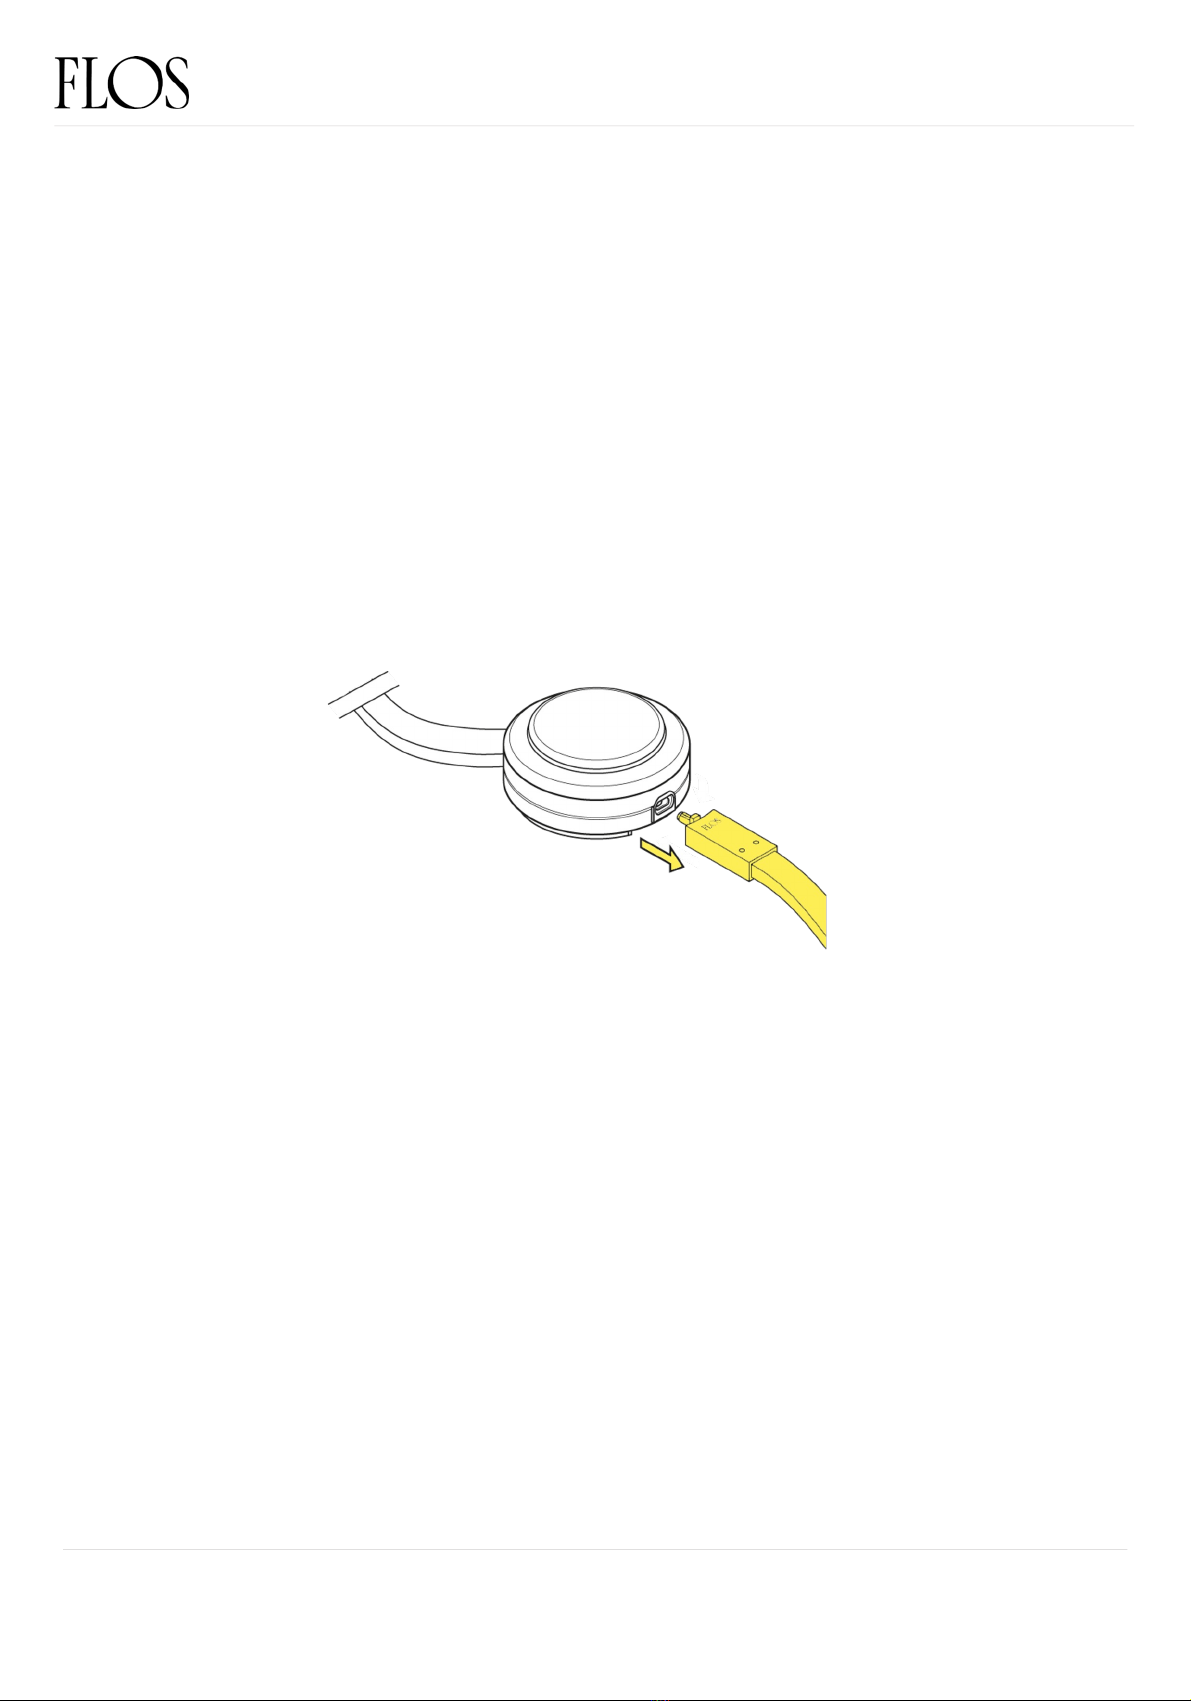
Disconnect the plug of the old body lamp from the dimmer unit by rotating
it 90°counterclockwise.
EN
Fig.1
REV. 1
DATE 19/08/2021
WIRERING F9513009
RF26649
ELECTRICAL MOUNTING BODY ASSEMBLY

10
WARNING! When installing and whenever acting on the appliance, ensure that the power supply has been switched off.
For the installation of the spare-part, it is necessary to consult a qualified electrician.
©2021 Flos -All rights reserved -www.flos.com
Flos reserves the right to introduce any changes to its own models, without prior notice.
Unscrew and remove the ferrule.
EN
Fig.2
REV. 1
DATE 19/08/2021
WIRERING F9513009
RF26649
ELECTRICAL MOUNTING BODY ASSEMBLY
11
WARNING! When installing and whenever acting on the appliance, ensure that the power supply has been switched off.
For the installation of the spare-part, it is necessary to consult a qualified electrician.
©2021 Flos -All rights reserved -www.flos.com
Flos reserves the right to introduce any changes to its own models, without prior notice.
EN
REV. 1
DATE 19/08/2021
Fig.3
Fig.4
Disconnect the body lamp by the ring.
Unfasten the screws and remove the cover of
the lower joint.
WIRERING F9513009
RF26649
ELECTRICAL MOUNTING BODY ASSEMBLY
12
WARNING! When installing and whenever acting on the appliance, ensure that the power supply has been switched off.
For the installation of the spare-part, it is necessary to consult a qualified electrician.
©2021 Flos -All rights reserved -www.flos.com
Flos reserves the right to introduce any changes to its own models, without prior notice.
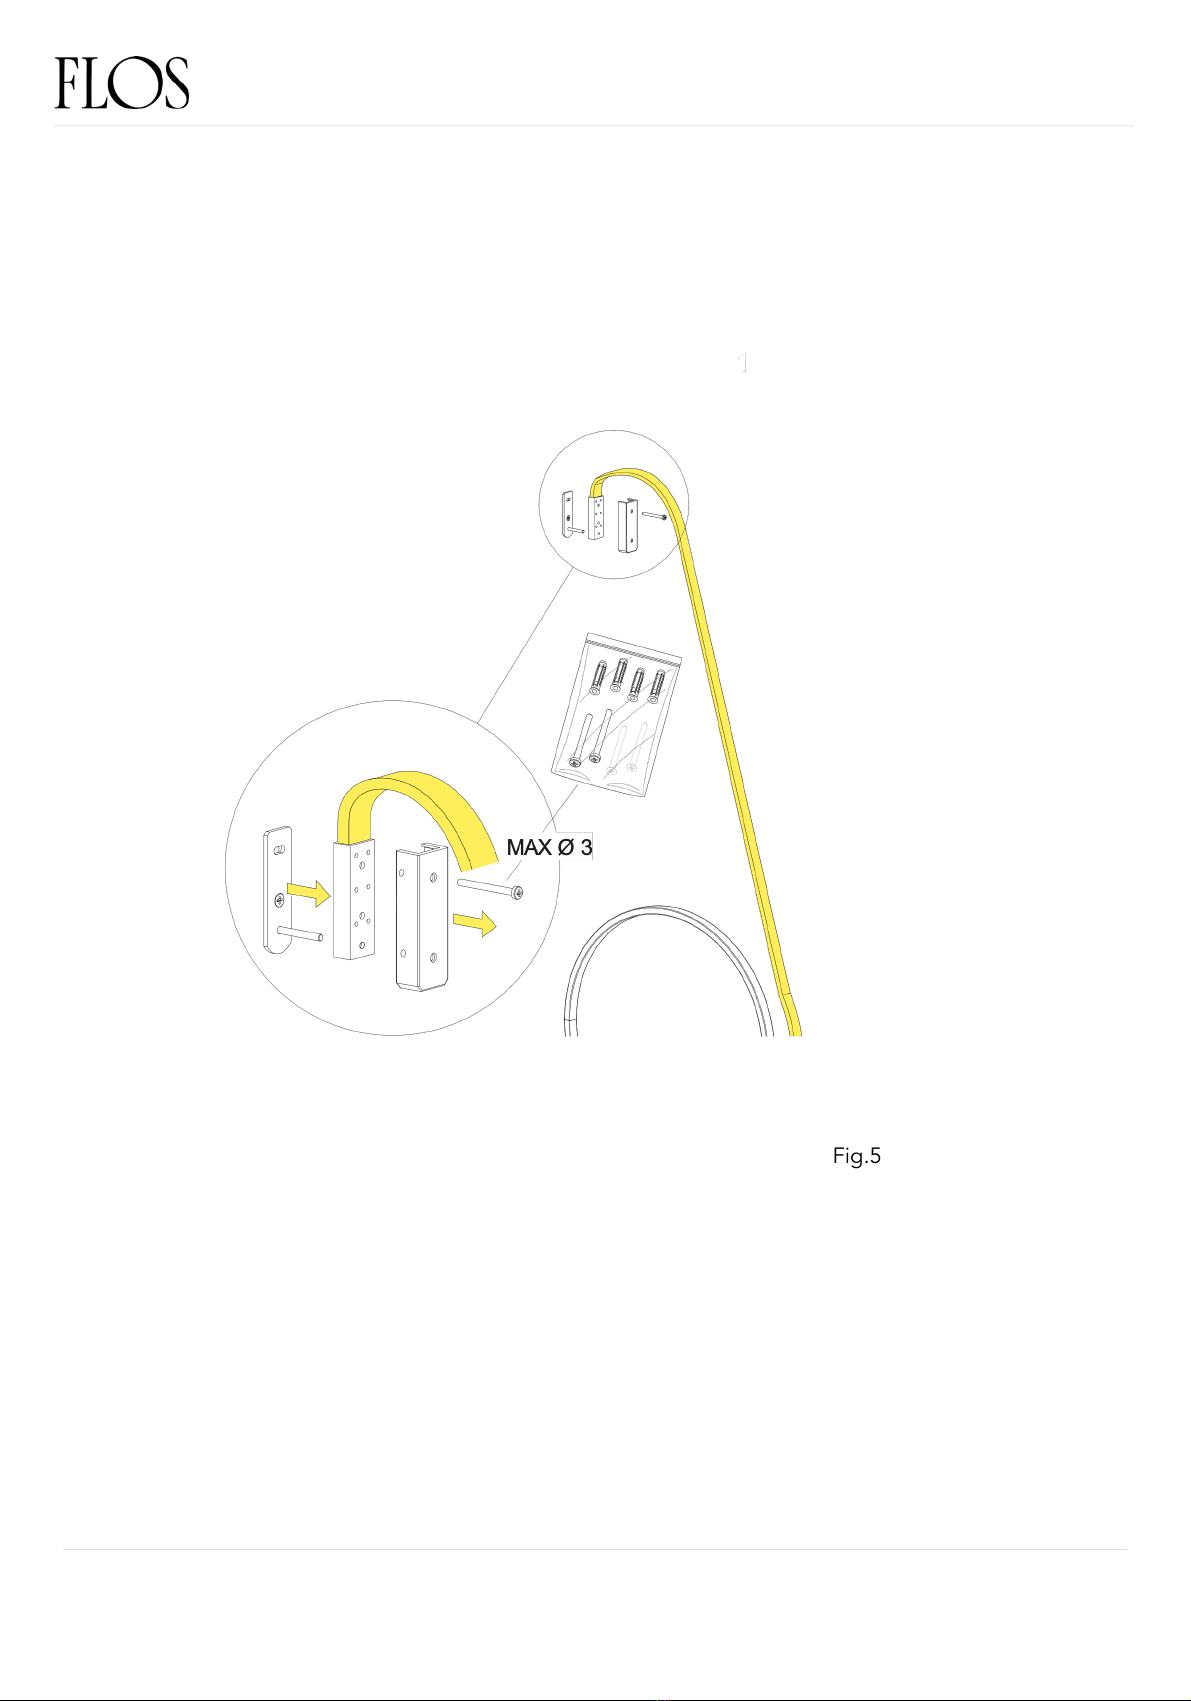
Unfasten the screws and remove the cover of the higher joint.
Pull the old cable out.
EN
Fig.5
REV. 1
DATE 19/08/2021
WIRERING F9513009
RF26649
ELECTRICAL MOUNTING BODY ASSEMBLY

13
WARNING! When installing and whenever acting on the appliance, ensure that the power supply has been switched off.
For the installation of the spare-part, it is necessary to consult a qualified electrician.
©2021 Flos -All rights reserved -www.flos.com
Flos reserves the right to introduce any changes to its own models, without prior notice.
Connect the new body lamp to the ring respecting the correct installation
direction.
EN
Fig.6
REV. 1
DATE 19/08/2021
WIRERING F9513009
RF26649
ELECTRICAL MOUNTING BODY ASSEMBLY
14
WARNING! When installing and whenever acting on the appliance, ensure that the power supply has been switched off.
For the installation of the spare-part, it is necessary to consult a qualified electrician.
©2021 Flos -All rights reserved -www.flos.com
Flos reserves the right to introduce any changes to its own models, without prior notice.
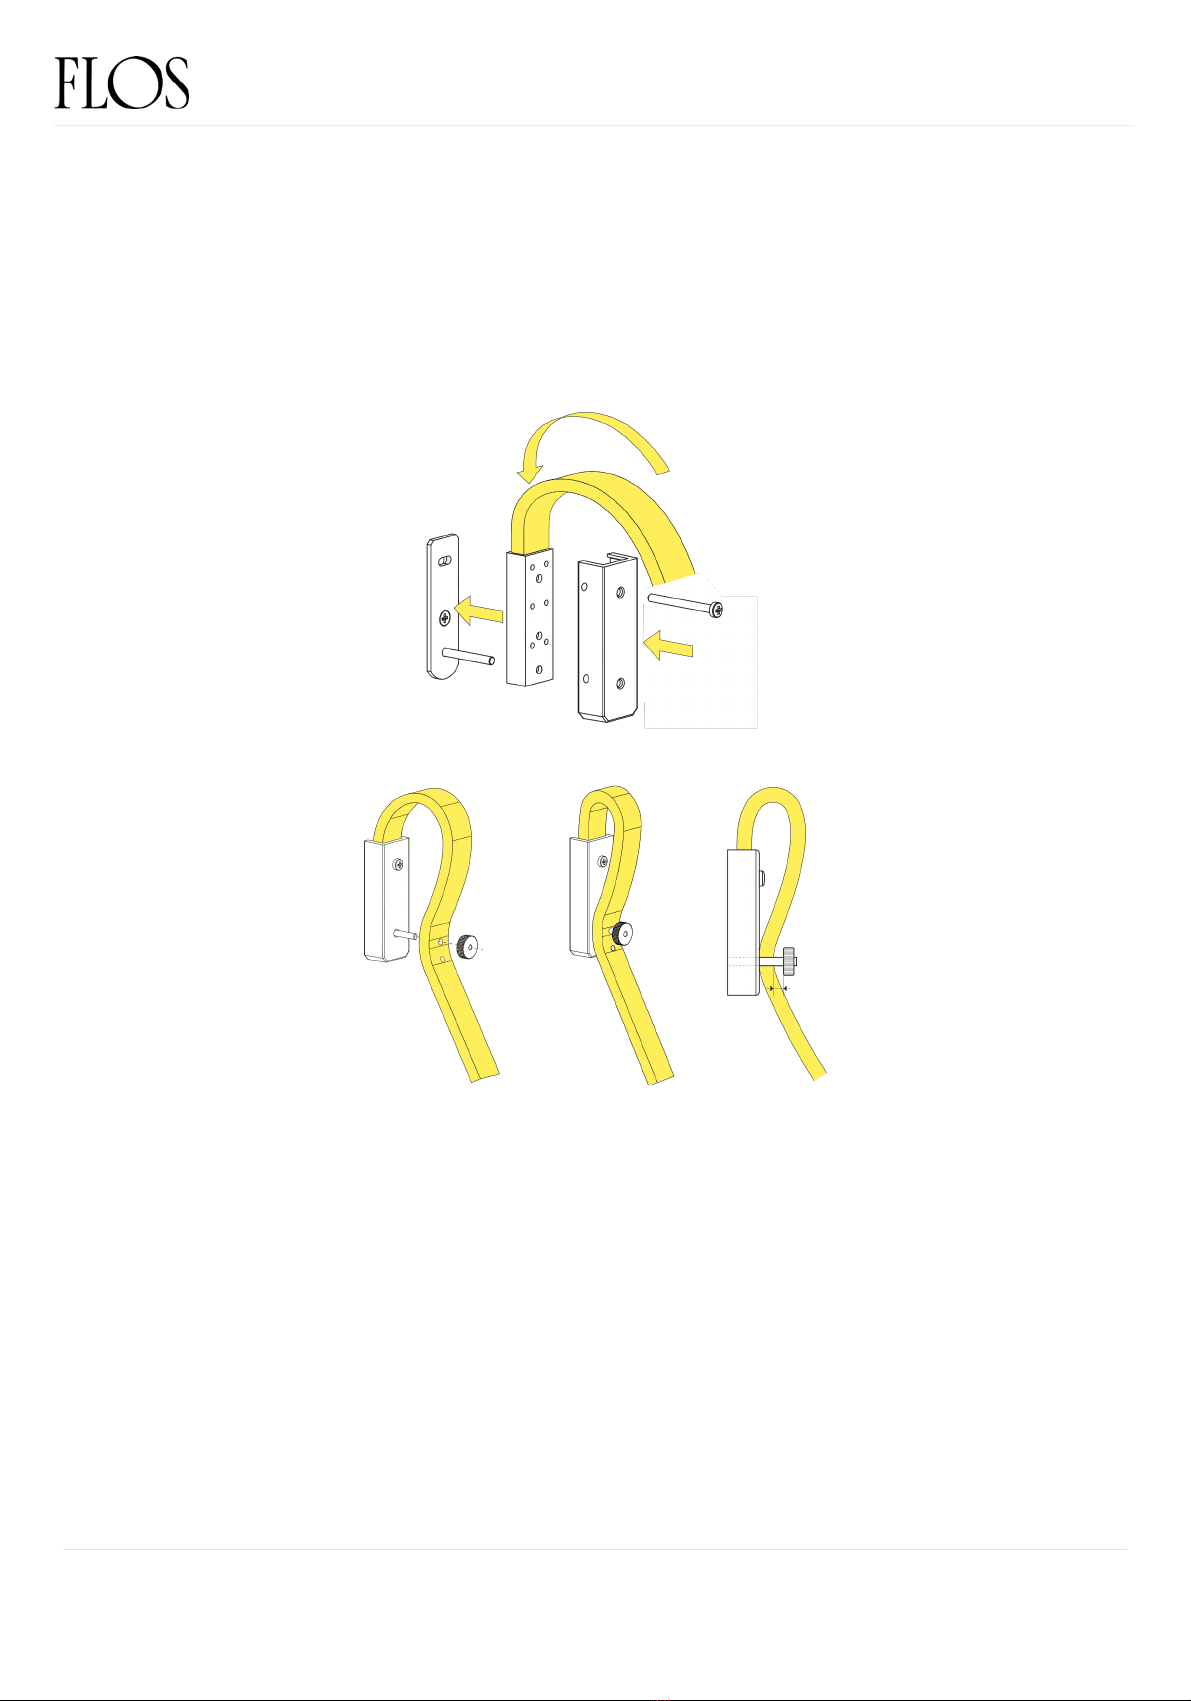
Insert the new body lamp. Fasten the screws, connect the ferrule and fix the
cover of the higher joint.
EN
Fig.7
REV. 1
DATE 19/08/2021
WIRERING F9513009
RF26649
ELECTRICAL MOUNTING BODY ASSEMBLY

15
WARNING! When installing and whenever acting on the appliance, ensure that the power supply has been switched off.
For the installation of the spare-part, it is necessary to consult a qualified electrician.
©2021 Flos -All rights reserved -www.flos.com
Flos reserves the right to introduce any changes to its own models, without prior notice.
EN
REV. 1
DATE 19/08/2021
Fig.8
Fig.9
Position the new body lamp. Fasten the
screws, connect the ferrule and fix the cover
of the lower joint.
WIRERING F9513009
RF26649
ELECTRICAL MOUNTING BODY ASSEMBLY
16
WARNING! When installing and whenever acting on the appliance, ensure that the power supply has been switched off.
For the installation of the spare-part, it is necessary to consult a qualified electrician.
©2021 Flos -All rights reserved -www.flos.com
Flos reserves the right to introduce any changes to its own models, without prior notice.
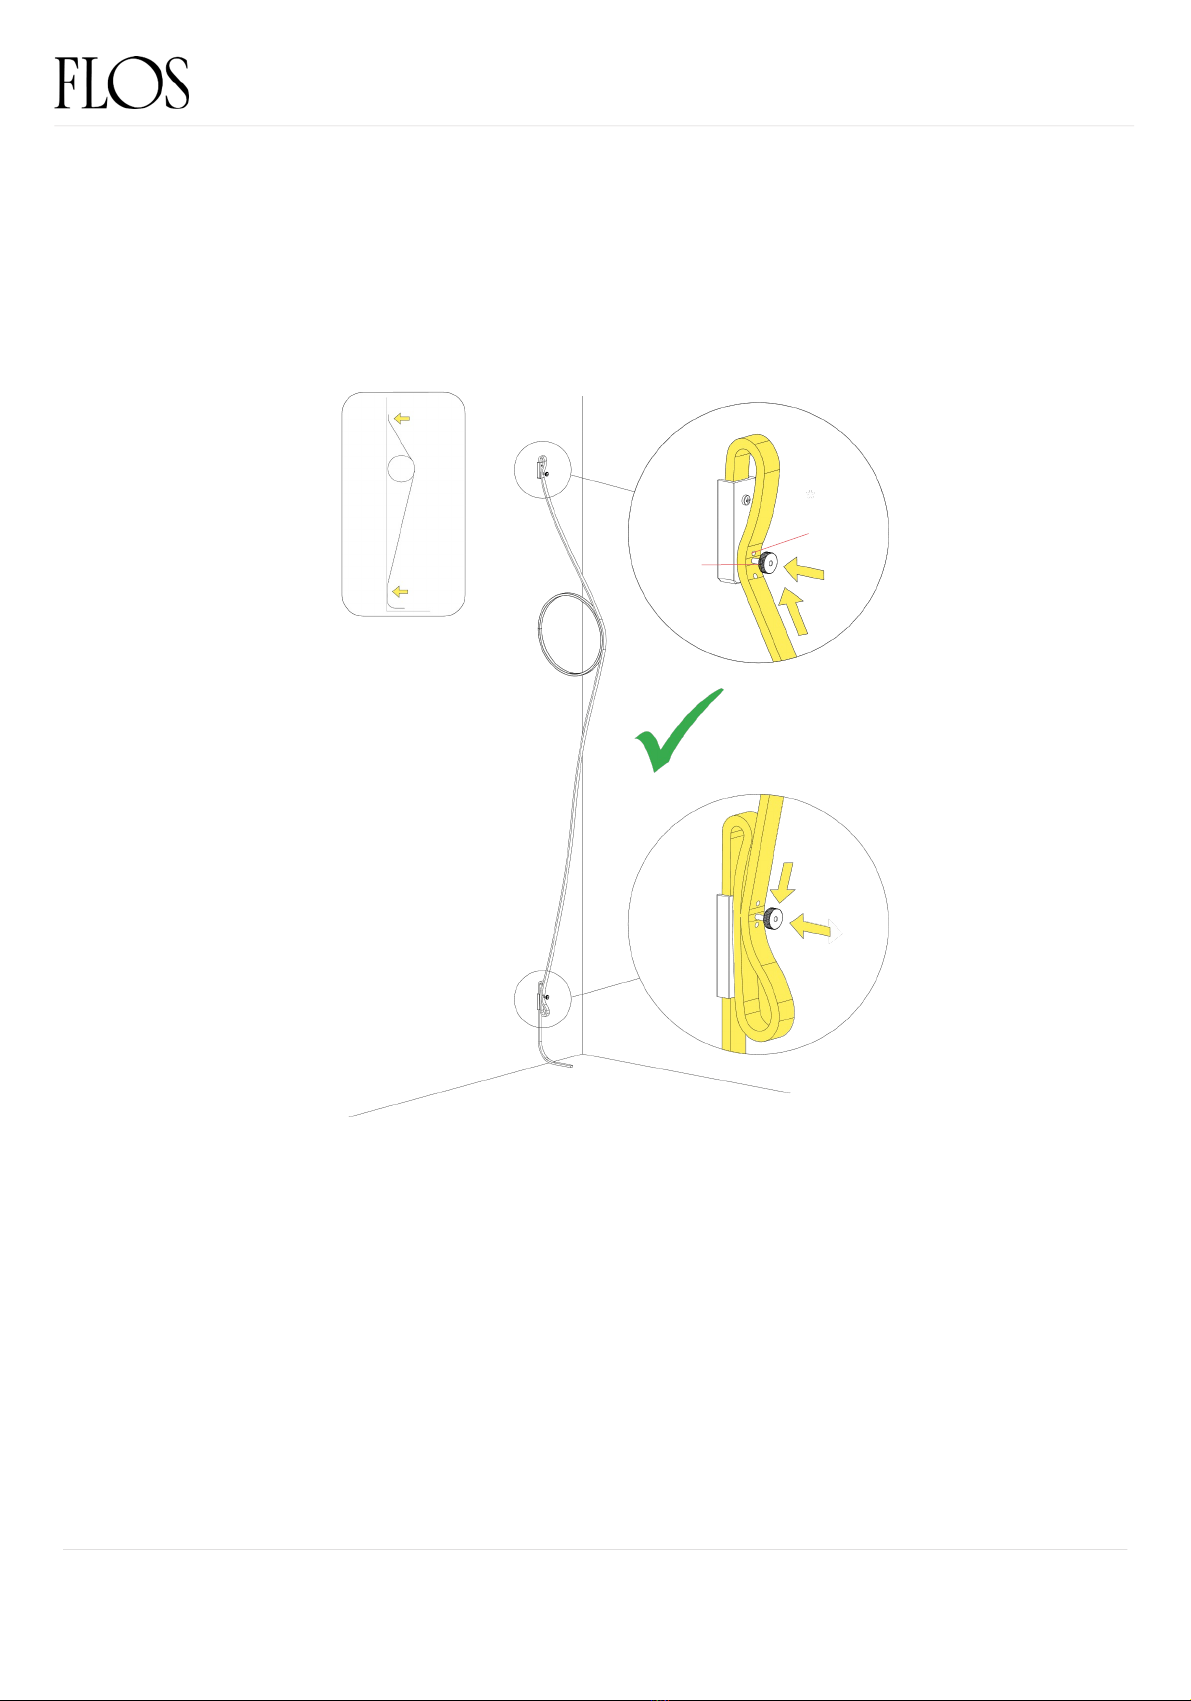
ADJUSTING THE CABLE TENSION: Pull the cable out of hole (C) then
thread it through the pin (D) so as to increase its tension, then tighten the
ferrule. If necessary, do the same at the bottom, moving the cable from
hole (H) to hole (I); then tighten the ferrule.
Connect the plug of the new body lamp to the dimmer unit by rotating it
90°clockwise.(Fig.1 page 9)
EN
Fig.10
REV. 1
DATE 19/08/2021
WIRERING F9513009
C
D
RF26649
ELECTRICAL MOUNTING BODY ASSEMBLY

EN
17
WARNING! When installing and whenever acting on the appliance, ensure that the power supply has been switched off.
For the installation of the spare-part, it is necessary to consult a qualified electrician.
©2021 Flos -All rights reserved -www.flos.com
Flos reserves the right to introduce any changes to its own models, without prior notice.
RF26645
ELECTRICAL MOUNTING ASSEMBLY WITH
DIMMER
REV. 1
DATE 19/08/2021
WIRERING F9513009

18
WARNING! When installing and whenever acting on the appliance, ensure that the power supply has been switched off.
For the installation of the spare-part, it is necessary to consult a qualified electrician.
©2021 Flos -All rights reserved -www.flos.com
Flos reserves the right to introduce any changes to its own models, without prior notice.
EN
REV. 1
DATE 19/08/2021
Fig.1
Fig.2
Disconnect the plug of the old electrical
mounting with dimmer assembly from the
driver and disconnect the dimmer from the
electrical mounting body assembly by rotating
it 90°clockwise.
Connect the plug of the new electrical
mounting with dimmer assembly from the
driver and connect the dimmer to the
electrical mounting body assembly by rotating
it 90°clockwise.
RF26645
ELECTRICAL MOUNTING ASSEMBLY WITH
DIMMER
WIRERING F9513009

19
WARNING! When installing and whenever acting on the appliance, ensure that the power supply has been switched off.
For the installation of the spare-part, it is necessary to consult a qualified electrician.
©2021 Flos -All rights reserved -www.flos.com
Flos reserves the right to introduce any changes to its own models, without prior notice.
To switch the device on/off push the button (Q); light sequence: MAXIMUM
/ MINIMUM (50%) / OFF. When the appliance is switched on, prolonged
contact of the button causes a progressive decrease of light intensity up to
10% and viceversa. Upon reaching the desired intensity, stop contact with
the button. NOTE: Due to the dimmer memory, when the appliance is
switched on again (from the wall switch or otherwise), it goes to the same
level of light intensity that it was set to before being switched off. The
dimmer function can only be
activated through the sensor (Q). After a blackout with the appliance
switched off, it will stay off when the power is restored.
EN
Fig.3
REV. 1
DATE 19/08/2021
RF26645
ELECTRICAL MOUNTING ASSEMBLY WITH
DIMMER
WIRERING F9513009
Q
EN
20
WARNING! When installing and whenever acting on the appliance, ensure that the power supply has been switched off.
For the installation of the spare-part, it is necessary to consult a qualified electrician.
©2021 Flos -All rights reserved -www.flos.com
Flos reserves the right to introduce any changes to its own models, without prior notice.
RF3320100
PLUG KIT + DRIVER SPARE PART
REV. 1
DATE 19/08/2021
WIRERING F9513009
Goldman
p.03
Kelvin
Edge
p.03
Kelvin
Led F
p.03
Ok
p.38
Copycat
p.05
Serena
p.10
Taccia
Small Led
p.11
Wirering
p.20
Tab F
p.03
Kelvin
Led GM
p.03
Tab T
p.03
To-Tie
All
Versions
p.03
Other FLOS Lighting Equipment manuals

FLOS
FLOS BELLHOP F F1070026 User manual

FLOS
FLOS OK F4640019 User manual

FLOS
FLOS IC C/W1 User manual

FLOS
FLOS Belvedere Spot wall User manual

FLOS
FLOS OK F4640030 User manual

FLOS
FLOS PATRICIA URQUIOLA TATOU T1 User manual

FLOS
FLOS RF25606 User manual

FLOS
FLOS KELVIN LED F User manual

FLOS
FLOS WIRERING F9513034 User manual

FLOS
FLOS BELLHOP User manual

FLOS
FLOS FU317959 User manual

FLOS
FLOS SERENA F6582015 User manual

FLOS
FLOS COPYCAT F1952044 User manual

FLOS
FLOS OK F4640009 User manual

FLOS
FLOS WIRERING F9512044 User manual

FLOS
FLOS WIRERING F9513044 User manual

FLOS
FLOS F1060026 User manual

FLOS
FLOS F0303000 User manual

FLOS
FLOS BELLHOP User manual

FLOS
FLOS ONTHEROCKS HL User manual


