QuickStart: Fluke Ti90/95
100
110/125 TiR110/125
© 2014 The Snell Group / 322 N. Main Street / Suite 8 / Barre, VT 05641 / 800-636-9820 /
www.thesnellgroup.com
2
5. FOCUS: This imager (except for Ti100 models) incorporates Fluke’s IR-OptiFlex
TM
focus
system (image, right) which allows the operator to often work without having to focus on
objects at distances greater than 48” (122cm) away. Any target beyond this threshold
will typically require little, if any, additional focus. To set this focus-free mode, adjust the
focus control located on the lens housing by aligning the white dot on the focus ring with
the larger white dot on the side of the camera. If additional focus is necessary, or if you
would like to manually focus/fine tune the image, simply turn the IR-OptiFlex
TM
focus control until the desired
focus is reached.
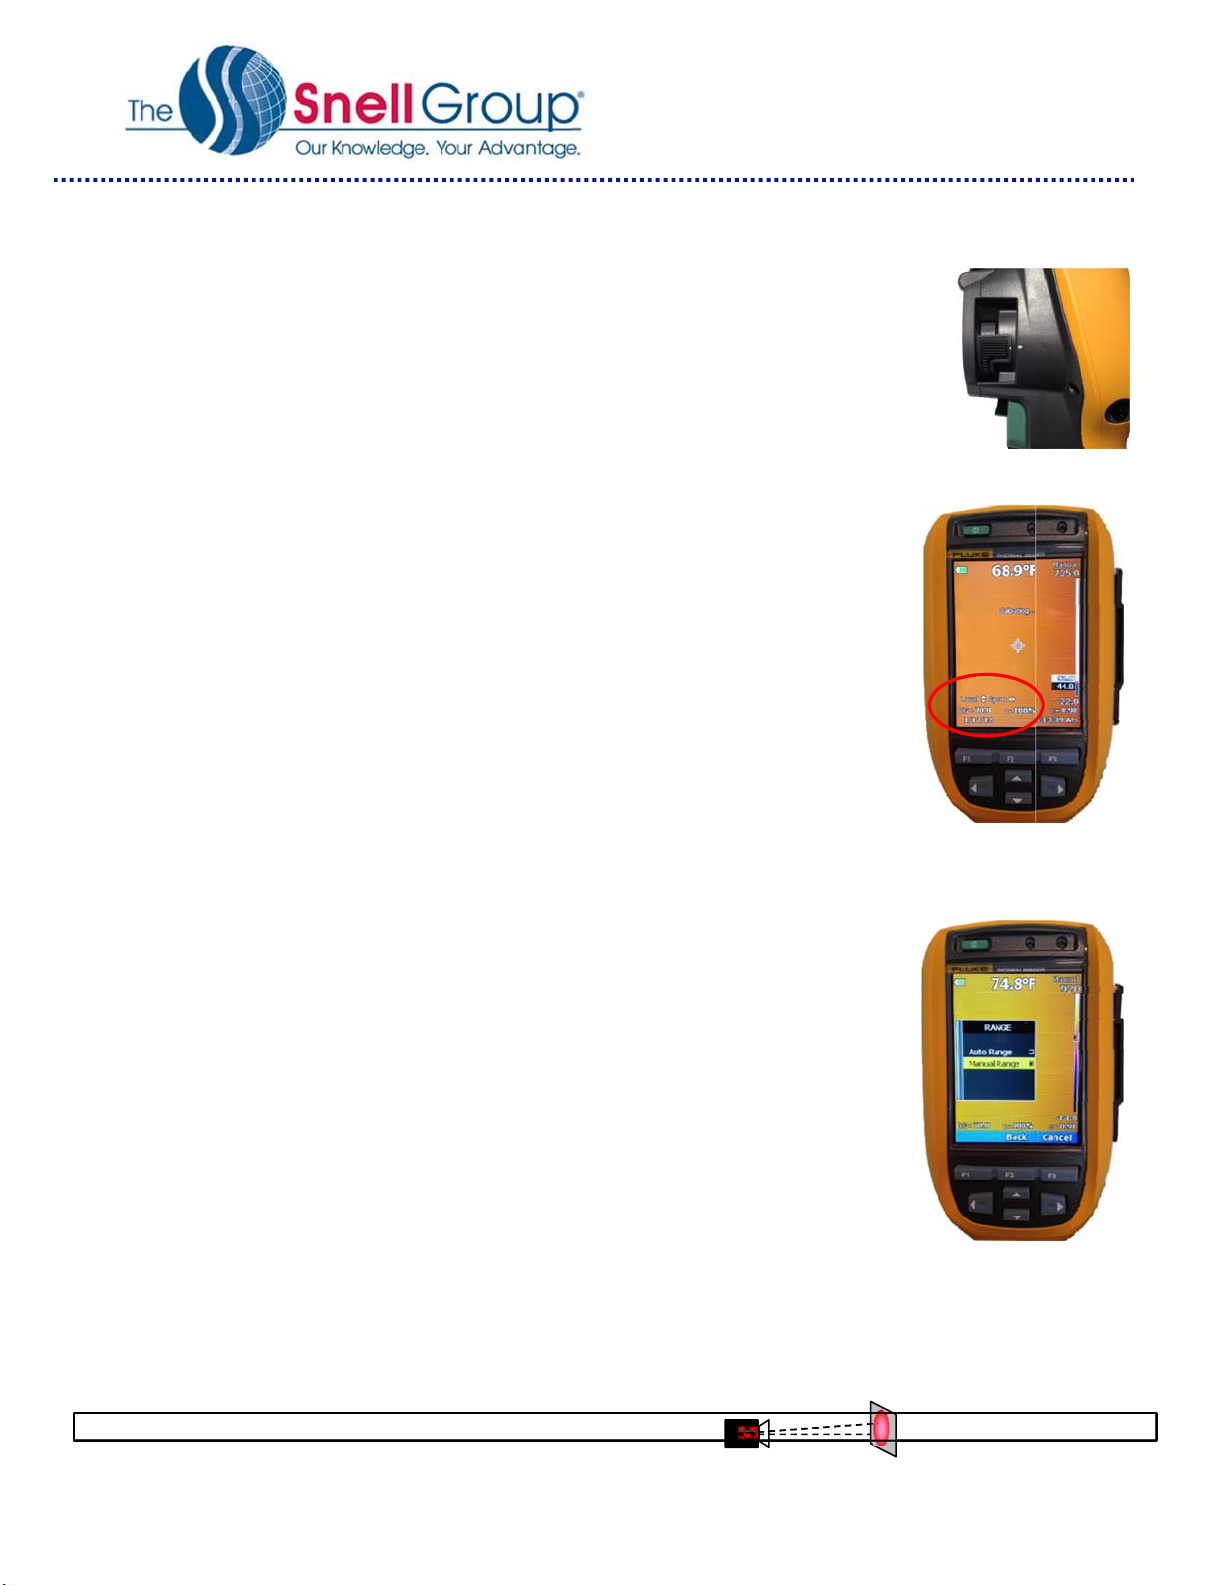
6. MANUAL ADJUST: (Level and Span)
Method #1 If in Auto Mode, hold the F1 Button to switch to “Manual Mode: Once in
Manual, use the ARROW KEYS (image, right) to adjust both the SPAN and LEVEL of
the image:
Span Adjustment
Left Arrow = Decreases Span
Right Arrow = Increases Span
Level Adjustment
Up Arrow = Raises Level
Down Arrow = Lowers Level
Method #2 Press F2 to enter the menu system.
Use the Up or Down arrow keys to highlight MEASURMENT on the main menu.
Press either F1 [OK] or the RIGHT ARROW button. This will take you to the
Measurement sub-menu, Highlight RANGE using the Up or Down arrow keys and
once again press either F1 [OK ] or the RIGHT ARROW button. This will bring you to
the Range sub-menu where you will see two options for span and level adjustment.
Select, MANUAL RANGE (image, right) to go to Manual Mode.
7. PAUSE IMAGE: Pause or Freeze the image by pressing the front Trigger once. If
this is not an image you desire to save, abort the saved image by pressing the trigger
button again (or F3 to CANCEL) and return to a live image.
8. SAVE IMAGE: To save an image, first pause the image (see above) and then
select F1 [SAVE].
9. PALETTE: From the main menu [F2], navigate to IMAGE then PALETTE then
STANDARD and select your color palette preference (Use Grayscale or Ironbow for now).
Select F1 [DONE] to lock it in.
10. EMISSIVITY: From the main menu [F2], navigate to MEASUREMENT and select EMISSIVITY. You can either
manually enter a value or select one from the table provided. Select DONE to lock it in.
11. BACKGROUND TEMPERATURE: From the main menu [F2], navigate to MEASUREMENT and select
BACKGROUND Adjust the background temperature values and select DONE to lock it in.
IFOV = 3.39 mRad (Theoretical with 160x120 Detector and 31°x22.5°lens) Detect 1in. target @ 24.5ft.


