manuals.online logo
Brands
  1. Home
  2. •
  3. Brands
  4. •
  5. foc.us
  6. •
  7. Bicycle Accessories
  8. •
  9. foc.us RAVEN + JAM CARBON User manual

foc.us RAVEN + JAM CARBON User manual

Other foc.us Bicycle Accessories manuals

foc.us 151013023 Manual

foc.us

foc.us 151013023 Manual

foc.us T.E.C. Pack Box User manual

foc.us

foc.us T.E.C. Pack Box User manual

foc.us JAM2SL User manual

foc.us

foc.us JAM2SL User manual

foc.us C.I.S. STEM User manual

foc.us

foc.us C.I.S. STEM User manual

foc.us THRON User manual

foc.us

foc.us THRON User manual

foc.us DROPPER POST Manual

foc.us

foc.us DROPPER POST Manual

Popular Bicycle Accessories manuals by other brands

Sigma BC 16.16 manual

Sigma

Sigma BC 16.16 manual

Playcore Dero Setbacks installation instructions

Playcore

Playcore Dero Setbacks installation instructions

VDO Cyclecomputing x3dw instruction manual

VDO Cyclecomputing

VDO Cyclecomputing x3dw instruction manual

Cateye RAPID X2 manual

Cateye

Cateye RAPID X2 manual

buratti meccanica Clorofilla Trail Use and maintenance manual

buratti meccanica

buratti meccanica Clorofilla Trail Use and maintenance manual

Shimano SG-8R20 Service instructions

Shimano

Shimano SG-8R20 Service instructions

BOB YAK owner's manual

BOB

BOB YAK owner's manual

APLIC 303303/20190717TW012 user manual

APLIC

APLIC 303303/20190717TW012 user manual

SRAM AXS BlipBox user manual

SRAM

SRAM AXS BlipBox user manual

Garmin EDGE 500 owner's manual

Garmin

Garmin EDGE 500 owner's manual

Shimano FD-RX810 Dealer's manual

Shimano

Shimano FD-RX810 Dealer's manual

Cateye V2C - Quick start manual

Cateye

Cateye V2C - Quick start manual

KMART 43115907 instructions

KMART

KMART 43115907 instructions

SIGMA SPORT Buster 2000 manual

SIGMA SPORT

SIGMA SPORT Buster 2000 manual

NVO Components STEM manual

NVO Components

NVO Components STEM manual

DAXYS BP188 user manual

DAXYS

DAXYS BP188 user manual

XLC BV-W17 manual

XLC

XLC BV-W17 manual

Deda Elementi SUPERBOX user manual

Deda Elementi

Deda Elementi SUPERBOX user manual

manuals.online logo
manuals.online logoBrands
  • About & Mission
  • Contact us
  • Privacy Policy
  • Terms and Conditions

Copyright 2025 Manuals.Online. All Rights Reserved.

1
USER MANUAL
STORAGE BOX – COVER ASSEMBLY / TECHNICAL MANUAL Version 1 | 16.03.2023
EN INSTRUCTIONS FOR COVER ASSEMBLY OF STORAGE BOX
DE ANLEITUNG ZUR MONTAGE DER RAHMEN-BOX-ABDECKUNG
FR INSTRUCTIONS POUR L’ASSEMBLAGE DU CACHE DE LA BOÎTE DE RANGEMENT
ES INSTRUCCIONES PARA EL MONTAJE DE LA TAPA DE LA CAJA DE ALMACENAMIENTO
IT ISTRUZIONI PER IL MONTAGGIO DELLA COVER DEL PORTAOGGETTI
NL INSTRUCTIES VOOR DE MONTAGE VAN HET OPBERGVAK-DEKSEL
STORAGE BOX – COVER ASSEMBLY
RAHMEN-BOX – MONTAGE DER ABDECKUNG
BOÎTE DE RANGEMENT - ASSEMBLAGE DU CACHE
CAJA DE ALMACENAMIENTO - MONTAJE DE LA TAPA
SPAZIO PORTAOGGETTI - MONTAGGIO DELLA COVER
FRAME-OPBERGVAK - DEKSEL MONTAGE
RAVEN + JAM CARBON
2STORAGE BOX – COVER ASSEMBLY / TECHNICAL MANUAL
RAVEN + JAM CARBON STORAGE BOX – COVER ASSEMBLY
RAHMEN-BOX – MONTAGE DER ABDECKUNG
BOÎTE DE RANGEMENT - ASSEMBLAGE DU CACHE
CAJA DE ALMACENAMIENTO - MONTAJE DE LA TAPA
SPAZIO PORTAOGGETTI - MONTAGGIO DELLA COVER
FRAME-OPBERGVAK - DEKSEL MONTAGE
3STORAGE BOX – COVER ASSEMBLY / TECHNICAL MANUAL
EN
DE
FR
ES
IT
NL
2 NM
Screw the button to the cover, and lock into position with the flat nut. (2 NM)
Schraube den Druckknopf an den Abdeckung und fixiere ihn mit der Flachmutter. (2 NM)
Vissez le bouton au cache et le bloquer en position à l‘aide de l‘écrou plat. (2 NM)
Atornille el botón a la tapa y bloquéelo en su posición con la tuerca plana. (2 NM)
Avvitare il pulsante alla cover e bloccarlo in posizione con il dado piatto. (2 NM)
Schroef de knop op het deksel en zet hem vast met de platte moer. (2 NM)
1
4STORAGE BOX – COVER ASSEMBLY / TECHNICAL MANUAL
EN
DE
FR
ES
IT
NL
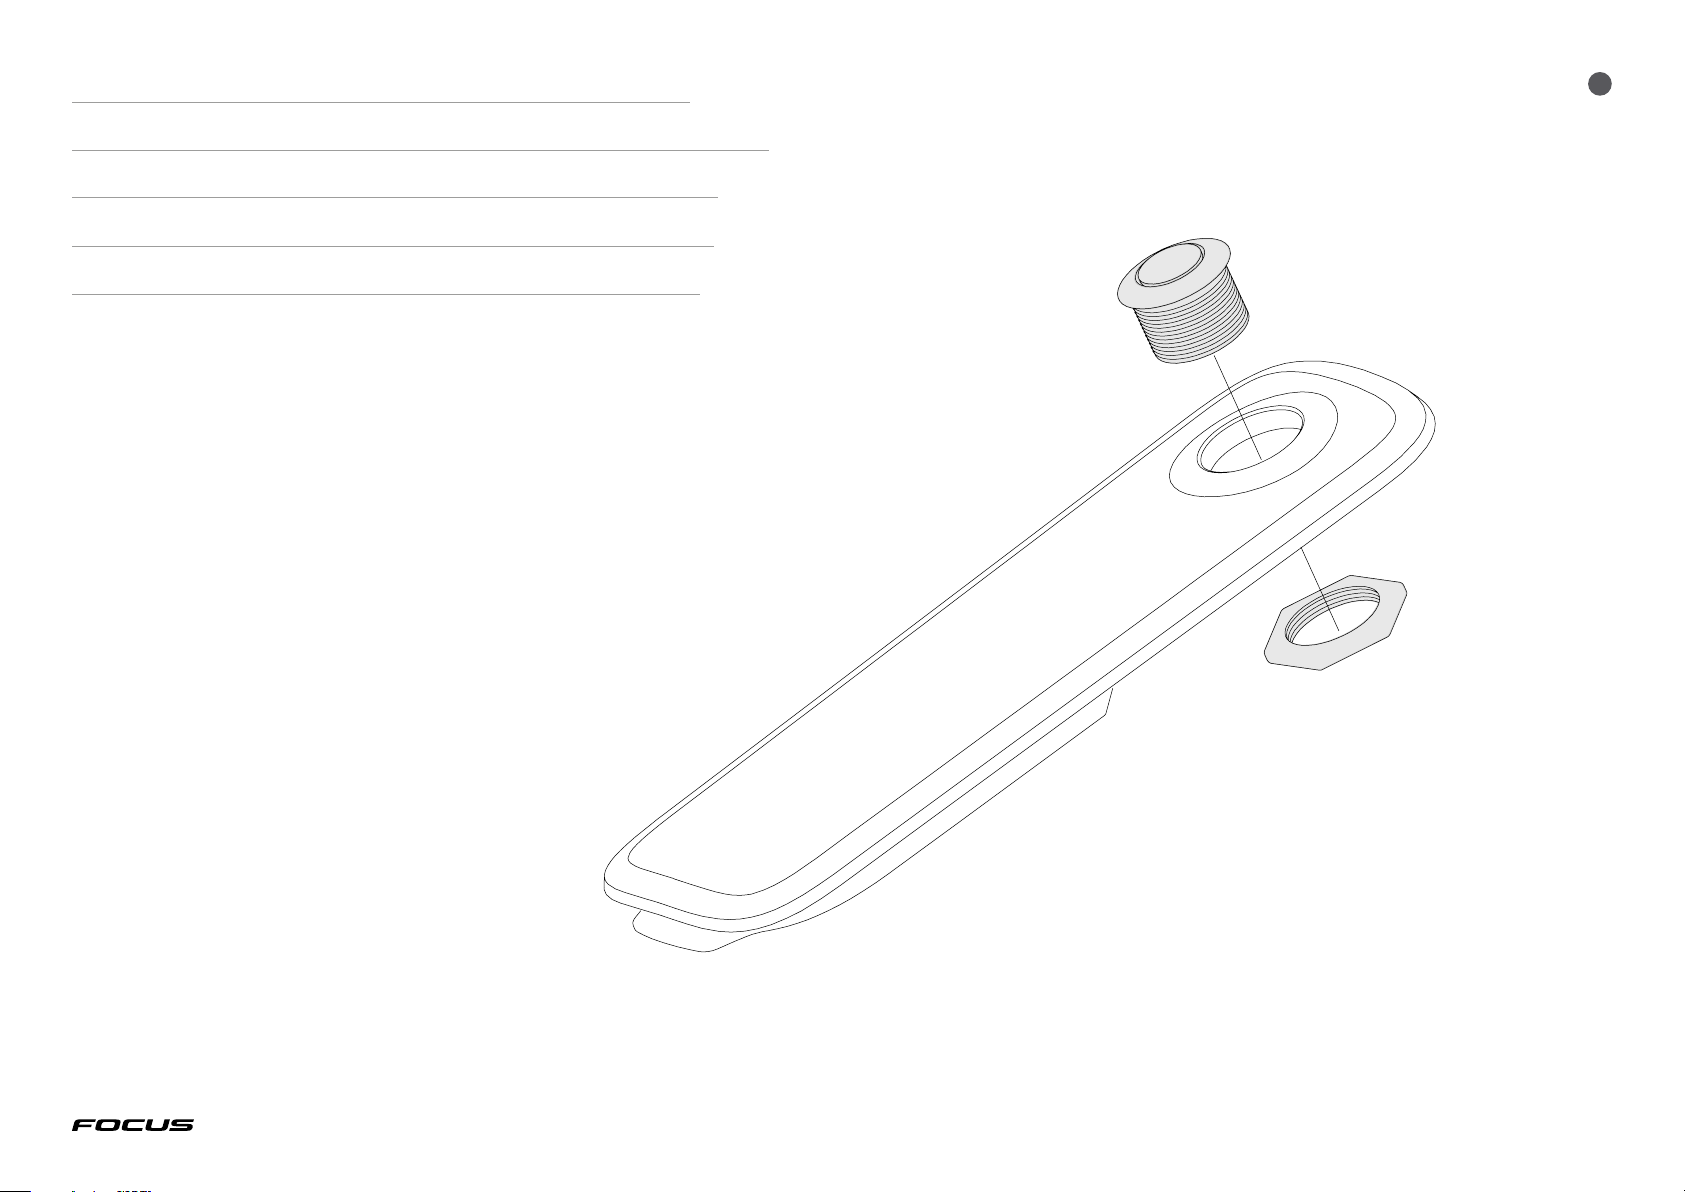
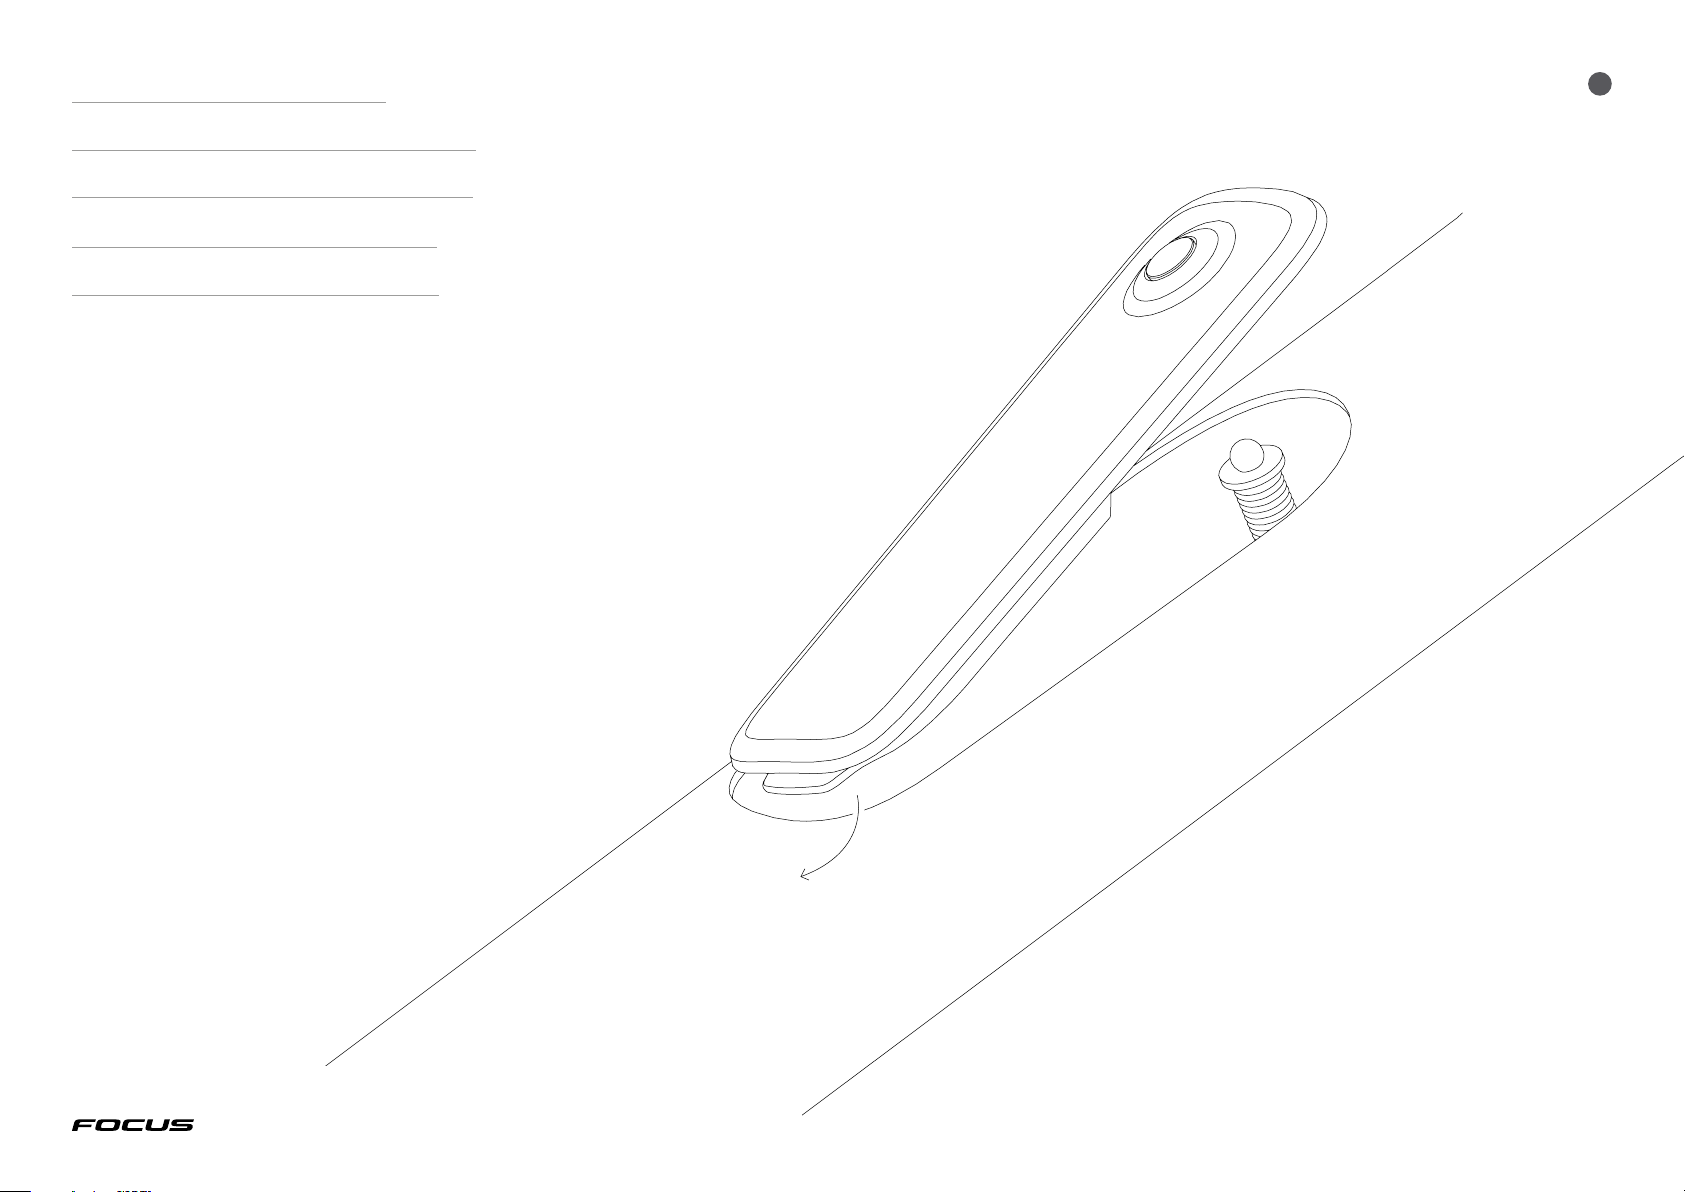
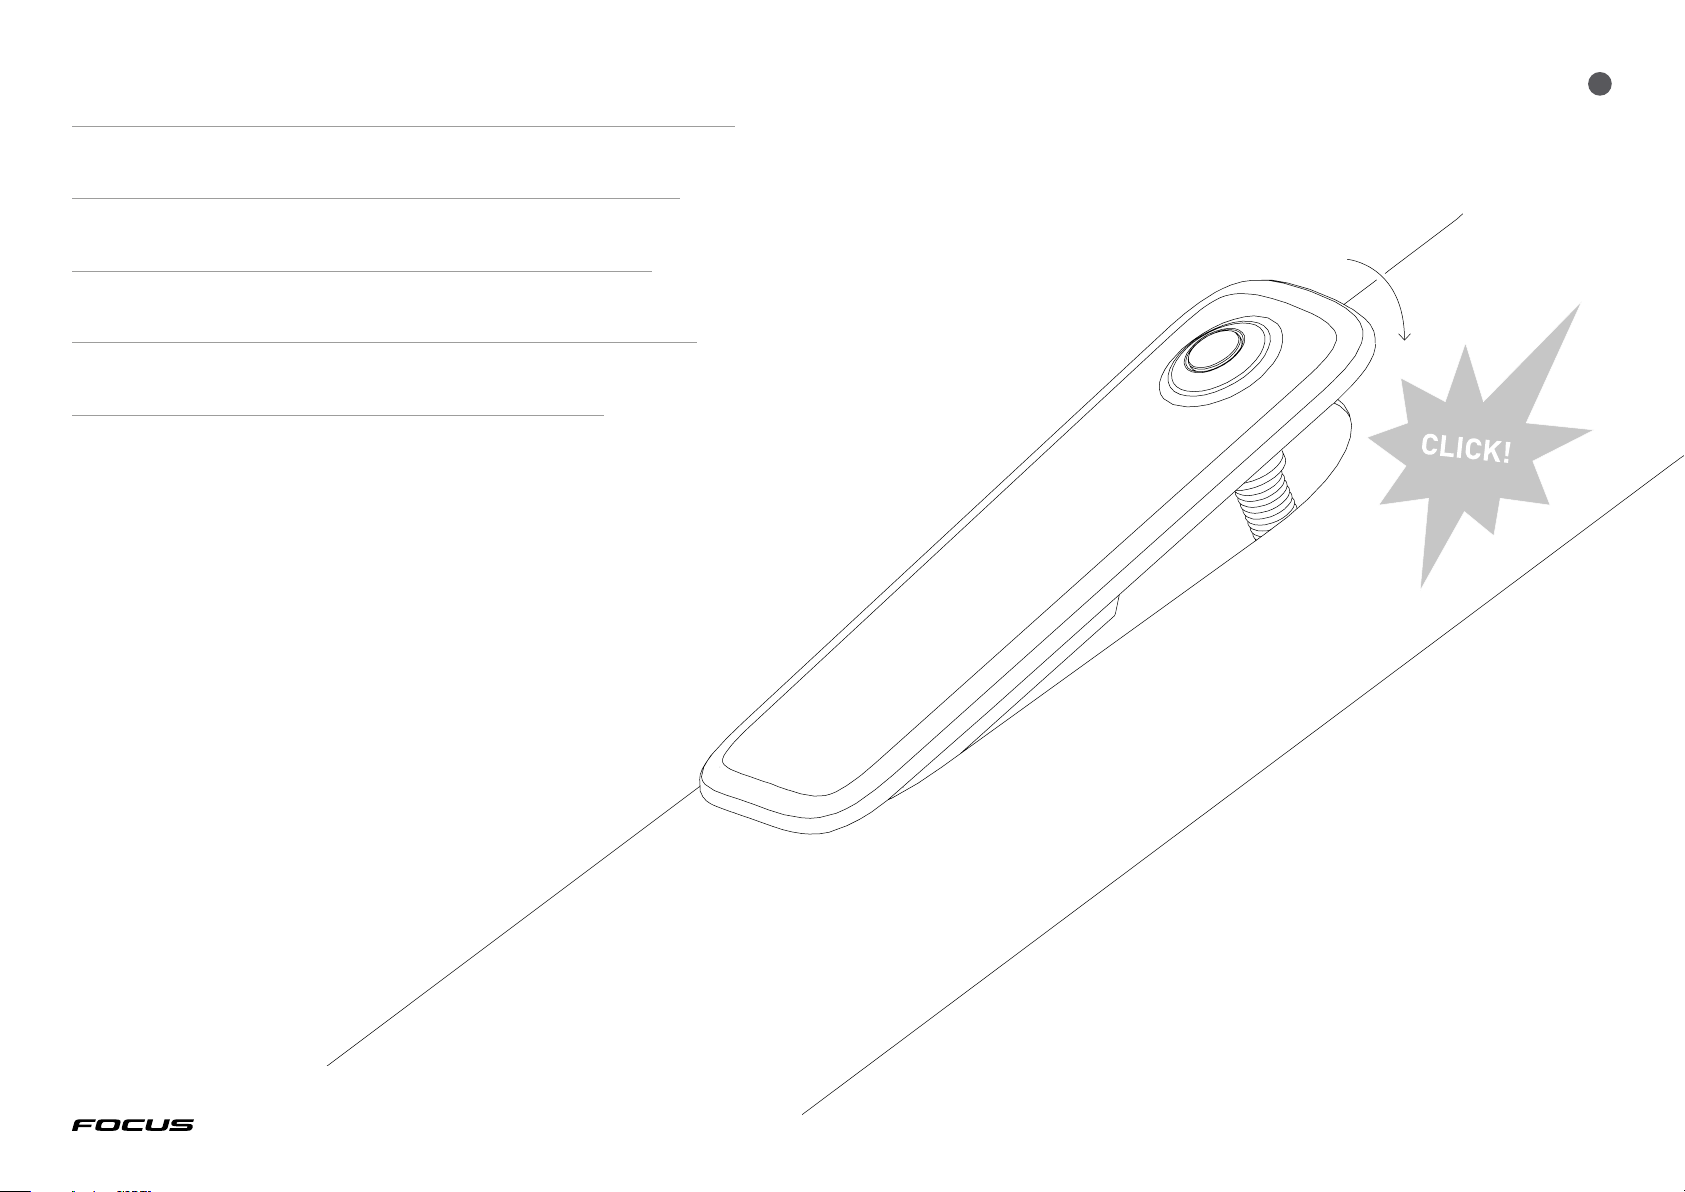
Threaded Pin Assembly.
Gewindestift-Montage.
Assemblage de la goupille filetée.
Montaje del pasador roscado.
Gruppo perno filettato.
Stelschroef-montage.
Insert the washer.
Setze die Unterlegscheibe ein.
Insérez la rondelle.
Inserte la arandela.
Inserire la rondella.
Plaats de sluitring.
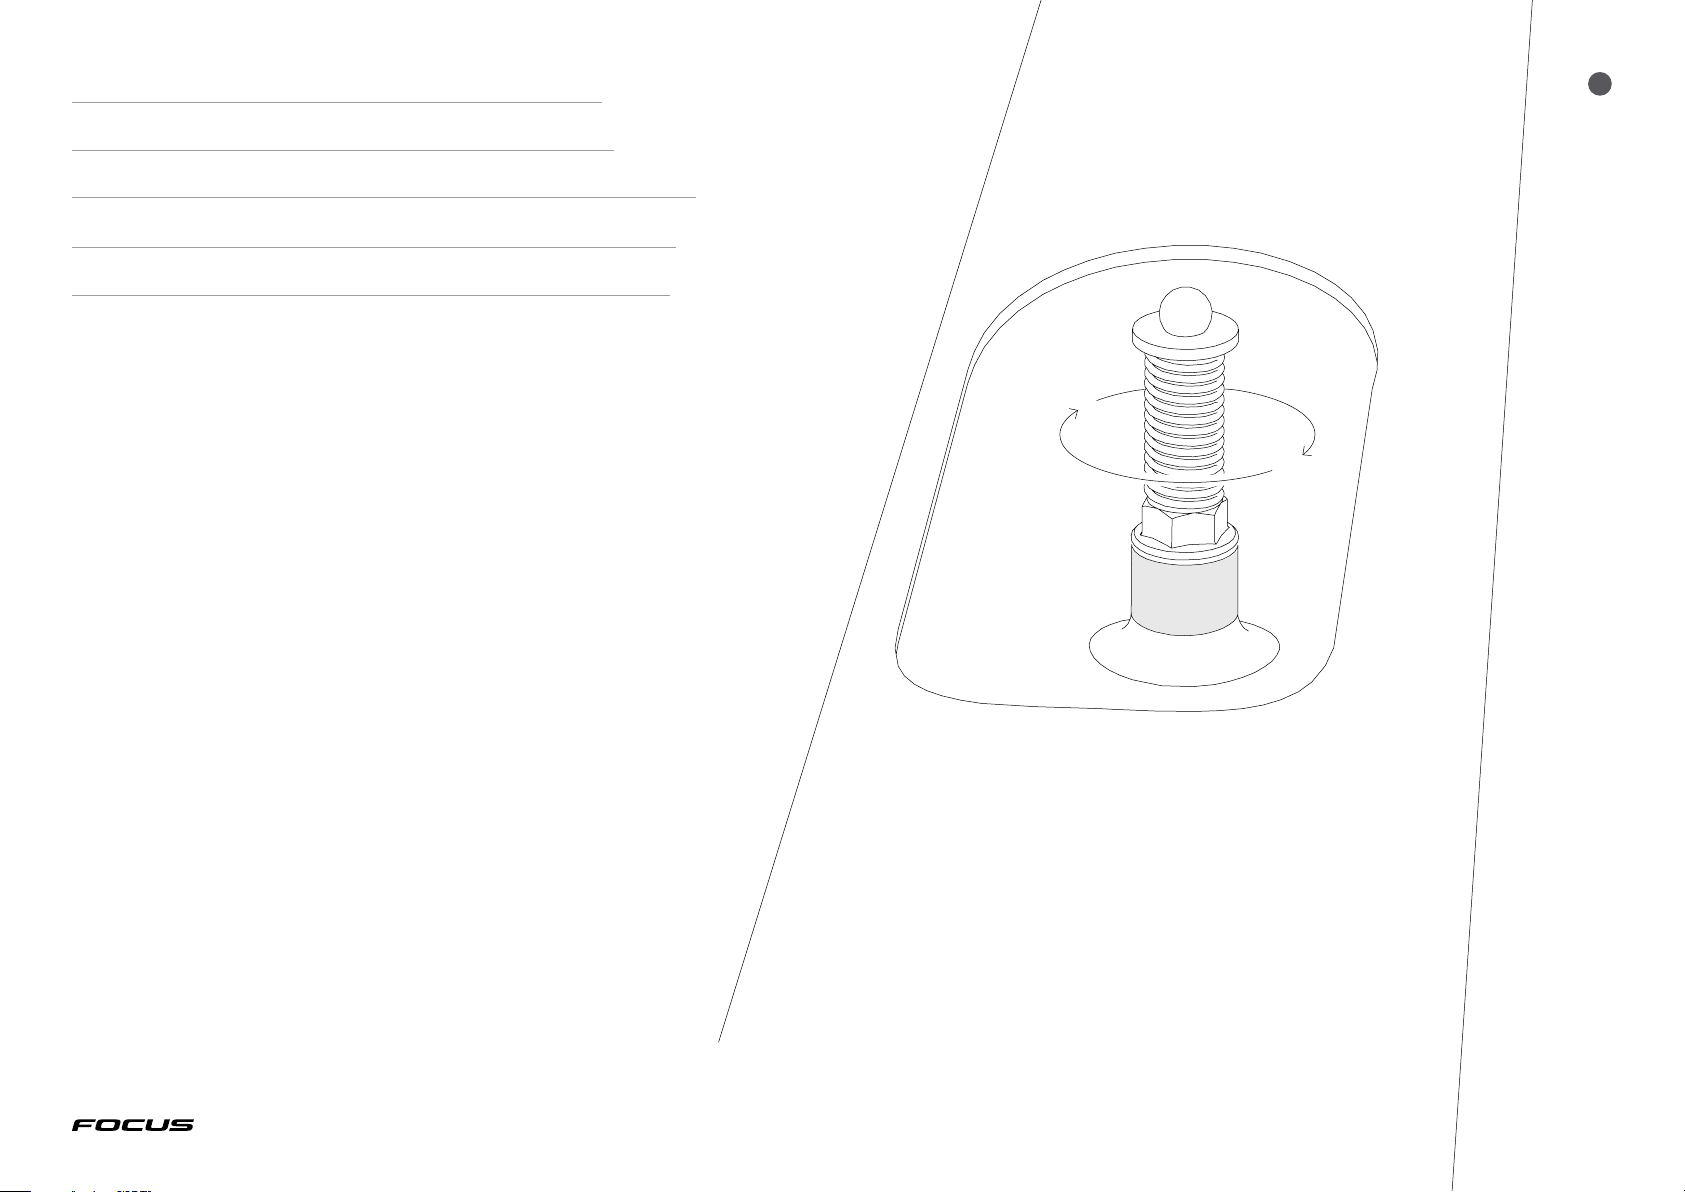
Insert the spring.
Setze die Feder auf.
Insérez le ressort.
Inserte el resorte.
Inserire la molla.
Plaats de veer. Screw the nut on the threaded pin,
leaving 11mm of insertion.
Schraube die Mutter auf den Gewindestift,
lass dabei 11 mm Platz.
Vissez l’écrou sur la tige filetée, en
laissant 11 mm d’insertion.
Enrosque la tuerca en el pasador roscado,
dejando 11 mm de inserción.
Avvita il dado sul perno filettato,
lasciando 11 mm di inserimento.
Schroef de moer op de stelschroef, hou
11 mm schroefdraad over.
2
EN
DE
FR
ES
IT
NL
EN
DE
FR
ES
IT
NL EN
DE
FR
ES
IT
NL
11 MM
5STORAGE BOX – COVER ASSEMBLY / TECHNICAL MANUAL
EN
DE
FR
ES
IT
NL
Screw in the pin on to the frame insert.
Schraube den Stift in den Rahmeneinsatz.
Vissez la goupille dans l‘insert du cadre.
Atornille el pasador en el inserto del cuadro.
Avvitare il perno sull‘inserto del telaio.
Schroef de stelschroef in het frame-inzetstuk.
3
6STORAGE BOX – COVER ASSEMBLY / TECHNICAL MANUAL
4
EN
DE
FR
ES
IT
NL
Hand-tighten until the nut makes contact with the frame insert.
Die Mutter handfest anziehen, bis sie den Rahmeneinsatz berührt.
Serrez à la main jusqu’à ce que l’écrou entre en contact avec l’insert du cadre.
Apriete a mano hasta que la tuerca haga contacto con el inserto del cuadro.
Serrare a mano finché il dado non entra in contatto con l‘inserto del telaio.
Handvast draaien tot de moer contact maakt met het frame-inzetstuk.
7STORAGE BOX – COVER ASSEMBLY / TECHNICAL MANUAL
5
EN
DE
FR
ES
IT
NL
Then with a 10mm spanner, counter tight the nut against the insert.
(Reference 3 NM)
Dann mit einem 10-mm-Schlüssel die Mutter gegen den Einsatz
anziehen. (Referenz 3 NM)
Ensuite, à l‘aide d‘une clé de 10 mm, serrez le contre-écrou
sur l’insert. (référence : 3 NM).
A continuación, con una llave de 10 mm, contraapriete
la tuerca contra el inserto. (Referencia 3 NM)
Poi, con una chiave da 10 mm, controserrare il dado
contro l‘inserto. (Riferimento 3 NM)
Draai dan met een 10mm sleutel de moer tegen
het inzetstuk aan. (referentie 3 NM).
8STORAGE BOX – COVER ASSEMBLY / TECHNICAL MANUAL
6
EN
DE
FR
ES
IT
NL
For visual refence: The ball point should be popping out
around 3 MM out of the frame.
Zur visuellen Kontrolle: Die Kugelspitze sollte etwa
3 MM aus dem Rahmen herausragen.
Pour référence visuelle : l’extrémité arrondie doit
ressortir d’environ 3 MM du cadre.
„Para referencia visual: La punta de la bola debe
sobresalir unos 3 MM fuera del marco.“
„Per riferimento visivo: la punta a sfera dovrebbe uscire
fuori 3 MM dal telaio.“
Visuele check: de punt van de kogel moet ca. 3 MM
uit het frame steken.
9
7
STORAGE BOX – COVER ASSEMBLY / TECHNICAL MANUAL
Put the cover on, bottom side first.
Setze den Deckel mit der Unterseite zuerst ein.
Replacez le cache, la partie basse en premier.
Coloque la tapa, primero la parte inferior.
Posizionare la cover, prima il lato inferiore.
Doe het deksel erop, onderkant eerst.
EN
DE
FR
ES
IT
NL
10
8
STORAGE BOX – COVER ASSEMBLY / TECHNICAL MANUAL
Then press the front down against the downtube until you hear a
clicking sound. That means the cover is locked in place.
Dann die Oberseite nach unten gegen das Unterrohr drücken, bis ein Klickgeräusch
zu hören ist. Das bedeutet, dass die Abdeckung eingerastet ist.
Appuyez ensuite le haut du cache contre le tube oblique jusqu‘à ce que vous
entendiez un clic. Cela signifie que le cache est bloqué en position.
Luego presione la parte delantera contra el tubo inferior hasta que oiga
un chasquido. Eso significa que la cubierta está bloqueada en su lugar.
Quindi premi la parte anteriore verso il basso contro il tubo obliquo finché non
senti un clic. Ciò significa che il coperchio è bloccato in posizione.
Druk dan de voorkant tegen de onderbuis totdat je een klik hoort.
Dat betekent dat het deksel op zijn plaats zit.
EN
DE
FR
ES
IT
NL