2COOL 2 www.freeair.cz
2COOL
Dear customer, congratulations on the purchase of the 2Cool model. Before you begin, please
read carefully the building instructions and make sure that you understand the building
process.
DESCRIPTION OF THE MODEL:
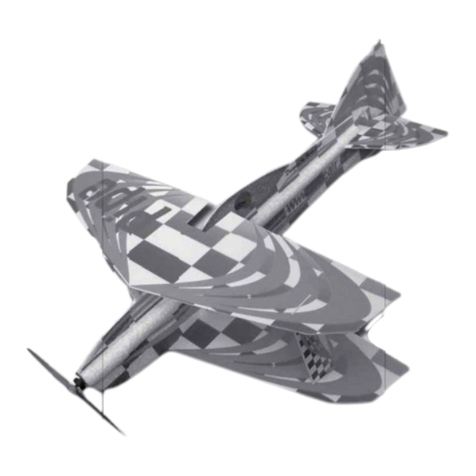
The 2Cool model was designed to cater for the needs of the indoor aerobatics and the
aero musical. This does not prevent it, however, from being also perfectly suitable for flying
outdoors. Thanks to its low weight, (around 320 grams) it has a low wing loading, enabling
it to fly in a wide band of speeds. Its concept harks back to the Microbat model. If you were
not able to hover in the chandelle („hang on the prop“) with your models yet, you need not
worry. 2Cool is extremely suitable to train the hovering flight - you are going to be much
surprised how easy it actually is. The model is made completely from EPP, with the carbon
fibre composite used for the undercarriage and for the wing spars. The kit contains all parts
necessary to finish your model, with the exception of the RC equipment and powerplant. We
recommend the Rotex 25/6/17 motor fed from 3 cells of LiPol batteries of 720-1500 mAh
capacity. In this configuration the model weighs 325 grams. As a second propulsion alternative
we propose the Microtex 20/8/16 motor and three 340 mAh cells, enabling you to achieve
the weight of less than 280 grams! Both single or two-servo aileron control could be utilised.
BUILDING:
Start with gluing together both wing halves, using either the standard CyA glue or the
five-minute epoxy. According to fig.1 and 2, and using a sharp modelling knife, cut a 3 mm
deep spanwise groove at the distance of 70 mm from the wing leading edge (fig. 3). Then
insert and glue the carbon fibre composite rod spar of 640 mm length to both wing halves (fig.
3), and secure the joint with the CyA glue. As shown on figs. 4, 5 and 6, attach the ailerons,
using the glass-weave adhesive tape.
Now set the wings aside and start working on the fuselage. According to the Fig.7, cut out
the inner portions of the fuselage sections and glue them to the outer sections, as shown on
figs. 8, 9 and 10. This provides for a ready fuselage.
Now glue the bottom wing to the fuselage, observing that the parts are square and true
(see figs. 11 and 12). Establish the number of servos to be used for aileron control - for a single
servo layout, install it according to the fig.13. First cut an opening for the servo, slightly smaller
than its overall dimensions, and push the servo into the cut-out, gluing it to hold in place, if
necessary, with the CyA glue. Glue the control surface horns and install the push-pull rods. If
you choose the 2-servo layout, cut out the servo openings according to the fig. 14 and 15 and
install the push-pull rods in a way similar to the layout used on the single servo version .
Glue the elevator servo (fig. 16) between the EPP bulkheads and cut the pillars supporting
the push-pull rod guides (fig.17). Glue in the pillars . Using a carbon tube of 5 mm diameter as
a core drill, make a circular hole in the elevator (at a 1/3 of the elevator chord, fig. 19). Then
glue to this carbon tube a lever and its ring doublers (fig. 18 and 20). Slip also the bushings
on the tube .If they fit too tightly (if they bind), ream them carefully with a file or a sandpaper
on a dowel, to ensure that they turn freely; but avoid any excessive play!!!! According to (fig.
21 and 22), cut in the fuselage, in the distance of 70 mm from its end, a semicircular-section
groove for the carbon fibre composite elevator joiner, then glue on the bushings . According
to fig. 23, slip the plastic guides to the elevator push-pull rod outer sleeve; glue the guides to
the support pillars in the fuselage. Install the elevator push-pull rod (fig. 24). Ensure, that the
elevator control lever is perpendicular to the fuselage longitudinal axis, ensuring thusly the
maximum elevator deflection up and down. According to fig. 25, connect the receiver and the
controller, check the elevator neutral position and, if the controller cable does not reach up to
the front fuselage, use the extension cable. The fig. 26 shows the place for the rudder servo
opening. Connect the servo cable to the receiver and glue the servo to the fuselage (fig. 27).
Glue the undercarriage support base in the fuselage, as shown on (fig. 28), using preferably
the five-minute epoxy. Once the glue hardens, cut out a slot across the width of the fuselage,
immediately above the undercarriage base block . Later on the undercarriage leaf spring shall
be slid through this slot. Using a 2mm bit, drill a hole for the bolt that holds the undercarriage
wheel on the leaf spring (fig. 29). Secure the bolt from both sides of the leaf spring with a
nut. Slide the leaf spring though the slot, gluing it thoroughly to its base. If you are afraid of
hard landings, the spring could be attached to the base with screws .
Then add the second undercarriage wheel (fig. 30).
Now cut in the upper fuselage half, in the distance of 70 mm from its end, a semicircular-
section groove for the carbon fibre composite elevator joiner tube, then glue the whole fuselage
assembly together as per figs. 31 and 32. Attach the motor to the motor bulkhead and glue
it to the fuselage as per fig. 34. Using the CyA, glue the cabane central strut (pylon) to the
fuselage top.
Prepare the wing struts as per fig. 35, reinforcing them with the dural rods of 160 mm length,
so that 5 mm of the rod would protrude from each end. Glue the struts to the wings at a
distance of the 320 mm from the centreline (640 mm total lateral distance), ensuring their
lateral and longitudinal symmetry (fig. 36 a 37).
This operation done, attach the upper wing, ensuring again that it is placed true and
square relative to the bottom wing and fuselage (fig. 38).
Check that the elevator servo is in the neutral position and glue the elevator halves
together (fig. 39 and 40). Avoid getting the glue to the bushings holding the carbon tube and
ensure that the slab elevator halves have the same angle of incidence. Apply glue to the inner
surfaces of the fuselage joint and put them together as per figs. 41 and 42. Prepare the rudder
and the plastic hinges, and glue them to the grooves in the fuselage end and the rudder figs.
43. Glue the tail skid made of the EPP, as shown on fig. 44.
See figs. 45, 46 for the guide to installation of the wings cross braces. Push the carbon rod
through the wing and secure it using the CyA glue. Extreme care and accurate work is necessary
during this operation, as it is almost impossible to straighten the wing box once distorted by
improper handling. Using the fig. 47 as a guide, glue the aileron interconnecting rod horns to
the trailing edges of the ailerons and attach the joining rod to them as per fig. 48. Ensure that
both rods are the same length and that the ailerons are parallel.
Check the position of the centre of gravity (CG) and, based on its established position, cut
out the compartment for the battery as shown on the fig. 49. To be able to use more types of
battery, open up two compartments. The required position of the centre of gravity is some 90
mm from the wing leading edge back, as shown on the fig. 50.
A lot of fun and many smooth landings with your model wishes FreeAir.
PARTS LIST
Part name Pcs Part name Pcs
Fuselage of EPP 2 Undercarriage wheel 2
Elevator and rudder control rods 2 Set of bolts 2
Wing of EPP 2 Set of nuts 4
Elevator and rudder of EPP 3 Undercarriage carbon leaf spring 1
Aileron of EPP 4 Undercarriage base block 1
Wing cross brace (carbon 1x340 mm) 2 Push-pull rod levers 3
Aileron push-pull rod 2 Carbon wing spars (1x640 mm) 2
Plastic hinge 2 Carbon elevator joiner (5x100 mm) 1
Tailskid of EPP 1 Slab elevator set (bushings and control
lever) 1
Plastic tube (3x10 mm) 4 Instructions 1
Motor bulkhead 1 Wing struts 3
Aileron interconnect boom 4 Strut reinforcing wire (1,6x160 mm) 2
Aileron interconnect wire (1,6x170 mm) 2
You will need the following tools and materials
CyA glue, five-minute epoxy, 2 mm dia drill bit, CyA activator, glass-weave reinforced self-
adhesive band, sharp (modelling) knife, sandpaper, 3M contact glue in a spray can, soldering
pistol. To complete the model you need the following: Receiver (Rex 5+), servos (HS-55),
controller (TMM 1210-3), battery pack (2-3 LiPol cells of 720-1500 mAh), motor (Rotex
27/6/17).

