manuals.online logo
Brands
  1. Home
  2. •
  3. Brands
  4. •
  5. Fresh
  6. •
  7. Fan
  8. •
  9. Fresh TF100 User manual

Fresh TF100 User manual

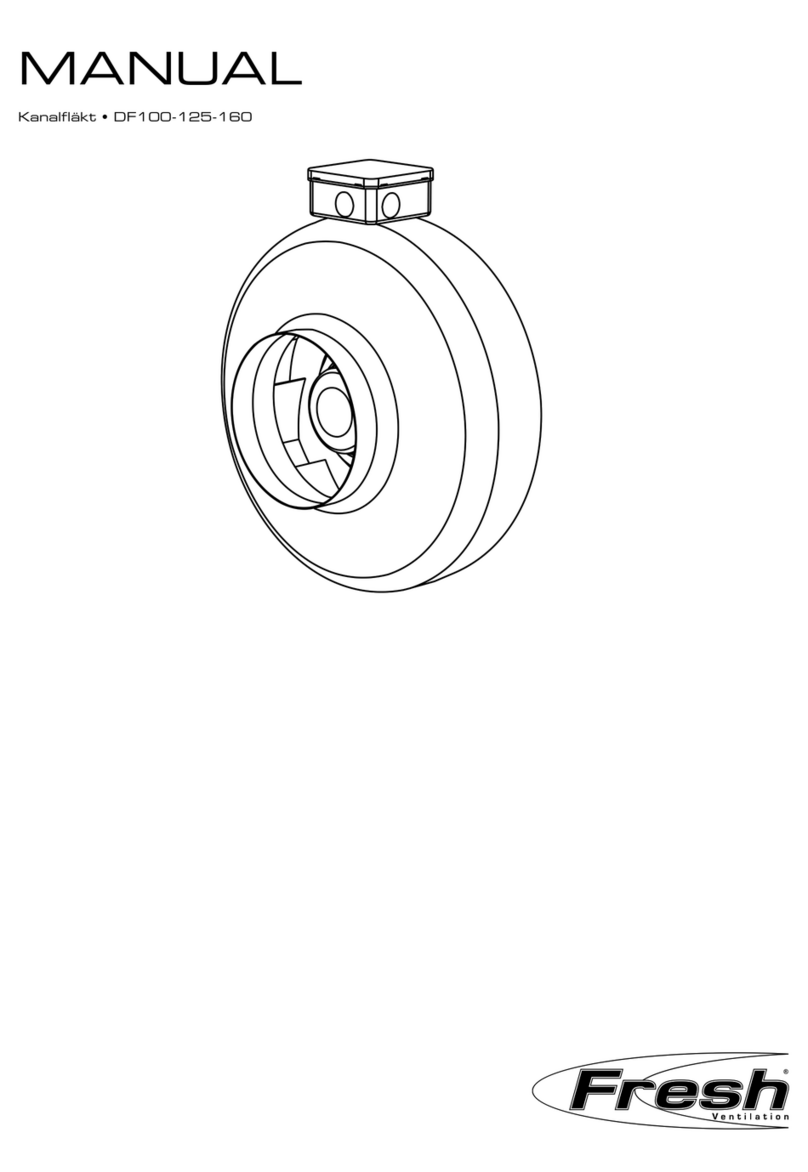
T F10 0 -12 5 -15 0 - 2 0 0
General Conditions
• This type of extractor fan is designed to work
inserted into any stretch of air extraction conduit,
whether positioned vertically or horizontally.
• This tubular extractor is designed to be installed in
a flexible or rigid ducting of 100/125/150/200mm
diameter depending on the TF model. The extractor
(C) is placed between the inlet (A) and the exhaust
(B) See Fig 1.
• Do not install the exhaust pipe of the extractor unit
to a chimney, ventilation pipe or hot air conduit.
• Before connecting the units to the ducting, consult
the local regulations regarding exhaust air.
• Precautions must be taken to avoid the backflow of
gases into the room from the open flue of gas or
other open-fire appliances when mounted in outside
windows or walls.
• Make sure there is sufficient make up air, especially
when used with an appliance with a combustion
chambe r.
• This extractor is designed for the ventilation of
homes or similar premises.
• Do not use the extractor in explosive atmospheres
• Do not use in premises where the room
temperature exceeds 55ºC.
• This extractor does not cause any interference in
radio/television sets (CEE regulations No 89/336)
• This fan is double insulated and does not require an
earth. Having unpacked the extractor fan, check
that it is undamaged and that it works correctly.
If there are faults or damage, do not attempt to
use it or repair it yourself.
Installation Guidelines
Switch off the mains supply before making any
electrical connections. If in any doubt contact a
qualified electrician.
• Installation, electrical connections and adjustments
must be performed according to the local
regulations by a qualified person
• Failure to comply with these instructions will void
the warranty
• In the event of incorrect installation, the
Manufacturer will not accept responsibility for the
material or personal damage which may occur.
• Before beginning the installation, check that:
- The fan is not distorted or damaged
- There is no foreign body lodged within the casing
- The fan moves freely on being turned by hand
1. Loosen the 2 screws (D) and lift the flanges (E).
Take the casing assembly (F) out of its housing (F.2)
2. Install the supporting assembly and spigots (G) in
the (C) position (Fig.1). To do this it is necessary to:
- Locate the extractor in its installation place
(wall or ceiling) and mark the 4 holes (H).
- Mark the 4 holes using a 6mm bit.
- Use the plugs and screws supplied with the
extractor to fix the assembly. It is advisable to
locate the extractor at a distance of 1 metre or
more away from the closest bend and also from the
nearest inlet and outlet.
3. Join the inlet (A) and outlet (B) duct to the spigots (l)
with jubilee clips, cable ties or similar to ensure a
long term seal is achieved. See Fig 2. It is important
that the ducting is of the same diameter as the
spigots to allow efficient operation of the fan.
4. Replace the casing (F) in its housing so that the
airflow (indicated on label) and cable outlet
direction are as desired. Close the flanges (E) and
tighten the screws (D) (fig 2). N.B. Make sure that
once the extractor is installed there is no accidental
access to the moving parts.
INSTALLATION INSTRUCTIONS FOR TF FAN MODELS
The TF induct mounted fans have been designed for applications
that require high air flows and pressure with low noise levels.
Electrical Connections
• The extractor fan must be connected to a single
phase mains network, at the voltage and frequency
indicated on the extractor specification plate.
• The installation must have an omnipolar switch
with a contact separation of at least 3mm. The
circuit must be protected by either a 3 Amp fuse
or suitable 3A MCB.
• Earthing is not required as this extractor is a
class II double insulated appliance.
• The extractor must be connected permanently to
by a fixed installation cable secured in fixed
channeling. (Flex of two conductor wires of
minimum section 1mmÇ and maximum 1.5mmÇ).
• The 100 / 125 / 150mm fans have a two speed
motor, the 200mm fans have a three speed motor.
To make the Electrical Connection:
1. Loosen the 4 screws (1. K) and take off the
connection cover (M) (Fig. 2).
2. Perforate the flex holder (O) to allow the
power supply wires to pass through
(Fig. 2 & 3).
3. Make the connections as indicated
on the next page.
C
B
A
FIG. 1: INSTALLATION DIAGRAM
A
D
E
M
K
E
D
I
B
G
H
FJ
O
I
This appliance does not need an earth connection as it is double insulated. (Class II)
CONNECT THE LIVE SUPPLY TO LTERMINAL
CONNECT THE NEUTRAL TO ONE OF THE NTERMINALS - SEE BELOW:
TF200
Connect Mains Neutral to:
N3 for High Speed
N2 for Medium Speed
N1 for Low Speed
Maintenance and service
Switch off mains supply before making any
electrical connections. If in any doubt contact
a qualified electrician.
For any maintenance operation which is not simply
cleaning the exterior of the extractor fan, the casing
assembly must be taken out of its housing as indicated
in point 1 of the installation instructions. Then the two
reducer tubes (V) must be removed. (see Fig.14)
To remove casing assembly:
1. Loosen 8 screws (X)
2. Gently separate reduce cones (V)
from chassis.
The motor, fan and all the components must be
regularly inspected to ensure that they are not dirty
nor have suffered any damage. The frequency will
depend on its operating conditions.
During the maintenance sessions remove any dirt
collected on the fan blades and the internal parts of
the frame to avoid any imbalance in operation which
would lead to a reduction of the aerodynamic qualities
and possible damage to the motor.
Never submerge the appliance in water or in any
liquid. Do not use solvents to clean the appliance
The motor bearings need no maintenance.
X
V
X
V
X
F i g .14
RATING/ SPECIFICATIONS
For all electrical power and IP ratings refer to the fan
rating and wiring label.
IMPORTANT
Switch off mains supply before making any
electrical connections. If in any doubt contact a
qualified electrician. The appliance is not intended
for use by young children or infirm persons without
supervision.
Young children should be supervised to ensure that
they do not play with the appliance.
Precautions must be taken to avoid the backflow
of gases into the room from the open
flue of gas or other open-fire appliances
when mounted in outside windows or walls.
N2
N1
N2
N1
N2
N1
L
N
L
L
L
L
L
L
N
N
N
N3 Speed 3 MF200S only
N2 Speed 2
N1 Speed 1
Live
DO NOT USE
DO NOT USE
....
....
....
N3
N2
N1
L
DO NOT
USE
DO NOT
USE
TF100/ 125/ 150 mm
FRESH AB Phone +46 (0)470-70 77 00 • Fax +46 (0)470-70 77 39 • info@fresh.se • www.fresh.se
Copyright © Fresh AB 2013 • Edtition 2013-2
Model Art. no.
Fresh TF100 Inline fan 430102
Fresh TF125 Inline fan 43 0112
Fresh TF150 Inline fan 430122
Fresh TF200 Inline fan 430132
Dimensions (mm)
Size 100 125 150 200
AØ 97 122 147 199,5
BØ 178 178 200 223
C124 124 138 146
D298 259 350 300
E96 96 118 130
F168 168 192 195
G120 120 162 100
H153.5 153.5 178 18 0
G
D
A
B
F
H
C
E

This manual suits for next models

3

Other Fresh Fan manuals

Fresh Intellivent Sky User manual

Fresh

Fresh Intellivent Sky User manual

Fresh F100 Manual

Fresh

Fresh F100 Manual

Fresh INTELLIVENT CELSIUS User manual

Fresh

Fresh INTELLIVENT CELSIUS User manual

Fresh INTELLIVENT 2.0 User manual

Fresh

Fresh INTELLIVENT 2.0 User manual

Fresh INTELLIVENT User manual

Fresh

Fresh INTELLIVENT User manual

Fresh Intellivent Sky User manual

Fresh

Fresh Intellivent Sky User manual

Fresh DF100 User manual

Fresh

Fresh DF100 User manual

Fresh ID100 User manual

Fresh

Fresh ID100 User manual

Fresh TF Series User manual

Fresh

Fresh TF Series User manual

Fresh TL100DE User manual

Fresh

Fresh TL100DE User manual

Popular Fan manuals by other brands

Parrot Uncle F6215 Installation & operating instructions

Parrot Uncle

Parrot Uncle F6215 Installation & operating instructions

Flair Smart Vent installation guide

Flair

Flair Smart Vent installation guide

Impecca FANFAIR FTF-3000 user guide

Impecca

Impecca FANFAIR FTF-3000 user guide

Home Decorators Collection Merryn owner's manual

Home Decorators Collection

Home Decorators Collection Merryn owner's manual

Hunter 21620 Installating and operation manual

Hunter

Hunter 21620 Installating and operation manual

NuTone QTN80E quick start guide

NuTone

NuTone QTN80E quick start guide

Lasko 2506 Important instructions

Lasko

Lasko 2506 Important instructions

Inspire Joran PV36401 Assembly, Use, Maintenance Manual

Inspire

Inspire Joran PV36401 Assembly, Use, Maintenance Manual

Jata JVVS3014 Instructions of use

Jata

Jata JVVS3014 Instructions of use

Ventpro VBX 190 quick start guide

Ventpro

Ventpro VBX 190 quick start guide

Makita DCF050 manual

Makita

Makita DCF050 manual

Canarm 700 Series Operation instructions

Canarm

Canarm 700 Series Operation instructions

Lennox ELS SERIES Unit information

Lennox

Lennox ELS SERIES Unit information

Sealey SFF16Q quick start guide

Sealey

Sealey SFF16Q quick start guide

Xtreme Garage HV-20SE owner's manual

Xtreme Garage

Xtreme Garage HV-20SE owner's manual

EuropAce EQQ 7931S manual

EuropAce

EuropAce EQQ 7931S manual

Vassilias R-853 Instructions for use

Vassilias

Vassilias R-853 Instructions for use

Davies Craig DCSL-8 installation instructions

Davies Craig

Davies Craig DCSL-8 installation instructions

manuals.online logo
manuals.online logoBrands
  • About & Mission
  • Contact us
  • Privacy Policy
  • Terms and Conditions

Copyright 2025 Manuals.Online. All Rights Reserved.