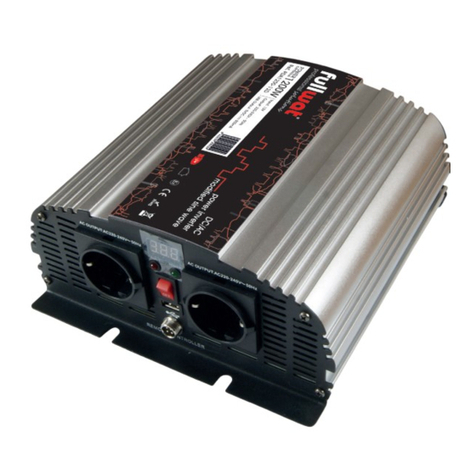
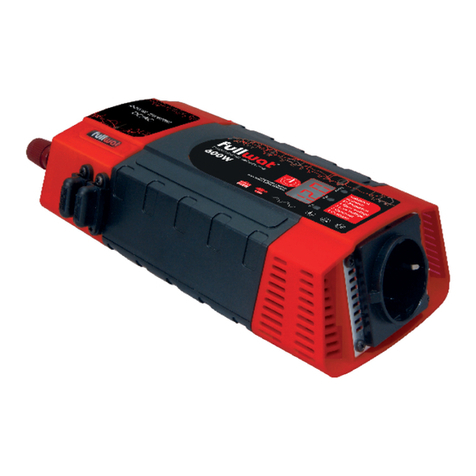
Fullwat PDA300-LC Series User manual

PDA300-LC series
Convertidor DC/AC
Power inverter DC/AC
Manual de instrucciones.............página 3
User manual..............page 10


- 3 -
1. INTRODUCCIÓN
Lea este manual detenidamente antes de instalar y utilizar su inversor, preste especial atención
a las notas de PRECAUCION de este manual.
2. COLOCACIÓN DEL INVERSOR
Para obtener el mejor rendimiento del inversor, debe colocarse sobre una superficie plana, como
el piso del vehículo. El inversor debe usarse en ubicaciones que cumplan los siguientes requisitos.
1. SECO -mantenga el inversor alejado del agua.
2.FRESCO -
la temperatura ambiente debe ser inferior a 50ºC. No coloque el inversor sobre o
cerca de un calentador. Si es posible, no coloque el inversor bajo la luz solar directa.
3.VENTILADO - debe haber al menos unos centímetros de espacio alrededor del inversor para
que fluya el aire. No coloque nada sobre o por encima del inversor durante la operación.
4.SEGURIDAD - no coloque el inversor cerca de materiales inflamables ni en ningún lugar
que puedan acumular gases inflamables, como el compartimento de la batería de su
automóvil, camión o embarcación. Nunca conduzca el automóvil cuando el producto esté
conectado a la batería con las pinzas suministradas (si desea utilizar el inversor durante la
conducción, debe estar instalado y cableado de forma permanente).
3. CONEXIÓN A LA FUENTE DE ENERGIA
La fuente de energía debe poder suministrar suficiente corriente para el funcionamiento de
la carga. Como pauta aproximada, en un sistema con entrada nominal de 12V, divida el
consumo de energía de la carga (en vatios) por 10 para mantener la corriente (en amperios)
que debe suministrar la fuente de energía. En un sistema con entrada nominal de 24V, divida
el consumo de energía de la carga (en vatios) por 20 para mantener la corriente (en amperios)
que debe suministrar la fuente de energía.
Ejemplo: en un sistema de 12V la carga tiene una potencia de 150 vatios. Entonces la fuente
de energía debe ser capaz de entregar: 150 dividido por 10 = 15 amperios.
El inversor se puede conectar directamente a la batería o bien a través de la toma de
mechero de su vehículo.
Por favor, averigüe qué potencia total puede manejar el conector de mechero de su vehículo.
En todo caso, el conector de mechero suministrado con esta unidad sólo es apto para
manejar un máximo de 150w.
Precaución
La fuente de alimentación debe proporcionar un voltaje normal (12V-14V o 22-24V).
NOTA:
si la toma del encendedor de su automóvil se calienta, se recomienda encarecidamente
conectar el inversor a la batería del automóvil directamente, teniendo cuidado con la polaridad.
Precaución
¡Nunca utilice el inversor con tierra positiva!
Inversor
(DC a AC)
F
A
N
V
2
1
C
D
:
T
U
P
N
I
FU
S
E
Inversor
Cable de corriente continua con
enchufe para toma del encendedor
Toma de encendedor
Conexión a la toma del encendedorConexión a la batería

- 4 -
Precaución
Antes de efectuar ninguna conexión, asegúrese de que el inversor esté apagado.
4. TOMA DE SALIDA USB
Conecte un dispositivo externo USB al puerto USB y enciéndalo.
La salida USB de este inversor de corriente
proporciona una fuente de alimentación de 5
VDC para dispositivos externos USB (por ejemplo,
luces, ventiladores, radios).
La salida USB se enciende permanentemente
cuando el inversor de corriente está conectado a
un voltaje de entrada de 12V.
Advertencia
La salida USB del inversor de corriente no está diseñada para transferir datos.
No conecte tarjetas de memoria, reproductores de MP3 o dispositivos externos de
almacenamiento de datos similares.
¡No conecte ningún cable de transferencia de datos al puerto USB!
5. CONEXIÓN DE EQUIPOS
La mayoría de las herramientas eléctricas, electrodomésticos y equipos de audio / video tienen
una etiqueta que indica el consumo de energía en amperios (A) o vatios (W). La potencia total
del equipo conectado debe ser inferior a la potencia nominal del inversor. Si el consumo de
energía se clasifica en amperios, multiplíquelos por el voltaje de corriente alterna (110 / 220V)
para determinar la potencia. Por ejemplo, una televisión clasificada en 1 amperio con un
voltaje de 220V consumirá 220 vatios.
Las cargas resistivas, como las luces incandescentes, son las más fáciles para el inversor, pero
las cargas resistivas más grandes, como estufas o calentadores eléctricos, pueden requerir
más energía que la que puede suministrar este inversor. Las cargas inductivas, como los
televisores y los reproductores de audio (cualquier dispositivo con un transformador) requieren
más corriente para funcionar que una carga resistiva de la misma potencia. Los motores de
inducción y algunos televisores pueden necesitar de 2 a 6 veces su potencia nominal para
arrancar. Dichos dispositivos pueden requerir el encendido repetido de la energía del inversor
ON / OFF para comenzar. Los más exigentes son aquellos dispositivos que arrancan en carga,
es decir, compresores y bombas. Dado que las características eléctricas de los equipos
conectados varían ampliamente, es posible que deba intentar averiguar si se puede iniciar y
cuánto tiempo puede funcionar.
Figura 1
Figura 2
Conexión del inversor directamente a la batería
Figura 1 - Afloje los tornillos de los terminales y deslice
los conectores del cable entre la tapa y la
base. Luego apriete firmemente.
Figura 2 - Abra las pinzas de cocodrilo y luego
conéctelas a los terminales adecuados de
la batería.
Conecte la pinza de cocodrilo roja al
terminal positivo (+) de la batería y la pinza
de cocodrilo negra al terminal negativo (-)
de la batería.
F
A
U
L
T
P
O
W
E
R
O
FF
N
O
- 5 -
6. FUNCIONES DE PROTECCIÓN
ALARMA Y DESCONEXIÓN POR BATERÍA BAJA
Una alarma con sonido se activa cuando el voltaje de la batería cae a 11V (22V). Esto indica
que la batería requiere recarga. Se recomienda apagar el equipo conectado, ya que el
inversor se apagará automáticamente cuando el voltaje de la batería baje a 9,5V (19V).
7. TIEMPO DE FUNCIONAMIENTO DE LA BATERÍA
La batería típica del vehículo puede usarse durante al menos 2 horas, dependiendo del
consumo de energía del equipo conectado.
Se recomienda encender el motor del vehículo cada 2 horas para recargar la batería. Esto
evitará paradas inesperadas del equipo conectado y asegurará que siempre haya suficiente
capacidad de batería para arrancar el motor.
8. REEMPLAZO DE FUSIBLES
En caso de conectar la polaridad invertida, el fusible puede quemarse. Para reemplazar
el fusible, abra el portafusibles en el lado de entrada. Luego reemplace el fusible como se
muestra a continuación. Intente averiguar la causa del problema antes de intentar usar la
unidad nuevamente.
1
2
3
4
5
6
Interruptor de ENCENDIDO / APAGADO
(ON / OFF)
Puerto USB con salida de 5V 2,1A
Tomas de corriente alterna
Terminales de entrada de
corriente continua.
Ventilador de refrigeración
Fusible externo
1
2
3
5
4 6
Quitar la tapa
Portafusibles
Retirar el fusible de tipo automóvil.
Reemplazar con un fusible igual

- 6 -
9. GUÍA PARA RESOLVER PROBLEMAS
Problema Causas posibles Solución sugerida
La unidad no
funciona.
El voltaje de la batería
es inferior a 10Vdc en
sistemas de 12 Vdc y 20
Vdc para sistemas de
24 Vdc.
Cargue o reemplace la batería.
El equipo conectado
consume demasiada
potencia.
Reduzca la carga a la potencia
nominal del inversor.
El inversor está
desconectado por
sobrecalentamiento.
El inversor debe enfriarse.
Compruebe la ventilación.
Asegúrese de que la carga esté
dentro de su potencia nominal.
Conexión con polaridad
invertida, fusible
quemado.
Cambia el fusible.
La tensión en la
entrada del inversor
es inferior a la medida
en la salida de la
batería.
Potencia insuficiente o
gran caída de voltaje.
Verifique el estado de las pinzas de
cocodrilo. Límpielas o remplácelas,
si es necesario.
Revise que la sección del cable no
sea menor a la requerida.
Lectura de tensión de
entrada errónea.
Determinado con un
voltímetro habitual.
Voltaje de entrada por
debajo de 11V (22V).
Utilice un medidor verdadero valor
eficaz. Mantenga el voltaje de
entrada por encima de 11V (22V).
Interferencia de
televisión.
Nieve, imágenes de mala
calidad.
Ubique el inversor lo más lejos
posible del televisor, la antena y
otros cables. Ajuste la orientación
del inversor, los cables de antena
y el cable de alimentación del
televisor.
Zumbidos o ruidos en
el sistema de audio
La fuente de alimentación
del dispositivo de audio
no filtra adecuadamente
la onda sinusoidal
modificada producida
por el inversor.
Obtenga un sistema de sonido que
utilice una fuente de alimentación
de mayor calidad.

- 7 -
10. ESPECIFICACIONES
Nota: Especificaciones sujetas a cambio sin previo aviso
Modelo PDA300-LC12 PDA300-LC24
Potencia nominal (vatios) 300W
Potencia de pico (vatios) 600W
Voltaje de entrada (DC) 12V 24V
Rango de voltaje de entrada (DC) 10~15V DC 20~30V DC
Voltaje de salida (AC) 230V
Rango de voltaje de salida (AC) 220~240V
Frecuencia de salida 50/60Hz±3
Corriente de carga sin consumo 0,3A
Salida USB 5V 2,1A
Alarma por bajo voltaje 10,5±0,5V 21±1V
Desconexión por bajo voltaje 10±0,5V 20±1V
Desconexión por sobretensión 15~16V 30~32V
Protección contra cortocircuito Apagado y reinicio automático
Protección contra inversión de
polaridad Mediante fusible
Ventilador En funcionamiento después de conectar las
cargas de corriente alterna
Arranque suave Sí 5~10’s
Desconexión por sobrecarga Sí
Fusible de corriente continua 12V:40A *1 24V:20A *1
Dimensiones (Largo*Ancho*Alto) 18,5*10,8*6,2cm
Peso neto / unidad (g) 650g

- 8 -
11. INSTRUCCIONES DE ELIMINACIÓN
EQUIPO ELECTRÓNICO PARA EL HOGAR: Si ya no desea utilizar este dispositivo, llévelo al punto
de recolección correspondiente o entréguelo a un lugar público de reciclaje para equipos
electrónicos viejos. Los equipos electrónicos no deben desecharse bajo ninguna circunstancia
de la misma manera que los desechos domésticos normales (vea el símbolo del cubo de
basura tachado a continuación).
INSTRUCCIONES DE ELIMINACION ADICIONALES: Entregue el electrodoméstico en condiciones
que permitan un reciclaje y eliminación seguros. Retire todas las baterías del aparato de
antemano y evite que se dañen los recipientes de líquidos. El equipo electrónico puede contener
sustancias nocivas. El uso incorrecto o el mal funcionamiento causado por un daño puede
afectar negativamente la salud humana y dañar el medio ambiente durante el reciclaje.
12.
GARANTÍA Y ACUERDOS DE SERVICIO
Esta garantía cubre solo defectos de fabricación. El aparato no debe modificarse de ninguna
manera con respecto a su forma o a sus funciones, internas o externas.
También se considerará anulada la garantía si el aparato ha sufrido la intervención de
personal no autorizado o ajeno a la organización de la marca.
Esta garantía no se aplica en caso de uso incorrecto; uso que cae más allá del uso normal
como se indica en el manual del usuario o si hay daños causados por fuerza mayor (por
ejemplo, desastre natural).
La garantía es sólo aplicable a este aparato y no se reparará ningún aparato o instalación
dañada como consecuencia del uso del mismo.
Solo se aceptarán aparatos limpios e intactos para la reparación con garantía y sin garantía.
La garantía cubre piezas y mano de obra necesarias para resolver el problema.
Este dispositivo está considerado como un “bien o producto industrial” que necesita de la
intervención de un profesional conocedor de los detalles y parámetros de instalación.
No se trata de un “bien de consumo” apto para ser instalado por un usuario final no
profesional. Si usted como tal, decide instalar el aparato por su cuenta, por favor tenga en
cuenta este detalle y en lo que una instalación no profesional representa a los efectos de
aplicación de la garantía.
La garantía de este dispositivo es de 12 meses a partir de la fecha de compra. Ésta, es una
garantía limitada y voluntaria, ofrecida por la marca y siguiendo la legislación pertinente en
lo que respecta a “productos o bienes industriales”.
Para hacer efectiva esta garantía es necesario presentar factura fechada original del
distribuidor con todos los datos de éste y el número de serie del dispositivo.
Número de modelo ...................................................................
Fecha de compra .....................................................................
Sello y firma del concesionario ..................................................
Fecha de reclamación de garantía ..........................................
Defectos observados .................................................................


- 10 -
1. INTRODUCTION
Please read this manual carefully before installing and using your inverter, pay special attention
to the Caution statements of this manual.
2. PLACEMENT OF THE NVERTER
For the best performance of the inverter should be placed on a flat surface such as floor of the
vehicle. The inverter should be used in locations that meet the following requirements.
1. DRY - keep away for the water.
2.COOL - that surround temperature should be less than 50ºC. Do not place the inverter on or
near a heater. If possible do not place the inverter in direct sunlight.
3.VENTILATED - There should be at least a few centimeters of space around the inverter for air
flow. Do not place anything on or over the inverter during the operation.
4.SAFETY -
Do not place the inverter near flammable materials or in any location which may
accumulate flammable gases such as the battery compartment of your car, truck or boat.
Never drive the car when the product is connected to the battery with the battery clamps (if
you wish to use the inverter during driving, it should be then permanently mounted and wired).
3. CONNECTING TO THE POWER SOURCE
The power source should be able to supply sufficient current to operate the load. As a rough
guideline, in a 12V rated input voltage, divide the power consumption of the load (in watts)
by 10 to obtain the current (in amperes) that power source must deliver. In a 24V rated input
voltage divide the power consumption of the load (in watts) by 20 to obtain the current (in
amperes) that power source must deliver.
Example: In a 12V system, load is rated 150 watts. Then the power source must be able to
deliver: 150 divide by 10 = 15 ampers.
Power inverter can be connected directly to battery as well as using cigar socket available from
your vehicle.
Please, check maximum power supported by your vehicle’s cigar desk connector.
Note that cigar plug kit supplied with this unit is only capable to manage 150w.
Caution
The power source should provide a normal (12V-14V or 22-24V) voltage.
NOTE: if your car’s lighter gets hot- it is strongly recommended to connect the inverter to car’s
accumulator directly, being carefully with the polarity.
Power Inverter
(DC to AC)
F
A
N
V
2
1
C
D
:
T
U
P
N
I
FU
S
E
Power Inverter
DC cable with
cigarette lighter plug
cigarette lighter socket
Connecting to cigarette lighter socketConnecting to the battery

- 11 -
Caution
Never use the inverter with positive ground!
Caution
Before connection make sure the inverter is turned off.
4. USB OUTPUT SOCKET
Connect the USB external appliance to the USB port and
switch it on.
The USB output on this power inverter provides a supply
of 5V DC power for external USB external appliances
(e.g. Lights, fans, radios).
The USB output it permanently on when the power
inverter is connected to a 12V input voltage.
Warning
The USB output on the power inverter is not designed for transferring data.
Do not connect memory sticks, MP3 player or similar data storage external appliances.
Do not connect any data transfer cables to the USB port!
5. CONNECTION OF EQUIPMENT
Most electrical tools, appliances and audio/video equipment have a label indicating power
consumption in amps (A) or watts (W). Total power connected equipment should be less than
within inverter’s rated power. If the power consumption is rated in amps, multiply them by the
AC voltage (110/220V) to determinate the wattage. For example, a television rated at 1 amp
with 220V voltage will use 220watts.
Resistive loads, such as incandescent lights, are the easiest for the inverter but the larger
resistive loads such as electric stoves or heaters might require more power. Inductive loads,
such as TV’s and audio players (any device with a transformer in it) require more current to
operate than a resistive load of the same power rating. Induction motors as well as some
televisions may require 2 or 6 times of their power rating to start up. Such devices may require
repeated switching of the inverter power ON/OFF in order to get them started. The most
demanding are those devices that start under load, i.e. compressors and pumps. Since the
electrical characteristics of the connected equipment vary widely you might have to try to find
out if it can be started at all and how long it can run.
Figure 1
Figure 2
Connecting the inverter directly to the battery
Figure 1 - Loosen the caps on the terminals and
slide the lugs between the cap and the
base. Then tighten firmly.
Figure 2 - Open the alligator clips and attach then
to the appropriate battery terminals.
Connect the red alligator clip to the (+)
positive battery terminal and the black
alligator clip to the (-) negative battery
terminal.
FAULT
POWER
OFF
NO

- 12 -
6. PROTECTION FUNCTION
LOW BATTERY ALARM AND SHUTDOWN
An alarm with sound when the voltage of the battery drops to 11V (22V). This indicates that the
battery requires recharging. It is recommended that to switch the connected equipment off,
since the inverter will shut down automatically when battery voltage drops to 9.5V (19V).
7. BATTERY OPERATING TIME
The typical vehicle battery can be used for at least 2 hours depending on the power
consumption of the connected equipment.
It is recommended to start the vehicle engine every 2 hours to recharge the battery. This will
prevent unexpected shutdowns of the attached equipment and ensure that there is always
sufficient battery capacity to start the engine.
8. FUSE REPLACEMENT
In case of reverse polarity, the fuse may be burnt. To replace the fuse please open the fuse
case on the input side. Then replace the fuse as shown below. Try to find out the cause of the
problem before attempting to use the unit again.
1
2
3
4
5
6
ON/OFF switches
USB port 5V 2.1A
AC outlet
DC terminals
Cooling fan
Fuse external
1
2
3
5
4 6
Pull off cap
Fuse holder
Remove automotive type fuse.
Replace with the automotive fuse

- 13 -
9. TROUBLESHOOTING GUIDE
Problem Possible causes Suggested solution
Unit does not work
Battery voltage available
is smaller than 10Vdc in
case 12 Vdc system and
20Vdc if we are working
on 24 Vdc system.
Charge or replace battery.
Attached equipment
draws too much power.
Reduce load to inverter’s rated
power.
Inverter is in thermal
shutdown condition.
Inverter must cool down.
Check ventilation.
Make sure the load is within its rated
power.
Reverse polarity
connection, fuse burn. Change the fuse.
Tested voltaje
battery is higher
than voltaje
received on
inverter input
terminals
Insufficient power or large
voltage drop.
Check condition of alligator clips.
Clean or replace then if neccessary.
Check size wires used is good enough
for the rated power.
Wrong input
voltage measured
Determined with a usual
voltmeter. Input voltage
below 11V (22V).
Use true RMS reading meter. Keep
input voltage above 11V (22V).
Television
interference Snow, bad quality images.
Locate the inverter as far as possible
from TV, antenna and other cables.
Adjust the orientation of the inverter,
antenna cables and the TV power
cord.
Make sure that high quality shielded
antenna cable is used.
Buzzing sounds or
noise using the
audio system
The power supply of
the audio device does
not adequately filter
the modified sine wave
produced by the inverter.
Get a sound system that uses a higher
quality power supply.

- 14 -
10.
SPECIFICATIONS
Note: the specifications change without prior notice.
Model PDA300-LC12 PDA300-LC24
Rated power (watss) 300W
Surge power (watts) 600W
Input voltage (DC) 12V 24V
Input voltage range (DC) 10~15V DC 20~30V DC
Output voltage (AC) 230V
Output voltage range (AC) 220~240V
Output frequency 50/60Hz±3
No load current draw 0.3A
USB output 5V 2.1A
Low voltage alarm 10.5±0.5V 21±1V
Low voltage shutdown 10±0,5V 20±1V
Over voltage shutdown 15~16V 30~32V
Short circuit protection Shutdown and auto-reset
Reverse polarity protection By fuse open
Cooling fan Running after connecting with AC loads
Soft start Yes 5~10’s
Over load shutdown Yes
DC Fuse 12V:40A *1 24V:20A *1
Dimension (L*W*H) 18.5*10.8*6.2cm
N.W./unit (g) 650g

- 15 -
11.
DISPOSAL INSTRUCTIONS
HOME ELECTRONIC EQUIPMENT: If you no longer wish to use this appliance, please take it to
the applicable collection point or deliver it to a public recycling location for old electronic
equipment. Electronic equipment shall under no circumstances be disposed of in the same
manner as normal household waste (see the crossed-out garbage can symbol below).
FURTHER DISPOSAL INSTRUCTIONS: Hand over the appliance in a condition that will allow for
safe recycling and disposal. Remove all batteries from the appliance in advance and prevent
any liquid containers from being damaged. Electronic equipment may contain harmful
substances. Improper use or malfunction caused by damage may adversely affect human
health and harm the environment during recycling.
12.
WARRANTY AND SERVICE AGREEMENTS
This warranty covers only manufacturing defects. The device must not be altered in any way
with regard to its form or its function, internal or external.
The warranty will also be considered null and void if the device has been manipulated by
unauthorized personnel or persons outside the organization of the brand.
This warranty does not apply in case of incorrect use; use beyond normal use as indicated in
the user manual or if there is damage caused by force majeure (e.g. natural disaster).
The warranty is only applicable to this device and any appliance or installation damaged as a
result of this device use will not be repaired.
Only clean and intact devices will be accepted for warranty and non-warranty repair. The
warranty covers parts and labour necessary to solve the problem.
This device is considered as an “industrial product” that needs the intervention of a professional
installer who knows details and installation parameters.
This device is not a “consumer product” suitable for installation by a non-professional end
user. If you, as end-user, decide to install the device on your own, please take into account
this detail and what a non-professional installation represents for the purposes of warranty
application.
The warranty for this device is 12 months from the date of purchase. This is a limited and
voluntary guarantee, offered by the manufacturer and following pertinent legislation regarding
“industrial products”.
To make this warranty effective, it is necessary to present the dealer’s original dated invoice with
all the details of the dealer and the device’s serial number.
Model number: ........................................................
Purchase date: ........................................................
Dealer’s stamp and signature: ....................................
Date of warranty claim:...............................................
Defect(s) noted: ........................................................

Agente importador
A48.139.786
UKAI S.A.
Ribera de Elorrieta, 7C
48015 - Bilbao - SPAIN
Designed in EU - Made in PRC
fullwat.com
Table of contents
Languages:
Other Fullwat Inverter manuals

Fullwat
Fullwat PDA1500-STATION Series User manual

Fullwat
Fullwat PDA-SS-C Series User manual

Fullwat
Fullwat PDA5500-STATION User manual

Fullwat
Fullwat PDATROLY-1000 User manual

Fullwat
Fullwat PDA500SS User manual

Fullwat
Fullwat PDA300S User manual

Fullwat
Fullwat PDA400 User manual

Fullwat
Fullwat PDA-D Series User manual
Popular Inverter manuals by other brands

BONFIGLIOLI
BONFIGLIOLI active operating instructions

Danfoss
Danfoss 4K installation manual

Cobra
Cobra CPI890 operating instructions

Generac Power Systems
Generac Power Systems SD600 instruction manual

Radio Shack
Radio Shack DC to AC Power Inverter owner's manual

Anritsu
Anritsu MG3700A MG3700A Product introduction