manuals.online logo
Brands
  1. Home
  2. •
  3. Brands
  4. •
  5. Fusion
  6. •
  7. Marine Equipment
  8. •
  9. Fusion MS-NRX200i User manual

Fusion MS-NRX200i User manual

VVARNINGS
AND
CAUTIONS
Do
not
attempt
to open the unit's chassis. There are no user-serviceable parts
or
adjustments
inside. Take care when handling.
CARE
AND
MAINTENANCE
As with
all
products with a chrome finish exposed to the harsh Marine environment, a
little
care
will
help to preserve the finish and prevent corrosion. Fusion recommends
that
you clean any
salt
water
and/or
salt residue from the remote
with
a damp cloth soaked in fresh water. Always fit the
protective cover when not in use.
REGISTER
YOUR
PRODUCT
ONLINE:
For your own peace of mind, register your product
purch~se
online at
www.fusionelectronics.com
All
FUSION True Marine Products are backed
by
a 3 Year Limited Consumer Warranty and
by
registering your product you can
be
assured that
if
the unexpected occurs
we'll
have your details
and be·ready to help.
RECORD
YOUR
PRODUCT
DETAILS
HERE:
SERIAL
NUMBER
____________
DATE
OF
PURCHASE
__________
_
AFFIX
RECEIPT
HERE
2
CONTENTS
•
USER
INTERFACE
AND
CONTROLS
......................................................................................................
pg
4
Control
Panel Layout ...............................................................................................................................
pg
4
Button
function
........................................................................................................................................
pg
4
•
INSTALLATION
......................................................................................................................................
pg
5
Fusion Remote
Control
Network
.............................................................................................................
pg
6
Connecting
the
MS-NRX200i to
the
700
Series
.......................................................................................
pg
6
Connecting
the
MS-NRX200i to
the
MS-RA205 Stereo ...........................................................................
pg
7
Example of
Installation
with
Multiple
(3)
Remote
Controls
....................................................................
pg
7
Connecting to an Existing NMEA 2000
Network
.....................................................................................
pg
7
NMEA 2000 Optional Accessories............................................................................................................
pg
8
•
OPERATION
...........................................................................................................................................
pg
8
Power
On/Off............................................................................................................................................
pg
8
Assigning
the
remote
to a stereo.............................................................................................................
pg
8
Volume
adjustment
..................................................................................................................................
pg
8
Backlight
brightness
................................................................................................................................
pg
8
•
MOUNTING
............................................................................................................................................
pg
9
Mounting
diagram
....................................................................................................................................
pg
9
• SiriusXM
SATELLITE
RADIO
...............................................................................................................
pg
10
• NMEA2000
OPERATION
......................................................................................................................
pg
10
NMEA2000 Repeater mode....................................................................................................................
pg
10
NMEA2000 Repeater sentences...................................-.........................................................................
pg
11
NMEA2000 Repeater Messages ............................................................................................................
pg
12
•
FUSION
TRUE
MARINE
.......................................................................................................................
pg
14
•
LICENSING
..........................................................................................................................................
pg
14
•
NOTES
.................................................................................................................................................
pg
15
3
USER
INTERFACE
AND
CONTROLS
CONTROL
PANEL
LAYOUT
BU
T
TON
FUNC
TI
ON
4
POWER
Press
to
turn
the
unit
ON
-[Stereo &
Remote) Press and hold
for
2 seconds to
power
OFF-
[Stereo
&
Remote)
MUTE
Press once to
mute/un-mute
audio
SOURCE
Press
to
cycle available sources
MENU
Press
to
enter
menu
system. Press
to
return
to
previous screen. Press and
hold to exit
the
menu
structure.
Press
to
exit NMEA mode.
PLAY/PAUSE
Short Press
iPod/USB/CD-Pause/Resume current track.
DVD
-Pause/Resume current
video
playbac'k.
AM/FM/VHF-
Press to cycle through
tuning modes (auto, manual, presets!.
SiriusXM [USA Only) -Press to cycle
through tuning modes [channels, presets)
Press and Hold
AM/FM/SiriusXM/VHF-
Store the
current
station/channel
as a Preset
BACK/PREVIOUS
Short Press
iPod/USB/CD-
Select
the
previous
track.
DVD
-Select previous
chapter
AM/FM/VHF-
Start
tuning
down the
frequency
spectrum
or
channel.
[Auto/Manual
tuning
model
or
previous
preset
[Preset
model.
SiriusXM [USA
Only)
-Step
down the channel list.
Press and Hold
iPod/USB/CD-
Rewind the
current
track.
DVD
-Rewind video playback.
AM/FM/VHF-
Fast
station/channel
stepping.
SiriusXM [USA
Only)-
Fast browse down the
channel list. Release button to select channel.
FORWARD/NEXT
Short Press
iPod/USB/CD-
Select the next
track
.
DVD-
Select next
chapter
AM/FM/VHF-
Start
tuning
up the
frequency
spectrum
or
channel.
[Auto/Manual
tuning
mode]
or
previous
preset
[Preset
model.
SiriusXM [USA Only)
-Step
up the channel list.
Press and Hold
iPod/USB/CD-
Fast forward the
current
track.
DVD-
Fast
Forward
video playback.
AM/FM/VHF
-Fast
station/channel
stepping.
SiriusXM [USA Only) -Fast browse up the
channel list. Release button to select channel.
ROTARY
ENCODER
Turn to
adjust
volume,
move up
or
down a
menu
structure,
or
adjust
a specific
setting
item.
Press
to
select
a
highlighted
option,
confirm
a
setting.
INSTALLATION
To
complete the ultimate marine audio experience MS-NRX200i Marine Wired Remote Controls
can
be
installed throughout the vessel to provide
full
control of multiple
FUSION
Marine Stereos, creating
flexible zone control and NMEA
2000
monitoring solutions.
NMEA 2000 Components Supplied with MS-NRX200i
NMEA
2000
NMEA
2000
NMEA
2000
FEMALE
TERMINATOR
TEE-CONNECTOR
INLINE
TERMINATOR
NMEA
2000
BACKBONE
CABLE-
6
METRE
The MS-NRX200i is a
plug and play device
with two connection
options. Connect the
remote control to your
FUSION
Marine Stereo
with the standard cable
kit
provided with your
pu.rchase
or
to a existing
NMEA 2000 network.
5
INSTALLATION
OP
T
ION
1 :
FUSION
REMOTE
CONTROL
NETWORK
Power Loading of the FUSION Network
To
avoid exceeding the
power
loading lim
itations
of
a
FU
SION
remote
control
network
the
max
i
mum
number
of
devices
supported
on a
FU
SION
network
is;
1.
One
Stereo Head
Unit
[MS-IP700i,
MS
-AV700i
or
MS-RA205]
2.
Up to three M
S-N
RX200i R
emot
e
contro
ls [M
S-
NR
X2
00il.
For
installations
requiring
a
greater
num
b
er
of devices the ins
tallation
of a
full
NMEA 2000
network
is
recommende
d. R
efer
to option
2.
Connecting the MS-NRX200i to the 700 Series
6
NMEA2000
TEE
-
CONNECTOR
NMEA2000
INLINE
TERMINATOR
NMEA2000
F
EMALE
TERMINATOR
NMEA2000
BACKBONECABLE
-
SM
POWERED
F
USION
-
Fus
io n
Onl
y
Netw
ork
__
___.._._
__
_
Powered
Drop
Cab
le
CRedl
Part*
CAB000851
Suppl
i
ed
w it h
Stere
o
FUSION
MARINE
STEREO
MS-IP700i
or
MS-AV7001
"
mil
~
,
......
u
....
,
FUSION
MS-NRX200i
Example
of
Installation with Multiple (3) Remote Controls
Connecting the MS-NRX200i to the MS-RA205 Ster
eo
NMEA2000
BACKBONECABLE
-
SM
NMEA2000
TEE-CONNECTOR
NMEA2000
INLINE
TERM
I
NATOR
NMEA2000
FEMALE
TERMINATOR
I I
POWERED
FUSION
-
Fus
i
on
On
ly
Networ
k
Powered
Drop
Cable
MS-RA205
(Red)
Part*
CAB000862
Supplied
with
Stereo
c
gjl
...
.
....
,
FUSION
MARINE
STEREO
MS-RA205
FUSION
MS-NRX200
1
CASE
BACK-
REMOTE
CONTROL
CONNECTION
INSTA
L
LATION
OPTION
2 :
CO
N
NEC
T
ING
TO
AN
EX
I
STING
NMEA
2000
N
ETWORK
\
NM
E
A2
00
0
TER
MINAT
OR
LOC
AT
ED
AT
END
O F N E
TW
O
RK
NOTE
: The supplied
Terminators
must
be
fitted
to the ends of the network
as shown.
Fa
i
lure
to do so
will
affect operati
on
.
FUSION's MS-NRX200i
wire
d remote controls are capable of operating over an existing NMEA 2000
network,
removing
the
need to
wire
back to the stereo unit. The MS-N
RX200
i pack contains
all
necessary
cables and connectors
for
connecting the remote
control
to an existing NMEA 2000
network
.
Important Note: NMEA 2000 Drop cables
for
FUSION Stereo head
units
are not supplied wi
th
the
stereos. The drop cables are available
from
FUSION as an
optional
accessory. 7
FUSION
NMEA
2000
O P T IO N
AL
ACCESSORIES
Stereo FUSION NMEA 2000 Drop Cable FUSION NMEA 2000 T
-Connector
MS-AV700i CAB000852 CAB000581
MS-IP700i CAB000852 CAB000581
MS-RA205 CAB000863 CAB000581
OPERATION
POWER
ON/OFF
Press to
turn
on
the
remote
control.
The FUSION
Marine
Stereo wi
ll
power
on
if
cur
r
ently
OFF.
Note:
If
the
remote
control
is
configured
to
display
NMEA
2000 data
sentences
the
power
on
sequence
becomes a
two-step
process
. See NMEA
Repeater
section
below
.
Press to MUTE the audio when the stereo is
ON
.Press and hold to turn the stereo and remote control
OFF.
ASSIGNING
THE
REMOTE
TO
A
STEREO
Press
the
'Menu
·
button
and
select
'SETTINGS'
--7
'STEREO'.
Select
the
desired
stereo
from
the
list
of
available devices on
the
network.
Press
the
'
Rotary
Encoder
'
button
to
save and exit.
ASSIGNING
THE
REMOTE
TO
A
ZONE
Press the 'Menu·
button
and
select
'SETTINGS'
--7
'ZONE'
--7
'ASSIGN'. Select
the
desired zone
from
the
list
of available zones. Press
the
'Menu
·
button
to
exit.
Note: Due
to
space
limitations
on
the
MS-NRX200i
display
the
full
zone
name
is
not
qisplayed if
ALL
ZONES
is
selected.
VOLUME
ADJUST
Turn
the
'Rotary
Encoder· to
adjust
volume
levels. Press
Encoder
to move
highlight
[if
remote
is assigned
to
AL
L
ZO
NESI.
ZONE 1
--7
ZONE 2
--7
ZONE 3
--7
ZONE 4
--7
ALL
ZONES
--7
BACKLIGHT
BRIGHTNESS
Press the 'Menu'
button
and select 'SETTINGS'
--7
'LCD'. Turn
the
'Rotary Encoder' to
adjust
Brightness
or
Contrast. Press the 'Rotary Encoder· to step between Brightness and Contrast. Press the 'Menu' button to exit.
After
a period of
inactivity
the
remote
turns
off
the
display
backlight
!Default!.
To
disable
this
funct
ion
Press
the
'Menu·
button
and
select
'SETTINGS'
--7
'POWER
SAVE
'. Press
the
'Rotary
Encoder
' to
enable/disable
the
function.
Press
the
'Menu
·
button
to exit.
8
MOUNTING
DIAGRAM
CNOT
TO
SCALEJ
~
~
\o
\o
or-- or--
..........
..........
or-- or--
or-- or--
1 I
N
or--
........
E E
E E
00
("()
\0
-.::t
w
u
z
<C_...
ex:
=
<(M
w-
_J
E
u
E
"'Lf"'
z,........
11
Omm(4-
3/8
11
)
40
E E
0 E
,........
~
or--
~
--~==~========~==~--1-~
z
::::>
0
~
DRILL 4xPILOT
HOLES
(/J
2.5mm
(3/32
11
)
DRILL HOLE
(/J
50mm(2
11
)
95mm(3-3/4
11
)
11
Omm(4-3/8
11
)
9
S1r1usXM
SATELLITE
RADIO
(USA
only) -Requires optional SiriusXM Vehicle Connect Tuner (not included) connected to
FUSION
Stereo.
Everything worth listening to is
on
SiriusXM, getting over
130
channels, including the most commercial-free
music, plus the best sports, news, talk and entertainment. A SiriusXM Connect Tuner (sold separately)
connected to the
FUSION
Stereo and Subscription are re·quired. For more information, visit
www.siriusxm.com.
For
additional
SiriusXM
information
refer
to
the
FUSION
Stereo
user
manual
The
user manual contains information regarding the following;
• SiriusXM installation and activation information.
• SiriusXM operation information.
• A trouble shooting guide to assist the
user.
with installation and information regarding
SiriusXM status and
error
messages.
NMEA
2000
REPEATER
CNMEA
2000
NETWORK
ONLYJ
The remote
control
will
also serve as an NMEA repeater displaying NMEA navigation data
or
vessel
performance data
from
other
NMEA devices on
an
existing NMEA 2000 network.
NMEA
2000
REPEATER
MODE
SELECTING
NMEA
2000
DATA
SENTENCES
TO
DISPLAY
Press the 'Menu' button and select 'SETTINGS'
--7
'NMEA MONITOR'. Select the NMEA data to
be
displayed
from
the
list
of available data. Press the 'Menu' button to exit.
• Wind Direction • Heading
• Wind Speed • Position
• Depth • Water Temperature
• Speed over Ground •
Atmospheric
Pressure
• Speed
through
Water •
ETA
SELECTING
THE
DISPLAY
METHOD
The remote
control
can
be
configured to
automatically
cycle through the selected NMEA 2000 data.
Press the 'Menu' button and select 'SETTINGS'
--7
'NMEA
Monitor'
--7
'CYCLE SCREENS'.
Select
from
the following options. Press the
'Menu'
button to exit.
• Off • 5 seconds
• 2 seconds • 1
0 seconds
10
SELECTING
UNITS
OF
MEASURE
Press
the
'Menu' button and
select
'
SETTINGS'~
'NMEA
Monitor'~
'SET UNITS'. Select
from
the
following
options. Press
the
'Menu· button to exit.
Distance: KM, Miles,
Nautical
Miles, Metres, Feet
Speed: KM/H, MPH, KTS, M/S Depth: Metres, Feet, Fathoms Temperature; °C,
°F
POWER
ON/OFF-
NMEA
2000
REPEATER
MODE
If
the
remote
control
has been configured to display NMEA 2000 data sentences
it
can be
turned
on
independently
of
the
FUSION
Marine
Stereo. This
permits
the
user
to
monitor
NMEA data
without
turning
on
the
stereo.
Press A to
turn
on
the
remote
control.
The
remote
control
will
enter
NMEA 2000
repeater
mode
and
will
NOWurn
on
the
stereo. The stereo can
be
turned
on
from
the
remote
control
by pressing
the
Menu
key to exit
the
NMEA 2000
repeater
mode.
To
return
to
the
repeater
mode press and
hold
the Source key.
When in NMEA 2000
repeater
mode
the
remote
will
monitor
the
state
of
the stereo. If
the
stereo is
turned
on
then
the
remote
will
allow
the
user
to change
volume
and
mute
the
stereo, play, pause and
skip
track
(back and forwards)
without
leaving NMEA 2000
repeater
mode.
TURNING
ON
THE
REMOTE
CONTROL
WITH
THE
MARINE
STEREO
TURNED
ON
Press to
turn
ON
the
remote control. It
will
detect
the
stereo is on and
enter
the remote control mode.
CHANGING
REMOTE
CONTROL
MODE
Press and Hold
REMOTE CONTROL MODE NMEA2000 REPEATER MODE
11
NMEA
2000
REPEATER
MESSAGES
PGN
Number
PGN
Data Field FUSION
Supported
127250
Heading
Sensor
Reference
0
=True,
Yes
1= Magnetic,
Yes
128259
Speed
Water
,Reference Type
00
= Paddle
Wheel
Yes
01
=
Pi
tot
Tube
Yes
02
=
Doppler
Log
Yes
03
=
Correlation
Log
(Ultra-Sound)
Yes
04
=
EM
Log
(Electro-
Magnetic)
Yes
128267
Water
Depth
Offset
add/subtract
Yes
129025
Position
Lat/Lon
Yes
129026
COG/SOG
COG
Reference
0
=True,
Yes
1= Magnetic,
Yes
129029
GNSS Position Data
Yes
130306
Wind Data
Wind reference
OxOO
=Theoretical
Wind
[ground
referenced,
referenced to True
North;
calculated
using
COG/SOG)
Yes
Ox01
=Theoretical
Wind
[ground
referenced, referenced
to
Magnetic
North;
calculated
using
COG/SOG)
Yes
Ox02
=Apparent
Wind (relative to
the
vessel
centerline)
No
Ox03
=Theoretical
(Calculated to
Centerline
of
the
vessel,
referenced to
ground;
calculated
using
COG/SOG) No
Ox04
=Theoretical (Calculated to Centerline of the vessel,
refetenced to water; calculated using Heading/Speed through Water) No
130310
Water
Temp &
Air
Pressure
Yes
130311
..
Water
Temp &
Air
Pressure
Yes
12
PGN
Number
PGN
Data Field FUSION Supported
130312
Temperature
Yes
Temperature
Source
00
=Sea
Temperature
Yes
01
=Outside
Temperature No
02
=Inside
Temperature No
03
=Engine
Room Temperature No
04
= Main Cabin Temperature No
05
= Live Well
Temperature
No
06
= Bait
Well
Temperature
No
07
= Refrigeration
Temperature
No
08
=Heating
System
Temperature
No
09
= Dew Point
Temperature
No
10
=Wind
Chill
Temperature, Apparent No
11
=Wind
Chill
Temperature,
Theoretical
No
12
= Heat Index
Temperature
No
13
= Freezer
Temperature
No
130314
Actual
Pressure
Pressure Source
00
=Atmospheric
Pressure
Yes
01
=Water
Pressure No
02
=Steam
Pressure No
03
= Compressed
Air
Pressure No
04
= Hydraulic Pressure No
130577 Direction Data
COG
Reference
0
=True,
Yes
1 = Magnetic,
Yes
SOG
Yes
STW
Yes
129284 Navigation Data
ETA
Date
Yes
Bearing, Origin
To
Destination Waypoint No
Bearing, Position
To
Destination Waypoint No
Destination Waypoint
Number
No
Destination Wpt Latitude No
Destination Wpt Longitude No
Waypoint Closing Velocity No
13
FUSION
TRUE
MARINE
Recognised as the
worldwide
leader in
marine
entertainment
and
innovation, FUSION True Marine products combine cutting edge
technology and high quality
materials,
with
a clear focus on ease of
use.
At FUSION, we believe
that
products should
be
designed to
perform
season
after
season even
after
exposure to some of the harshest
marine conditions. With this longevity in mind,
all
True Marine
products are designed and engineered
from
the ground up -
specifically
for
use
on
the water.
Environmental protection is at the
heart
of
all
our
product designs
and only
after
each product has been subjected to (and passed)
our
rigorous environmental testing, are they awarded the True Marine
stamp and a 3 Year Limited Worldwide Consumer Warranty.
Our extensive testing gives
our
customers
confidence in
our
products and has
further
cemented FUSION
as
industry
leaders in
marine
entertainment
LICENSING
((<Siriusxm>))
READY
Sirius,
XM
and
all
related
marks
and
logos are
trademarks
of
SiriusXM Radio Inc.
All
rights reserved.
14
NMEA
2000-
is a
Registered
Trademark
of the National Marine
Electronics Association, Inc.
ENGLISH
LIMITED
3
YEAR
MARINE
CONSUMER
WARRANTY
FUSION
Electronics Limited ('FUSION') warrants that this
FUSION
Marine
product
is
free from defects
in
material
and
workmanship,
according
to
the following terms
and
conditions:
• The limited warranty
for
the
FUSION
product purchased extends to
36
months beginning on the date of
purchase ofthe product ·
• The limited warranty extends only to the original consumer purchaser (consumer!
of
the product and is not assignable
or
transferableto any subsequent purchaser/end user.
• The limited
warranty
extends only to consumers who purchase the product in one of the countries (or areas! set
forth
on
www.fusionelectronics.com.
The limited
warranty
is onlyvalid in FUSION's intended country (or areal of sale
ofthe product.
• During the limited
warranty
period,
FUSION
or
its authorised service network
will
repair
or
replace (at FUSION's
discretion!. any defective product
or
parts thereof with new and
return
the product to the consumer in working
condition.
No
charge
will
be
made to the consumer for either parts
or
labour in repairing
or
replacing the product.
All
replaced
parts
and cosmetic parts should
be
free of defects atthe time of shipment and, therefore shall not
be
covered
underthese limitedwarranty
terms
.
• Repaired product
will
be
warranted
for
the balance ofthe original
warranty
period
or
for
ninety (90l days from the date
of repair, whicheveris longer.
•
All
warrantyclaims must
be
accompanied with a copy of this
warranty
card, and a copy of proof
of
purchase.
The
consumer shall
have
no
coverage
or benefits under this limited warranty if
any
of
the
following
conditions
are
applicable:
• The product has been subject to: abnormal use, abnormal conditions,
improper
storage, unauthorised modifications,
unauthorised connections, unauthorised repair including but not limited to use of unauthorised spare parts
in
repairs,
misuse, neglect, abuse, accident, alteration, improperinstallation, acts of
God,
spill
of foods
or
liquids, maladjustment
of customer controls
or
other acts which are beyond the reasonable control of FUSION, including deficiencies
in
consumable parts such
as
fuses, and breakage
or
damage to antennae unless caused directly
by
defects in materials
or
workmanship, and
normal
wearand tearofthe product.
•
FUSION
was not notified by the consumer of the alleged defect
or
malfunction of the product during the applicable
limitedwarranty period. ·
• The productserial number
or
the accessory date code has been removed, defaced
or
altered.
• The productwas used with
or
connected to an accessory not suppli.
ed
by
FUSION
or
fit
for.use with
FUSION
product,
or
used in amannerotherthan itsintended use.
If
aproblem
develops
duringthelimitedwarrantyperiod,the
consumer
should
takethefollowingstep-by-step
procedure:
1. The consumer shall
return
the product to any authorised
FUSION
dealer in authorised sales countries
for
repair
or
replacement processing.
FUSION
assumes
no
freight
or
shipping responsibility
for
returning goods to
an
authorised
FUSION
dealer, or return freight from an authorised dealerto the consumer submitting the
warranty
claim.
2.
The consumer shall
be
charged
for
any parts
or
labour charges not covered
by
this limited warranty. The consumer
shall
be
responsible
for
expenses related to removal and reinstallation ofthe product.
3.
Ifthe product is returned to
FUSION
afterthe expiration ofthe warranty period, FUSION'S normalservice policies shall
applyand the consumer
will
be
charged accordingly.
THE
BENEFITS
CONFERRED
BY
THIS
LIMITED
WARRANTY
APPLY
TO
THE
EXTENT
THAT
THEY
ARE
NOT
SUPERCEDED
BY
ANY
OTHER
RIGHTS
AND
REMEDIES
UNDER
ANY
APPLICABLE
LEGISLATION
THAT
CANNOT
BE
EXCLUDED.
OTHERWISE,
TO
THE
EXTENT
PERMITTED
BY
LAW,
ANY
IMPLIED
WARRANTY
IS
EXCLUDED
AND
THE
FOREGOING
WARRANTY
IS
THE
PURCHASER'S
SOLE
AND
EXCLUSIVE
REMEDY
AND
IS
IN
LIEU
OF
ALL
OTHER
WARRANTIES,
EXPRESS
OR
IMPLIED.
TO
THE
EXTENT
PERMITTED
BY
LAW,
FUSION
SHALL
NOT
BE
LIABLE
FOR
INCIDENTAL
OR
CONSEQUENTIAL
DAMAGES
OR
A
LOSS
OF
ANTICIPATED
BENEFITS
OR
PROFITS,
OUT
OF
USE
OR
INABILITY
TO
USE
THE
PRODUCT.
• Some states in America
do
not allowthe exclusion
or
limitation of consequential damages,
so
the above limitation
and
exclusion may notapply to you.This
warranty
gives
you
specific legalrights which mayvaryfrom state to state.
•
FUSION
neither assumes
nor
authorises any authorised service centre
or
any person
or
entity to assume
for
it any
otherobligation
or
liabilitybeyond that which is expressly provided
for
inthiswarranty.
•
All
warranty information, productfeatures and specifications are subject to change without notice.

Other manuals for MS-NRX200i

4

This manual suits for next models

1

Other Fusion Marine Equipment manuals

Fusion 750 Series User manual

Fusion

Fusion 750 Series User manual

Fusion Apollo MS-SRX400 User manual

Fusion

Fusion Apollo MS-SRX400 User manual

Fusion Apollo MS-WB670 User manual

Fusion

Fusion Apollo MS-WB670 User manual

Fusion Apollo RA770 User manual

Fusion

Fusion Apollo RA770 User manual

Fusion Apollo MS-SRX400 Instruction manual

Fusion

Fusion Apollo MS-SRX400 Instruction manual

Fusion Apollo MS-RA770 User manual

Fusion

Fusion Apollo MS-RA770 User manual

Fusion MS-RA70 User manual

Fusion

Fusion MS-RA70 User manual

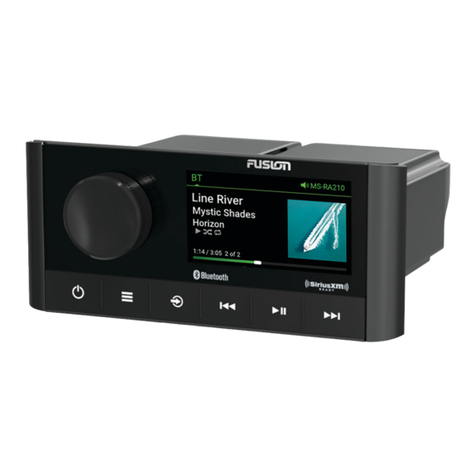
Fusion MS-RA210 Instruction manual

Fusion

Fusion MS-RA210 Instruction manual

Fusion Apollo MS-WB670 User manual

Fusion

Fusion Apollo MS-WB670 User manual

Fusion MS-RA70 User manual

Fusion

Fusion MS-RA70 User manual

Fusion Apollo MS-RA770 User manual

Fusion

Fusion Apollo MS-RA770 User manual

Fusion Apollo 770 Instruction manual

Fusion

Fusion Apollo 770 Instruction manual

Fusion 700 Series User manual

Fusion

Fusion 700 Series User manual

Fusion MS-CD50 User manual

Fusion

Fusion MS-CD50 User manual

Fusion Apollo MS-RA670 User manual

Fusion

Fusion Apollo MS-RA670 User manual

Fusion Apollo RA770 Instruction manual

Fusion

Fusion Apollo RA770 Instruction manual

Fusion MS-BB300 User manual

Fusion

Fusion MS-BB300 User manual

Fusion MS-CD60 Guide

Fusion

Fusion MS-CD60 Guide

Fusion MS-AM702 Guide

Fusion

Fusion MS-AM702 Guide

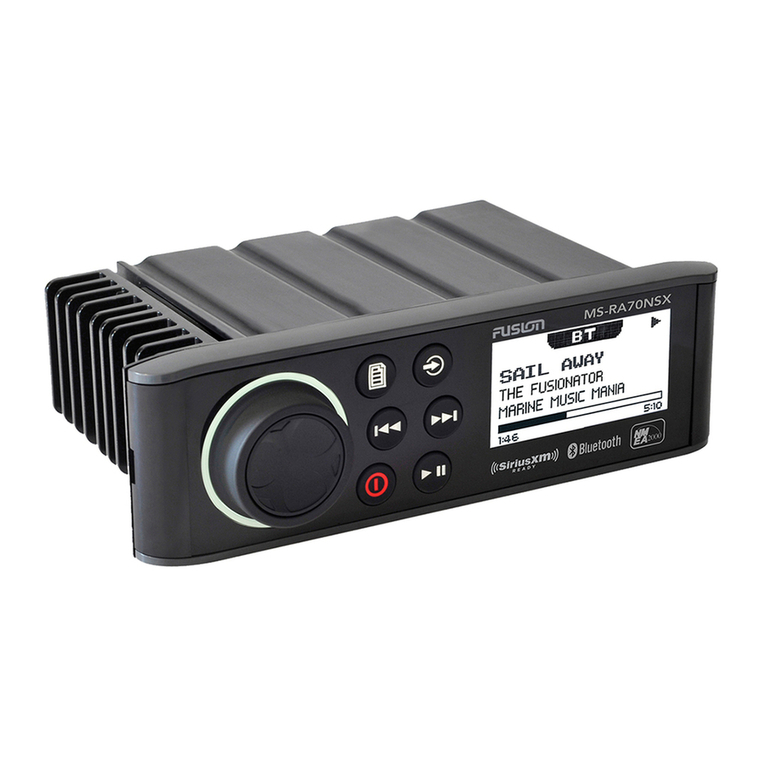
Fusion MS-RA70NSX User manual

Fusion

Fusion MS-RA70NSX User manual

Fusion Apollo RA770 User manual

Fusion

Fusion Apollo RA770 User manual

Fusion MS-CD500G User manual

Fusion

Fusion MS-CD500G User manual

Fusion Apollo MS-RA670 User manual

Fusion

Fusion Apollo MS-RA670 User manual

Popular Marine Equipment manuals by other brands

MEDC DB1 Technical manual

MEDC

MEDC DB1 Technical manual

OceanSat AIS manual

OceanSat

OceanSat AIS manual

E2S Appello A121APPX instruction manual

E2S

E2S Appello A121APPX instruction manual

Lowrance SonarHub installation guide

Lowrance

Lowrance SonarHub installation guide

Furuno FCV-667 Operator's manual

Furuno

Furuno FCV-667 Operator's manual

PerTronix Ignitor II installation instructions

PerTronix

PerTronix Ignitor II installation instructions

Seiwa SWx 900 installation manual

Seiwa

Seiwa SWx 900 installation manual

Teknim TFS-1192R installation manual

Teknim

Teknim TFS-1192R installation manual

AML Oceanographic AML-6 RT user manual

AML Oceanographic

AML Oceanographic AML-6 RT user manual

Aquatic AQ-DM-5 DIGITAL MEDIA LOCKER owner's manual

Aquatic

Aquatic AQ-DM-5 DIGITAL MEDIA LOCKER owner's manual

Raymarine Autohelm ST30 Bidata manual

Raymarine

Raymarine Autohelm ST30 Bidata manual

Garmin GMI 10 installation instructions

Garmin

Garmin GMI 10 installation instructions

Mercury VERADO L6 Assembly instructions

Mercury

Mercury VERADO L6 Assembly instructions

TIGRESS T-Top 88965 Installation and Maintenance

TIGRESS

TIGRESS T-Top 88965 Installation and Maintenance

Furuno FI-503 Operator's manual

Furuno

Furuno FI-503 Operator's manual

Clarion CMS5 owner's manual

Clarion

Clarion CMS5 owner's manual

Garmin GFS 10 - Fuel Sensor installation instructions

Garmin

Garmin GFS 10 - Fuel Sensor installation instructions

RTK DA132 operating instructions

RTK

RTK DA132 operating instructions

manuals.online logo
manuals.online logoBrands
  • About & Mission
  • Contact us
  • Privacy Policy
  • Terms and Conditions

Copyright 2025 Manuals.Online. All Rights Reserved.