8
SY66000107 - 01
È severamente vietata la riproduzione anche parziale di questo manuale / All copying, even partial, of this manual is strictly forbidden
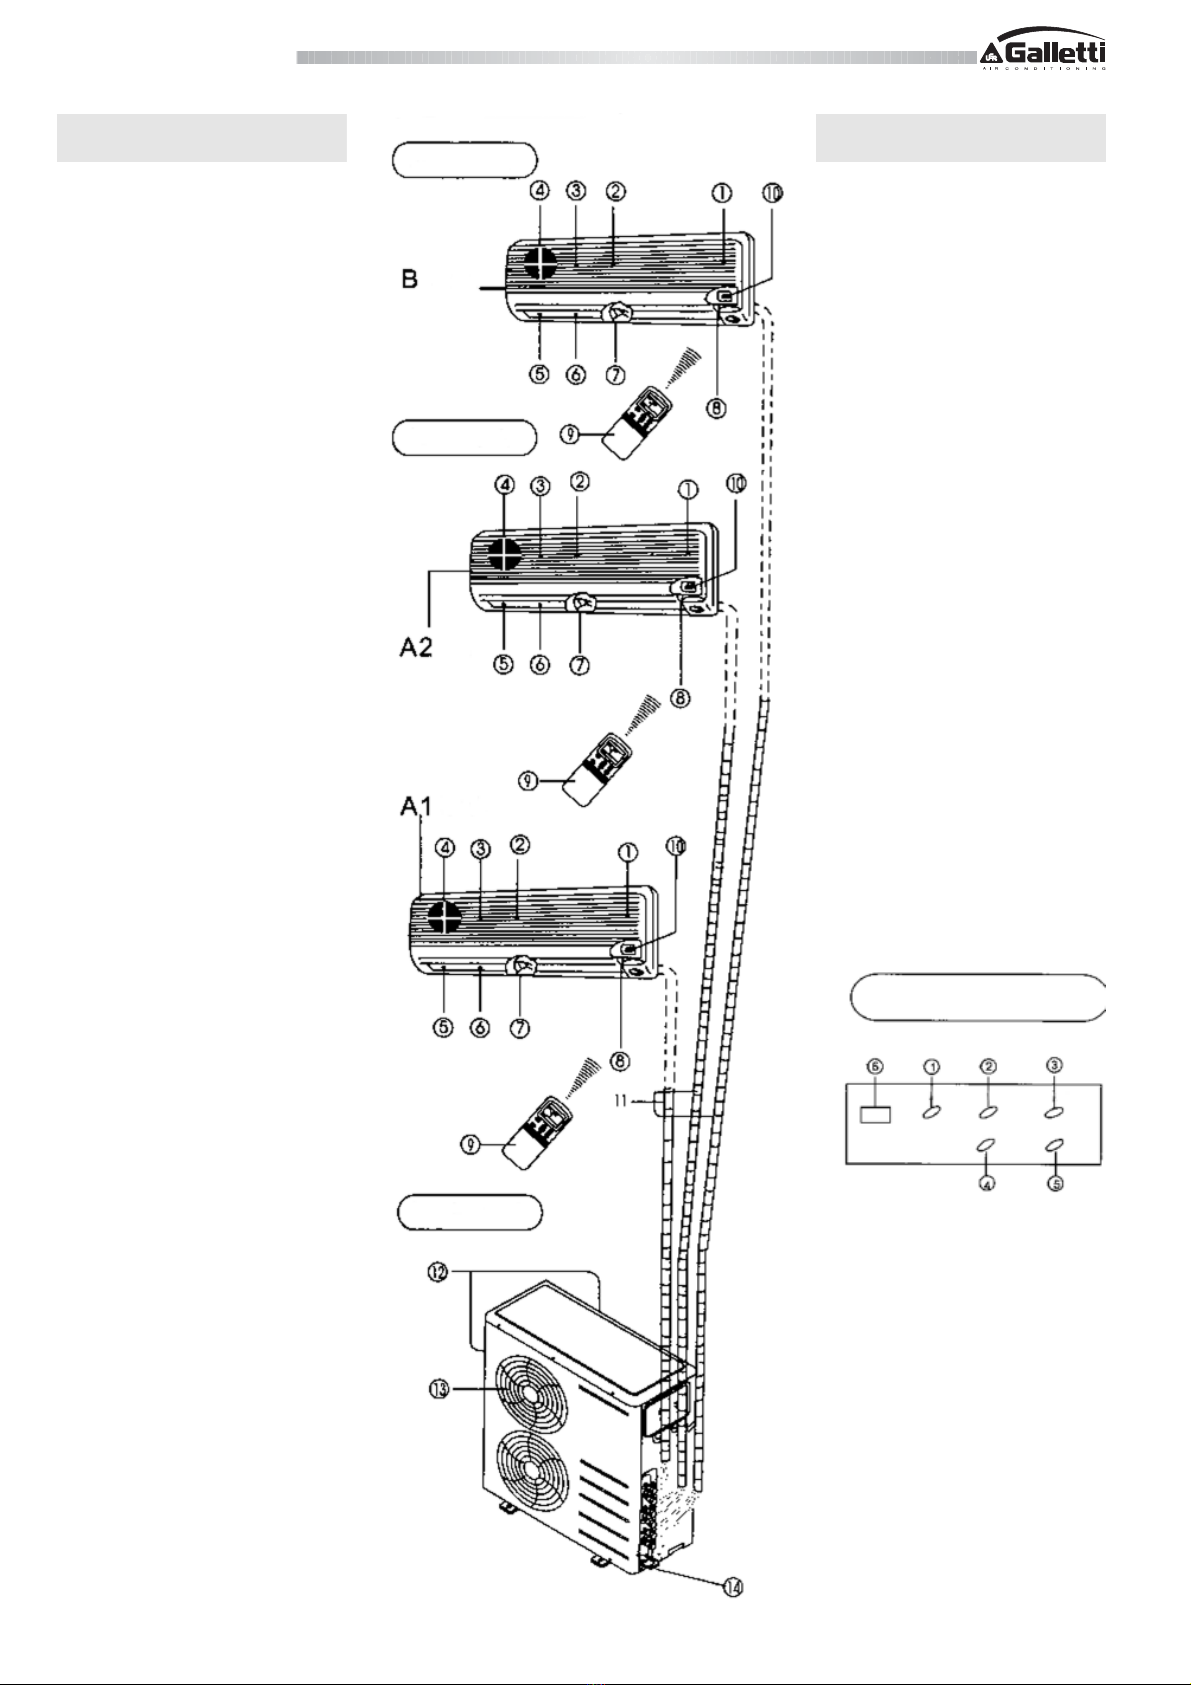
MSA - MSA 5
5. ORIENTAMENTO DEL FLUSSO D'ARIA
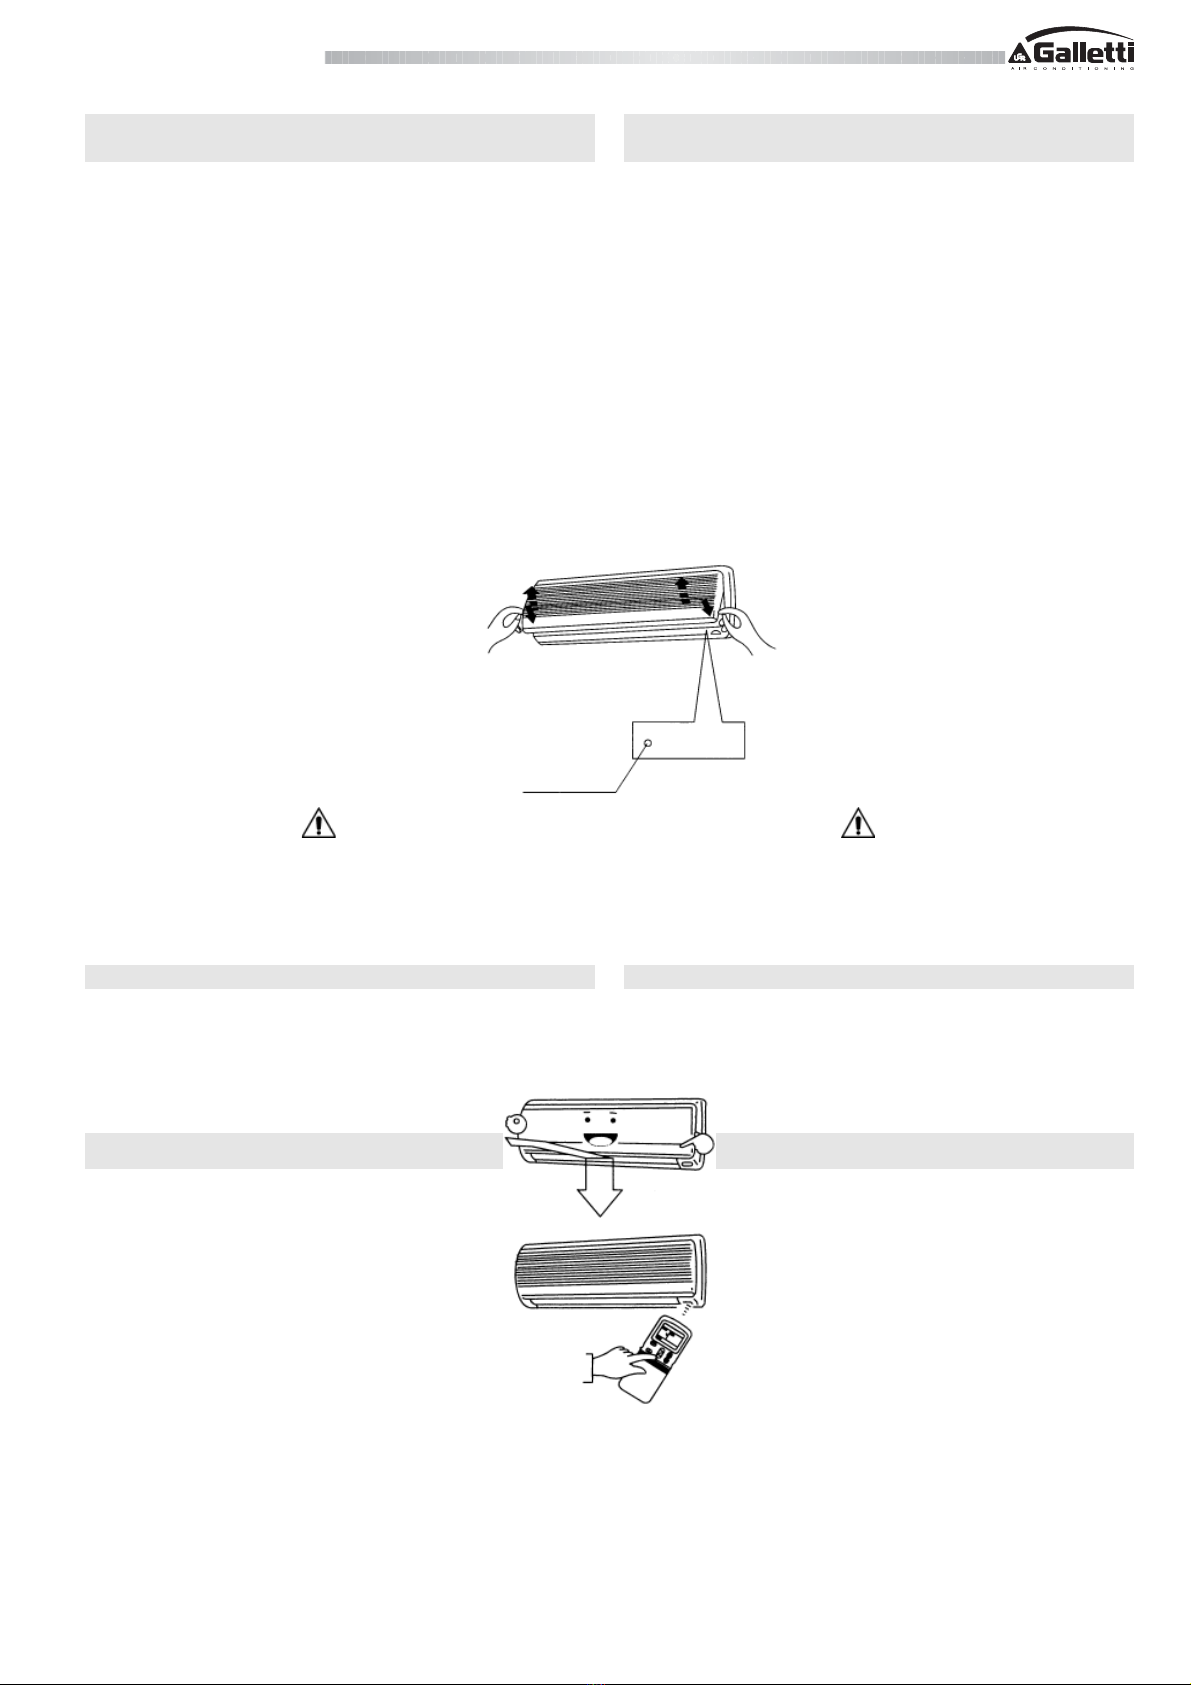
Oscillazione automatica del flusso d'aria
Questa operazione va effettuata quando l'apparecchio è in
funzione.
Premere il pulsante SWING (oscillazione) sul comando a
distanza.
- Per interrompere questa funzione, premere nuovamente
il pulsante SWING.
- Per modificare la direzione dell'oscillazione, premere il
pulsante AIR DIRECTION (orientamento aria).
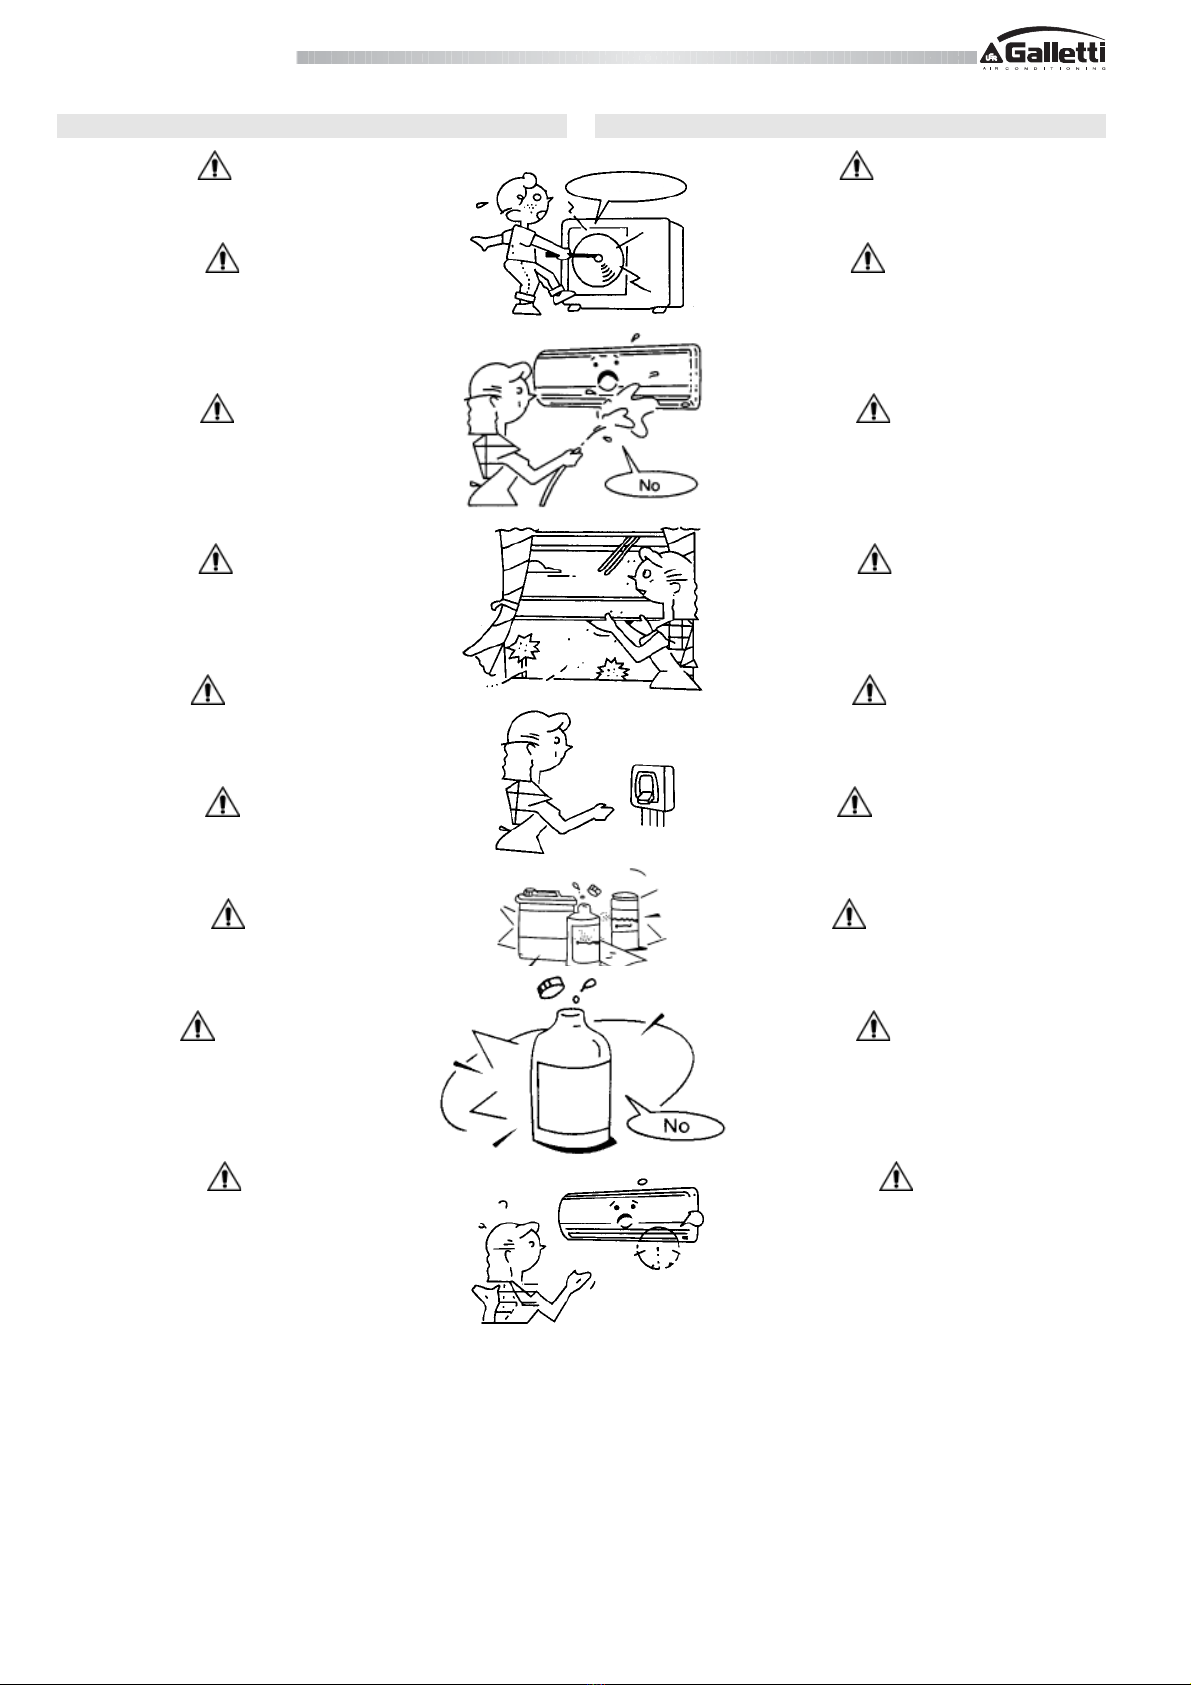
ATTENZIONE
-Quando il condizionatore non è in funzione (anche
quando è impostata l'attivazione del TIMER) i pulsanti
AIR DIRECTION e SWING sono disabilitati.
-Non far funzionare per molte ore il condizionatore con
il flusso d'aria orientato verso il basso nella
modalità freddo o deumidificazione.
Potrebbe formarsi in questo caso condensa sulla
superficie del deflettore verticale con conseguente
gocciolamento.
-Non muovere il deflettore verticale manualmente.
Utilizzare sempre il pulsante AIR DIRECTION
(orientamento aria). Se questo deflettore
viene mosso manualmente può funzionare in modo
anomalo. In caso di cattivo funzionamento del
deflettore, fermare il condizionatore e poi riavviarlo.
-Quando il condizionatore viene riacceso
immediatamente dopo l'arresto, il deflettore verticale
può rimanere fermo per una decina di secondi.
5. ADJUSTING AIR FLOW DIRECTION
To automatically swing the air flow direction
Perform this function while the air conditioner is in operation.
Push the SWING button on the remote controller.
-To stop the function, push the SWING button again.
-To change the swing direction, push the AIR DIRECTION
button.
CAUTIONS
-The AIR DIRECTION and SWING buttons will be disabled
when the air conditioner is not in operation (including when
the ON TIMER is set).
-Do not operate the air conditioner for long hours with the air
flow direction set downward during the cooling or dry
operation.
Otherwise, condensation may occur on the surface of the
vertical air flow louver and cause dew dripping.
-Do not move the vertical louver manually. Always
use the AIR DIRECTION button. If you move
the louver manually, it may malfunction
during operation. If the louver malfunctions,
stop the air conditioner once and restart it.
-When the air conditioner is started immediately
after it was stopped, the vertical air flow louver might
not move for 10 seconds or so.
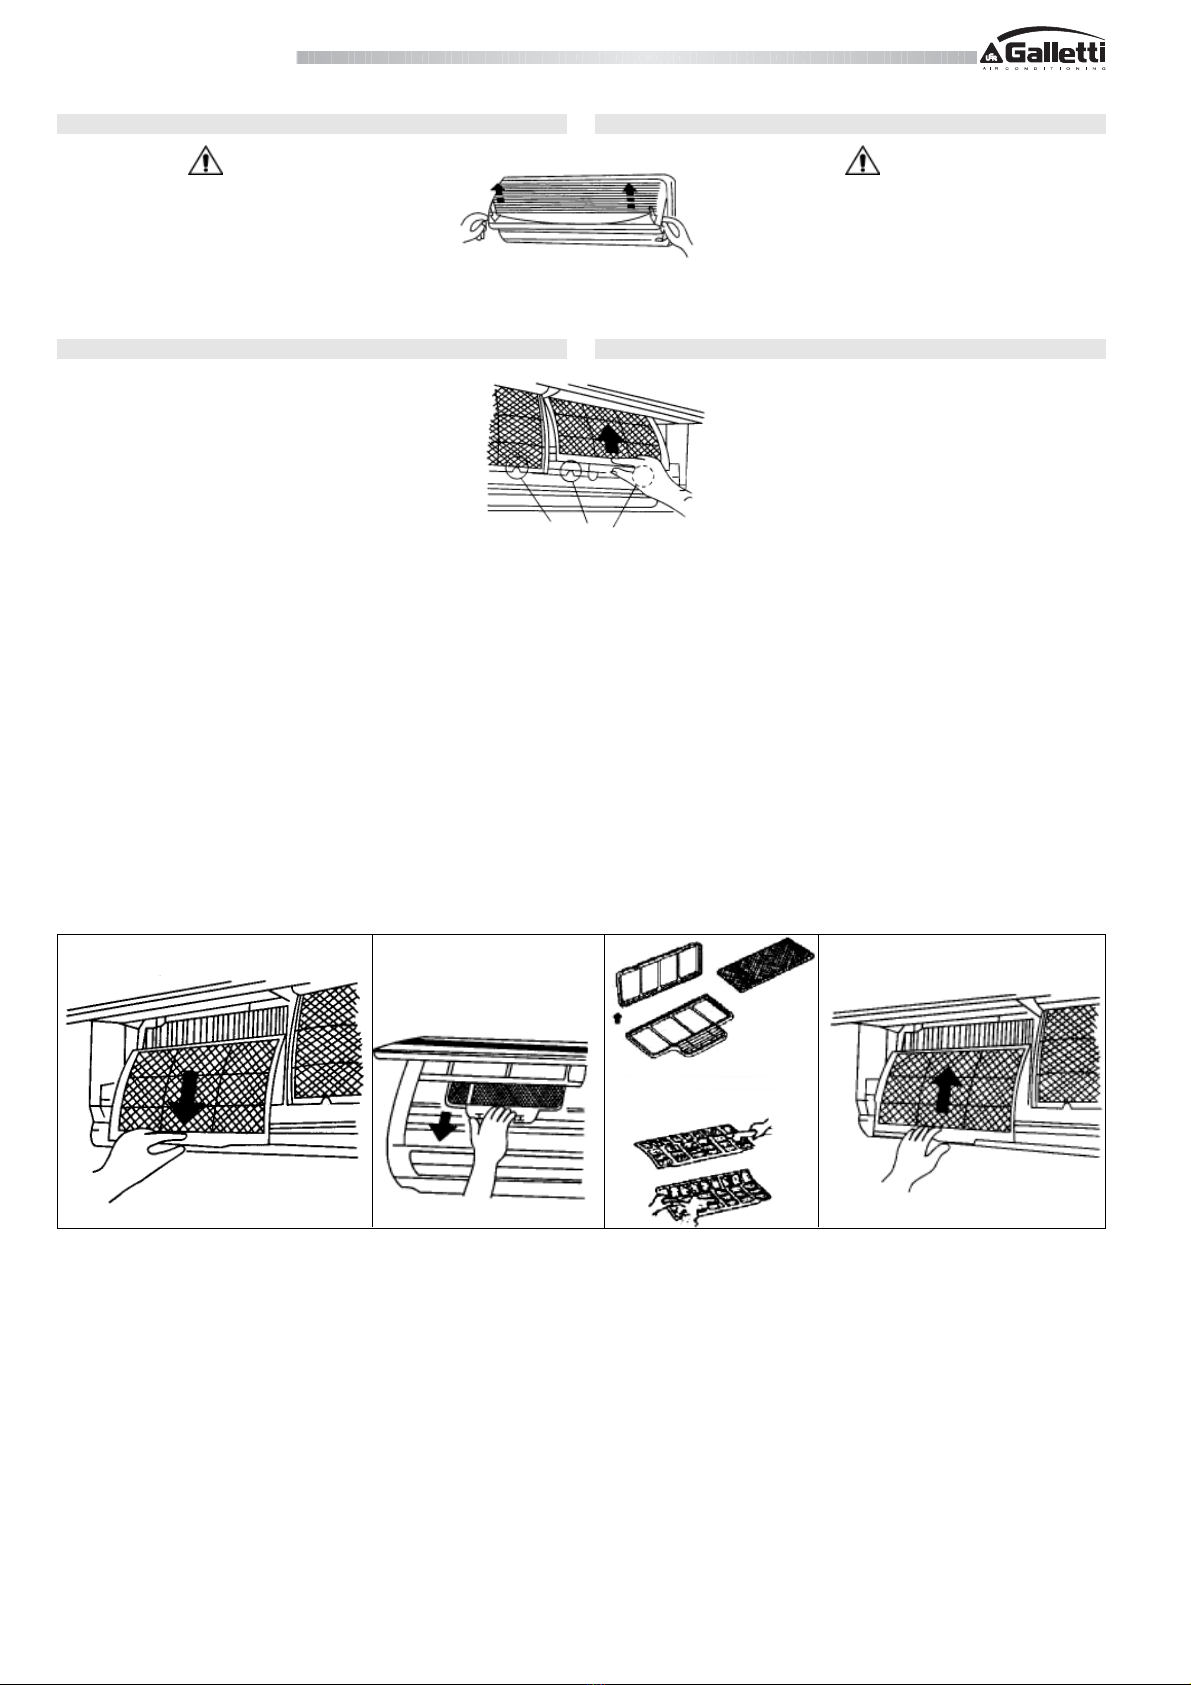
Afferrare
Hold
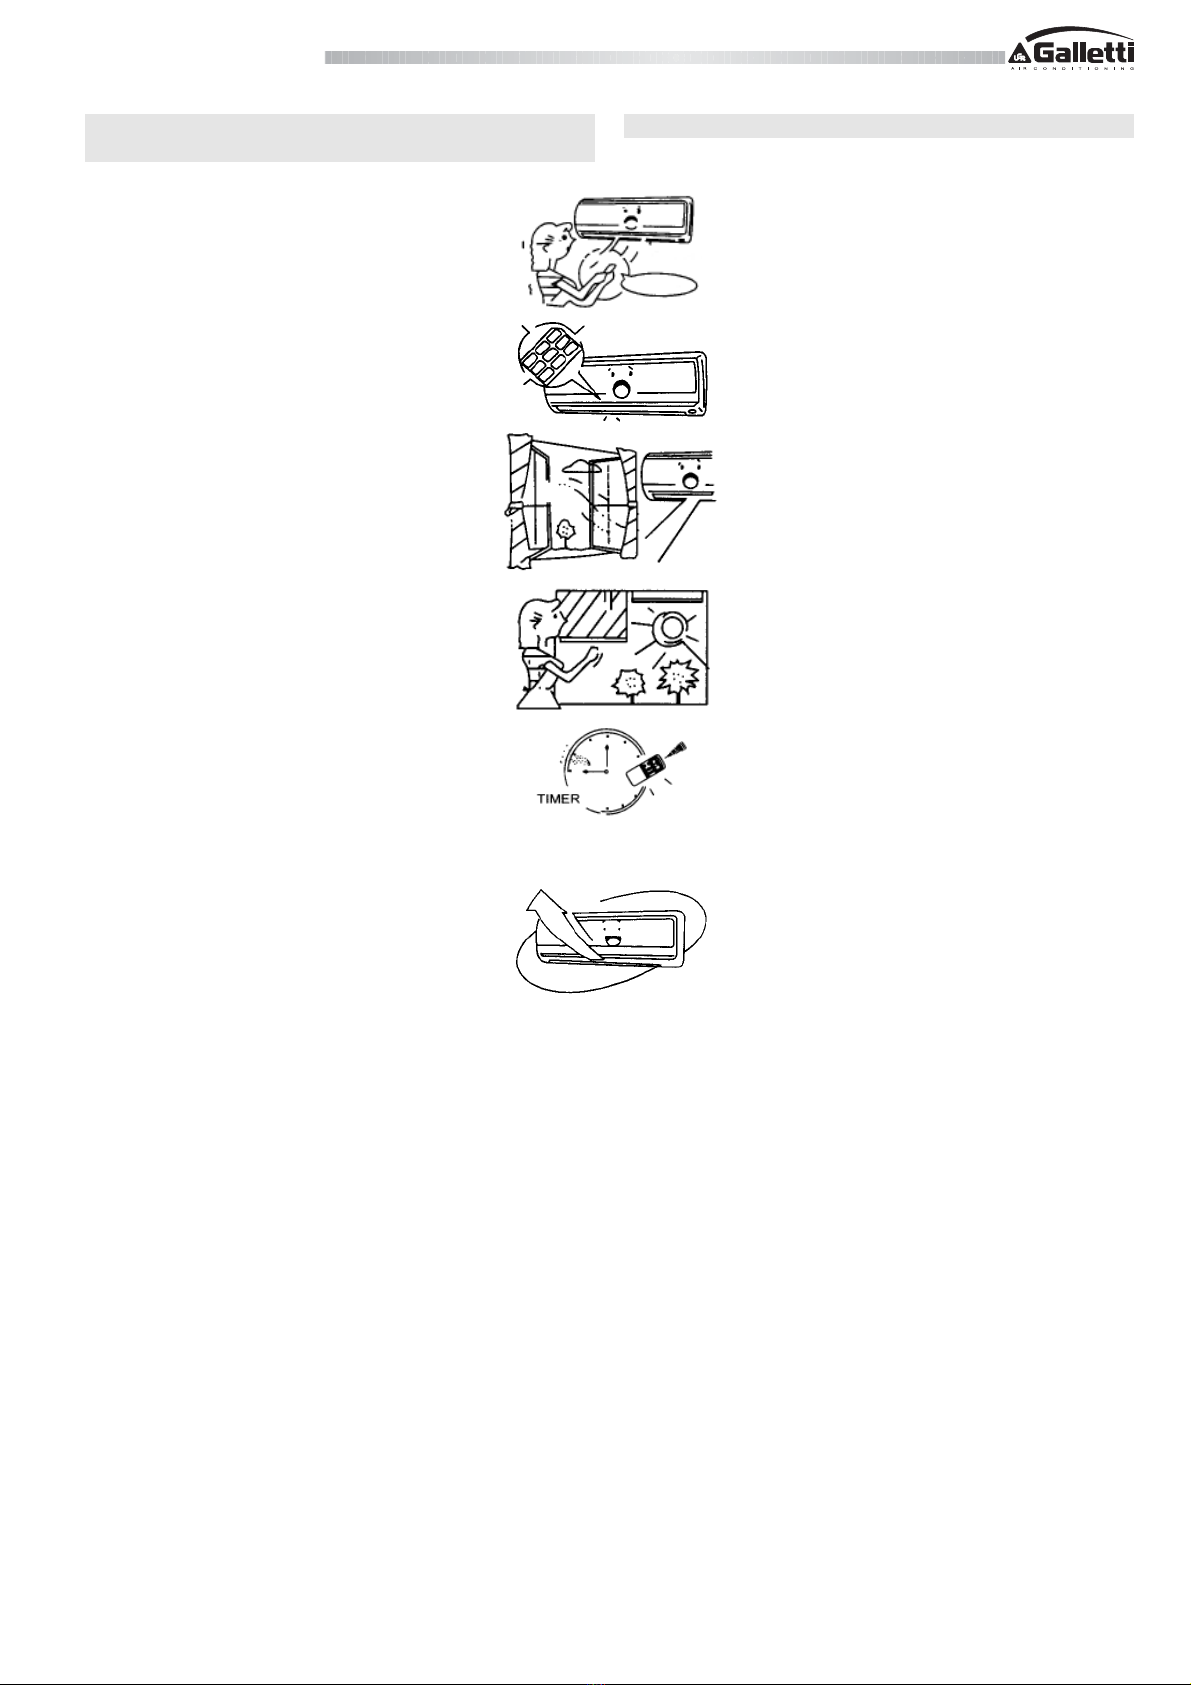
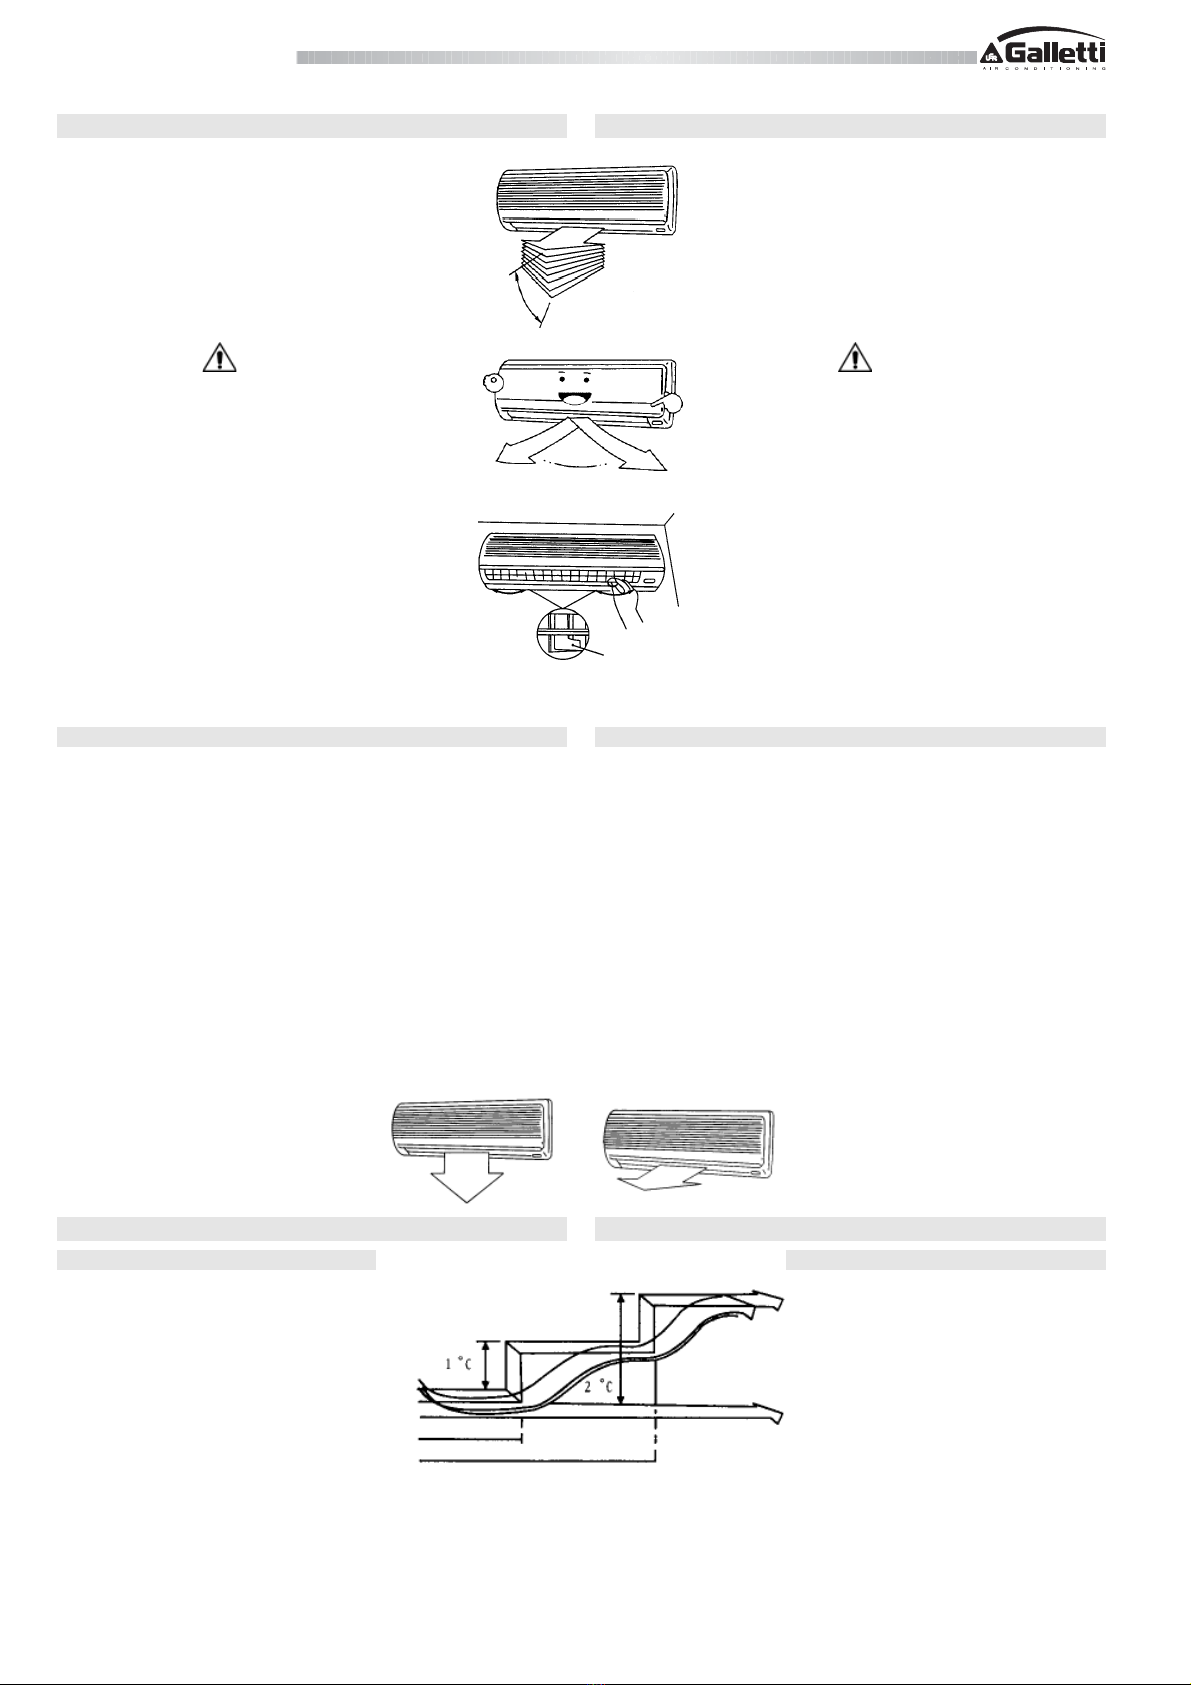
5.2 ADJUSTING THE HORIZONTAL AIR FLOW DIRECTION
Preparation:
For the cooling or dry operation, move the vertical air flow louver downward
using the AIR DIRECTION button on the remote controller.
-Take hold of the lever on the horizontal air flow grilles and move them
to adjust the air flow direction as required.
-For the cooling or dry operation, return the vertical air flow louver to
the original position using the AIR DIRECTION button on the remote
controller.
If your use the AIR DIRECTION button to set the vertical air flow direction, the
direction will move downward at first, then turn automatically to the direction
as you desire.
When you stop operating with the remote controller, the vertical air flow louver
will shut automatically.
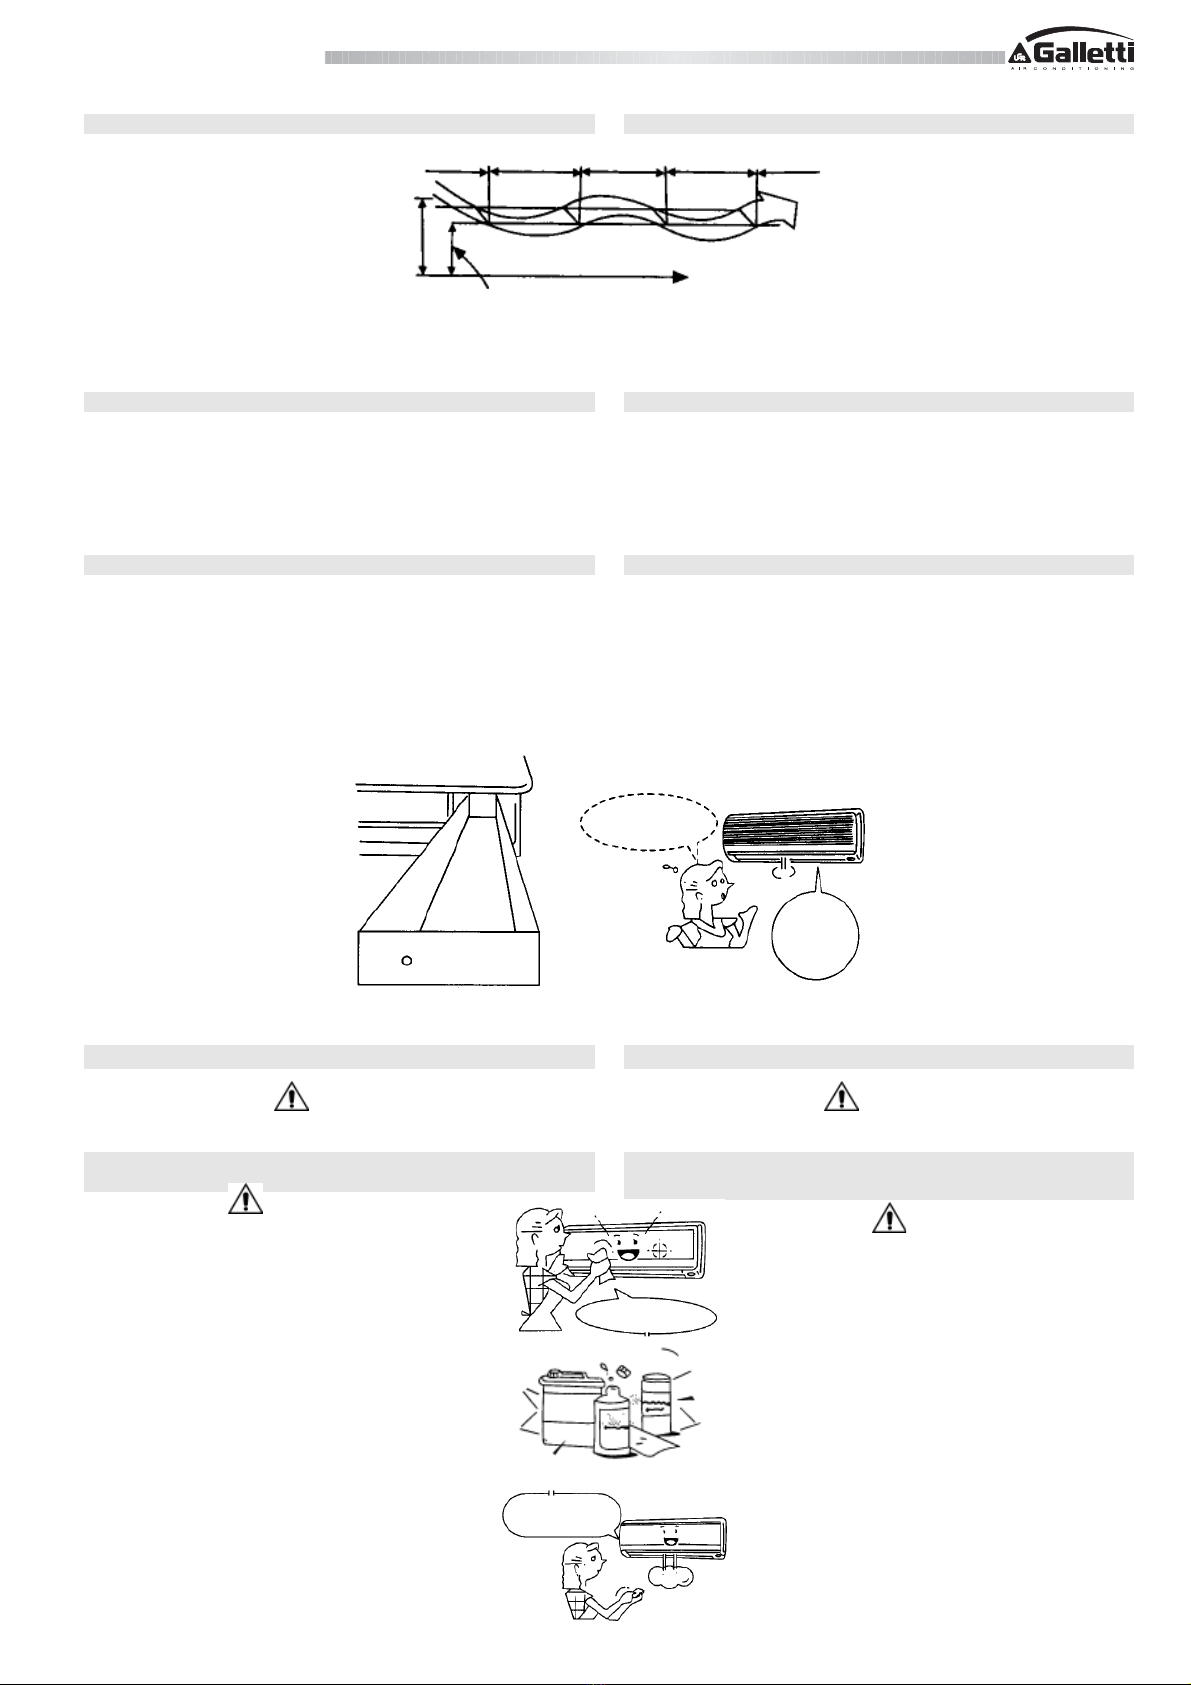
6. HOW THE AIR CONDITIONER WORKS
6.1 AUTOMATICOPERATION
-The air conditioner selects and operates in
one of the operating modes of cooling,
heating (cooling only type without) or fan
only, depending on the room temperature.
-The air conditioner will control room
temperature automatically round
the temperature point set by you.
-If the Auto mode is uncomfortable, you can
select the desired conditions manually.
5.2 ORIENTAMENTO DEL FLUSSO D'ARIA ORIZZONTALE
Preparazione:
Per il funzionamento nella modalità raffreddamento o deumidificazione,
muovere il deflettore del flusso aria verticale verso il basso tramite il pulsante
AIR DIRECTION posto sul comando a distanza.
-Afferrare la levetta sulla griglia del flusso aria orizzontale e muoverla
fino a raggiungere l'orientamento del flusso d'aria desiderato.
-Per il funzionamento nella modalità raffreddamento o
deumidificazione, riportare il deflettore del flusso aria verticale verso
la posizione originale tramite il pulsante AIR DIRECTION
posto sul comando a distanza.
Quando viene utilizzato il pulsante AIR DIRECTION per l'orientamento del
flusso aria verticale, il deflettore si muoverà subito verso il basso, poi
comincerà a spostarsi fino a raggiungere l'orientamento desiderato.
Quando l'apparecchio viene fermato tramite il comando a distanza, il
deflettore del flusso aria verticale si chiude automaticamente.
6. FUNZIONAMENTO DEL CONDIZIONATORE
6.1 FUNZIONAMENTOAUTOMATICO
-A seconda della temperatura ambiente,
il condizionatore seleziona
e funziona in una delle modalità di
funzionamento di cui dispone,
raffreddamento,riscaldamento (tipo solo
freddo) o solamente ventilazione.
-Il condizionatore controlla
automaticamente la temperatura
ambiente in base alla impostazione
prescelta dall'utilizzatore.
-Nel caso in cui nella modalità Auto
l'ambiente non sia confortevole,
selezionare manualmente le condizioni
desiderate.
Zona di funzionamento a potenza minima
Operation suppression zone
Funzionamento CON RISPARMIO ENERGETICO
ECONOMIC Operation
inizio funzionamento
Operations starts
Temperatura impostata
Set temperature
1 ora
1 hours
2 ore
2 hours