manuals.online logo
Brands
  1. Home
  2. •
  3. Brands
  4. •
  5. Gardeners
  6. •
  7. Lawn And Garden Equipment
  8. •
  9. Gardeners 8610207 User manual

Gardeners 8610207 User manual

1-800-876-5520 • gardeners.com
info@gardeners.com
8% of our profits go back to our communities.
Learn more at gardeners.com/FoRCE-FoR-GoOD
G Rev /# # #
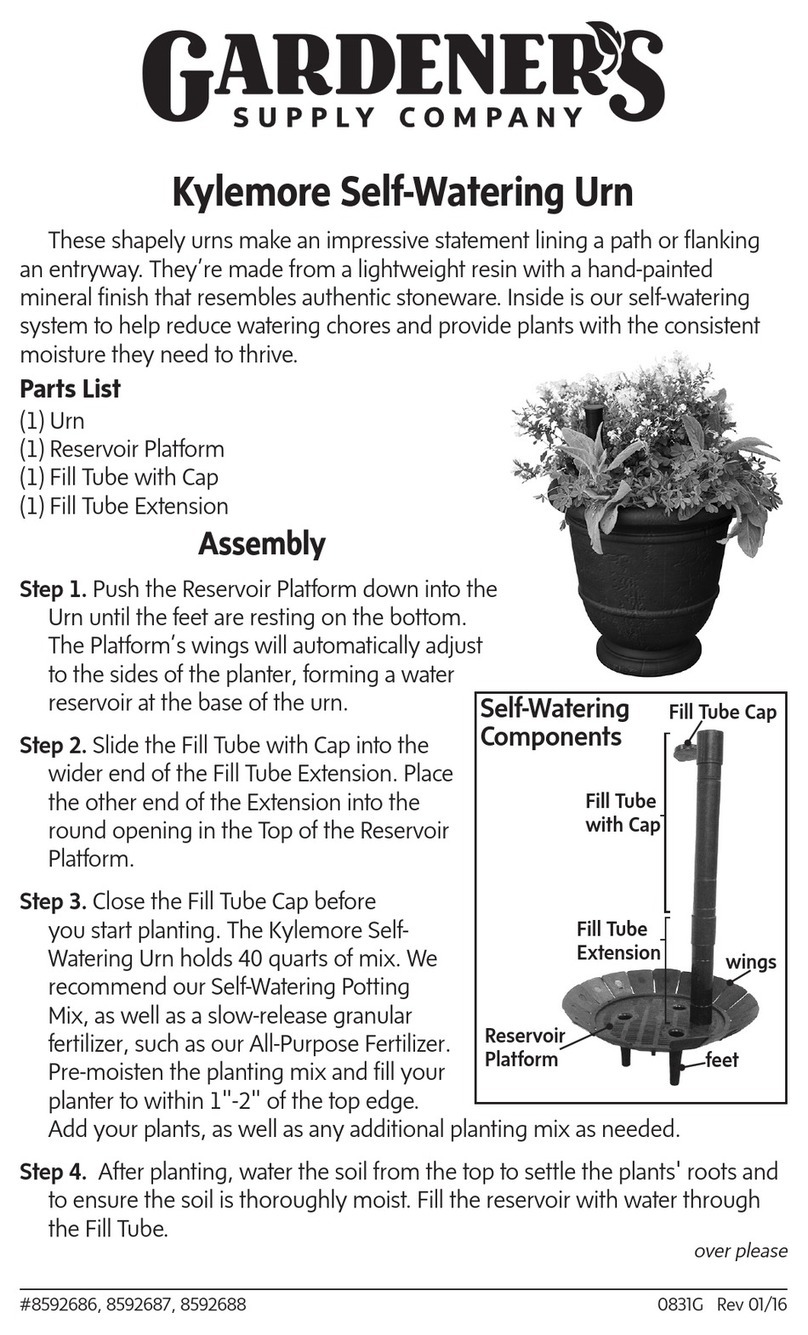
Self-Watering Metal Raised Bed
Parts List
2' x 4' Raised Bed
() RESERVOIRS and RESERVOIR TOPS
() CONNECTING TUBE
() FILL TUBE
() WATER LEVEL INDICATOR
() CAPS
Tools Required
Snips or shears
2' x 8' Raised Bed
() RESERVOIRS and RESERVOIR TOPS
() CONNECTING TUBES
() FILL TUBE
() WATER LEVEL INDICATOR
() CAPS
4' x 4' Raised Bed
() RESERVOIRS and RESERVOIR TOPS
() CONNECTING TUBES
() FILL TUBE
() WATER LEVEL INDICATOR
() CAPS
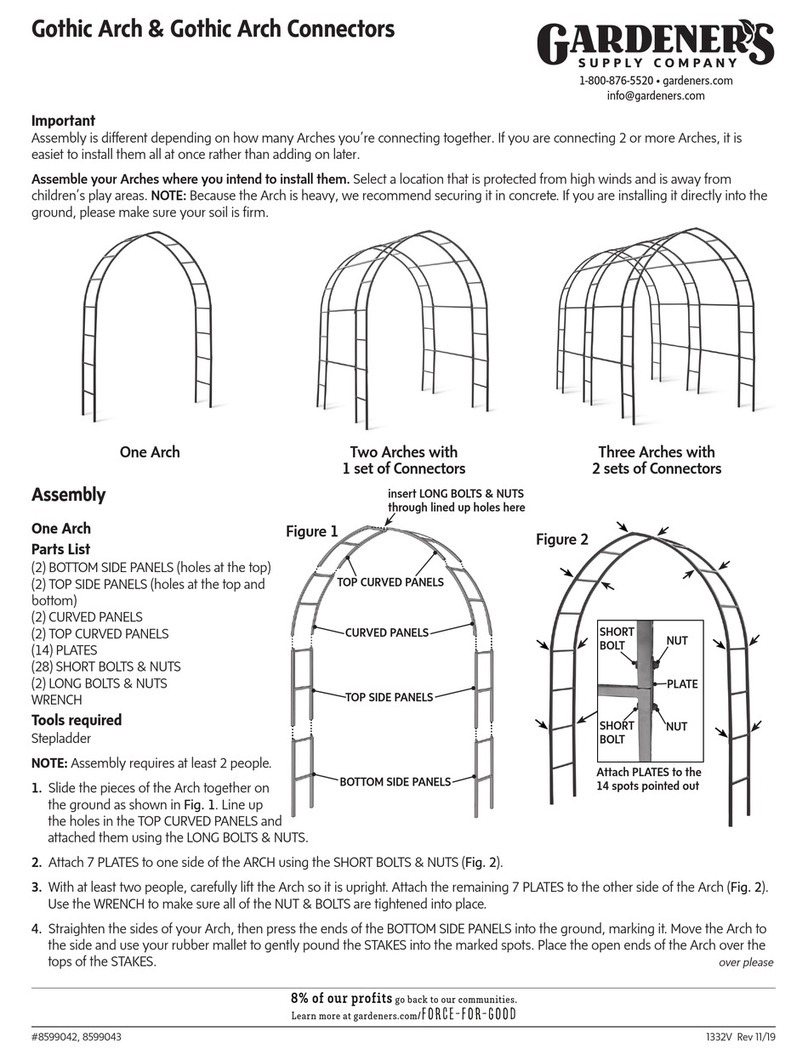
Assemble your Metal Raised Bed (shipped separately) according to the instructions provided, and place it
in the garden. Then, follow the instructions below to install the self-watering system.
Shown here:
2' x 4' Self-Watering
Metal Raised Bed
Shown here:
2' x 8'
Self-Watering
Metal Raised
Bed
PLEASE
RECYCLE
2. Link RESERVOIRS with CONNECTING TUBE(S) by sliding the
tubes fully over each port. Place inside your raised bed, add
some water, and check for leaks. (For the ' x ' bed you will
connect all four RESERVOIRS in a single row. For the ' x ' bed
you will create two pairs of connected RESERVOIRS.)
3. Remove perforated circle in
RESERVOIR TOP(S) to create a hole
for the FILL TUBE. (Remove just one
perforated circle for the ' x ' and ' x
' beds; two for the ' x ' bed.)
1. Use CAPS to seal connector ports.
(Seal one port on each RESERVOIR for
both the ' x ' and ' x ' beds; seal
one port on only two RESERVOIRS for
the ' x ' bed.)
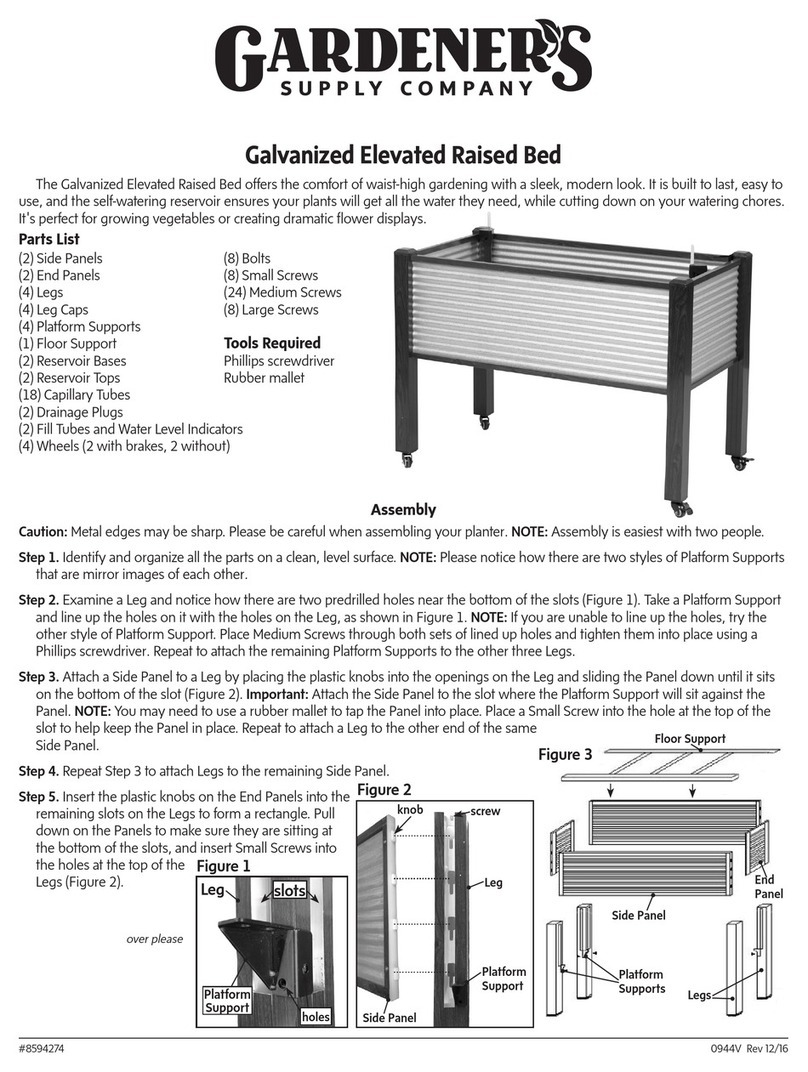
4. Add RESERVOIR TOPS to RESERVOIRS. Then insert FILL TUBE(S) into the holes you created
in Step . The FILL TUBE is notched so you can set it at multiple heights. Be sure to set it above
your desired soil planting line. Once placed, slide outer section up if needed (for additional
height), then insert WATER LEVEL INDICATOR, foam end down. You may need to trim indicator
to close cap. Note: The WATER LEVEL INDICATOR should rise up when reservoirs are full. The
foam end, however, may become caught under the FILL TUBE during filling. If this happens,
gently jostle it free.
Filling and Planting
Fill your raised bed with a lightweight mix designed for self-watering containers, such as our Organic Self-Watering Potting Mix. Add
some compost and a slow-release fertilizer for best results. Press the potting mix into the channels in RESERVOIR TOPS to ensure
good water-soil contact. Fill the RESERVOIRS completely using the FILL TUBE. You're now ready to plant! While plants are getting
established, or in higher temperatures, water regularly from the top too.
Metal raised bed
51in x 51in 51in x 23.6in
98.4in x 23.6in
BRACE
27.5in
27.5in
27.5in
27.5in
27.5in
27.5in
23.6in
23.6in
19.7in
19.7in
19.7in
19.7in
19.7in
19.7in
• Before assembly and while
unpacking, please be aware
that there are sharp corners and
edges that could cause injury and
it is advisable to wear protective
gloves when handling these
items, sensible shoes are also
recommended. Until such time
as the SAFETY EDGE is fitted all
necessary precautions need to
be undertaken to avoid injury.
• We recommend placing the
bottom edge of the bed on a
layer of 1/2 - 3/4 inches gravel,
this allows excellent drainage
and protects the bottom edge of
the bed. Placing the bed on level
ground is also advised.
• If filling with a bobcat or
backhoe fill initial 1/3 of bed
slowly. Also when filling your
veggie bed do not climb in as
this puts unnecessary pressure
onto the bed.
IMPORTANT ASSEMBLY
CONFIGURATIONS
DUE TO THE MANUFACTURING PROCESS BED SIZING MAY VARY +/-50MM
Remove protective plastic covering (on all
coloured beds). Choose shape from available
configurations (as shown below) and lay panels
out on ground accordingly.
INSIDE OUTSIDE
Attach all nuts loosely & then tighten with a
screwdriver. A cordless drill will assists with this
process. Failure to tighten each nut and bolt to
its maximum may cause failure.
Assemble all side panels first then attach
corners.
ENSURE THAT YOU ATTACH THE CORNERS
ON THE OUTSIDE OF THE STRAIGHT SHEETS
Simply push the rubber edging onto the rolled
steel edge and trim excess. The safety edging
is designed to lock onto the rolled steel edge
making it more permanent.
If you have trouble getting the eding onto the
overlapped sheets, use a butter-knife to pry
and rotate it open.
Ensure 23.6in sheets are po-
sitioned as shown otherwise
brace will not align.

Other Gardeners Lawn And Garden Equipment manuals
Gardeners Essex Arbor User manual

Gardeners

Gardeners Essex Arbor User manual

Gardeners 8600331 User manual

Gardeners

Gardeners 8600331 User manual

Gardeners Titan A-Frame Trellis User manual

Gardeners

Gardeners Titan A-Frame Trellis User manual

Gardeners Elevated Rolling U-Garden User manual

Gardeners

Gardeners Elevated Rolling U-Garden User manual

Gardeners 8586751 User manual

Gardeners

Gardeners 8586751 User manual

Gardeners 8609185 User manual

Gardeners

Gardeners 8609185 User manual

Gardeners 8586770 User manual

Gardeners

Gardeners 8586770 User manual

Gardeners Self-Watering Elevated Cedar Planter Box User manual

Gardeners

Gardeners Self-Watering Elevated Cedar Planter Box User manual

Gardeners Cedar Three Bin Composter User manual

Gardeners

Gardeners Cedar Three Bin Composter User manual

Gardeners Deluxe Pyramid Composter User manual

Gardeners

Gardeners Deluxe Pyramid Composter User manual

Gardeners 8596999 User manual

Gardeners

Gardeners 8596999 User manual

Gardeners 8599042 User manual

Gardeners

Gardeners 8599042 User manual

Gardeners 8598238 User manual

Gardeners

Gardeners 8598238 User manual

Gardeners Demeter Metal Composter User manual

Gardeners

Gardeners Demeter Metal Composter User manual

Gardeners 34-051 User manual

Gardeners

Gardeners 34-051 User manual

Gardeners 8610923 User manual

Gardeners

Gardeners 8610923 User manual

Gardeners 8600288 User manual

Gardeners

Gardeners 8600288 User manual

Gardeners 8590159 User manual

Gardeners

Gardeners 8590159 User manual

Gardeners Self-Watering Apex Trellis Planter User manual

Gardeners

Gardeners Self-Watering Apex Trellis Planter User manual

Gardeners 8610909 User manual

Gardeners

Gardeners 8610909 User manual

Gardeners Oxford Arch User manual

Gardeners

Gardeners Oxford Arch User manual
Gardeners Demeter Potting Bench User manual

Gardeners

Gardeners Demeter Potting Bench User manual

Gardeners Oxford Arch User manual

Gardeners

Gardeners Oxford Arch User manual

Gardeners Snip-n-Drip User manual

Gardeners

Gardeners Snip-n-Drip User manual

Popular Lawn And Garden Equipment manuals by other brands

Ribimex Ribiland PRPLM2EN1 User and maintenance manual

Ribimex

Ribimex Ribiland PRPLM2EN1 User and maintenance manual

Agria 5500 GRIZZLY compact operating instructions

Agria

Agria 5500 GRIZZLY compact operating instructions

Prem-I-Air EH1355 user manual

Prem-I-Air

Prem-I-Air EH1355 user manual

Rehau RE.GUARD Installation and operating instructions

Rehau

Rehau RE.GUARD Installation and operating instructions

Land Pride RBT45 Series Specifications

Land Pride

Land Pride RBT45 Series Specifications

WilTec 51704 Operation manual

WilTec

WilTec 51704 Operation manual

Toro 29517 Operator's manual

Toro

Toro 29517 Operator's manual

Gecko LT25 instruction manual

Gecko

Gecko LT25 instruction manual

Billy Goat CR550HC Operator owner's manual

Billy Goat

Billy Goat CR550HC Operator owner's manual

Blumfeldt Greenwire Select manual

Blumfeldt

Blumfeldt Greenwire Select manual

Trelawny TFP260 Operation and maintenance manual

Trelawny

Trelawny TFP260 Operation and maintenance manual

Suncast RB448 owner's manual

Suncast

Suncast RB448 owner's manual

BRC ATRIUM 30i instruction sheet

BRC

BRC ATRIUM 30i instruction sheet

Classen TA-17DE Operator's manual

Classen

Classen TA-17DE Operator's manual

Tiger Mowers FLX10 parts manual

Tiger Mowers

Tiger Mowers FLX10 parts manual

Westfalia GM941 instruction manual

Westfalia

Westfalia GM941 instruction manual

Forest garden VICTORIAN WALL GREEN HOUSE Assembly

Forest garden

Forest garden VICTORIAN WALL GREEN HOUSE Assembly

Hoselink 5561 user manual

Hoselink

Hoselink 5561 user manual

manuals.online logo
manuals.online logoBrands
  • About & Mission
  • Contact us
  • Privacy Policy
  • Terms and Conditions

Copyright 2025 Manuals.Online. All Rights Reserved.