manuals.online logo
Brands
  1. Home
  2. •
  3. Brands
  4. •
  5. Gardeners
  6. •
  7. Lawn And Garden Equipment
  8. •
  9. Gardeners Self-Watering Elevated Cedar Planter Box User manual

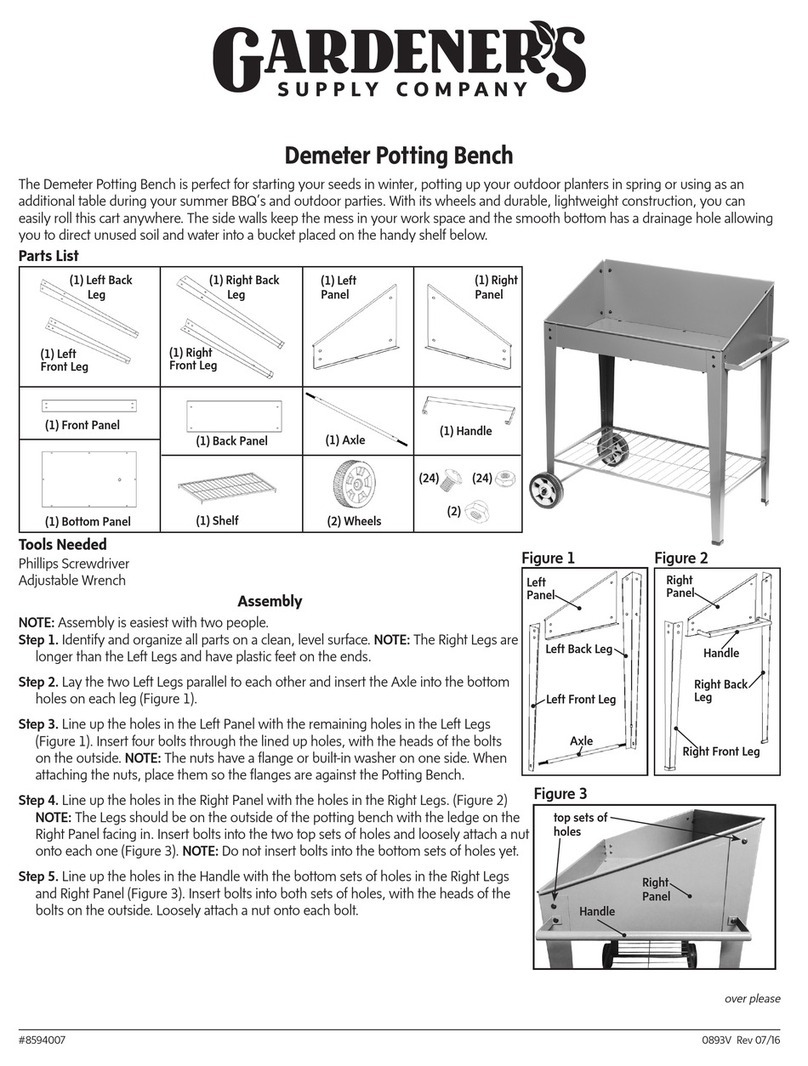
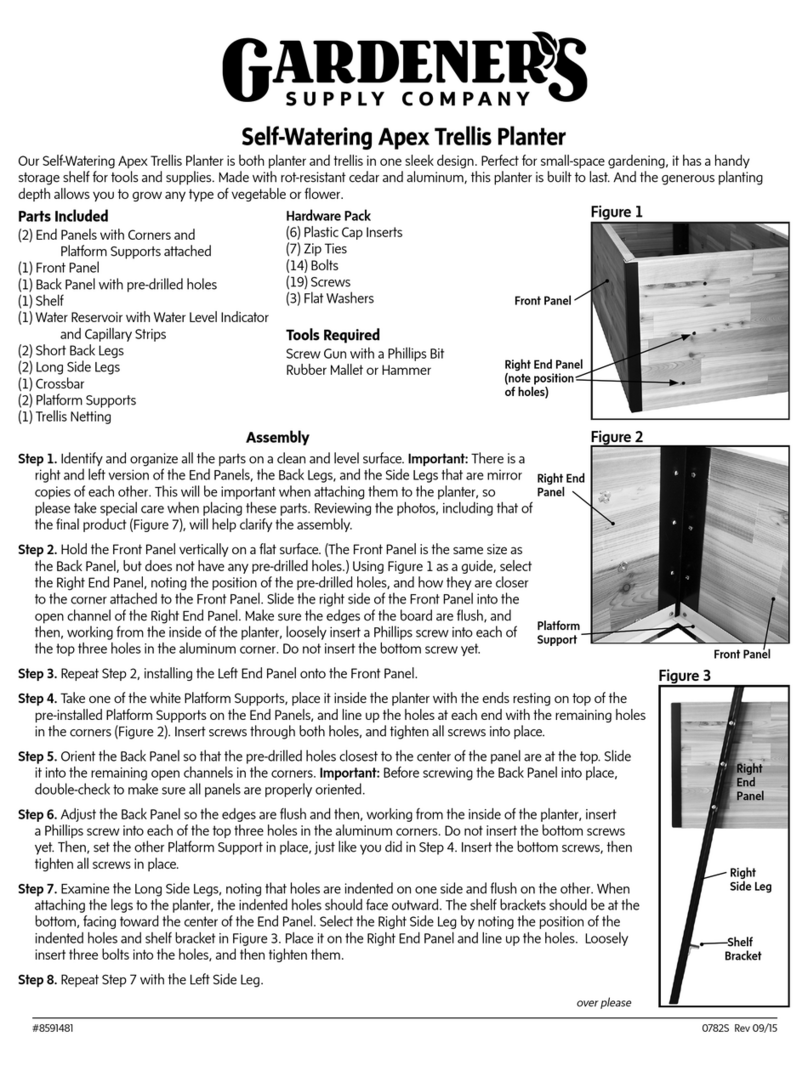
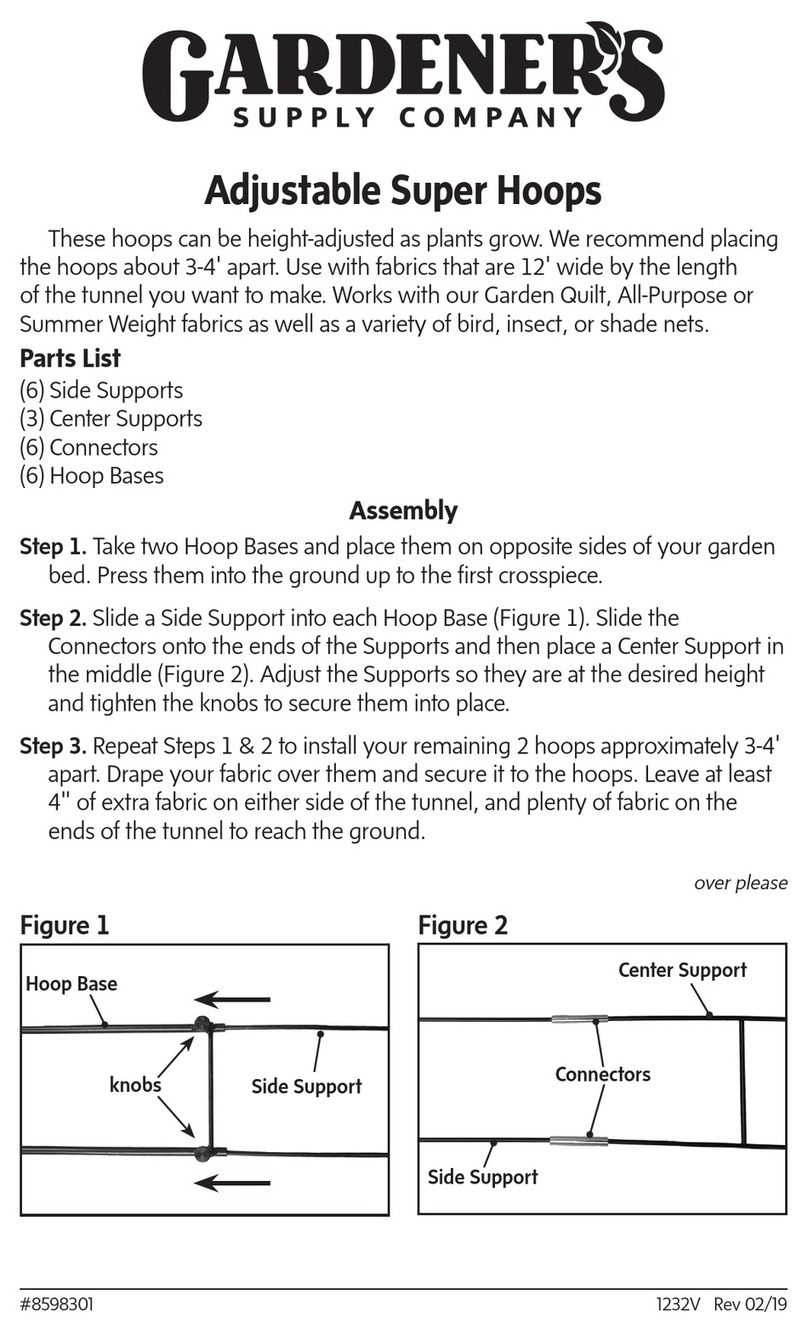
Gardeners Self-Watering Elevated Cedar Planter Box User manual

1-800-876-5520 • gardeners.com
info@gardeners.com
8' CEDAR BOARDS
(rough faces)
holes
PLATFORM SUPPORT
FLAT STOCK
CORNER
Figure 1
The top CEDAR
BOARD should sit
⅛" above the
CORNER.
LIT SKU#  | G Rev /# #/*/*/*/*
Instructions for Self-Watering Elevated Cedar Planter Box and
Self-Watering Insert for Elevated Cedar Planter Box, 2' x 8'
Planter Box Parts List
() ' CEDAR BOARDS
() CORNERS
() PLATFORM SUPPORTS
() FLAT STOCK
() CROSS SUPPORTS
() ' END PANELS
() CORNER CAPS
() PHILLIPS SCREWS
Self-Watering System Parts List
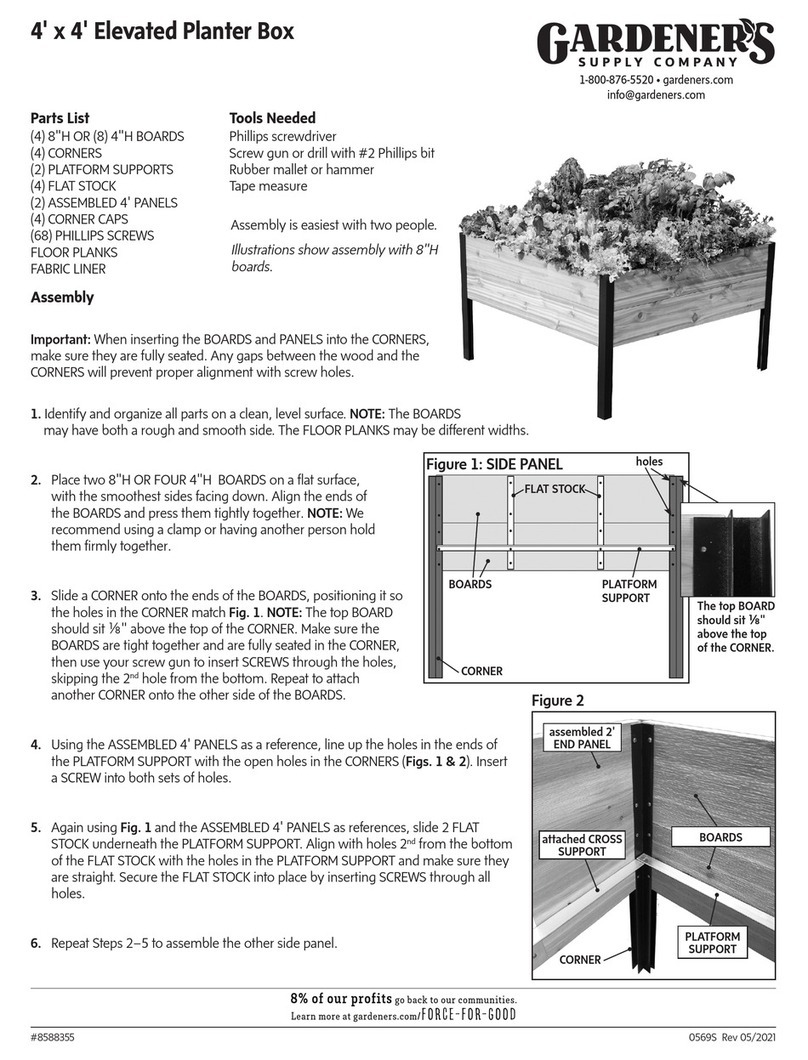
1. Align the short edges of two ' CEDAR BOARDS on a flat surface, (rough sides facing up) and clamp or hold them firmly together.
2. Slide a CORNER onto the ends of the CEDAR BOARDS, positioning it as shown in Fig. 1. The top CEDAR BOARD should come to sit
⅛" above the top of the CORNER.
3. Making sure there is no gap between the CEDAR BOARDS and that they are fully seated into the CORNER, secure with PHILLIPS
SCREWS. Leave the nd hole from the bottom open for now. Repeat Steps - to attach another CORNER to the other end.
4. Take a PLATFORM SUPPORT and place the face with  holes against the CEDAR BOARDS (Fig. 1). Align the holes on the ends with
the holes you left open in Step  and secure with PHILLIPS SCREWS.
5. Slide  FLAT STOCK underneath the PLATFORM SUPPORT and align holes as shown in Fig. 1. Secure the FLAT STOCK with PHILLIPS
SCREWS.
6. Repeat Steps – to assemble the other side panel.
I. Planter Box Assembly
If you are retrofitting an existing ' x ' Elevated Cedar Planter Box, empty it out, remove the existing cedar floor, fabric liner, and
cross supports and skip to Part II: Self-Watering System Assembly. Keep the cross supports — you will reinstall them after you
connect and insert the water reservoirs. You will not need to reinstall the floor planks or liner.
Assembly Tools Required
Screw gun / drill with # Phillips bit
Phillips screwdriver
Rubber mallet or hammer
Tape measure
Clamp (optional)
Snips or shears (for Self-Watering System Assembly only) () RESERVOIRS and
RESERVOIR TOPS
() CONNECTING
TUBES
() WOODEN SPACERS
() FILL TUBE
() WATER LEVEL INDICATOR
() CAPS
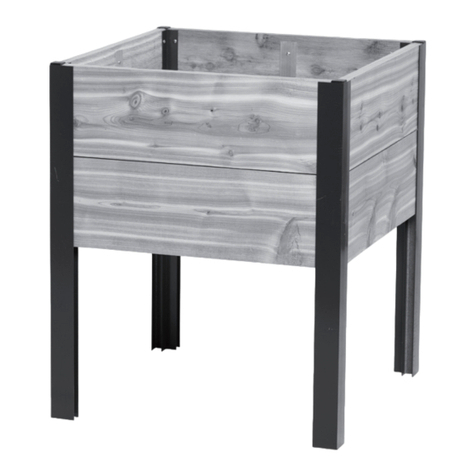
Assembled Planter Box
Assembly is easiest with two people.
PLATFORM
SUPPORT
Figure 3
Screw
CROSS SUPPORT
(attaches under
PLATFORM SUPPORT)
For video instructions, gardening tools, accessories, and advice — visit us at gardeners.com PLEASE
RECYCLE
Figure 2
CROSS
SUPPORT
8' SIDE PANEL
2' END PANEL
PLATFORM
SUPPORT
SCREW
7. Use a rubber mallet to tap a pre-assembled '
END PANEL into the open channel of a CORNER,
positioning it so the CROSS SUPPORT sits under
the PLATFORM SUPPORT on the ' side panel
(Fig. 2 ) and screw holes align. Ensure END PANEL
is fully seated and ⅛" above the top of the CORNER,
then secure with PHILLIPS SCREWS as shown. Repeat
to attach the remaining ’ END PANEL to the other
end.
8. Place the remaining ’ side panel on a flat surface.
Carefully guide the ’ END PANELS of your partially
assembled box into the open channels of the CORNERS. Secure with PHILLIPS SCREWS. Once all PANELS are attached, stand your
Planter Box right side up and tap a CORNER CAP into the top of each aluminum CORNER.
9. You will install the  CROSS SUPPORTS during Step  of Self-Watering System Assembly (below). To do this, place CROSS SUPPORTS
under PLATFORM SUPPORTS but over CONNECTING TUBES, align screw holes, and secure with PHILLIPS SCREWS from the top (see
Fig. 3).
IV. Filling and Planting
Fill/refill your Planter Box with a lightweight mix designed for self-watering containers, such as our Organic Self-Watering Potting Mix. Add
some compost and a slow-release fertilizer for best results. Avoid using a heavy garden soil as it may overload your planter. Press the
potting mix into the channels in RESERVOIR TOPS to ensure good water-soil contact. Fill the RESERVOIRS using the FILL TUBE. You're now
ready to plant! While plants are getting established, or in higher temperatures, water regularly from the top too.
II. Self-Watering System Assembly
3. Link RESERVOIRS with CONNECTING TUBES; slide tubes
fully over each port. Then, install/reinstall planter box CROSS
SUPPORTS (see # above). Add water, and check for leaks.
2. Rest RESERVOIRS on PLATFORM
SUPPORTS with open connector ports
facing, sealed connector ports on ends.
4. Remove perforated
circle in ONE RESERVOIR
TOP to create a hole for
the FILL TUBE.
5. Install RESERVOIR TOPS* and place WOODEN SPACERS between RESERVOIRS. Then, insert the FILL TUBE (it is
notched so you can set it at multiple heights. Be sure to set it above your desired soil planting line). Once placed,
slide outer section up if needed (for additional height), then insert WATER LEVEL INDICATOR, foam end down. You
may need to trim indicator to close cap. Note: The WATER LEVEL INDICATOR should rise up when reservoirs are full.
The foam end, however, may become caught under the FILL TUBE during filling. If this happens, gently jostle it free.
1. Seal one connector port on
two RESERVOIRS with a CAP.
* In tests, we found that placing the FILL TUBE in the center, rather than on an end, promoted faster refilling of the reservoirs.

This manual suits for next models

1

Other Gardeners Lawn And Garden Equipment manuals
Gardeners 8598597 User manual

Gardeners

Gardeners 8598597 User manual

Gardeners 8586718 User manual

Gardeners

Gardeners 8586718 User manual

Gardeners 8586770 User manual

Gardeners

Gardeners 8586770 User manual

Gardeners 8610923 User manual

Gardeners

Gardeners 8610923 User manual

Gardeners Harrod Storm-Proof Crop Cage, Large User manual

Gardeners

Gardeners Harrod Storm-Proof Crop Cage, Large User manual

Gardeners Plant-A-Bar User manual

Gardeners

Gardeners Plant-A-Bar User manual

Gardeners Galvanized Elevated Raised Bed User manual

Gardeners

Gardeners Galvanized Elevated Raised Bed User manual

Gardeners Snip-n-Drip User manual

Gardeners

Gardeners Snip-n-Drip User manual

Gardeners 8586751 User manual

Gardeners

Gardeners 8586751 User manual

Gardeners Insta brace 8599321 User manual

Gardeners

Gardeners Insta brace 8599321 User manual

Gardeners 34-051 User manual

Gardeners

Gardeners 34-051 User manual

Gardeners Cedar Stacking Garden User manual

Gardeners

Gardeners Cedar Stacking Garden User manual

Gardeners Kylemore 8592686 User manual

Gardeners

Gardeners Kylemore 8592686 User manual

Gardeners 8587631 User manual

Gardeners

Gardeners 8587631 User manual

Gardeners 8613058 User manual

Gardeners

Gardeners 8613058 User manual

Gardeners 8600288 User manual

Gardeners

Gardeners 8600288 User manual
Gardeners Oxford Arch User manual

Gardeners

Gardeners Oxford Arch User manual

Gardeners Tweet Bathe Twin Brid User manual

Gardeners

Gardeners Tweet Bathe Twin Brid User manual

Gardeners Victory User manual

Gardeners

Gardeners Victory User manual

Gardeners Titan Squash Tunnel User manual
Gardeners

Gardeners Titan Squash Tunnel User manual

Gardeners 8597991 User manual

Gardeners

Gardeners 8597991 User manual

Gardeners Oxford Arch User manual

Gardeners

Gardeners Oxford Arch User manual

Gardeners Randolph User manual

Gardeners

Gardeners Randolph User manual

Gardeners Square Galvanized Elevated Raised Bed User manual
Gardeners

Gardeners Square Galvanized Elevated Raised Bed User manual

Popular Lawn And Garden Equipment manuals by other brands

Westfalia 82 72 70 instruction manual

Westfalia

Westfalia 82 72 70 instruction manual

Echo HC-245 Operator's manual

Echo

Echo HC-245 Operator's manual

Costway GT3434 user manual

Costway

Costway GT3434 user manual

Makita UV3200 Original instruction manual

Makita

Makita UV3200 Original instruction manual

Lifetime 60280 Assembly instructions

Lifetime

Lifetime 60280 Assembly instructions

Sunnydaze Decor LAM-474 Assembly instructions

Sunnydaze Decor

Sunnydaze Decor LAM-474 Assembly instructions

AL-KO HW 601 manual

AL-KO

AL-KO HW 601 manual

Makita EY403MP instruction manual

Makita

Makita EY403MP instruction manual

Kasco Robust-Aire RA1-PM owner's manual

Kasco

Kasco Robust-Aire RA1-PM owner's manual

Ecotechnics CoolShade 120mm x 400mm Information sheet

Ecotechnics

Ecotechnics CoolShade 120mm x 400mm Information sheet

Gloria Gardenboy PLUS operating instructions

Gloria

Gloria Gardenboy PLUS operating instructions

Oase Aquamax Gravity Eco 10000 operating instructions

Oase

Oase Aquamax Gravity Eco 10000 operating instructions

Billy Goat OS900SPS owner's manual

Billy Goat

Billy Goat OS900SPS owner's manual

EasyPro BD1 installation instructions

EasyPro

EasyPro BD1 installation instructions

AQUA FLOW PNRAD instructions

AQUA FLOW

AQUA FLOW PNRAD instructions

Remington RM4625 Operator's manual

Remington

Remington RM4625 Operator's manual

Sabo 38-EV Operator's manual

Sabo

Sabo 38-EV Operator's manual

Cardigo 26102 instruction manual

Cardigo

Cardigo 26102 instruction manual

manuals.online logo
manuals.online logoBrands
  • About & Mission
  • Contact us
  • Privacy Policy
  • Terms and Conditions

Copyright 2025 Manuals.Online. All Rights Reserved.