
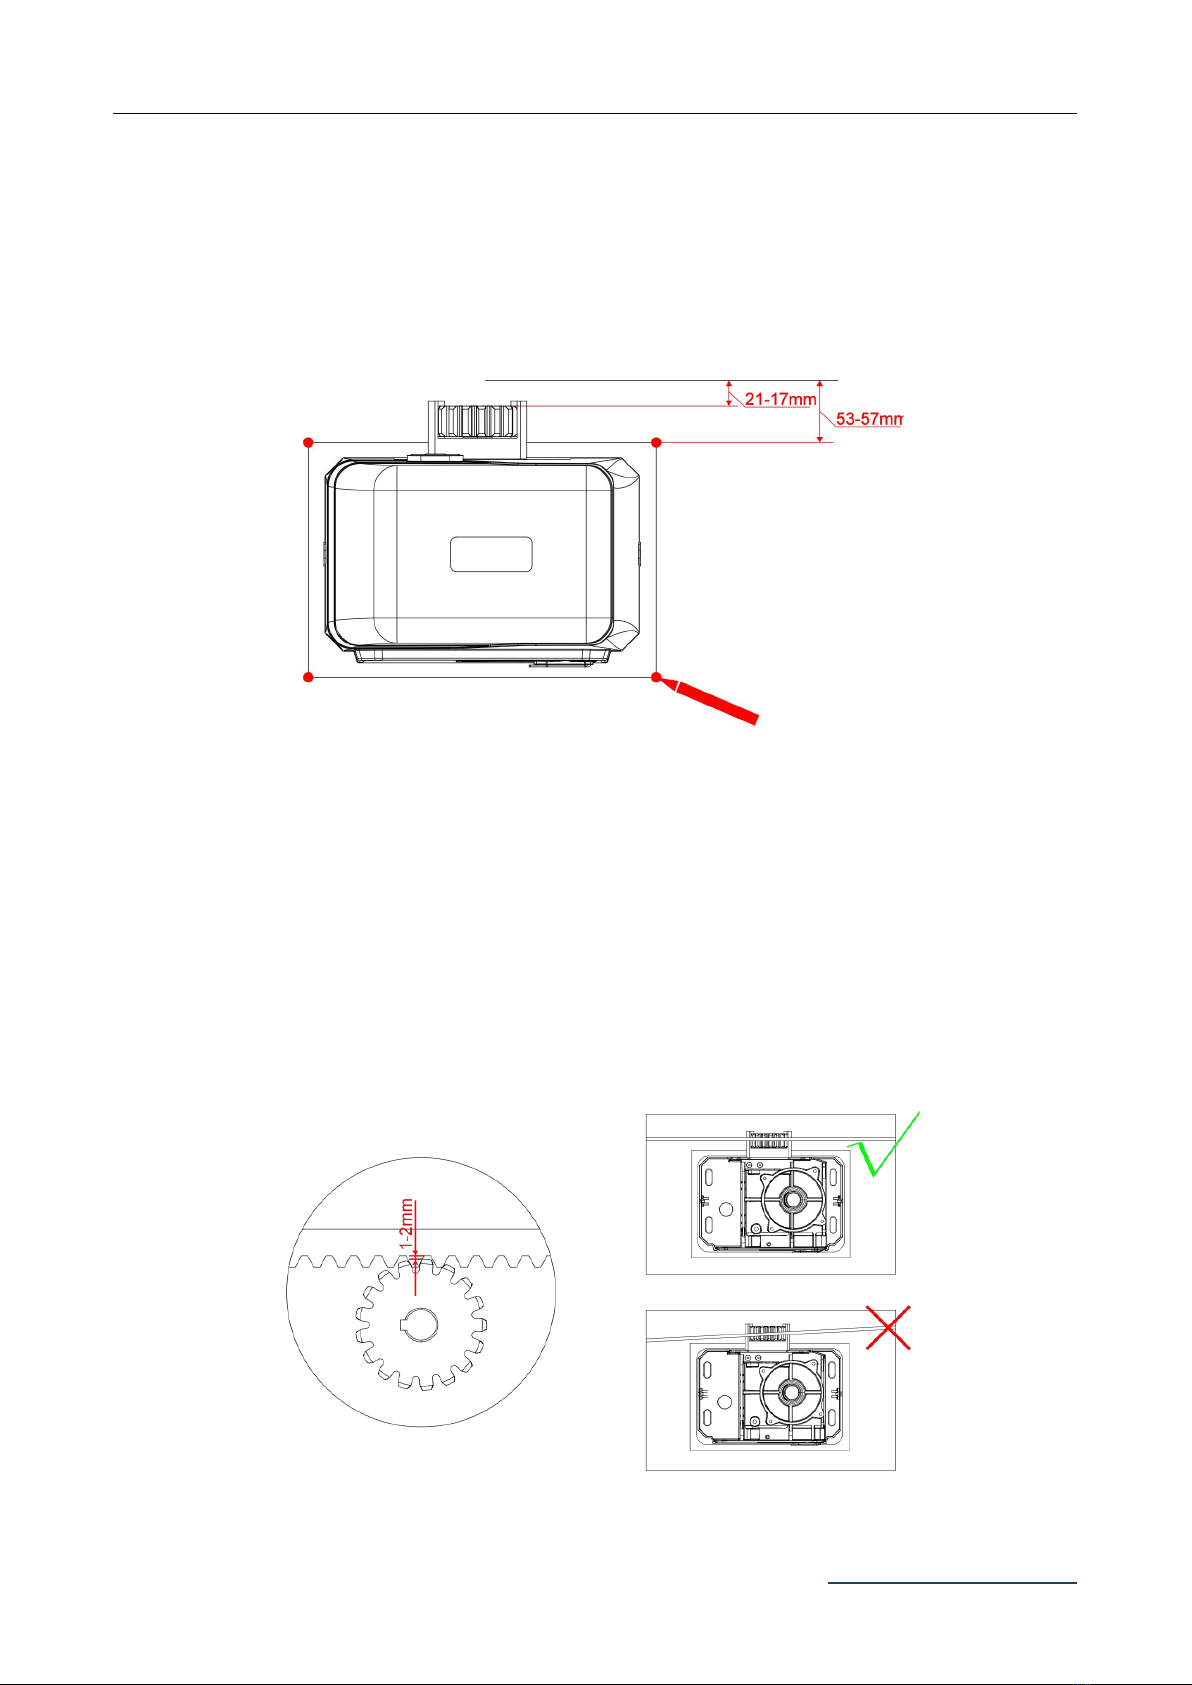
Instructions for GT1000DC
www.gatexpertstore.com
Safety Instruction
Warning: Incorrect or improper use of this product can cause damage to persons, animals or
properties.
·Please ensure that the input voltage used matches with the supply voltage of gate opener.
·All modifications to wiring or electrics, and any adjustment or maintenance to input voltage
must be done by a qualified electrician.
·All potential hazards and exposed pinch points of the gate must be eliminated or guarded prior
to installation of this gate opener.
·Never mount any device that operates the gate opener where the user can reach over (under,
around or through) the gate to operate the controls. These must be placed away from any
moving range of the moving gate.
·Ensure power plug is disconnected from the power socket during installation or maintenance.
·Keep remote control and other control devices out of children’s reach, in order to avoid
unintentional activation.
·To ensure safety, before installing the motor, mount a Gate End Catch and a Gate Stop at each
end of the rail to prevent the gate travelling off the track.
·If required, install infrared photocell to detect obstructions and prevent injury to person or
damage to property.
·Instruct all users about the control systems provided and the manual opening operation in case
of emergency.
·Ensure that the power cable is connected to a RCD protected weatherproof power outlet
installed by a qualified electrician.
·Do not install this product in an explosive atmosphere or where there is any danger of flooding.
·This product was exclusively designed and manufactured for the use specified in the present
documentation. Any other use not specified in this documentation could damage the product
and be dangerous.
·Only use original parts for any maintenance or repair operation. Our company declines all
responsibility with respect to the automation safety and correct operation when other supplier’s
components are used.
·Do not modify the automation components, unless explicitly authorized by our company.
·The user must avoid any attempt to carry out any works or repairs on this product, and should
always request the assistance of qualified personnel.
·This product is suitable for use on one sliding gate only.
·Anything which is not expressly provided for in these instructions is not allowed and will void
warranty.
·Dispose of all packing materials (plastic, cardboard, polystyrene etc.) according to current
guidelines. Keep plastic bags and polystyrene out of children’s reach.
·Save these instructions for future use.


 user manual")


