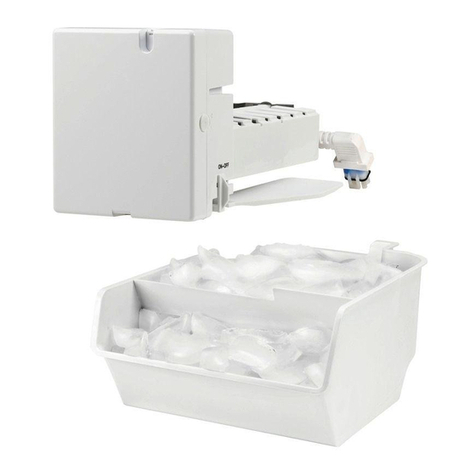
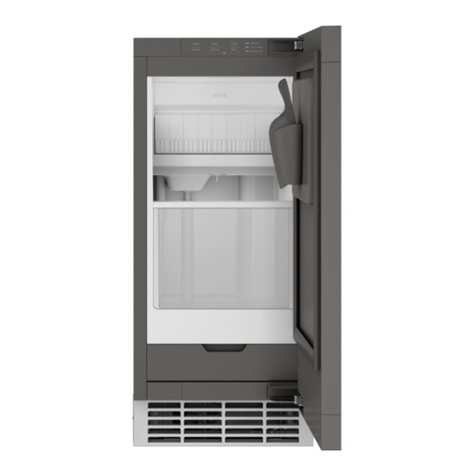
GE IM-6D Original instructions

Which instructions
should you follow?
Look for a label on the back
of the refrigerator that will
tell you which instructions
to use:
LMNQRST U
Vor W
ENGLISH/FRANÇAIS/
ESPAÑOL
245D1617P001 49-60704-2 08-17 GEA
OWNER’S MANUAL &
INSTALLATION
INSTRUCTIONS
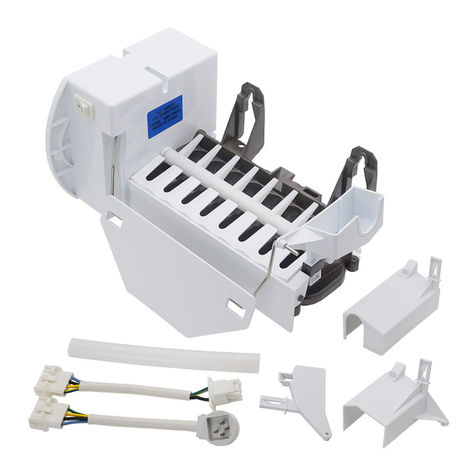
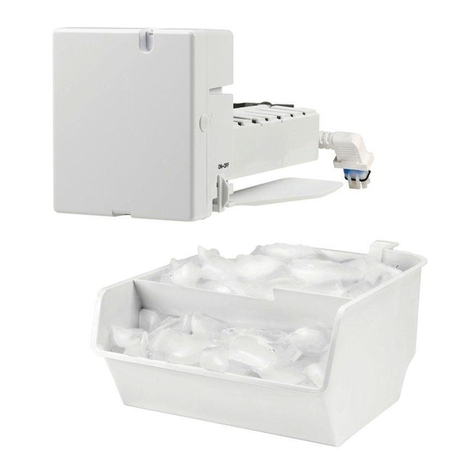
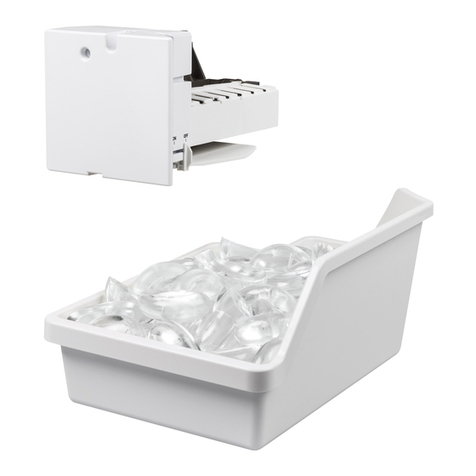
ICEMAKER ACCESSORY KIT
IM-6D
GE is a trademark of the General Electric Company. Manufactured under trademark license.
SAFETY INFORMATION .........3
USING THE ICEMAKER
Automatic Icemaker....................4
Preparing for Vacation .................4
Setting the icemaker to OFF ............4
Normal sounds you may hear. . . . . . . . . . . .4
INSTALLATION
INSTRUCTIONS .................5
Parts List .............................6
Removing Existing
Ice Cube Tray Holder...................8
Repositioning or Removing
the Freezer Shelf ......................9
Icemaker L.........................10
Icemaker M.........................14
Icemaker N.........................18
Icemaker Q.........................22
Icemaker R........................ 26
Icemaker S........................ 30
Icemaker T........................ 34
Icemaker U, Vor W................38
Cold Water Line ..................... 43
Fill Tube Templates .................. 47
TROUBLESHOOTING........... 48
WARRANTY .......................51
CONSUMER SUPPORT ..........52

249-60704-2
THANK YOU FOR MAKING GE APPLIANCES A PART OF YOUR HOME.
Whether you grew up with GE Appliances, or this is your first, we’re happy to have you in the family.
We take pride in the craftsmanship, innovation and design that goes into every
GE Appliances product, and we think you will too.

49-60704-2 3
STATE OF CALIFORNIA PROPOSITION 65 WARNINGS
WARNING This product contains one or more chemicals known to the State of California to cause
cancer and birth defects or other reproductive harm.
WARNING To reduce the risk of fire, explosion, electric shock, or injury when using your
refrigerator, follow these basic safety precautions:
Ŷ5HDGWKHIXOO6DIHW\,QIRUPDWLRQDQG,QVWUXFWLRQV
of your refrigerator before installing or operating
the icemaker.
Ŷ8QSOXJWKHUHIULJHUDWRUEHIRUHEHJLQQLQJWKH
installation of this icemaker accessory kit.
Ŷ:KHQPRYLQJWKHUHIULJHUDWRUDZD\IURPWKH
wall, be careful not to roll over or damage the
power cord.
Ŷ5HSODFHDOOSDUWVDQGSDQHOVRIWKHUHIULJHUDWRU
before operating.
Ŷ&RQQHFWWRSRWDEOHZDWHUVXSSO\RQO\
CAUTION
Avoid contact with the moving parts of the icemaker ejector mechanism, or with the heating element
that releases the cubes, located on the bottom of the icemaker. Do not place fingers or hands on the
automatic icemaker while the refrigerator is plugged in.
SAFETY INFORMATION
READ AND SAVE THESE INSTRUCTIONS
IMPORTANT SAFETY INFORMATION
READ ALL INSTRUCTIONS BEFORE INSTALLING THE
ICEMAKER OR ACCESSORIES

449-60704-2
The icemaker will produce seven cubes per cycle-
approximately 100-130 cubes in a 24-hour period,
depending on freezer compartment temperature, room
temperature, number of door openings and other use
conditions.
,IWKHUHIULJHUDWRULVRSHUDWHGEHIRUHWKHZDWHUFRQQHFWLRQ
is made to the icemaker, set the power switch to OFF.
When the refrigerator has been connected to the water
supply, set the power switch to ON.
The icemaker will fill with water when it cools to freezing.
A newly-installed refrigerator may take 12 to 24 hours to
begin making ice cubes.
You will hear a buzzing sound each time the icemaker
fills with water.
Throw away the first few batches of ice to allow the
water line to clear.
Be sure nothing interferes with the sweep of the feeler
arm.
When the bin fills to the level of the feeler arm, the
icemaker will stop producing ice.
,WLVQRUPDOIRUVHYHUDOFXEHVWREHMRLQHGWRJHWKHU
,ILFHLVQRWXVHGIUHTXHQWO\ROGLFHFXEHVZLOOEHFRPH
cloudy, taste stale and shrink.
Automatic Icemaker
USING THE ICEMAKER
A newly-installed refrigerator may take 12 to 24 hours to begin making ice.
,FHPDNHU
Feeler Arm
Power
Switch
Preparing for Vacation
Set the icemaker power switch to OFF and shut off the
water supply to the refrigerator.
,IWKHWHPSHUDWXUHFDQGURSEHORZIUHH]LQJKDYHD
TXDOLILHGVHUYLFHUGUDLQWKHZDWHUVXSSO\V\VWHPRQ
some models) to prevent serious property damage due
to flooding.
When you should set the icemaker power switch to OFF
Ŷ:KHQWKHLFHVWRUDJHELQLVUHPRYHGIRUPRUHWKDQD
minute or two.
Ŷ:KHQWKHZDWHUVXSSO\ZLOOEHVKXWRIIIRUVHYHUDO
hours.
Ŷ:KHQWKHUHIULJHUDWRUZLOOQRWEHXVHGIRUVHYHUDO
days.
Normal sounds you may hear
Ŷ7KHLFHPDNHUZDWHUYDOYHZLOOEX]]ZKHQWKH
LFHPDNHUILOOVZLWKZDWHU,IWKHSRZHUVZLWFKLVLQWKH
ON position, it will buzz even if it has not yet been
hooked up to water. Keeping the power switch in
the ON position before it is hooked up to water can
damage the icemaker. To prevent this, move the
power switch to the OFF position. This will stop the
buzzing.
Ŷ7KHVRXQGRIFXEHVGURSSLQJLQWRWKHELQDQGZDWHU
running in the pipes as the icemaker refills.
49-60704-2 5
BEFORE YOU BEGIN
Read these instructions completely and carefully.
• IMPORTANT – Save these instructions for
local inspector’s use.
• IMPORTANT – Observe all governing codes
and ordinances.
• Note to Installer – Be sure to leave these
instructions with the Consumer.
• Note to Consumer – Keep these instructions
for future reference.
• Skill level±,QVWDOODWLRQRIWKLVDSSOLDQFHUHTXLUHV
basic mechanical skills.
• Completion time – 20–60 minutes
• Proper installation is the responsibility of the
installer.
• Product failure due to improper installation is not
covered under the Warranty.
,I\RXKDYHTXHVWLRQVFDOO*($SSOLDQFHVDW1.800.GE.CARES or visit our Website at:
GEAppliances.com.,Q&DQDGDFDOO1.800.561.3344 or visit our Website at: www.geappliances.ca
Installation
Instructions IM-6D Icemaker Kit
ARE YOU REPLACING AN
ICEMAKER WITH THIS KIT?
,W¶VLPSRUWDQWWKDW\RXXVHWKHZDWHUYDOYHDQGILOO
tube assembly that come with this kit, even though
your refrigerator may already have them installed.
The old valve will not allow enough water through to
fill the icemaker properly and will cause damage.
DAMAGE – SHIPMENT/
INSTALLATION
Ɣ,IWKHXQLWLVGDPDJHGLQVKLSPHQWUHWXUQWKHXQLW
to the store in which it was bought for repair or
replacement.
Ɣ,IWKHXQLWLVGDPDJHGE\WKHFXVWRPHUUHSDLURU
replacement is the responsibility of the customer.
Ɣ,IWKHXQLWLVGDPDJHGE\WKHLQVWDOOHULIRWKHUWKDQ
the customer), repair or replacement must be made
by arrangement between customer and installer.
WHICH INSTRUCTIONS SHOULD
YOU FOLLOW?
There is a label on the back of the refrigerator that
ZLOOWHOO\RXZKHWKHUWRXVH,QVWUXFWLRQV
L M N Q R S T U V or W
Pages 8–44FRQWDLQIRXUWHHQGLIIHUHQW,QVWDOODWLRQ
,QVWUXFWLRQV
The actual installation of the icemaker will depend on
which model refrigerator you have.
INSTALLATION INSTRUCTIONS

649-60704-2
Installation Instructions
CONTENTS OF KIT
*NOTE: Screw lengths are the lengths of the threaded portion of the screw, not including the head.
INSTALLATION INSTRUCTIONS
,QVWDOODWLRQ,QVWUXFWLRQV
2
Hex-Head Screw for
:DWHU/LQH&ODPS´
7
Water Valve and
Tube Assembly
4
3Hose Clamp
EODFN
6Hose Clamp
QRWEODFN
Adhesive-Backed
Water Line Fasteners
5
,FH%XFNHW
9
,FH%XFNHW
8
11
20
21
22
12
Water Line Clamp
VWUDLQUHOLHI
17
16 Phillips Head Screws,
IRUPRXQWLQJLFHPDNHU´
Fill Tube Extension
2'>PP@
10
Fill Tube Assy
19
13 ,FHPDNHU)LOO&XS
VLGHPRXQWHG
14
Short Fill Tube
$VVHPEO\a´
:DWHU7XEH,QOHW
Plug Button
Bracket Extension
Long Fill Tube
$VVHPEO\a´
,FHPDNHU
$SSHDUDQFHPD\YDU\
1
,QVWDOODWLRQ
,QVWUXFWLRQV
,FHPDNHU)LOO&XS
HQGPRXQWHG±
ORQJ
Hex-Head Screw, for
attaching water valve
´
15
Warranty Label
18
ICEMAKER
WARRANTY VERIFICATION
Date Installed
Dealer
23 Hex-Head Screws, for
EUDFNHWH[WHQVLRQ
´

49-60704-2 7
INSTALLATION INSTRUCTIONS
Installation Instructions
Parts List 8VHZLWK,QVWDOODWLRQ,QVWUXFWLRQV
LM NQRSTUVW
1 ,FHPDNHU XX XX X XXX XX
2 ,QVWDOODWLRQ,QVWUXFWLRQV XX XX X XXX XX
3 +RVH&ODPSEODFN XXXXX XXX
4 Water Valve and Tube Assembly* X X X X X X X X X X
5
Adhesive-Backed Water Line Fasteners
XX XX X XXX XX
6 +RVH&ODPSQRWEODFN XX
7
Hex-Head Screw for Water Line Clamp
XX XX X XXX XX
8 ,FH%XFNHW XX XX
9 ,FH%XFNHW XX XX
10 )LOO7XEH([WHQVLRQ2' X
11 6KRUW)LOO7XEH$VV\a´ XXX
12 /RQJ)LOO7XEH$VV\a´ XXX
13 ,FHPDNHU)LOO&XSVLGHPRXQWHG XX XXX X X X
14 ,FHPDNHU)LOO&XSHQGPRXQWHG X
15 Hex-Head Screw X X X X X X X X X X
16 3KLOOLSV+HDG6FUHZ XX XX X XXX XX
17 :DWHU/LQH&ODPSVWUDLQUHOLHI XX XX X XXX XX
18 Warranty Label X X X X X X X X X X
19 Fill Tube Assy X X X X
20 :DWHU7XEH,QOHW XXX XX
21 Plug Button X X X X
22 Bracket Valve Adapter X X
23 Hex-Head Screw X X
* Always change the water valve when replacing an icemaker that
makes round cubes. This new icemaker uses a different voltage
which may cause the old valve to fail. For dispenser models, order
GE Appliances Part Number WR57X96.

849-60704-2
REMOVE EXISTING ICE TRAY HOLDER
Follow the instructions below for the ice tray holder that looks like yours.
Type 1
• Unhook the ice tray holder side and bottom from
the retaining hooks. Lower the holder until the side
is clear of the freezer shelf and remove it from the
freezer. You will not need this part.
Retaining hooks
Type 2
• As you lift the tab on the left side in the holder with
the blade of a screwdriver, pull the holder forward
and out. You will not need this part.
Do not
lift here
Lift this
tab out
Type 3
• Remove the 2 screws and save them for installation
of the icemaker.
• Lift the ice tray holder off the plastic hook. You will
not need this part.
Screws
Plastic hook
Type 4
5HPRYHWKHVFUHZZLWKDQXWGULYHU
• Pull the ice tray shelf away from the wall. Remove
the shelf. You will not need this part.
• Replace the screw.
Screw
Installation Instructions
INSTALLATION INSTRUCTIONS

49-60704-2 9
INSTALLATION INSTRUCTIONS
Installation Instructions
REPOSITION OR REMOVE FREEZER SHELVES
On some models, you may need to remove or reposition the freezer shelf so the icemaker and bucket sit properly.
Follow the instructions below for the ice tray holder that looks like yours.
Type 1
• To reposition the two-piece shelf supports, slide
the shelf up off the base mount.
Base
mount
Shelf
support
Type 2
• On some bottom-mount no-frost refrigerators, you
need to remove a full width flat freezer shelf before
installing the icemaker.

10 49-60704-2
Flat blade and Phillips
screwdrivers Pliers Sharp knife
BEFORE YOU BEGIN
Read these instructions completely and carefully.
WARNING To reduce the risk of
electric shock or injury during installation,
you must first unplug the refrigerator
before proceeding.
TOOLS YOU WILL NEED
1REMOVE ICE CUBE TRAY SHELF
Ŷ Remove the two screws securing the ice cube tray
to the side wall of the freezer. Remove the tray.
Ŷ Replace the screws but do not screw them all the
way in. The screw heads should extend about
PPIURPWKHVLGHZDOORIWKHIUHH]HU
2PREPARE FOR INSTALLATION
Ŷ Remove and discard the large white plug from
the rear freezer wall.
Ŷ Remove the outlet cover with a flat-blade
screwdriver.
3INSTALL FILL TUBE EXTENSION
Ŷ 6OLGHWKHILOOWXEHH[WHQVLRQ
onto the fill tube against the
stop.
4SET POWER SWITCH TO OFF
Ŷ Set the icemaker power switch to OFF. Leave
the power switch in the OFF position until the
refrigerator is connected to the water supply to
prevent premature operation.
1XWGULYHU
Installation Instructions
ICEMAKER INSTALLATION INSTRUCTIONS L
INSTALLATION INSTRUCTIONS
$UHWKHVHWKHULJKWLQVWUXFWLRQVIRU\RXUPRGHO")ROORZWKH,QVWDOODWLRQ,QVWUXFWLRQVLQGLFDWHGE\WKHODEHORQWKHEDFN
of the refrigerator— L M N Q R S T U V or W
Remove
plug
10
Power
Switch
$SSHDUDQFHPD\YDU\

49-60704-2 11
INSTALLATION INSTRUCTIONS
Installation Instructions
5INSTALL THE ICEMAKER FILL CUP
Ŷ ,QVWDOOWKHLFHPDNHUILOOFXSVLGHPRXQWHG
into the icemaker as shown.
8INSTALL THE ICE BUCKET
Ŷ Put the ice bucket LQSODFHXQGHUWKH
icemaker.
Ŷ Make sure the icemaker
power switch is set to
OFF.
10 KEEP THIS MANUAL
Ŷ The warranty for the icemaker is printed in
this manual. Keep this manual with your
Refrigerator Owner’s Manual.
Ŷ The icemaker installation inside the freezer is now
complete. Continue to the Water Valve Assembly
section.
9ATTACH WARRANTY LABEL
Ŷ A labelLVSURYLGHGZLWKWKLVNLWWRUHFRUGWKH
date of installation for warranty purposes. Apply it
to the back of the refrigerator.
7MOUNT THE ICEMAKER
Ŷ /LIWWKHLFHPDNHUVRWKHILOOtube extension
fits in the fill cup opening&+DQJWKHLFHPDNHU
on the two mounting screws$
Make sure:
Ŷ The power cord is still firmly in the socket.
Ŷ 7KHILOOWXEHH[WHQVLRQLVVWLOOLQWKHILOOFXS
RSHQLQJ&KHFNWKHUHDURIWKHUHIULJHUDWRUWR
make sure the fill tube has not been pushed out of
the back of the refrigerator.)
Ŷ 7KHLFHPDNHUPRXQWLQJVFUHZVDUHORFDWHGLQWKH
uppermost position of the mounting slots.
THEN TIGHTEN THE
ICEMAKER MOUNTING
SCREWS SECURELY.
6PLUG IN THE ICEMAKER
Ŷ Holding the icemaker in place, insert the power
cord plug into the socket, making sure that the
prongs and holes are matched. Press the plug
firmly into the socket. Lock the plug in place by
clipping the restraints onto each side of the plug.
Make sure the restraints click into place.
13
10
C
A
9

12 49-60704-2
Installation Instructions
INSTALLATION INSTRUCTIONS
WATER VALVE ASSEMBLY INSTALLATION INSTRUCTIONS L
$UHWKHVHWKHULJKWLQVWUXFWLRQVIRU\RXUPRGHO")ROORZWKH,QVWDOODWLRQ,QVWUXFWLRQVLQGLFDWHGE\WKHODEHORQWKHEDFN
of the refrigerator— L M N Q R S T U V or W
Flat blade and Phillips
screwdrivers Pliers Sharp knife
BEFORE YOU BEGIN
Read these instructions completely and carefully.
WARNING To reduce the risk of
electric shock or injury during installation,
you must first unplug the refrigerator
before proceeding.
TOOLS YOU WILL NEED
1REMOVE THE COVER
Ŷ At the bottom rear of the refrigerator, remove the
VFUHZVKROGLQJWKHDFFHVVFRYHU
Ŷ Bend the cover back for access to the
compartment.
Ŷ Be sure to save the screws as the access cover
must be reinstalled later to ensure your refrigerator
will function properly.
2ATTACH THE WATER VALVE
Ŷ /RFDWHWKHIHPDOHFRQQHFWRUSOXJ&ZKLFKLV
attached to the cabinet by a metal or plastic clip.
Remove the clip by removing the screw.
Ŷ 3OXJWKHIHPDOHFRQQHFWRU&RQWRWKHPDOH
WHUPLQDOVRQWKHZDWHUYDOYH(LWKHUZLUHFDQ
go on either terminal.
Ŷ Fasten the water valve to the cabinet by driving
WKHKH[KHDGVFUHZIURPWKHNLWLQWRWKHKROH
in the cabinet leg.
DQG1XWGULYHU
C4
Metal or
plastic clip
C
15
WARNING To reduce the risk of death or
electric shock, you must follow these
instructions:
Ŷ Unplug the refrigerator before removing any
panels.
Ŷ Do not damage any wiring while the panel is
removed.
Ŷ Replace all parts and panels before plugging
the refrigerator back in.

49-60704-2 13
INSTALLATION INSTRUCTIONS
Installation Instructions
3INSTALL WATER LINE CLAMP
Ŷ Attach the metal water line clamp VWUDLQUHOLHI
WRWKHUHIULJHUDWRU'ULYHRQHRIWKHVFUHZV
removed in Step 1, into the cabinet edge through
the clamp and hole in compressor cover.
Ŷ 7KHPHWDOFODPSLVIRUWKHKRXVHZDWHUOLQHVHH
:DWHU/LQH,QVWDOODWLRQ,QVWUXFWLRQV,WLVQRWWREH
used for the tubing from the water valve up to the
icemaker.
5ROUTE AND ATTACH THE
PLASTIC WATER LINE
Ŷ Route the plastic water line along the back of the
refrigerator to the water tube inlet.
Ŷ 8VHWKHWKUHHDGKHVLYHEDFNHGIDVWHQHUVWR
secure the plastic water line to the case back.
6WATER VALVE INSTALLED
Ŷ 5HIHUWRWKH:DWHU/LQH,QVWDOODWLRQ,QVWUXFWLRQVIRU
connection to the home water supply. After water
line installation is completed, set the icemaker
power switch to ON.
Ŷ The icemaking cycle will not begin until the
icemaker and freezer compartment reach
operating temperature, then icemaking will
begin automatically.
4CONNECT THE WATER LINE
Ŷ 5HPRYHWKHVPDOOSODVWLFFDS%IURPWKHERWWRP
of the water tube inlet located in the upper-right
rear corner of the refrigerator.
Ŷ 6TXHH]HWKHHQGVRIWKHKRVHFODPSIURPWKH
kit with pliers and slide the clamp over the water
tube inlet.
Ŷ :KLOHVWLOOVTXHH]LQJWKHFODPSLQVHUWWKH
plastic water line into the inlet as far as it will go
DSSUR[LPDWHO\>PP@
Ŷ Then slide the clamp downward to capture the
plastic water line in place.
17
Screw
6
Water tube
inlet
B
Adhesive-backed
fasteners for
plastic water line
7REINSTALL THE COVER
Ŷ Reinstall the compressor compartment access
FRYHU7KLVUHTXLUHVXVLQJWKHVFUHZV\RX
removed previously to reattach the cover to
the back of the refrigerator case. This must be
reinstalled for your refrigerator to function properly.
WARNING ELECTRIC SHOCK
HAZARD
Attach tubing clamp using existing hole only. DO
NOT drill into the refrigerator.

14 49-60704-2
BEFORE YOU BEGIN
Read these instructions completely and carefully.
WARNING To reduce the risk of
electric shock or injury during installation,
you must first unplug the refrigerator
before proceeding.
TOOLS YOU WILL NEED
3INSTALL FILL TUBE
Ŷ ,IWKHUHIULJHUDWRUDOUHDG\KDVDZDWHUWXEHLQOHW
on the back of the refrigerator, use a flat-blade
screwdriver to gently remove it. The removed
plastic elbow and gasket can be discarded.
Ŷ Remove and discard the white plug
from the upper left corner of the
freezer wall.
Ŷ Open the fresh food door and locate
the label in the upper left corner of
the compartment.
Ŷ Find the model number in bold listed under
MODEL NO.
Ŷ Match the two digit number in the model number
to the table below. NOTE: The desired number
starts at the fourth character.
Ŷ Go to the back of the refrigerator. Find the small
label in the upper right hand corner and peel it off.
7KHUHLVDQDGKHVLYHEDFNLQJRQWKHILOOWXEHRU
12). Remove the adhesive backing and slide the
tube into the hole near the top at the back of the
refrigerator. Firmly press on the inlet to secure it to
the refrigerator.
Installation Instructions
ICEMAKER INSTALLATION INSTRUCTIONS M
INSTALLATION INSTRUCTIONS
$UHWKHVHWKHULJKWLQVWUXFWLRQVIRU\RXUPRGHO")ROORZWKH,QVWDOODWLRQ,QVWUXFWLRQVLQGLFDWHGE\WKHODEHORQWKHEDFN
of the refrigerator— L M N Q R S T U V or W
Flat blade and Phillips
screwdrivers Pliers Sharp knife
1REMOVE THE COVER
Ŷ Remove the outlet
cover with a flat-blade
screwdriver.
2PREPARE FOR INSTALLATION
Ŷ ,QVLGHWKHIUHH]HUORRVHQWKHWZRmounting
screws%EXWGRQRWVFUHZWKHPDOOWKHZD\RXW
,I\RXUPRGHOGRHVQRWKDYHWKHVFUHZVDOUHDG\LQ
the freezer wall, look for two plug buttons. Remove
the plug buttons and insert the two Phillips
head screws 7KHVFUHZVVKRXOGH[WHQG
DSSUR[LPDWHO\PPRXWIURPWKHIUHH]HU
wall.
B
Remove
plug
GENERAL ELECTRIC COMPANY
APPLIANCE PARK LOUISVILLE, KY 40225
www.GEAppliances.com
LISTED HOSEHOLD REFRIGERATOR/FREEZER
SERIAL NO.
182A
MODEL NO.
FZ743041GTH18GBDCRWW
IIIIIIIIIIIIIIIIIIIIIIIIIIIIIIIIIIIIIIIIIIIIIIIIIIIIIIIIIIIIIIIIIIIIII
IIIIIIIIIIIIIIIIIIIIIIIIIIIIIIIIIIIIIIIIIIIIIIIIIIIIIIIIIIIIIIIIIIIIIIIIIIIIII
IIIIIIIIIIIIIIIIIIIIIIIIIIIIIIIIIIIIIIIIIIIIIIIIIIIIIIIIIIIIIIIIIIIIIIII
IIIIIIIIIIIIIIIIIIIIIIIIIIIIIIIIIIIIIIIIIIIIIIIIIIIIIIIIIIIIIII
IIIIIIIIIII
IIIIIIII
IIIIII
Model
Number Fill
Tube
16 #
17 #
18 #
11
11
12
Model Number
11 or 12

49-60704-2 15
INSTALLATION INSTRUCTIONS
Installation Instructions
5INSTALL THE ICEMAKER FILL CUP
Ŷ ,QVWDOOWKH icemaker fill cup VLGHPRXQWHG
into the icemaker as shown.
8INSTALL THE ICE BUCKET
Ŷ Put the ice bucket
LQSODFHXQGHUWKH
icemaker.
Ŷ Make sure the icemaker
power switch is set to
OFF.
10 KEEP THIS MANUAL
Ŷ The warranty for the icemaker is printed in
this manual. Keep this manual with your
Refrigerator Owner’s Manual.
Ŷ The icemaker installation inside the freezer is now
complete. Continue to the Water Valve Assembly
section.
9ATTACH WARRANTY LABEL
Ŷ A labelLVSURYLGHGZLWKWKLVNLWWRUHFRUGWKH
date of installation for warranty purposes. Apply it
to the back of the refrigerator.
7MOUNT THE ICEMAKER
Ŷ /LIWWKHLFHPDNHUVRWKH fill tube RUILWV
in the fill cup opening'+DQJWKHLFHPDNHURQ
the two screws.
Make sure:
Ŷ The power cord is still firmly in the socket.
Ŷ 7KHfill tubeRUH[WHQGVLQWRWKHILOOFXS
RSHQLQJDWWKHEDFNRIWKHLFHPDNHU&KHFN
the rear of the refrigerator to make sure the fill
tube has not been pushed out of the back of the
refrigerator).
Ŷ 7KHLFHPDNHUPRXQWLQJVFUHZVDUHORFDWHGLQWKH
uppermost position of the mounting slots.
THEN TIGHTEN THE ICEMAKER MOUNTING
SCREWS SECURELY.
6PLUG IN THE ICEMAKER
Ŷ Holding the icemaker in place, insert the power
cord plug into the socket on the side wall, making
sure that the prongs and holes are matched. Press
the plug firmly into the socket. Lock the plug in
place by clipping the restraints onto each side of
the plug. Make sure the restraints click into place.
13
9
4SET POWER SWITCH TO OFF
Ŷ Set the icemaker power switch to OFF. Leave
the power switch in the OFF position until the
refrigerator is connected to the water supply to
prevent premature operation.
Power
Switch
$SSHDUDQFHPD\YDU\
11 12
D
or

16 49-60704-2
Installation Instructions
INSTALLATION INSTRUCTIONS
WATER VALVE ASSEMBLY INSTALLATION INSTRUCTIONS M
$UHWKHVHWKHULJKWLQVWUXFWLRQVIRU\RXUPRGHO")ROORZWKH,QVWDOODWLRQ,QVWUXFWLRQVLQGLFDWHGE\WKHODEHORQWKHEDFN
of the refrigerator— L M N Q R S T U V or W
Flat blade and Phillips
screwdrivers Pliers Sharp knife
BEFORE YOU BEGIN
Read these instructions completely and carefully.
WARNING To reduce the risk of
electric shock or injury during installation,
you must first unplug the refrigerator
before proceeding.
TOOLS YOU WILL NEED
1REMOVE THE COVER
Ŷ 8VHDQXWGULYHURUDQDGMXVWDEOHZUHQFK
to remove the compressor compartment access
FRYHU7KLVUHTXLUHVUHPRYLQJVL[VFUHZVZKLFK
attach the cover to the back of the refrigerator
case.
Ŷ Be sure to save the screws as the access cover
must be reinstalled later to ensure your refrigerator
will function properly.
2ATTACH THE WATER VALVE
Ŷ Locate the female connector plug. Plug the female
connector &RQWRWKHPDOHWHUPLQDOVRQWKH
water valve(LWKHUZLUHFDQJRRQHLWKHU
terminal.
Ŷ Fasten the water valve to the cabinet by driving
the hex-head screwIURPWKHNLWLQWRWKHKROH
in the cabinet leg.
DQG1XWGULYHU
C4
15
WARNING To reduce the risk of death or
electric shock, you must follow these
instructions:
Ŷ Unplug the refrigerator before removing any
panels.
Ŷ Do not damage any wiring while the panel is
removed.
Ŷ Replace all parts and panels before plugging
the refrigerator back in.

49-60704-2 17
INSTALLATION INSTRUCTIONS
Installation Instructions
3INSTALL WATER LINE CLAMP
Ŷ Attach the metal water line clampVWUDLQUHOLHI
WRWKHUHIULJHUDWRU'ULYHWKHscrewIURP
the kit through the clampDWWKHLQGHQWLQWR
the back of the cabinet.
Ŷ 7KHPHWDOFODPSLVIRUWKHKRXVHZDWHUOLQHVHH
WKH:DWHU/LQH,QVWDOODWLRQ,QVWUXFWLRQV,WLVQRWWR
be used for the tubing from the water valve up to
the icemaker.
5ROUTE AND ATTACH THE
PLASTIC WATER LINE
Ŷ Fasten the plastic water line to the back of the
cabinet with adhesive-backed fasteners
spacing the fasteners as shown to take up slack in
the line.
6WATER VALVE INSTALLED
Ŷ 5HIHUWRWKH:DWHU/LQH,QVWDOODWLRQ,QVWUXFWLRQVIRU
connection to the home water supply. After water
line installation is completed, set the icemaker
power switch to ON.
Ŷ The icemaking cycle will not begin until the
icemaker and freezer compartment reach
operating temperature, then icemaking will
begin automatically.
4CONNECT THE WATER LINE
Ŷ Make sure there is enough plastic water line to
extend from the water valve to well into the water
tube inlet RU&XWRIIDQ\H[FHVVWXELQJ
Ŷ 6TXHH]HWKHHQGVRIWKHhose clampIURPWKH
kit with pliers and slide the clamp over the water
tube inlet.
Ŷ :KLOHVWLOOVTXHH]LQJWKHFODPSLQVHUWWKH
plastic water line into the inlet as far as it will go
DSSUR[LPDWHO\>PP@
Ŷ Then slide the clamp downward to capture the
plastic water line in place.
7REINSTALL THE COVER
Ŷ Reinstall the compressor compartment access
FRYHU7KLVUHTXLUHVXVLQJWKHVFUHZV\RX
removed previously to reattach the cover to
the back of the refrigerator case. This must be
reinstalled for your refrigerator to function properly.
7
17
3
Water tube
inlet
Adhesive-backed fasteners
for plastic water line
WARNING ELECTRIC SHOCK
HAZARD
Attach tubing clamp using existing hole only. DO
NOT drill into the refrigerator.

18 49-60704-2
Installation Instructions
INSTALLATION INSTRUCTIONS
BEFORE YOU BEGIN
Read these instructions completely and carefully.
WARNING To reduce the risk of
electric shock or injury during installation,
you must first unplug the refrigerator
before proceeding.
TOOLS YOU WILL NEED
ICEMAKER INSTALLATION INSTRUCTIONS N
$UHWKHVHWKHULJKWLQVWUXFWLRQVIRU\RXUPRGHO")ROORZWKH,QVWDOODWLRQ,QVWUXFWLRQVLQGLFDWHGE\WKHODEHORQWKHEDFN
of the refrigerator— L M N Q R S T U V or W
Flat blade and Phillips
screwdrivers Pliers Sharp knife
1REMOVE ICE CUBE TRAY SHELF
Ŷ Remove the two screws securing the ice cube tray
to the side wall of the freezer. Remove the tray.
Ŷ There are two white plug buttons above the screw
holes. Remove these plug buttons and install them
in the two screw holes that were used to hold the
ice cube tray shelf.
Ŷ ,QVWDOOtwo Phillips head screwsLQWKHKROHV
that the plug buttons were in, but do not screw
them all the way in. The screw heads should
H[WHQGDERXWPPIURPWKHVLGHZDOORI
the freezer.
2PREPARE FOR INSTALLATION
Ŷ Remove and discard the large white plug from the
rear freezer wall. Pull out the gray insulation plug
and remove any debris.
Ŷ Remove the outlet cover with a flat-blade
screwdriver..
3INSTALL FILL TUBE
Ŷ Cut the fill tube WRWKH N length
UHIHUWRWKH N template on page 47) with a sharp
knife or a single-edge razor blade.
Ŷ 6OLGHWKHILOOWXEHZLWKIRLORQWRWKHZDWHUWXEH
LQOHW
Ŷ Go to the back of the refrigerator.
On the tube side of the water
tube inletWKHUHLVDQ
adhesive backing. Remove the
adhesive backing and slide the
tube into the hole near the top
at the back of the refrigerator.
Firmly press on the inlet to
secure it to the refrigerator.
Plug
Buttons
16
20
19
4SET POWER SWITCH TO OFF
Ŷ Set the icemaker power switch to OFF. Leave
the power switch in the OFF position until the
refrigerator is connected to the water supply to
prevent premature operation.
Power
Switch
$SSHDUDQFHPD\YDU\

49-60704-2 19
INSTALLATION INSTRUCTIONS
Installation Instructions
5INSTALL THE ICEMAKER FILL CUP
Ŷ ,QVWDOOWKHicemaker fill cupVLGHPRXQWHG
into the icemaker as shown.
7MOUNT THE ICEMAKER
Ŷ /LIWWKHLFHPDNHUVRWKH fill tubeJRHVLQWRWKH
fill cup opening +DQJWKHLFHPDNHURQWKH
WZRVFUHZV
Make sure:
Ŷ The power cord is still firmly in the socket.
Ŷ 7KHfill tubeH[WHQGVLQWRWKHILOOFXSRSHQLQJ
DWWKHEDFNRIWKHLFHPDNHU&KHFNWKHUHDURIWKH
refrigerator to make sure the fill tube has not been
pushed out of the back of the refrigerator).
THEN TIGHTEN THE ICEMAKER MOUNTING
SCREWS SECURELY.
6PLUG IN THE ICEMAKER
Ŷ Holding the icemaker in place, insert the icemaker
power cord plug'LQWRWKHVRFNHWRQWKH
rear wall, making sure the prongs and holes are
matched. Press the plug firmly into the socket.
Lock the plug in place by clipping the restraints
onto each side of the plug. Make sure the
restraints click into place.
8INSTALL THE ICE BUCKET
Ŷ Place the ice bucket XQGHUWKHLFHPDNHU
Ŷ 0DNHVXUHWKHLFHPDNHUSRZHUVZLWFKLVVHWWR
OFF.
13
D
19
13
9
10 KEEP THIS MANUAL
Ŷ The warranty for the icemaker is printed in
this manual. Keep this manual with your
Refrigerator Owner’s Manual.
Ŷ The icemaker installation inside the freezer is now
complete. Continue to the Water Valve Assembly
section.
9ATTACH WARRANTY LABEL
Ŷ A labelLVSURYLGHGZLWKWKLVNLWWRUHFRUGWKH
date of installation for warranty purposes. Apply it
to the back of the refrigerator.

20 49-60704-2
Installation Instructions
INSTALLATION INSTRUCTIONS
WATER VALVE ASSEMBLY INSTALLATION INSTRUCTIONS N
$UHWKHVHWKHULJKWLQVWUXFWLRQVIRU\RXUPRGHO")ROORZWKH,QVWDOODWLRQ,QVWUXFWLRQVLQGLFDWHGE\WKHODEHORQWKHEDFN
of the refrigerator— L M N Q R S T U V or W
Flat blade and Phillips
screwdrivers Pliers Sharp knife
BEFORE YOU BEGIN
Read these instructions completely and carefully.
WARNING To reduce the risk of
electric shock or injury during installation,
you must first unplug the refrigerator
before proceeding.
TOOLS YOU WILL NEED
1REMOVE THE COVER
Ŷ 8VHDQXWGULYHURUDQDGMXVWDEOHZUHQFK
to remove the compressor compartment access
FRYHU7KLVUHTXLUHVUHPRYLQJVL[VFUHZVZKLFK
attach the cover to the back of the refrigerator
case.
Ŷ Be sure to save the screws as the access cover
must be reinstalled later to ensure your refrigerator
will function properly.
2ATTACH THE WATER VALVE
Ŷ 8VHD´QXWGULYHUWRDWWDFKWKHbracket
extensionWRWKHZDWHUYDOYHEUDFNHWZLWKWKH
screw
Ŷ :KLOHOHDYLQJDORRSRIDERXW´EHORZWKHYDOYH
snap the water line into the clip on the side of the
water valve.
2ATTACH THE WATER VALVE TO
THE MACHINE COMPARTMENT
Ŷ Locate the female
connector plug. Plug the
female connector onto the
male terminals on the water
valve. Either wire can go on
either terminal.
Ŷ Fasten the water valve
to the cabinet by driving the
hex-head screwIURPWKHNLWWKURXJKWKHKROH
in the bracket extension DQGLQWRWKHKROHLQ
the cabinet.
DQG1XWGULYHU
Bracket extension
$ERXW´
23
22
15 22
4
WARNING To reduce the risk of death or
electric shock, you must follow these
instructions:
Ŷ Unplug the refrigerator before removing any
panels.
Ŷ Do not damage any wiring while the panel is
removed.
Ŷ Replace all parts and panels before plugging
the refrigerator back in.
Table of contents
Languages:
Other GE Ice Maker manuals

GE
GE XPIO43SCSS User manual

GE
GE monogram ZDIC150 User manual

GE
GE unc15 Operating instructions

GE
GE OPAL01GEPKT User manual

GE
GE OPAL01GENKT User manual

GE
GE OPAL01GEPSS User manual

GE
GE Monogram ZDI15 User manual

GE
GE UCC15NPRII Operating instructions

GE
GE IM4 Operating instructions

GE
GE Profile XPIOX3SCSS User manual

GE
GE Monogram ZDIC150W User manual

GE
GE monogram ZDIC150 User manual

GE
GE OPAL XPIO13BCBT User manual

GE
GE UK-KIT-6 Training manual

GE
GE IM4D Original instructions

GE
GE UCC15 Operating instructions

GE
GE Monogram ZDIS15 User manual

GE
GE IM4D Operating instructions

GE
GE IM-5D Original instructions

GE
GE monogram ZDIC150 User manual