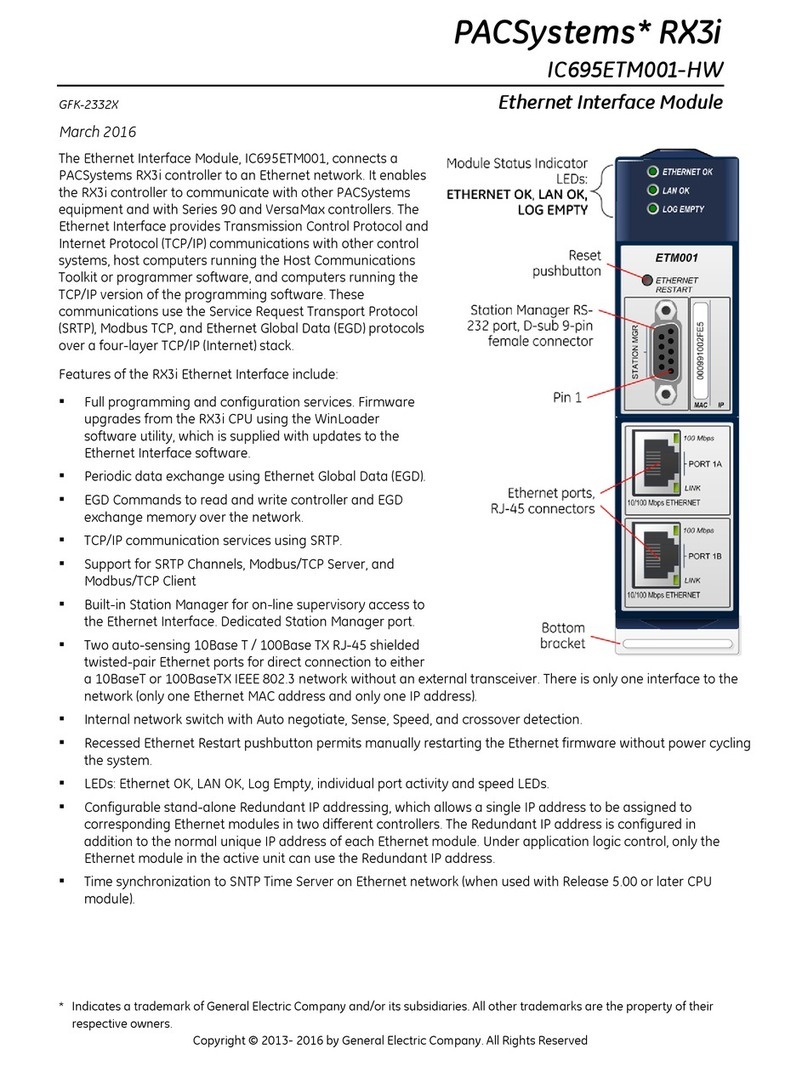
GE StationPortal User manual

GE
Intelligent Platforms
Production Support Device
StationPortal*
IC760STA100
Hardware User’s Guide, GFK-2522A
February 2010

GFL-002
Warnings, Cautions, and Notes
as Used in this Publication
Warning
Warning notices are used in this publication to emphasize that hazardous voltages, currents,
temperatures, or other conditions that could cause personal injury exist in this equipment or
may be associated with its use.
In situations where inattention could cause either personal injury or damage to equipment, a
Warning notice is used.
Caution
Caution notices are used where equipment might be damaged if care is not taken.
Note: Notes merely call attention to information that is especially significant to understanding and
operating the equipment.
This document is based on information available at the time of its publication. While efforts have been
made to be accurate, the information contained herein does not purport to cover all details or variations in
hardware or software, nor to provide for every possible contingency in connection with installation,
operation, or maintenance. Features may be described herein which are not present in all hardware and
software systems. GE Intelligent Platforms assumes no obligation of notice to holders of this document with
respect to changes subsequently made.
GE Intelligent Platforms makes no representation or warranty, expressed, implied, or statutory with respect
to, and assumes no responsibility for the accuracy, completeness, sufficiency, or usefulness of the
information contained herein. No warranties of merchantability or fitness for purpose shall apply.
* indicates a trademark of GE Intelligent Platforms, Inc. and/or its affiliates. All other trademarks are the
property of their respective owners.
©Copyright 2010 GE Intelligent Platforms, Inc.
All Rights Reserved

Notices
GE Intelligent Platforms reserves the right to make improvements to the products described
in this publication at any time and without notice.
StationPortal is the trademark of GE Intelligent Platforms in the United States and other
countries. Any other trademarks referenced herein are the property of their respective
owners and used solely for purposes of identifying compatibility with the products of GE
Intelligent Platforms. The uIP TCP/IP stack is used in the StationPortal design under license
The FCC requires the following note to be published according to FCC guidelines:
U.S., Canadian, Australian, and European regulations are intended to prevent equipment
from interfering with approved transmissions or with the operation of other equipment
through the AC power source.
The StationPortal product has been tested and found to meet or exceed the requirements
of U.S. (47 CFR 15), Canadian (ICES-003), Australian (AS/NZS 3548), and European
(EN55022) regulations for Class A digital devices when installed in accordance with the
guidelines noted in this manual. These various regulations share commonality in content
and test levels with that of CISPR 22 and based on this commonality testing to the each
individual standard was deemed inappropriate.
The FCC requires the following note to be published according to FCC guidelines:
Note: This equipment has been tested and found to comply with the limits for a Class A
digital device, pursuant to Part 15 of the FCC Rules. These limits are designed to provide
reasonable protection against harmful interference when the equipment is operated in a
commercial environment. This equipment generates, uses, and can radiate radio
frequency energy and, if not installed and used in accordance with the instruction
manual, may cause harmful interference to radio communications.
Operation of this equipment in a residential area is likely to cause harmful interference in
which case the user will be required to correct the interference at his own expense.
Industry Canada requires the following note to be published:
Note: This Class A digital apparatus complies with Canadian ICES-003.
Users must supply 100-240V, 50-60 Hz AC input power supply to power the StationPortal
unit covered by this manual.
This symbol is present on the enclosure where there is a risk of electric
shock due to Hazardous voltage present at that point.
For a complete list of agency approvals, please refer to “Agency Approvals” on page 21.
Contact Information
If you purchased this product through an Authorized Channel Partner, please contact the seller
directly.
General Contact Information
Online technical support and
GlobalCare http://www.ge-ip.com/support
Additional information http://www.ge-ip.com/
Technical Support
If you have technical problems that cannot be resolved with the information in this guide, please
contact us by telephone or email, or on the web at www.ge-ip.com/support
Americas
Online Technical Support www.ge-ip.com/support
Phone 1-800-433-2682
International Americas Direct Dial 1-780-420-2010 (if toll free 800 option is unavailable)
Customer Care Email customercare.ip@ge.com
Primary language of support English
Europe, the Middle East, and Africa
Online Technical Support www.ge-ip.com/support
Phone +800-1-433-2682
EMEA Direct Dial +352-26-722-780 (if toll free 800 option is unavailable or
if dialing from a mobile telephone)
Technical Support Email support.emea.ip@ge.com
Primary languages of support English, French, German, Italian, Czech, Spanish
Asia Pacific
Online Technical Support www.ge-ip.com/support
+86-400-820-8208Phone
+86-21-3217-4826 (India, Indonesia, and Pakistan)
Technical Support Email
[email protected]Customer Care Email

Contents
Welcome 1
Features 1
Functional Compatibility 1
Related Documents 1
Hardware Overview 2
Installation Instructions 4
Choosing a Mounting Location 4
Mounting Instructions 4
Connecting a Power Supply 5
Overcurrent Protection 5
Power Cord Retainer 5
Detailed Operation 6
Communications Ports 6
Ethernet Port 6
Serial Port 7
24V Discrete Input Port 8
Discrete Output Port 9
Horn 11
Configuration Reset Pushbutton 11
Lamps and Lenses 11
Pushbutton 11
Changeable Labels 11
Status Light 11
Hardware Configuration 12
Accessing the Configuration Menu 12
Configuration Parameters 14
StationPortal Device Driver 15
Error Handling 16
Troubleshooting Guidelines 18
StationPortal Specifications 19
Physical 19
AC Power Requirements 19
Functional 19
Environmental 20
Agency Approvals 21
Default Settings 22


Welcome
WelcomeCongratulations on your purchase of a StationPortal. The StationPortal is an I/O device that
connects factory floor I/O to a server-based system, such as MES and SCADA, over
standard Ethernet. This eliminates the need for a complex and expensive PLC-based
architecture. Operators can use the built-in devices (horn and lamps) as well as plug I/O into
one of the available ports for control by a remote client.
StationPortal is shipped ready for use after a few simple configuration steps. Connect a
power cord that has a standard IEC 60320-C13. Also, connect a standard unshielded,
twisted-pair CAT 5 Ethernet cable between the StationPortal and a Server PC or Ethernet
switch to be able to communicate with your client application. Depending on your
requirements, you may connect and configure input/output devices (see page 12).
Features
Universal power supply input (100V–240V, 50Hz–60Hz)
Three indicator lights
Status indicators for each digital I/O point
Horn, 90 dB
Serial RS-232 Port
Ethernet port, 10/100 Mbps
Three digital inputs on a 5-pin M12 female connector
Three digital outputs on a 5-pin M12 male connector
Momentary pushbutton
Configuration over Ethernet
Functional Compatibility
Clients: StationPortal is capable of communicating with a variety of clients. If Proficy*
HMI/SCADA CIMPLICITY* software is to be used with StationPortal, version 8.0 or later is
required. The necessary software driver can be ordered on CD as IC647NSD000.
Ethernet cable: Unshielded, twisted pair, UTP CAT 5 minimum
Related Documents
PROFICY HMI/SCADA – CIMPLICITY Communications Manual, StationPortal (This
document is placed in the CIMPLICITY Documentation folder when the driver is installed.
Also available in the StationPortal driver installation file.)
Proficy HMI/SCADA CIMPLICITY software documentation.
Note: The most recent software downloads and user documentation are available on the
Support website.
GFK-2522A 1

Hardware Overview
Hardware Overview
The following diagrams show the locations of user-accessible controls, indicators and
connectors.
Front View
Input Status LEDs
Top Light
Right Light
Output Status LEDs
Horn
Changeable Label
Changeable Label
Changeable Label
Left Light
Momentary Pushbutton
MAC Address Label
(on side of unit)
2 StationPortal Hardware User’s Guide – February 2010 GFK-2522A

Hardware Overview
Bottom View
GFK-2522A 3

Installation Instructions
The StationPortal unit can be installed on a wall or column.
Choosing a Mounting Location
The unit must be mounted on the flat surface of wall or column.
For adequate ventilation, allow at least 3 inches (76.2mm) of space between adjacent
equipment and all sides of the StationPortal. Ensure that specified conditions of
temperature and humidity are not exceeded.
Direct sun exposure may impose increased thermal loads on the StationPortal
leading to excessive temperatures. Cabinet design and orientation must be carefully
considered to avoid exceeding the operational temperature limits.
StationPortal does not have an enclosure suitable for outdoor use. For environmental
requirements, refer to page 20.
Mounting Instructions
Note: Limit the number of times you remove and reinstall the unit. Too many installations
may damage the plastic enclosure.
1. Install two M3 screws at a horizontal distance of 3.937” (100mm) apart at the required
height.
2. Mount the StationPortal on the two screws using mounting tabs provided at the top of the
unit. Tighten the screws if required.
3.937” (100mm)
3.937”(100mm)
11.821”
(300.3mm)
Horizontal distance between
the mounting Tabs: 3.937” (100mm)
Vertical distance between
the mounting Tabs: 11.821” (300.3mm)
3. For additional support, two M3 screws can be installed at the bottom of the unit at a
vertical distance of 11.821” (300.3 mm) from top hole and 3.937” (100 mm) apart.
4 StationPortal Hardware User’s Guide – February 2010 GFK-2522A

Installation Instructions
Connecting a Power Supply
The StationPortal operates with 100–240V AC, 50–60 Hz input power with 0.3A RMS
maximum input current.
The StationPortal requires a power cord that has a standard IEC 60320-C13 plug.
Overcurrent Protection
StationPortal unit’s power supply provides overcurrent protection (including short circuits). If
an overcurrent condition occurs, the power supply continually tries to restart until the
overcurrent condition is removed. An internal fuse (FU1), which is rated for 250VAC at 1A, is
provided in the input line as a backup. The power supply usually trips and goes into retry
mode before the fuse blows. There is no additional indication if the power supply fuse blows.
The fuse is not user-replaceable.
Power Cord Retainer
A clip is provided on the StationPortal unit to provide retention for a few types of power cords.
Warning
Electrical Shock Hazard: To avoid personal injury or damage to equipment,
ensure that the power cord is disconnected from AC input power during the
installation of the power cord and power cord retainer clip.
Note: The clip provided with the StationPortal will work best with a power cord that has a
plug or cord strain relief extending up to 2.441 inches (62mm).
GFK-2522A 5

Detailed Operation
Detailed Operation
A StationPortal can communicate with only one client at a time. However, a single client can
communicate with multiple StationPortal devices. Although the number and types of devices
that each client can support will vary, Proficy HMI/SCADA CIMPLICITY supports a native
interface to the StationPortal that acts as a client. Details on the number and types of devices
that a CIMPLICITY instance can support are described in the CIMPLICITY documentation.
The StationPortal I/O is natively addressable in the Proficy HMI/SCADA CIMPLICITY control
and visualization product.
Communications Ports
Ethernet Port
The StationPortal unit provides a 10/100 Mbps Ethernet port (IEEE802.3) with an RJ45
connector on the bottom of the enclosure. An unshielded, twisted pair, UTP CAT 5 cable is
the minimum required.
LED indicators on the port indicate channel status.
Port Location and Pin Assignments
Pin
Assignments
1 RX+
2 RX-
3 NC
4 NC
5 TX+
6 TX-
7 NC
8 NC
6 StationPortal Hardware User’s Guide – February 2010 GFK-2522A

Detailed Operation
Serial Port
The StationPortal unit provides one serial communication port with the following
specifications:
Port Specifications
Connector Type RS-232 male 9-pin D connector
Baud Rate Configurable baud rates: 2400, 4800, 9600, 19,200 baud with 8 data bits
Parity Configurable: Even / Odd / None
Stop Bits 1 (not configurable)
Flow Control None (not configurable)
Port Location and Pin Assignments
Pin Assignments
1 NC
2 RXD1
3 TXD1
4 NC
5 Ground
6 NC
7 NC
8 NC
9 NC
Note: When StationPortal unit is configured to check Even or Odd parity and equipment at
the other end of serial communication is configured for opposite parity setting, few
characters will be received by StationPortal unit which result in equal parity.
GFK-2522A 7

Detailed Operation
24V Discrete Input Port
A 5-pin M12 type female connector mounted at the bottom of the enclosure accepts three
digital inputs from field. These inputs are optically isolated sink type inputs.
Pin 1 of this connector can be used as a +24V DC auxiliary power supply for input devices
and to power the DC input circuits. The combination of input circuit current and external
device current must not exceed 300 mA.
Input status LEDs (I1, I2, I3) on the front of the unit indicate the On/Off states of the inputs.
Port Location and Pin Assignments
Pin Assignments
1 24 VDC for
input devices
2 Input 2
3 0V for input
devices
4 Input 1
5 Input 3
Typical 24 VDC Positive Logic Input Circuit
3.3V
+
_
3.3V
Input Connector
Field
24V
Input
Circuit CPU
Input Specifications
Inputs per Module 3 (one group with a single common)
Rated voltage 24V DC
Input Voltage Range 0 to +30 VDC
Isolation: Field to Frame Ground 1500 VAC for 1 minute.
Input Current 7 mA typical at rated voltage
Input Characteristics
On–state Voltage 8.2 to 30 volts DC
Off–state Voltage 0 to +5 volts DC
On–state Current 1.6 mA minimum
Off–state Current 0.9 mA maximum
On response Time 24 ms typical
Off response Time 24 ms typical
8 StationPortal Hardware User’s Guide – February 2010 GFK-2522A

Detailed Operation
Discrete Output Port
A 5-pin M12 type male connector provides three digital outputs to the field. These are dry
contact type relay outputs. An external source of AC or DC power must be supplied to
operate field devices.
Hazardous voltage may be present at the outputs.
\
Pin Assignments
1 Common
2 Output 2
3 Common
4 Output 1
5 Output 3
The state of outputs (On/Off) is indicated on the output status LEDs (O1, O2, O3) on the front
of the unit.
Relay Specifications
Outputs per Module 3 isolated Form A relay outputs
0 – 30VDC (5/24 VDC nominal)External Power Supply 0 – 250VAC (47 to 63 Hz), 120-240VAC nominal
Isolation, Field to Frame Ground 1500 VAC for 1 minute
Output Characteristics
5 – 30VDC (5/24 VDC nominal)Output Voltage 5 – 250VAC (47 to 63 Hz), 120-240VAC nominal
10mA per point minimum
4A for 5-250VAC maximum (resistive or general purpose)
4A for 5-30VDC maximum (resistive)
2A pilot duty per output (5 to 30VDC, 5 to 250VAC)
Output Current
2A lamp load per output (5 to 30VDC, 5 to 250VAC)
Output Voltage Drop 0.3VDC maximum
Output Leakage Current Not Applicable (open contact)
Response Times (On/Off) 10ms maximum (At nominal voltage excluding contact bounce)
Switching Frequency 20 cycles per minute maximum (50% duty cycle recommended)
Protection None. External snubbers may be applied if necessary
Relay Contact Life See “Load Current Limitations”
Diagnostic Information None
GFK-2522A 9

Detailed Operation
Load Current Limitations
Maximum Current for Load Type
Operating
Voltage Resistive Lamp or Solenoid * Typical Contact Life
(Number of Operations)
5 to 250 VAC 4 Amps 2 Amps 200,000
5 to 250 VAC 0.1 Amp 0.05 Amp 1,000,000
5 to 250 VAC 1 Amp 0.5 Amp 700,000
5 to 30 VDC 4 Amps 2 Amps 200,000
5 to 30 VDC 1 Amp 0.5 Amp 700,000
5 to 30 VDC 0.1 Amp 0.05 Amp 1,000,000
* Assumes a 7ms L/R time constant (DC inductive load) or Cos φ> 0.4 (AC inductive load)
Suppression Circuits
Relay contact life, when switching inductive loads, will approach resistive load contact life if
suppression circuits are used. Examples of typical suppression circuits for AC and DC loads
are shown below. The 1A, 200V diode shown in the DC load typical suppression example is
an industry standard 1N4935. The resistor and capacitor shown for AC load suppression are
standard components, available from most electronics distributors.
10 StationPortal Hardware User’s Guide – February 2010 GFK-2522A

Detailed Operation
Horn The StationPortal horn outputs 90dB1.
Configuration Reset Pushbutton
The Reset push button is used to restore the factory configuration settings. For details, refer
to the “Default Settings” section on page 22.
To access the Reset pushbutton, press the Reset pushbutton for 3 seconds.
Lamps and Lenses
The StationPortal includes three lamps. Each lamp is individually configurable for one of
three states – off, on, or blinking.
All lens covers are interchangeable and can be removed by turning them counterclockwise.
Pushbutton The StationPortal provides an integrated momentary push-button for use in your applications.
Changeable Labels
There are slots for labels below the Right light indicator, Left light indicator, and Pushbutton.
You can change the labels for the Right and Left indicator lights and the pushbutton. The
dimensions of the label are 33.78 mm x 11.99 mm x 0.40 mm (L x W x D). To insert the label
in the given slot, align the label to the edges of the slot and slide it inside the slot.
Status Light A status LED on the bottom of the unit indicates processor activity. This LED flashes during
the normal operation of the unit.
1Sound pressure level measured at the Station Portal unit.
GFK-2522A 11

Hardware Configuration
The StationPortal’s communications and operational parameters are configured using a
Telnet connection.
Accessing the Configuration Menu
To access the Configuration Menu, connect the StationPortal unit to the Ethernet LAN or to
any personal computer (PC) using an Ethernet cable. Power up the StationPortal unit.
Open the “command prompt” window on PC by clicking on “Start Run. Type “cmd” in the
dialog box.
At the command prompt, type the following to access the configuration menu:
> telnet <IP address>
Example: > telnet 192.168.0.35
Where <IP address> is the IP address of the StationPortal unit. The Default IP address of
StationPortal is 192.168.0.35.
12 StationPortal Hardware User’s Guide – February 2010 GFK-2522A

Hardware Configuration
If you do not know the IP address, it can be reset to the default settings. For details, refer to
the “Default Settings” section on page 22.
StationPortal Configuration Menu
GFK-2522A 13

Hardware Configuration
Configuration Parameters
Option Parameter Description Format
1 IP Address Sets the IP address for Ethernet communications xxx.xxx.xxx.xxx
2 Subnet Mask Sets the subnet mask for Ethernet communications xxx.xxx.xxx.xxx
3 Default Gateway Sets the default gateway for Ethernet communications xxx.xxx.xxx.xxx
4 Baud Rate Selects the baud rate for serial communications 0=2400
1= 4800
2=9600
3=19,200
5 Parity Selects the parity for serial communications 0=None
1=Odd
2=Even
6 Set default state
for outputs Set the default states that the outputs will assume if the StationPortal
is not in communication with a client.
For example, a lack of communications could be caused by the
Ethernet cable being removed from either end of an Ethernet
connection or upon initial device power-up.
Example: To select the following default states, enter 0123000.
Right Light – OFF
Left Light – ON
Top Light – Flash
Horn – Hold
OUTPUT1 – OFF
OUTPUT2 – OFF
OUTPUT3 – OFF
The factory default settings for StationPortal are to turn the Top Light
ON and all other outputs (horn, outputs 1-3, etc) off. Illuminating a
light when communication isn’t present allows the end-user to
distinguish between a loss of power and absence of communication.
Note: Do not enter “2” as the default state of the Field outputs
because they do not support Flash operation.
Note: While in this state, it is expected that clients will periodically
try to re-establish communication with StationPortal. If
communication can be established, the user’s application
will once again be able to drive outputs. However, the
default conditions will persist until the application does so.
Note: If the user has configured the default output state to “Hold
last state” and unit is power cycled, the Outputs will be
driven to “Off” state.
Note: If the user changes the default state of the output, the new
values applies when the unit is power cycled or loss of
communication occurred.
0=Off
1=On
2=Flash
3=Hold Last
State
14 StationPortal Hardware User’s Guide – February 2010 GFK-2522A
Table of contents
Other GE Recording Equipment manuals

GE
GE Bently Nevada TK84 User manual

GE
GE Interlogix ARITECH ATS1210 User manual

GE
GE Masoneilan SVI II ESD Manual

GE
GE VersaMax IC200CPUE05 User manual

GE
GE WIU-2 User manual

GE
GE QuickPanel Plus IC755CxS06RDx User manual

GE
GE IC695ETM001-HW User manual

GE
GE Bently Nevada 86517 User manual

GE
GE ATS1290 User manual

GE
GE 4BC21A1 User manual