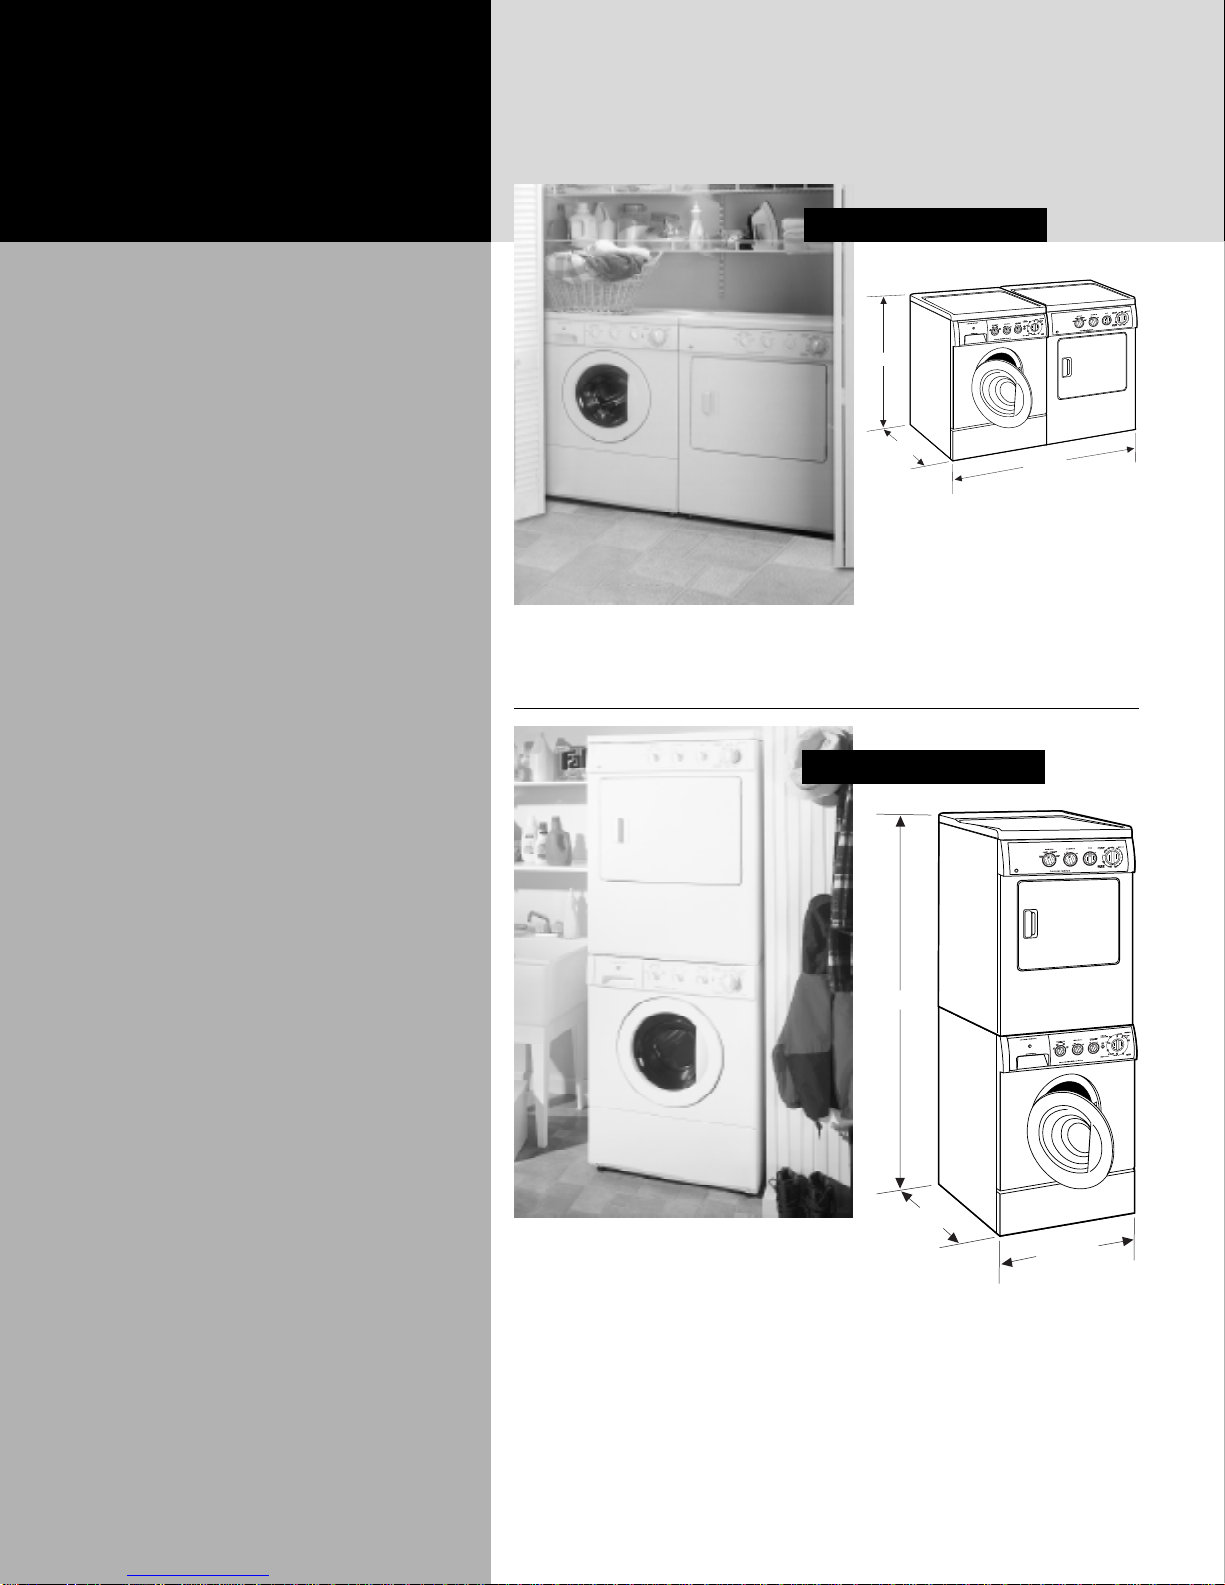
manuals.online logo
Brands
  1. Home
  2. •
  3. Brands
  4. •
  5. GE
  6. •
  7. Washer Dryer
  8. •
  9. GE 14-A008 User manual

GE 14-A008 User manual

GE Front Loading Laundry Pair
Installation Options
We bring good things to life.
36"
25-3/4" 53-1/2"
70-5/8"
25-3/4"
26-3/4"
G u i d e l i n e s t o
• This laundry pair requires a
53-1/2" wide space. No special
installation requirements, install
in the same manner as any other
laundry pair.
• Allow additional 3" minimum
behind the dryer for duct
connection and 1-1/2" minimum
behind the washer for standpipe.
No trim kits to order, no
additional cost.
Mounting brackets are
supplied with the dryer.
• Remove washer top cap,
install brackets and
mount the dryer over
the washer.
• The stacked pair is only
70-5/8" tall. The dryer
door will be eye-level,
an easy reach for most
users.
• Install the washer and
dryer according to the
installation instructions
packed with the
products.
Stacked
4
Optimize space and efficiency.
Side-By-Side
Washer:
• Install separate Hot & Cold faucets within 42" of the
washer inlet.
• Provide a standpipe, 1-1/4" min. dia. and 24" min.,
58" max. high. The attached drain hose will reach
a 58” standpipe.
• The washer must be supplied with 120 volt, 60 Hz.,
and connected to an individual, properly polarized
and grounded branch circuit protected by a 15 amp
circuit breaker or time delay fuse. The 3 prong
receptacle must be located where it will be accessible
when the washer is installed. Power cord
length is 36".
• Follow the installation instructions packed with the
product to remove shipping bolts and materials.
• Some installations require a pan to hold the washer.
Local codes to apply. Pan size to fit washer.
* Note: Standpipes up to 96" high can be accommodated
with a longer drain hose.
Dryer:
• Provide 4" min. dia. rigid metal duct for best
performance. Plan the shortest and straightest duct
run possible. The dryer must ALWAYS be exhausted
to outdoors.
• Electric models can exhaust 4 ways, from the right
or left side, rear or bottom. Gas models can exhaust
3 ways, from the right side, rear or bottom. Both gas
and electric models are shipped for rear exhaust.
• The dryer must be connected to an individual
branch circuit protected by the required time delay
fuses or circuit breakers. 208V or 240V installation
requires 30 amps. (Gas dryers require 120V, 60Hz,
15 or 20 amp circuit.) Locate the receptacle where
it will be accessible when the dryer is installed.
Power cord length is 36".
• Follow the installation instructions packed with the
product to complete the installation.
Note: Do not discard shipping bolts, clips or any parts
removed during installation. The consumer should
keep unused parts for possible future use or
shipping.
Washer Clearances:
• Allow 1-1/2" from the back of the washer to rear wall
for drain hose and standpipe. 0" to both sides.
Dryer Clearances:
• 0" to either side, 3" rear, 3" clearance at the front,
when installed into a recess or closet. When
installed in a closet allow a min. of 120 sq. inches
of opening such as louvers on the door.
• For complete installation instructions refer to washer
Pub. No. 31-2819 and dryer Pub. No. 49-9963.
• Top caps on the washer
and dryer must be
removed and replaced
with a top sheet kit. The
addition of a standard
1-1/2" thick countertop
over the pair will result
Washer
Top Sheet Dryer
Top Sheet
Countertop
A
BC
3/4" High x 3/4" Wide
Lip on All Sides
DIMENSION A:
14" recommended,
however this laundry pair
can be elevated to suit
customer needs.
• All four sides of the plat-
form should be perman-
ently secured and
extend a minimum of
3/4" above the platform.
• Height is only limited by
the use of overhead
cabinetry.
• The standpipe height
must be increased to
accommodate additional
installation height.
DIMENSION B:
• The platform must be
constructed to include a
3/4" high and 3/4" wide
lip all the way around
the top edge. The outside
depth should be 29"
minimum. Consideration
should be given to the
location of the washer
standpipe and dryer
duct run.
DIMENSION C:
• The outside width
should be wide enough
to accommodate the
laundry pair, plus a 3/4"
lip on each side.
Recommend 56" to
60" width.
• The platform surface
must be constructed to
minimum code floor
requirements.
• The structure must be
secured to a rear wall.
• To complete the
installation follow
instructions packed with
the washer and dryer.
• Order Built-In Instruc-
tions, Pub. No. 14-T029
• No trim kits required.
in a standard 36"
countertop height.
• Install the washer and
dryer according to the
installation instructions
packed with the
products.
Built-In
UnderCounter
Create an efficient work space for folding and storage.
• Install an extra deep
countertop to accom-
modate the laundry pair.
Adjacent cabinets can be
moved forward to align
with the front face of the
washer and dryer.
• Order Accessory Kits:
Washer Pub. No. 14-A037
Dryer Pub. No. 14-A008
Elevate the pair for easy accessibility and a custom appearance.
I n s t a l l a t i o n O p t i o n s
GE Appliances
General Electric Company
Louisville, Kentucky 40225
www.ge.com/appliances
Listed by
Underwriters Laboratories Pub. No. 14-T019
N.D. 413 (8/99)

This manual suits for next models

2

Other GE Washer Dryer manuals

GE Spacemaker GTUP240EMWW User manual

GE

GE Spacemaker GTUP240EMWW User manual

GE Spacemaker GTUP270GMWW User manual

GE

GE Spacemaker GTUP270GMWW User manual

GE GUD37EE User manual

GE

GE GUD37EE User manual

GE GUD24 User manual

GE

GE GUD24 User manual

GE Spacemaker WSM2000H User manual

GE

GE Spacemaker WSM2000H User manual

GE GTUN275 User manual

GE

GE GTUN275 User manual

GE GUD24 User manual

GE

GE GUD24 User manual

GE GFQ14ESSNWW Original instructions

GE

GE GFQ14ESSNWW Original instructions

GE DCCD330EJ Manual

GE

GE DCCD330EJ Manual

GE WNCD2050 User manual

GE

GE WNCD2050 User manual

GE GTUP270GMWM User manual

GE

GE GTUP270GMWM User manual

GE GUD27ESSMWW User manual

GE

GE GUD27ESSMWW User manual

GE GTUN275GM1WW User manual

GE

GE GTUN275GM1WW User manual

GE 8566267 User manual

GE

GE 8566267 User manual

GE Unitized Spacemaker GTUP240EM Service manual

GE

GE Unitized Spacemaker GTUP240EM Service manual

GE GUD27GSSMWWGE User manual

GE

GE GUD27GSSMWWGE User manual

GE GUD27EEMNWW User manual

GE

GE GUD27EEMNWW User manual

GE Spacemaker DSKS333EC Manual

GE

GE Spacemaker DSKS333EC Manual

GE Unitized Spacemaker WSM2420 User manual

GE

GE Unitized Spacemaker WSM2420 User manual

GE GTUP270GM1WW User manual

GE

GE GTUP270GM1WW User manual

GE GUD57EEMTDG User manual

GE

GE GUD57EEMTDG User manual

GE GUD27 User manual

GE

GE GUD27 User manual

GE GTUN275EM User manual

GE

GE GTUN275EM User manual

GE Unitized Electric Washer/Dryer User manual

GE

GE Unitized Electric Washer/Dryer User manual

Popular Washer Dryer manuals by other brands

Ariston Margherita AWD 12 Instructions for installation and use

Ariston

Ariston Margherita AWD 12 Instructions for installation and use

Frigidaire 134897500B installation instructions

Frigidaire

Frigidaire 134897500B installation instructions

Midea MF200D85B owner's manual

Midea

Midea MF200D85B owner's manual

Bosch WDU8H542SN User manual and installation instructions

Bosch

Bosch WDU8H542SN User manual and installation instructions

Whirlpool Thin Twin Four-Wire 240 Volt installation instructions

Whirlpool

Whirlpool Thin Twin Four-Wire 240 Volt installation instructions

Haier WNA500T Instructions for installation and operation

Haier

Haier WNA500T Instructions for installation and operation

Equator Super Combo 4400 owner's manual

Equator

Equator Super Combo 4400 owner's manual

Indesit WD 84 T Instruction

Indesit

Indesit WD 84 T Instruction

Whirlpool LTE5243DQ2 Control Panel Parts

Whirlpool

Whirlpool LTE5243DQ2 Control Panel Parts

Whirlpool LTE5243DQ9 User instructions

Whirlpool

Whirlpool LTE5243DQ9 User instructions

Kuppersbusch IWT 1459.1W Instructions for use

Kuppersbusch

Kuppersbusch IWT 1459.1W Instructions for use

GEAppliances GUD24 owner's manual

GEAppliances

GEAppliances GUD24 owner's manual

Indesit IWDC 6145 Instructions for use

Indesit

Indesit IWDC 6145 Instructions for use

Zanussi WDJ 1013/A Instructions for use and care

Zanussi

Zanussi WDJ 1013/A Instructions for use and care

Beko B3D510644UW user manual

Beko

Beko B3D510644UW user manual

Zanussi WD1010 user manual

Zanussi

Zanussi WD1010 user manual

Electrolux EN7W4862OF user manual

Electrolux

Electrolux EN7W4862OF user manual

Beko WDC 7523002 operating instructions

Beko

Beko WDC 7523002 operating instructions

manuals.online logo
manuals.online logoBrands
  • About & Mission
  • Contact us
  • Privacy Policy
  • Terms and Conditions

Copyright 2025 Manuals.Online. All Rights Reserved.