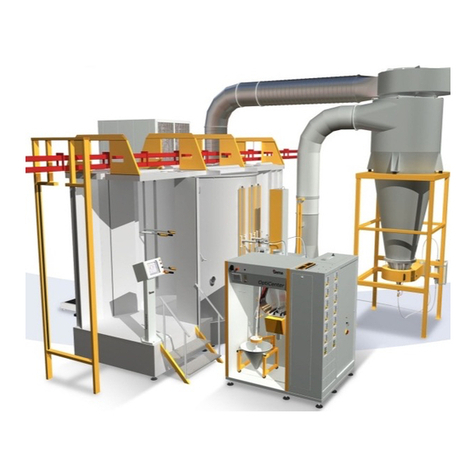
Gema OptiMove CR08 Guide

1011 515 En
Translation of the original operating instructions
Operating instructions and spare parts list
Axis control
OptiMove CR08

V 02/16
Documentation OptiMove CR08 Axis control unit
© Copyright 2016 Gema Switzerland GmbH
All rights reserved.
This publication is protected by copyright. Unauthorized copying is
prohibited by law. No part of this publication may be reproduced,
photocopied, translated, stored on a retrieval system or transmitted in any
form or by any means for any purpose, neither as a whole nor partially,
without the express written consent of Gema Switzerland GmbH.
MagicCompact, MagicCylinder, MagicPlus, MagicControl, OptiFlex,
OptiControl, OptiGun, OptiSelect, OptiStar and SuperCorona are
registered trademarks of Gema Switzerland GmbH.
OptiFlow, OptiCenter, OptiMove, OptiSpeeder, OptiFeed, OptiSpray,
OptiSieve, OptiAir, OptiPlus, OptiMaster, MultiTronic, EquiFlow, Precise
Charge Control (PCC), Smart Inline Technology (SIT) and Digital Valve
Control (DVC) are trademarks of Gema Switzerland GmbH.
All other product names are trademarks or registered trademarks of their
respective holders.
Reference is made in this manual to different trademarks or registered
trademarks. Such references do not mean that the manufacturers
concerned approve of or are bound in any form by this manual. We have
endeavored to retain the preferred spelling of the trademarks, and
registered trademarks of the copyright holders.
To the best of our knowledge and belief, the information contained in this
publication was correct and valid on the date of publication. Gema
Switzerland GmbH makes no representations or warranties with respect
to the contents or use of this publication, and reserves the right to revise
this publication and make changes to its content without prior notice.
For the latest information about Gema products, visit
www.gemapowdercoating.com.
For patent information, see www.gemapowdercoating.com/patents or
www.gemapowdercoating.us/patents.
Printed in Switzerland
Gema Switzerland GmbH
Mövenstrasse 17
9015 St.Gall
Switzerland
Phone: +41-71-313 83 00
Fax.: +41-71-313 83 83

V 02/16
OptiMove CR08 Table of contents • 1
Table of contents
About this manual 3
General information ................................................................................................3
Keeping the Manual ................................................................................................3
Presentation of the contents ...................................................................................3
Figure references in the text ......................................................................3
Safety symbols (pictograms)...................................................................................3
Software version .....................................................................................................4
Safety 5
Basic security instructions.......................................................................................5
Product specific security regulations ......................................................................5
Product description 9
OptiMove CR08 axis control unit ............................................................................9
Operating panel .........................................................................................9
Intended use .........................................................................................................10
Reasonably foreseeable misuse...........................................................................10
Technical data.......................................................................................................10
Connectable axes ....................................................................................10
General data ............................................................................................10
Electrical data ..........................................................................................11
Dimensions ..............................................................................................11
Design and function 13
Structure................................................................................................................13
Function description..............................................................................................13
Configuration............................................................................................14
Operating and display elements, operating modes 15
Display and input buttons...................................................................................... 15
Operating modes ..................................................................................................18
"Manual" operating mode.........................................................................18
Keyboard lock ..........................................................................................18
Start-up 19
Connections – rear side ........................................................................................19
Initial start-up.........................................................................................................20
Measures before initial start-up................................................................20
Electrical wiring and screening concept...................................................20
Setting the system parameters .............................................................................20
System parameters – overview................................................................21
System parameter P1 – setting the upper stroke limit.............................22
Operation 23
Operating the axis control unit ..............................................................................23
Switch on/off the axis control unit .........................................................................23

V 02/16
2 • Table of contentsAbout this manual OptiMove CR08
Travel to reference point....................................................................................... 23
Start/stop the axis................................................................................................. 24
Program change ................................................................................................... 24
Displaying the cycle time ...................................................................................... 25
Edit programs ....................................................................................................... 25
Axes operating modes 27
General information .............................................................................................. 27
Pendulum operating mode ................................................................................... 27
Editing/Setting ......................................................................................... 28
Sequence program ............................................................................................... 28
Structure of a program step (procedure step) ......................................... 29
Programming example – positioning ....................................................... 30
Programming example – pendulum movements..................................... 30
Programming example with path-time diagram....................................... 31
Semiautomatic pendulum operating mode........................................................... 32
RAM reset............................................................................................................. 32
Entering the RAM reset mode ................................................................. 32
Default values after RAM reset ............................................................... 33
CAN bus 35
General information .............................................................................................. 35
Hardware .............................................................................................................. 35
CAN bus cable – plug assignment .......................................................... 35
Troubleshooting 37
General information .............................................................................................. 37
Hardware 39
Pin allocations ...................................................................................................... 39
Plug 2.1 – Power IN................................................................................. 39
Plug 2.2 – Drive supply............................................................................ 39
Plug 2.6 – CAN bus OUT ........................................................................ 39
Spare parts list 41
Ordering spare parts............................................................................................. 41
Front plate and power pack.................................................................................. 42
Rear wall............................................................................................................... 43
Appendix – program table .................................................................................... 44

V 02/16
OptiMove CR08 About this manual • 3
About this manual
General information
This operating manual contains all important information you will need to
work with the OptiMove CR08. It will safely guide you through the start-up
process and give you references and tips for the optimal use of your new
powder coating system.
Information about the functional mode of the individual system
components should be referenced in the respective enclosed documents.
Keeping the Manual
Please keep this Manual ready for later use or if there should be any
queries.
Presentation of the contents
Figure references in the text
Figure references are used as cross references in the descriptive text.
Example:
"The high voltage (H) created in the gun cascade is guided through the
center electrode."
Safety symbols (pictograms)
The following warnings with their meanings can be found in the Gema
operating instructions. The general safety precautions must also be
followed as well as the regulations in the relevant operating instructions.
DANGER
Indicates a hazardous situation which,
if not avoided, will result in death or serious injury.

V 02/16
4 • About this manual OptiMove CR08
WARNING
Indicates a potentially hazardous situation which,
if not avoided, could result in death or serious injury.
CAUTION
Indicates a potentially hazardous situation which,
if not avoided, could result in minor or moderate injury.
ATTENTION
Indicates a potentially harmful situation which,
if not avoided, the equipment or something in its surrounding may be
damaged.
ENVIRONMENT
Indicates a potentially harmful situation which,
if not avoided, may have harmful consequences for the environment.
MANDATORY NOTE
Information which must be observed.
NOTE
Useful information, tips, etc.
Software version
This document describes the operation of the control unit with software
version starting from V1.0.

V 02/16
OptiMove CR08 Safety • 5
Safety
Basic security instructions
– This product is built to the latest specification and conforms to the
recognized technical safety regulations and is designed for the
normal application of powder coating.
– Any other use is considered non-compliant. The manufacturer shall
not be liable for damage resulting from such use; the user bears sole
responsibility for such actions. If this product is to be used for other
purposes or other substances outside of our guidelines then Gema
Switzerland GmbH should be consulted.
– Start-up (i.e. the execution of intended operational tasks) is
forbidden until it has been established that this product has been set
up and wired according to the guidelines for machinery. The
standard "Machine safety" must also be observed.
– Unauthorized modifications to the product exempt the manufacturer
from any liability from resulting damage.
– The relevant accident prevention regulations, as well as other
generally recognized safety regulations, occupational health and
structural regulations are to be observed.
– Furthermore, the country-specific safety regulations also must be
observed.
Product specific security regulations
– This product is a constituent part of the equipment and is therefore
integrated in the system's safety concept.
– If it is to be used in a manner outside the scope of the safety
concept, then corresponding measures must be taken.
– The installation work to be done by the customer must be carried out
according to local regulations.
– It must be ensured, that all components are earthed according to the
local regulations before start-up.

V 02/16
6 • Safety OptiMove CR08
WARNING
The power of the axes is much stronger than that of a human
being!
– All axes must be secured against access during operation (see
local regulations).
– Never stand under the Z carriage when the vertical axis is not
operating!
– The plugs and sockets of the axis control unit and the power unit of
the vertical axis should only be unplugged when the power supply is
disconnected
– The connecting cables between the control unit and the axis must be
laid in such a way, that they cannot be damaged during axes
operation. Please observe the local safety regulations!
– The maximum upper stroke limit of the vertical axis must always
be set with reference to the maximum height of the booth gun
slots. If an incorrect (too high) stroke limit is set, this can lead to
damage to the reciprocator and/or the booth!
ATTENTION
The equipment may be damaged during a test run!
– In particular, the limitations of the stroke range have to be
observed (for further information, see chapter "System parameter
P1 – Setting the upper mechanical stop")!
– The voltage supply of the axis is guaranteed by the OptiMove CR08
Axis control unit. The supply voltage amounts to 230 VAC and must
always be conducted in the emergency stop circuit. In case of an
emergency, the voltage supply to the motor may be interrupted with
the emergency stop switch.
– When repairing the axis, both the OptiMove CR08 axis control unit
and the axis must be disconnected from the mains according to the
local safety regulations!
– Repairs may be done only by authorized Gema service centers.
Unauthorized conversions and modifications can lead to injuries and
damage to the equipment. The Gema Switzerland GmbH guarantee
would no longer be valid.
– We point out that the customer himself is responsible for the safe
operation of the equipment. Gema Switzerland GmbH is in no way
responsible for any resulting damage.
NOTE
For further security information, see the more detailed Gema safety
regulations!

V 02/16
OptiMove CR08 Safety • 7
WARNING
Working without operating instructions
Working without operating instructions or with individual pages
from the operating instructions may result in damage to property
and personal injury if relevant safety information is not observed.
– Before working with the device, organize the required documents
and read the section "Safety regulations".
– Work should only be carried out in accordance with the
instructions of the relevant documents.
– Always work with the complete original document.


V 02/16
OptiMove CR08 Product description • 9
Product description
OptiMove CR08 axis control unit
Operating panel
fig. 1: Operating panel
1 Operating and display elements
2 Power switch ON/OFF

V 02/16
10 • Product description OptiMove CR08
Intended use
The OptiMove CR08 Axis control unit is designed exclusively for
operating electrically driven axes in electrostatic powder coating
equipment.
Observance of the operating, service and maintenance instructions
specified by the manufacturer is also part of conformity of use. This
product should only be used, maintained and started up by trained
personnel, who are informed about and are familiar with the possible
hazards involved.
Any other use is considered non-compliant. The manufacturer is not
responsible for any incorrect use and the risks associated with such
actions are assumed by the user alone!
For a better understanding of the interrelationships in powder coating, it is
recommended to read completely the operating instructions of the other
components, so as to be familiar with their functions too.
Reasonably foreseeable misuse
– Operation without the proper training
– Use in connection with unauthorized coating devices or components
Technical data
Connectable axes
OptiMove CR08 connectable
ZA10 yes
ACHTUNG
The OptiMove CR08 axis control unit may only be used with the
specified axes types!
General data
OptiMove CR08
Number of axes per control unit 1
Maximum available programs 255
Max. stroke height (theoretical) 5 m
Maximum speed 0.6 m/s
Minimum speed 0.08 m/s
Acceleration 0.1-2.0 m/s²

V 02/16
OptiMove CR08 Product description • 11
Electrical data
OptiMove CR08
Nominal input voltage 230 VAC
Tolerance +10% / -10%
Frequency 50/60 Hz
Control current circuit 24 VDC
Fuse F1 10 AT
Power consumption 0.6kW
Protection type IP54
Operating temperature 0 °C - +40 °C
(+32 °F - +104 °F)
Storing temperature -20 °C - +70 °C
(-4 °F - +158 °F)
Dimensions
OptiMove CR08
Width 173 mm
Depth 212 mm
Height 177 mm
Weight 3 kg


V 02/16
OptiMove CR08 Design and function • 13
Design and function
Structure
The OptiMove CR08 Axis control unit is available as an enclosure version
for building into an AS0x control system.
Function description
The OptiMove CR08 axis control unit is used in axis control systems. A
complete axis control system consists of an OptiMove control unit, a
servo regulator and an axis with synchronous motor. The servo regulator
receives the supply voltage and the control signals directly from the
OptiMove axis control unit.
The OptiMove CR08 axis control unit contains the visualization, input unit
and sequence control for the control of an axis with synchronous motor
and position regulator.
The drive motor is equipped with an electrical retaining brake. The holding
brake is activated if the axis control is disconnected from mains.

V 02/16
14 • Design and function OptiMove CR08
Configuration
fig. 2: Schematic presentation
1 Axis control
2 Position regulator
3 Pulse generator wiring
4 Motor cables
5 Drive motor

V 02/16
OptiMove CR08 Operating and display elements, operating modes • 15
Operating and display elements,
operating modes
Display and input buttons
The control unit is operated by a foil keyboard with input and display
elements. All displays (A1-A3) are 7 segment displays and all LEDs are
green.
In the "Manual" operating mode, all operation functions are released with
the foil keyboard. In the "Remote" operating mode, only visualization
functions are available.
fig. 3: Display and input buttons
ATTENTION
The input keys may be damaged if they are pressed with
fingernails or hard objects.
– Input keys should only be pressed with fingertips!

V 02/16
16 • Operating and display elements, operating modes OptiMove CR08
Display Meaning
A1
Actual value display (axis position)
– Desired value input (position above, speed upwards,
dwell time, program address)
A2
Actual value display (axis speed)
– Desired value input (position below, speed
downwards)
A3 Displays the selected program number or the error code
Keys Meaning
Start axis (T7)
Stop axis (T8)
– Press and hold 5 seconds = system parameter
Start reference point travel (T9)
Input keys for desired values and system parameters
(increase value)
Input keys for desired values and system parameters
(decrease value)
T5, T6 Input keys for program number, error acknowledgment
Activate display mode (select desired value input LED 4 -
LED 9)

V 02/16
OptiMove CR08 Operating and display elements, operating modes • 17
fig. 4: LEDs
LED Meaning
1
2
3
Preset/actual value mode
(dark = actual value mode / green = desired value mode)
4 - 9 Parameter selection display
10 Axis started
11 Axis stopped
12 Axis referencing
Remote Keyboard lock

V 02/16
18 • Operating and display elements, operating modes OptiMove CR08
Operating modes
The OptiMove CR08 Axis control unit provides following operating modes:
– Manual
– Keyboard lock
The OptiMove CR08 Axis control unit enables the simply creation of 255
programs with the help of the necessary parameters.
"Manual" operating mode
The manual operation permits the selection and the start of the travel
programs by the operator on the panel. In addition, the operator has the
possibility to change the program number or directly modify the running
program.
In this operating mode, all display and operating functions are possible by
the operating panel, such as:
– Program numbers selection
– Input mode/display mode selection
– Desired value setting in the input mode (only in pendulum operation)
– Start/Stop
– Error messages acknowledgement
– System parameter mode
Keyboard lock
In the Keyboard lock operating mode, the control unit operating panel is
locked. The prerequisite for it is that the System parameter P9 must
already have been correctly set (P9=1, for more see "Setting the system
parameters“).
If the systems parameter P9=1 is set, the keyboard lock function can be
activated through the remote digital input. This is displayed on the
operating panel by lighting-up of the green Remote LED.
Only a limited operation is possible by the operating panel, namely:
– Start, stop, referencing axes
– Input mode/display mode selection (desired values and actual
values visualization)
– Error messages acknowledgement
Table of contents
Other Gema Control Unit manuals
Popular Control Unit manuals by other brands

DMP Electronics
DMP Electronics SCS-104 installation guide

Emerson
Emerson Fisher ACE95 Series instruction manual

Loewe
Loewe SL 150 installation instructions

Tektronix
Tektronix VX4790A user manual

Peter electronic
Peter electronic VBMS Series Assembly and commissioning instructions

Sony
Sony DCU-8000 Operation manual