General International DP2001 Parts list manual

DP2001 man v.150326
SETUP & OPERATION MANUAL
Model #
General International Power Products, LLC
6243 Industrial Parkway
Whitehouse, OH 43571 USA
General International Power Products Ltd.
117-6741 Cariboo Rd.
Burnaby, BC V3N 4A3 Canada
website: www.gipowerproducts.com
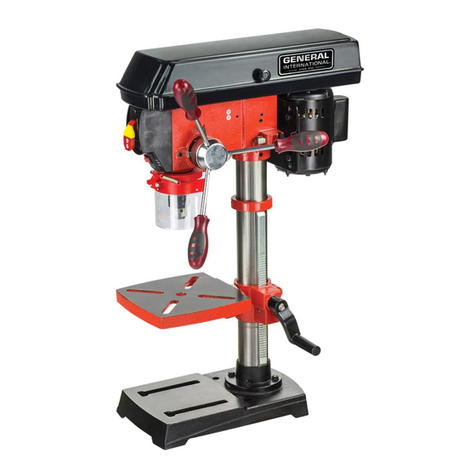
8 inch Bench Mount
Drill Press
DP2001
FEATURES
●5 speeds
●Patented precision cross-
pattern laser alignment and
centering guide
●Easy-access safety switch with
removable security key
●Transparent chuck safety guard
●Soft-grip feed handles
●Depth stop with scale
●Heavy cast-iron and steel
construction
SPECIFICATIONS
●Motor: 120 V ~ 60 Hz
●Power: 250 W
●Swing: 8 in. (203 mm)
●Drilling capacity:
1/2 in. (13 mm)
●Taper: JT33
●Quill stroke: 2 in. (50 mm)
●Speed: 620 - 3100 rpm
●Table tilt: 0 – 45 degrees
● CSA certication
●Net weight:
33 lb. (15 kg) 207013

English
2
THANK YOU
for choosing this General International machine. This tool has been
carefully tested and inspected before shipment and if properly used and
maintained, will provide you with years of reliable service. To ensure
optimum performance and trouble-free operation, and to get the most
from your investment, please take the time to read this manual before
assembling, installing and operating the unit.
The manual’s purpose is to familiarize you with the safe operation, basic
function, and features of this tool as well as the set-up, maintenance and
identication of its parts and components. This manual is not intended
as a substitute for formal woodworking instruction, nor to offer the user
instruction in the craft of woodworking. If you are not sure about the safety
of performing a certain operation or procedure, do not proceed until you
can conrm, from knowledgeable and qualied sources, that it is safe to do so.
Once you’ve read through these instructions, keep this manual handy for
future reference.
GENERAL®INTERNATIONAL
WARRANTY
All component parts of General®International products are carefully
inspected during all stages of production and each unit is thoroughly
inspected upon completion of assembly.
2-YEAR LImITEd WARRANTY
All products are warranted for a period of 2 years (24 months) from the
date of purchase. General®International agrees to repair or replace any
part or component which upon examination, proves to be defective in
either workmanship or material to the original purchaser during this 2-year
warranty period, subject to the “conditions and exceptions” as listed below.
Repairs made without the written consent of General International will void
the warranty.
DISCLAIMER
The information and specications in this manual pertain to the unit as
it was supplied from the factory at the time of printing. Because we are
committed to making constant improvements, General International
reserves the right to make changes to components, parts or features of
this unit as deemed necessary, without prior notice and without obligation
to install any such changes on previously delivered units. Reasonable care
is taken at the factory to ensure that the specications and information in
this manual corresponds with that of the unit with which it was supplied.
However, special orders and “after factory” modications may render some
or all information in this manual inapplicable to your machine. Further, as
several generations of this tool model and several versions of this manual
may be in circulation, if you own an earlier or later version of this unit, this
manual may not depict your machine exactly. If you have any doubts or
questions contact your retailer or our support line with the model and serial
number of your unit for clarication.
TO FILE A CLAIM
To le a claim under our Standard 2-year Limited Warranty, all defective
parts, components or machinery must be returned freight or postage
prepaid to General®International, or to a nearby distributor, repair center
or other location designated by General®International. For further details
contact our service department: USA toll-free (844) 877-5234 or (419)
877-5234 / Canada toll-free (888) 949-1161 or (604) 420-2299 or through
our website: www.gipowerproducts.com.
Along with the return of the product being claimed for warranty, a copy of
the original proof of purchase and a “letter of claim” must be included (a
warranty claim form can also be used and can be obtained, upon request,
from General®International or an authorized distributor) clearly stating
the model and serial number of the unit (if applicable) and including
an explanation of the complaint or presumed defect in material or
workmanship.
CONDITIONS AND EXCEPTIONS
This coverage is extended to the original purchaser only. Prior warranty
registration is not required but documented proof of purchase, i.e. a copy
of original sales invoice or receipt showing the date and location of the
purchase as well as the purchase price paid, must be provided at the time
of claim.

English
3
150326
Warranty does not include failures, breakage or defects deemed after
inspection by General®International to have been directly or indirectly
caused by or resulting from; improper use, or lack of or improper
maintenance, misuse or abuse, negligence, accidents, damage in
handling or transport, or normal wear and tear of any generally considered
consumable parts or components.
Repairs made without the written consent of General®International will
void all warranty.
READ ALL INSTRUCTIONS
BEFORE OPERATING
SAVE THESE INSTRUCTIONS
Before attempting to operate your new tool, please read these instructions
thoroughly. You will need these instructions for the safety warnings,
precautions, assembly, operation, maintenance procedures, parts list and
diagrams. Keep your invoice with these instructions. Write the invoice
number on the inside of front cover. Keep the instructions and invoice in a
safe, dry place for future reference.
THE WARNINGS, CAUTIONS AND INSTRUCTIONS discussed
in this instruction manual cannot cover all possible conditions or
situations that could occur. It must be understood by the operator that
common sense and caution are factors which cannot be built into this
product, but must be supplied by the operator.
IMPORTANT SAFETY
INSTRUCTIONS
The purpose of safety symbols is to attract your attention to possible
hazards. The safety symbols, and the explanations with them, deserve
your careful attention and understanding. The safety warnings do not, by
themselves, eliminate any danger. The instructions or warnings they give
are not substitutes for proper accident prevention measures.
DANGER! Indicates an imminently hazardous situation which, if not
avoided, will result in serious injury or death.
WARNING! Indicates an imminently hazardous situation which, if not
avoided, could result in serious injury or death.
CAUTION: Indicates an imminently risky situation which, if not avoided,
could result in minor injuries or slight injury. It may also be used to notify
the user to remain alert regarding unsafe practises which may cause
property damage.

English
4
WARNINGS AND CAUTIONS
Be sure to read, understand and follow all safety warnings and instructions
in the supplied operator’s manual.
WORK AREA
1.KEEP CHILDREN AND BYSTANDERS AWAY.
All children should be kept away from the work area. Don’t let them
handle machines, tools or extension cords. Visitors can be a distraction
and are difcult to protect from injury.
2.KEEP WORKING AREA CLEAN
and be sure adequate lighting is available. Cluttered areas invite
injuries.
3.MAKE WORKSHOP KID-PROOF
with padlocks, master switches, or by removing starter keys.
4.AVOID DANGEROUS ENVIRONMENTS
Don’t use power tools in damp or wet locations. Keep work area
well lit. Do not expose power tools to rain. Do not use the tool in the
presence of ammable liquids or gases.
5.STORE IDLE EQUIPMENT.
Store equipment in a dry area to inhibit rust. Equipment also should be
in a high location or locked up to keep out of reach of children.
PERSONAL SAFETY
1.LEARN THE MACHINE’S APPLICATIONS AND LIMITATIONS,
as well as the specic potential hazards particular to this machine.
Follow available safety instructions and safety rules carefully.
2.DON’T OVERREACH.
Keep proper footing and balance at all times. Do not reach over or
across machines that are running.
3.STAY ALERT
Watch what you are doing. Use common sense. Do not operate tool
when you are tired. Do not operate while under medication or while
using alcohol or other drugs.
4.AVOID DISTRACTIONS
while operating this tool.
5.WEAR APPROPRIATE APPAREL
Do not wear loose clothing, gloves, bracelets, necklaces,or jewellery
while operating the tool. Wear face, eye, ear, respiratory and body
protection devices, as indicated for the operation or environment.
6.ALWAYS WEAR SAFETY GLASSES
Also use face or dust mask if cutting operation is dusty, and ear plugs
during extended periods of operation. Everyday eyeglasses have only
impact resistant lenses, they are NOT safety glasses.
7.WEAR BREATHING PROTECTION.
Use of this tool can generate and/or disperse dust, which may cause
serious and permanent respiratory or other injury. Many types of wood
are naturally toxic, especially in dust form. Wear a clean dust mask
if the work involves creating a lot of ne or coarse dust. Always use
NIOSH/OSHA-approved respiratory protection appropriate for the dust
exposure. Direct particles away from face and body.
8.WEAR HEARING PROTECTION,
especially from repeated exposure.
9.GUARD AGAINST ELECTRIC SHOCK
Prevent body contact with grounded surfaces. For example: pipes,
radiators, ranges, refrigerator enclosures. When your body is grounded
the risk of electric shock increases. When working wherever “live”
electrical wires may be encountered, try to ascertain whether there is
a danger of shock. Even so, DO NOT TOUCH ANY METAL PARTS
OF THE TOOL while using it. Hold the tool only by the plastic grip to
prevent electric shock if you contact a live wire.
10.ALWAYS DISCONNECT TOOL BEFORE SERVICING
and when changing accessories such as belts, bits, blades, cutters.
11.KEEP GUARDS IN PLACE
and in working order. If a guard must be removed for maintenance or
cleaning, make sure it is properly attached before using the tool again.
WEAR YOUR
FORESIGHT IS
BETTER THAN
NO SIGHT

English
5
150326
12.ENSURE KEYS AND ADJUSTING WRENCHES ARE REMOVED
before turning power on. Left attached, these parts can y off a
rotating part and result in personal injury.
13.MAKE SURE THAT SWITCH IS IN “OFF” POSITION
before plugging in cord to reduce the risk of unintentional starts.
14.MAKE SURE TOOL IS PROPERLY GROUNDED.
If tool is equipped with three-prong plug, it should be plugged into a
three-pole electrical receptacle. Never remove the third prong.
15.NEVER STAND ON TOOL
Serious injury could occur if the tool is tipped or if the cutting tool is
unintentionally contacted.
16.KEEP HANDS WELL AWAY FROM ABRASIVE SURFACES
and all moving parts. Do not clear chips and sawdust away with
hands. Use a brush.
17.WHENEVER POSSIBLE USE A DUST COLLECTOR
with shaving hood to minimize health hazards.
18.SECURE WORK.
Use clamps or a vise to hold the work. It’s safer than using your hands
and it frees both hands to operate the tool.
19.DISCONNNECT THE PLUG FROM POWER
before making any adjustments. Changing attachments or accessories
can be dangerous if the tool could accidentally start.
TOOL SAFETY
1.MAKE SURE ALL DRILLING TOOLS
are moving at operation speed before feeding.
2.DO NOT FEED THE MATERIAL TOO QUICKLY.
The tool will perform better and be safer working at the rate for which it
was designed.
3.NEVER LEAVE THE MACHINE WITH THE POWER ON.
4.DO NOT FORCE THE MACHINE.
It will do the job better and be safer at a rate for which it was designed.
Don’t force a small tool or attachment to do the work of a larger
industrial tool. Don’t use a tool for a purpose for which it was not
intended.
5.MAINTAIN TOOLS WITH CARE.
Keep tools sharp and clean for better and safer performance. Follow
instructions for lubricating and safe performance. Follow instructions
for lubricating and changing accessories. Keep handles dry, clean and
free from oil and grease.
6.DISCONNNECT THE PLUG FROM POWER BEFORE MAKING ANY
ADJUSTMENTS.
Changing attachments or accessories can be dangerous if the tool
could accidentally start.
7.AVOID UNINTENTIONAL STARTING.
Be sure the switch is in the OFF position before plugging in. Do not
carry the tool with the power connected and your nger on the trigger.
8.KEEP GUARDS IN PLACE,
in working order, in good adjustment and alignment.
9.DO NOT USE THE TOOL
if it cannot be switched on or off. Have your tool repaired before using
it.
10.CHECK FOR DAMAGED PARTS.
Before using this tool, any part that is damaged should be carefully
checked to determine that it will operate properly and perform its
intended function. Check for alignment of moving parts, binding of
moving parts, breakage of parts, mountings, and other conditions that
may affect its operation. Inspect screws and tighten any ones that
are loose. Any part that is damaged should be properly repaired or
replaced by an authorized service center unless otherwise indicated
elsewhere in the instruction manual. Have defective switches replaced
by an authorized service center. Don’t use the tool if switch does not
turn it on and off properly.
Table of contents
Languages:
Other General International Power Tools manuals

General International
General International 40-350 User manual

General International
General International 75-075 Manual

General International
General International 75-155 Parts list manual

General International
General International 75-060 Parts list manual

General International
General International 75-100 Parts list manual

General International
General International DP2006 Manual instruction

General International
General International DP2003 Parts list manual

General International
General International DP2002 Parts list manual

General International
General International 25-300QC M1 Parts list manual

General International
General International Excalibur EXF-30S-R30 Parts list manual