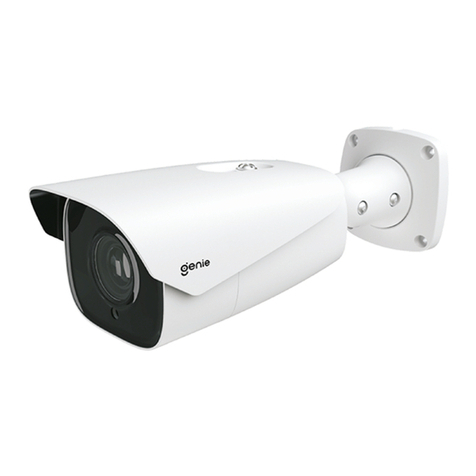
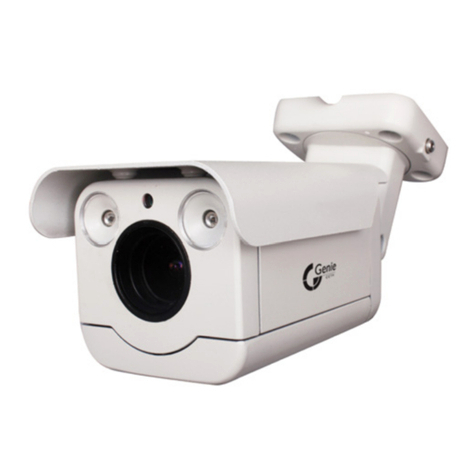
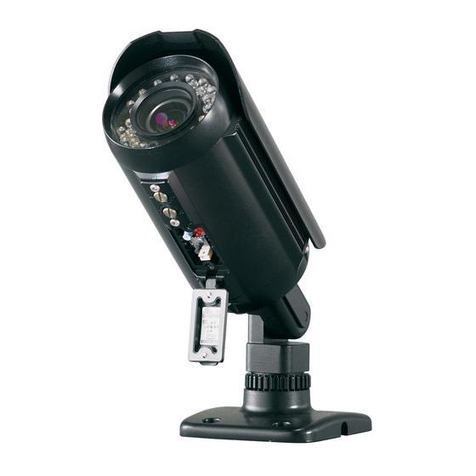
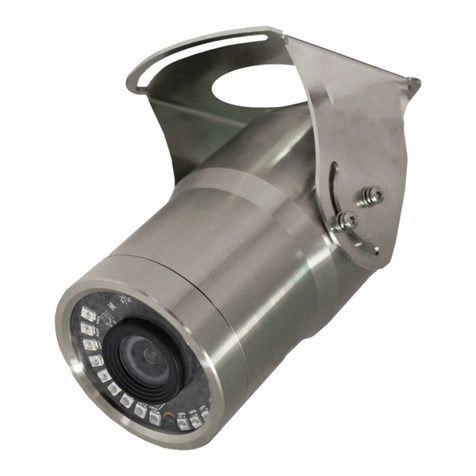
Genie IPB2AFIR Series User manual

IPB2AFIR Series
HD IP Fixed High Brightness Bullet Cameras
User Manual

Safety Information
Precaution
This exclamation point symbol is
intended to alert the user to the
presence of important operating and
maintenance (servicing) instructions
in the literature accompanying the
appliance.
Precaution
This exclamation point symbol is
intended to alert the user to the
presence of important operating and
maintenance (servicing) instructions
in the literature accompanying the
appliance.
Warning
1. Be sure to use only the standard adapter that is
specified in the specification sheet. Using any
other adapter could cause fire, electrical shock, or
damage to the product.
2. Incorrectly connecting the power supply or
replacing battery may cause explosion, fire,
electric shock, or damage to the product.
3. Do not connect multiple cameras to a single
adapter. Exceeding the capacity may cause
excessive heat generation or fire.
4. Securely plug the power cord into the power
socket. Insecure connection may cause fire.
5. When installing the camera, fasten it securely and
firmly. A falling camera may cause personal injury.
6. Do not place conductive objects (e.g. screw
drivers, coins, metal items, etc.) on top of the
camera. Doing so may cause personal injury, fire
or electric shock.
7. Do not install the unit in humid or dusty locations.
Doing so may cause fire or electric shock.
8. If any unusual smells or smoke comes from
the unit, stop using the product. Immediately
disconnect the power source and contact the
service centre. Continued use in such a condition
may cause fire or electric shock.
9. If this product fails to operate normally, contact
the nearest service centre. Never disassemble or
modify this product in any way.
10. When cleaning, do not spray water directly into
parts of the product. Doing so may cause fire or
electric shock.
Precaution
Operating
• Before using, make sure power supply and
all other parts are properly connected.
• While operating, if any abnormal condition
or malfunction is observed, stop using
the camera immediately and contact your
dealer.
Handling
• Do not disassemble or tamper with parts
inside the camera.
• Do not drop the camera or subject it to
shock or vibration as this can damage the
camera.
• Clean the clear dome cover with extra care
Scratches and dust can ruin the quality of
the camera image.
Installation and Storage
• Do not install the camera in areas of
extreme Temperature which exceed the
allowed range.
• Avoid installing in humid or dusty
environments.
• Avoid installing in places where radiation is
• present.
• Avoid installing in places where there are
strong magnetic fields and electric signals.
• Avoid installing in places where the camera
would be subject to strong vibrations.
CAUTION
RISK OF ELECTRIC SHOCK.
DO NOT OPEN.
TO REDUCE THE RISK OF ELECTRIC SHOCK, DO NOT REMOVE COVER (OR BACK) NO USER SERVICEABLE
PARTS INSIDE. REFER SERVICING TO QUALIFIED SERVICE PERSONNEL.
CAUTION:
2

Important Safety Instructions
1. Read these instructions - All safety and operating instructions should be read before the product is
installed or operated.
2. Keep these instructions - The safety, operating and user instructions should be retained for future
reference.
3. Heed all warnings - All warnings on the product and in the operating instructions should be adhered to.
4. Follow all instructions - All operating and user instructions should be followed.
5. Clean only with a dry lint free cloth - Unplug this product from the power source before cleaning. Only
use neutral detergents.
6. Do not block any ventilation openings. Install in accordance with the manufacturer’s instructions - Slots
and openings in the cabinet are provided for ventilation to ensure reliable operation of the product, and
to protect it from overheating.
7. Do not install near any heat sources such as radiators, heat registers, or other apparatus (including
amplifiers) that produce heat.
8. Protect the power cord from being walked on or pinched, particularly where they exit the product.
9. Only use accessories specified by the manufacturer.
10. Only use with brackets specified by the manufacturer, or sold with the apparatus.
11. Unplug this apparatus during lightning storms or when unused for long periods of time.
12. Refer all servicing to qualified service personnel. Servicing is required when the apparatus has been
damaged in any way, such as power supply cord or plug is damaged, liquid has been spilled or objects
have fallen into the apparatus, does not operate normally, or has been dropped.
3

Product & Accessories
Introduction -
Camera
Cables
Screw & Plastic Anchor-4pcs
Test Monitor Cable Manual CD Quick ManualTemplate Sheet
Please check if all the camera and accessories are included in the package.
Torx Wrench
4

Part Name
Introduction -
Bracket
Pan/Tilt Stoper Screw
Lens
Control Board
Con Cap
Sunshield
5

Introduction -
Specication
Model Number IPB2AFIRS IPB2AFIRL
Image Sensor 1/2.8” 2MP CMOS
Total Pixels 2000 (H) x 1241 (V)
Effective Pixels 2MP
Aspect Ratio HD: 16:9, SD: 4:3
Zoom Ratio N/A Optical x8 (Digital x12)
Focal Length Auto Focus 3 - 10.5 mm, F1.4, P-Iris
Lens 3.0 ~ 10.5 mm 6.3 ~ 50 mm
Horizontal Angle 100° (W) ~ 30° (T)
Minimum Illumination Colour: 0.1 Lux @ F3.5, 30IRE, B&W: 0.00 Lux @ IR LED ON
IR LED 54pcs IR LED (Distance: 20m) 6pcs High Power LED (Distance: 60m)
Digital In / Out 1 Alarm Sensor In / 1 Out
Audio In / Out 1 Audio In / 1 Audio Out
Video Out 2 Pin Connector (For Local Focus)
Day & Night Auto / Day / Night (ICR)
Focus Auto / Manual
DNR OFF / LOW / MIDDLE / HIGH
Shutter Speed 1/30 Sec ~ 1/60000 Sec, 1/25 Sec ~ 1/60000 Sec
DSS x2 ~ x8
AGC 41dB Max.
White Balance Auto / Auto-Ext / Indoor / Outdoor / One-Push Mode / Manual
BLC OFF / WDR / BLC / HLM
OS Embedded Linux
Video Compression Triple Codec, H.264 / MPEG4 / MJPEG
Video Streaming Multi-Streaming CBR / VBR (Controllable Frame Rate and Bandwidth)
Resolution H.264: 1080p / 720p / D1 / CIF, MJPEG: 1080p / 720p / D1 / CIF / QCIF
MPEG4: 720p / D1 / CIF
Frame Rate Max 30 / 25 fps
Audio Compression Two Way, G.711 PCM. μ-law 64kbps 8kHz
Local Storage SDHC Memory Card Located Externally (Card is Not Included)
Motion Detection Notication: FTP, E-mail, Alarm Out, JPEG Recording on SD
Alarm Pre-Post Alarm
Max. Number of Clients 10
Protocols Support
IPv4: ONVIF, TCP/IP, UDP/IP, RTP (UDP), RTSP, NTP, HTTP, HTTPS, SSL, DDNS, DHCP, FTP, SMTP, ICMP, SNMPv1 / v2c / v3
(MIB-2)
IPv6: TCP/IP, HTTP, HTTPS, DHCP
DDNS: Proprietry: NET4C
Pubblic DDNS services Suport:
www.dyndns.com, www.no-ip.com
Security: HTTPS(SSL),
Digest Authentication(ID/PW)
OS Supported Windows 7, Vista, XP, 2000
Approvals FCC, CE, IP66, ROHS
Power DC12V, 12W POE IEEE 802.3af DC12V, 24W High POE IEEE 802.3at
Operating Temperature -30°C ~ 50°C
Housing Dark Grey Weather Proof / Vandal Proof Structure
Material Aluminium Die-Casting
Camera Posture 3 Axis (Pan / Tilt / Rotation)
Dimensions (L x H x ø) 247.8 x 82 x ø96.7 mm
Weight 2Kg
6

Installation
Installation -
Before installing your camera, you have to read the following cautions.
1. You have to check whether the location can bear ve times of the weight of your camera.
2. Don’t let the cable to be caught in improper place or the electric line cover to be damaged. Otherwise
it may cause a breakdown or re.
3. When installing your camera, don’t allow any person to approach the installation site. If you have any
valuable things under the place, move them away.
Zoom Out
Zoom In
WIDE
TELE
Reset to the Factory Default
Press the reset button for 5 seconds to return the setup
to the factory default.
Warning
If you press the ‘Reset’ button, you will lose all setting
data. If needed, please, make a note for further
installation.
SD Card Slot
Reset
T-W Jog Button
Test Video Output
1
2
3
4
To pass cables through the wall/ceiling, drill holes on
the wall/ceiling.
Connect the network cable, power cable respectively.
See the section ‘Installation - Cabling’ for details.
Fix the camera on the wall/ceiling by screw provided.
Loosen the Pan/Tilt stoper screw a litte before xing the camera.
By using the video test cable, check the screen during
installation. You can adjust the zoom ratio using the
T-W jog button.
7

Micro
Inserting/Removing SD Memory Card
Installation -
1Inserting an SD Memory Card
Insert the SD card in the arrow direction.
Don’t insert the SD memory card while it’s upside down by force.
Otherwise, it may damage the SD memory card.
Use the tweezers when inserting or picking out the SD card.
2Removing an SD Memory Card
Removing an SD Memory Card Gently press down on the
exposed end of the memory card as shown in the diagram
to eject the memory card from the slot.
Pressing too hard on the SD memory card can cause the card to
shoot out uncontrollably from the slot when released.
If you have saved data in the SD memory card, removing the SD
memory card prior to setting record to OFF will cause damage to
the data stored in the card.
Recommended SD Card Specication (Not Included)
- Type: Micro SD (SDHC)
- Manufacturer: Transcend, Kingston, Toshiba, Sanddisk
- Capacity: 4~16G
- Class: over Class 6
The memory card is an external data storage device
that has been developed to oer an entirely new way
to record and share video, audio, and text data using
digital devices.
8

Cabling
Installation -
1
2Audio In
4Alarm In
1Audio Out
3Alarm Out
3
4
2
White : DIN+
Yellow : GND
Black : DOUT-
Red : DOUT+
Alarm Out
It connects to the alarm lights, siren or lamps and the sensor
types are normal open and normal close.
Cable of the alarm output device should connect to alarm
out+ and alarm out- of the cable slot.
Alarm In
Cable of the sensor/alarm input device should connect to
alarm in+ and alarm in- of the cable slot.
Audio In
Cable of the audio input device should connect to audio in
and GND pin of the cable slot and audio input device is
activated according to the web-viewer.
Audio Out
Cable of the audio output device should connect to audio
out and GND pin of the cable slot. Audio volume is controled
according to the web-viewer.
9

IP Installer
Network Setup -
Input ID and PW of the camera for authentication.
Make sure to change the ID and PW for security reason.
Go to “Web viewer>Admin page>System>Users” for ID and PW
change.
The ID and PW will be set to default value when ‘factory reset’ the
camera.
Make sure to click on‘Save’button to save changed values.
An “Apply” message will be popped-up when the settings are
applied normally, or an error message will be popped-up when
failed.
To reboot or reset (except network setting) the camera.
Select a camera (multiple camera can be selected) > Input ID and
PW > Click on Reboot or Factory Reset button.
Able to delete an Active-X which is installed when accessing
to Web Viewer.
Please try to re-install the Active-X after deleting previous Active-X
when there is a problem with it. Changing the security option of
IE might be necessary depending on the version of IE.
Note that all IE windows will be closed when uninstalling Active-X.
1
2
3
4
5
6
Run the manual CD and IP installer in S/W folder.
Click on Network Adaptor selection Menu (NIC) after run
this program.
Select a network which a camera is connected then click on
a ‘Search’ button. (Takes about 5 sec.)
Select a camera to set.
The information of the selected camera will be shown at
Device Info.
Select the network type.
7Input IP setting information when the network type is set to
STATIC.
1. Run IP Installer
If the internet service is dynamic IP method which receive the IP
address from DHCP server, please select DHCP.
If the IP address is received from a network administrator, please
select STATIC and input other information on IP setting.
If the internet service is based on Static IP address and to set it
directly to the camera, please contact to internet service center
for detailed information.
Default TCP/IP information
- IP: 192.168.1.80
- Subnet Mask: 255.255.255.0
- Gateway: 192.168.1.1
- DNS : 168.126.63.1
8Change the port as necessary when the network type is set
to STATIC.
A‘Port Forwarding’has to be set for external access to the camera.
Refer to the manual of the network hub for‘Port Forwarding’
settings.
An additional change of HTTPS, RTSP port can be done at Web
Viewer >Admin page.
9
10
11
12
Default ID / PW : admin / admin
2
3
4
5
6
7
8
9
10
11
12
10

Quick Start of Network Connection
Network Setup -
Please follow the steps below to complete
the initial setup of the network function.
In order to communicate with the IP Camera, access to
PC/laptop and configure the PC.
Keep a record of TCP/IP properties of the PC. (IP address,
subnet mask, gateway, DNS, etc.)
1.
Please do not power on the IP Camera until instructed.
Temporarily disable any proxy servers configured in internet
Explorer.
If connecting the IP Camera directly to a modem, power down
and reset the modem. Leave the modem powered down until
configurations are finalized with the IP Camera and the IP Camera
has been correctly connected to the modem.
Change the IP address of the host PC to 192.168.1.11 and
subnet mask to 255.255.255.0 (leave all other entries blank)
Connect the IP Camera to your PC’s Ethernet port via the
supplied crossover cable. (It does not matter what end is
used for the PC)
Power on the IP camera using the supplied power adapter.
After 1 minute of power, verify a flashing ACTIVE indicator
and a flashing or solid LINK indicator. After the
corresponding indicator lights are properly displayed, open
Internet Explorer.
Type - http://192.168.1.80 (the default IP of the IP Camera)
into your address bar.
Default ID/Password to access IP Camera are both the
word: admin.
Familiarize yourself with the Viewer Interface Screen.
Locate the TCP/IP configuration under Setup. Supply the
same ID and Password to enter Setup. (admin : admin)
Select STATIC under‘Network Type’. You will select Dynamic
only if you are connecting the IP Camera directly to your
cable/DSL/Broadband modem and your Internet Service
Provider is supplying a dynamic address.
2.
3.
4.
5.
6.
7.
8.
9.
10.
If your PC obtains its IP address automatically, there is no need to
record any information.
If you have a network with other devices (such as PC/laptop, etc.)
or a router, you will NEVER select Dynamic.
Configure the IP Camera’s TCP/IP settings as you normally
do any other PCs on your network by providing a proper IP
address, subnet mask, default gateway, and DNS server.
11.
If this is a stand-alone unit with a direct connection to cable/DSL/
Broadband modem, input the addresses you have received from
your ISP. If you have received no IP address from your ISP, select
Dynamic and choose the proper settings.
Current TCP/IP Settings
IP Address
Subnet Mask
Default Gateway
Primary DNS Server
Secondary DNS Server (Option)
Access your IP Camera via the Internet :
If you use a static IP address assigned by your ISP
1) Open Internet Explorer.
2) Type the IP of the IP Camera.
3) If you use a router, type the routers’ static IP and the web port
number of the IP Camera.
If you have a dynamic address provided by your ISP
1) Open Internet Explorer and visit the DDNS website.
2) Register the IP Camera.
3) Reboot the IP Camera.
4) Give the DDNS server 10 minutes to locate your IP Camera’s
IP information.
5) Click the refresh button in the Internet Explore.
6) After your camera is connected, select your camera.
15.
The IP Camera utilizes five TCP ports - a Web Port, a Video
Port, a Control Server Port, Audio ports. A Web Port is to
utilize Internet Explorer, a Video Server port is to support
the streaming video, a Control Control Port is to transmit to
control commands and Audio Ports are to transmit and
receive Audio data. If the IP Camera will be directly attached
to a cable/DSL/Broadband modem or it has been assigned a
static IP from your ISP, then leave the default port settings.
If you are installing the IP Camera on a network, you must
define a Web Port other than 80. The other ports, a Video
Port, a Control Port, Audio Ports can remain unchanged.
If the IP Camera is connected to a network which utilizes a
router, you must have Port Forwarding configured on your
personal router to forward all ports to the IP address you
have assigned the IP Camera.
After configuring Port Forwarding on your router
(if necessary), you may access your IP Camera on your local
network by opening Internet Explorer and specifying the IP
address and Web Port that you have assigned to the IP
Camera.
12.
13.
14.
Example: http://192.168.0.200:8888
If you leave your Web Port set to 80, you don’t need to specify
the port in the Address Bar to access to your IP Camera.
11

Initial Setup via a Crossover Cable
Network Setup -
This section provides a guide on how to
connect the IP Camera to your PC/Laptop for
initial setup.
Please follow the instructions in the order
below without skipping steps. Do not supply
power to the IP Camera until instructed.
In order to access the IP Camera’s firmware
you will need to connect the Video Server to
a PC or Laptop directly via the supplied
crossover cable.
Before you begin, you must determine the current network/
INTERNET (TCP/IP) settings on the PC or laptop. Write down
your entries below for quick reference.
1.
You will have to click ‘Yes’ twice to two individual prompts. This
allows your video to be displayed in Internet Explorer.
Current TCP/IP Settings
IP Address
Subnet Mask
Default Gateway
Primary DNS Server
Secondary DNS Server (Option)
To make the IP Camera to communicate with your PC,
change your PC’s IP address and subnet mask.
2.
Now you will be able to see the login screen for the IP
Camera.
7.
The default ID and Password are both the word ‘admin’
(without the “ ”)
At any time if you are prompted to download ActiveX controls,
Click ‘Yes’as all contents are safe.
8.
9.
You should change your IP address to 192.168.1.11 and change
the subnet mask to 255.255.255.0
Leave all other entries (Default Gateway, DNS Servers, etc.) blank.
For information on how to change your IP address and subnet
mask, see Appendix B.
After you have made the changes to your IP address and
subnet mask, you may attach the IP Camera to your PC via
the supplied crossover cable. Plug-in either end of the
crossover cable into the PC’s network card and the other end
into your IP Camera.
After connecting the PC and IP Camera using the crossover
cable, power on the IP Camera by plugging in the power
supply shipped with the IP Camera.
No longer than 1 minute after powering on the IP Camera,
verify that the ACTIVE indicator light is flashing, and the LINK
indicator light is flickering or solid. No longer than 1 minute
after power on the IP Camera, verify that the ACTIVE indicator
light is flashing and the LINK indicator light is flickering or
solid. If they are not, read the FAQ.
3.
4.
5.
Open Internet Explorer and type the IP address of 192.168.1.80
(default IP of the IP Camera from the factory) into the Address Bar
of the web browser (as seen below). Press Enter.
If a message box similar to the image below appears, choose
‘Try Again’. The message will vary depending on the operating
system.
The 3 authorities are available :
Administrator, Operator and Viewer. The authority setup is
available in Setup.
• Viewer : Only monitoring is allowed.
• Operator : Most of the functions are allowed except
‘Setup’.
• Administrator : All functions are allowed.
For information on how to determine your currents settings, see
Appendix A.
If you are obtaining an IP Address automatically, there is no need
to write down the information.
Now you will be able to access the viewer software within
the IP Camera.
6.
12

DDNS Registration
Network Setup -
If you have DYNAMIC IP service from your
Internet Service Provider (ISP), you can’t tell
the current IP address of the IP Camera.
To solve this problem, you have to register to
our DDNS service.
At first, you have to check if you are using
dynamic addressing. If so, register your IP
Video Server on our DDNS website before you
configure, setup, or install the IP Camera.
Even though your IP is not dynamic, you will
get benefit if you register to DDNS. In this
case, just remember ‘alex.net4c.net/gate1’
instead of complicated series of numbers like
http://201.23.4.76:8078.
For more details, contact our Support Center.
To register IP Camera to DDNS,‘Serial No.’of the IP Camera should
be known. The ‘Serial No.’can be found in section 6 ‘Setup - DDNS’
menu.
To use a public DDNS called ‘dyndns’or ‘no-ip’, refer to the detail
information on how to use the service.
(Visit the web site : http://www.dyndns.com or
http://www.no-ip.com)
13

Guide to Network Environment
Network Setup -
Please configure the IP Camera at the
installation site. You must determine your
network scenario in order to configure the IP
Camera with the proper TCP/IP settings.
This tutorial will guide you through the
process. Before actually configuring the IP
Camera, determine settings to be applied.
Record those settings to be used to configure
your IP Camera for reference.
When configuring your IP Camera, treat the
IP Camera as another PC on your network.
You will assign it several addresses and other
TCP/IP properties to match your current
network.
This step-by-step tutorial will teach what IP
addresses and network configurations should
be assigned based on the network scenario.
If you were not given any IP addresses or the ISP was responsible
for the setup and installation of your Internet connection, go to
step 2.
If you are not using a router on your network, your ‘Current TCP/IP
Settings’(from the previous section) and ‘Assigned IP Addresses
from My ISP’ will be exactly the same.
Before you begin, locate any information and settings
received from your Internet Service Provider (ISP). You may
need to refer to these IP addresses at a later time during the
configuration.
1.
You must determine whether the IP address is STATIC or
DYNAMIC. At this moment, you are only concerned about the
ISP. Did they provide you with a STATIC or DYNAMIC address?
If you are unsure, contact your ISP.
Configure your IP Camera’s TCP/IP settings for network
connectivity by selecting Setup from the main interface and
selecting TCP/IP located on the left of the Setup screen.
If prompted for ID and Password, use ‘admin’for both entries.
The default web port number is 80. If port 80 is blocked by
the ISP, a value between 1025 ~ 60000 should be used. If TCP
port 80 is blocked, consult the ISP
2.
3.
4.
Current TCP/IP Settings
IP Address
Subnet Mask
Default Gateway
Primary DNS Server
Secondary DNS Server (Option)
Static Dynamic
5. The following descriptions are several basic network
scenarios. Determine which scenario describes your network.
If your network does not match one of the scenarios below
and you are unsure how to setup your IP Camera, contact
your network administrator and then call our Support Center.
You cannot control the rectangular gray areas and only the ISP
has access to the devices.
14

Setup Case A, B
Network Setup -
Case A:
Dynamic IP +
Personal Router [Most SOHO]
Personal Router
W/Intergrated Switch
Cable/xDSL Modem
(ISP Provided)
Phone Line
or CATV
PC
Internet
Case B:
Static(Fixed) IP +
Personal Router [Ecient]
PC
Personal Router
W/Intergrated Switch
Gateway or Router
at ISP
Public Line
Internet
Configure your IP Camera's TCP/IP properties
as follows :
STATIC (even though you have Dynamic IP from
your ISP, use STATIC on the IP Camera)
Network Type :1.
A private IP address such as
192.168.0.200 (Example)
Internet Address :2.
You need to assign an IP address to the IP Camera just as you do
with PC.
The IP address you assign must be unique to your network and
match your network as well. For information on how to choose
a unique IP and match your network, read the FAQ.
The IP address you assign must be a private IP. For information
on how to choose a private IP please, read the FAQ.
255.255.255.0 (Example)
192.168.0.1 (Example)
Subnet Mask :3.
You must use the same subnet mask as the one you noted under
‘Current TCP/IP Settings’.
Default Gateway :4.
This IP address must be the IP address of your router.
(private or LAN side)
Use the same Default Gateway you noted under‘Current TCP/IP
Settings’.
Use the 1st DNS Server from ‘Assigned IP
Address from My ISP’.
Preferred DNS Server :5.
Use the DDNS server.
DDNS Server :6.
This is the same site you will register later to accommodate
dynamic IP from your ISP.
8888Web Port :7.
Do not use the default port 80 as this number must be changed.
You may select any number between 1025 ~ 60000.
7777Control Port :8.
You may select any number between 1025 ~ 60000.
7778Video Port :9.
You may select any number between 1025 ~ 60000.
7779
7780
Audio Transmit Port :10.
You may select any number between 1025 ~ 60000.
Audio Receive Port :11.
You may select any number between 1025 ~ 60000.
If you did not receive any IP addresses from your ISP, contact
the ISP and acquire the IP address of their DNS server.
Camera
Camera
15

Setup Case C, D
Network Setup -
To connect the IP Camera directly to a modem, power down
and reset the modem. Leave the modem powered down until
configurations are finalized with the IP Camera and the IP
Camera has been connected correctly to the modem. Then
power on the modem, followed by the IP Camera.
Cable/xDSL Modem
(ISP Provided)
Phone Line
or CATV
Internet
Internet
Public Line Gateway or
Router at ISP
STATICNetwork Type :1.
A static IP address received from your ISP such
as 24.107.88.125 (Example)
Internet Address :2.
You need to assign an IP address to the IP Camera just as you do
with PC.
Subnet mask assigned from your ISP such as
255.255.255.240 (Example)
24.107.88.113 (Example)
Subnet Mask :3.
Default Gateway :4.
Use the assigned default gateway from your ISP
Use the 1st DNS Server from ‘Assigned IP
Address from My ISP’
Preferred DNS Server :5.
Use the DDNS server
DDNS Server :6.
This is the same site you will register later to utilize our DDNS
service.
80Web Port :7.
You may select any number between 1025 ~ 60000.
7777Control Port :8.
You may select any number between 1025 ~ 60000.
7778Video Port :9.
You may select any number between 1025 ~ 60000.
7779
7780
Audio Transmit Port :10.
You may select any number between 1025 ~ 60000.
Audio Receive Port :11.
You may select any number between 1025 ~ 60000.
If you have not received any IP addresses from your ISP, contact
them to acquire the IP address of their DNS server.
DYNAMICNetwork Type :1.
Use the DDNS serverDDNS Server :2.
This is the same site you will register later to accommodate
dynamic IP from your ISP.
80Web Port :3.
You may select any number between 1025 ~ 60000.
7777Control Port :4.
You may select any number between 1025 ~ 60000.
7778Video Port :5.
You may select any number between 1025 ~ 60000.
7779
7780
Audio Transmit Port :6.
You may select any number between 1025 ~ 60000.
Audio Receive Port :7.
You may select any number between 1025 ~ 60000.
Configure your IP Camera's TCP/IP properties
as follows :
Configure your IP Camera's TCP/IP properties
as follows :
Case C:
Static(Fixed) IP [Dedicated line directly
to the IP Camera]
Case D:
Dynamic IP + DSL/Cable Modem [Connected
directly to the IP Camera]
Camera
Camera
16

Port Forwarding
Network Setup -
After entering the correct TCP/IP settings, you
are ready for ‘Port Forwarding’(Cases A, B).
Please record the TCP/IP settings of your IP Camera for future
reference. You may need this information to access your IP
Camera and to configure ‘Port Forwarding’.
1.
After clicking ‘Apply’, the system will prompt for a reboot.
Please allow the system 50 seconds to reboot and accept the
changes. After 50 seconds, close the configuration screen.
The view will display‘Trying to Reconnect’. If the ACTIVE light
on the IP Camera has gone off and is now back on again
flashing, the IP Camera has rebooted. After the system
reboots completely, remove the power supply from the
unit and close Internet Explorer.
Return your PC/Laptop TCP/IP properties to their original
settings.
Before installing the IP Camera, you must use ‘Port
Forwarding’ on your personal router (Cases A, B).
You will need to forward 5 ports:
• Web Port
• Control Port
• VideoPort
• Audio Transmit Port
• Audio Receive Port
All the ports will be forwarded to the IP address you
assigned to the IP Camera.
In the example above, you would forward:
• 8888 192.168.0.200
• 7777 192.168.0.200
• 7778 192.168.0.200
• 7779 192.168.0.200
• 7780 192.168.0.200
2.
3.
4.
IP Camera TCP/IP Settings
IP Address
Subnet Mask
Default Gateway
Preferred DNS Server
DDNS Server
Web Port
Control Port
Video Port
Audio Transmit Port
Audio Receive Port
For information on how to use‘Port Forwarding’, please read
Appendix C.
17

Starting IP Camera
Network Setup -
After forwarding correctly the Web Port,
Video Port, Control Port and two Audio Ports
through your router (if applicable), install the
IP Camera in a proper location.
Locate the serial number located on the label attached to the
bottom of the IP Camera, you will need this for DDNS
registration.
Connect the IP Camera to your router or cable/DSL modem
(per your network scenario) via a Cat5/5e UTP Ethernet
network cable.
Supply power to the IP Camera.
After 1 minute, verify the IP Camera indicators:
• ACTIVE : Flashing
• LINK : Flickering/Solid
After configuring Port Forwarding on your computer
(if necessary), access your IP Camera on your local network
by opening Internet Explorer and specifying the IP address
and Web Port assigned to the IP Camera.
1.
2.
3.
4.
5.
Access your IP Camera via the Internet :6.
Examples: http://192.168.0.200:8888 or http://24.106.88.123
If you left your Web Port set to 80, do not need to specify the
port in the Address Bar to access the IP Camera.
If you use Case B, C
1) Open Internet Explorer.
2) Type the IP of the IP Camera.
If you use Case A, D
1) Open Internet Explorer.
2) Visit the DDNS website.
3) Register the IP Camera.
4) Give the DDNS server 10 minutes (MAX) to locate your IP
Camera’s IP information. You may reboot the server to send an
immediate request to our DDNS server.
5) After your camera is connected, select your camera.
The difference between B and C is that B needs to set the port
forwarding.
Since the type of DDNS differs from the service type, refer to
the related service site.
18

Basic Screen
Web Viewer Screen -
1
2
5
7
3
4
8
6
2
1
7
8
3
4
5
6
Web viewer is optimized with Windows XP or above version
and explorer browser.
Live video display. This is the region for live video stream
from the camera.
Resolution. The resolution of video that displays currently
on the screen.
SD Card Search. Searching or Playing the Image which
stored in the SD Card.
Setup popup button. Click it to open the Setup page to
setup details of IP camera like Video, Network, Events,
System and etc. See the section ‘Setup’.
Control tab button. Click it to extend the panel to control
the function of web-viewer. See the next page for detail.
Full screen button. Click it to extend the live video to full
screen. To return to normal mode, press ‘Esc’ or ‘Enter’ key.
Camera Setup popup button. Click it to open the Setup page
to setup details of Lens, White Balance, Auto Exposure, image
Backlight and etc. See the section ‘Camera Setup’.
Event alert icon. If Alarm in and Motion detection are
detected, below icons will appear.
<Alarm Input> <Motion Detection>
19

Control Tab
Web Viewer Screen -
2
1
5
3
4
6
When the image goes unsmoothly because of bad network
connection, it stored image during setup time and shows
the image on the live view screen.
User will see the delayed images as much as setup time.
Video stream button. Select a stream produced from the
camera between Stream 1 ~ 3 to display it in the live view
screen.
Refer the ‘Setup > Basic > Video’to setup the Video Stream.
Capture button. Capture the live video in the form of BMP or
JPG file. The location and file name of image can be decided
after clicking this button.
Refer the ‘Setup > Basic > Backup’to setup the type of Image.
Print Button. Print current live image to the printer
connected to the PC.
Record Button. If you click this button, the current live video
will be stored as AVI format file in your PC. During the
recording, you cannot change the Video Format. If you
change the Video Format, the recording will be stopped
automatically.
Alarm Input Status. It shows the Alarm Input status. If the
status of alarm input becomes On state, the‘Off’ button will
be changed to ‘On’ button and event alert icon( ) is
displayed on the‘Live video display’. If alarm is removed, the
alarm input status is reset.
Regardless of alarm status, the Alert Icon will remain unless
'Event Display Clear' button is clicked.
Relay Out Button. Enable or Disable relay out function.
Event Display Clear Button. Remove Event Alert Icons result
from Alarm Input or Motion detection.
7
8
3
1
2
6
4
5
7
8
20
Table of contents
Other Genie Security Camera manuals

Genie
Genie ZD2812IR User manual

Genie
Genie PWIP4EBVAF User manual

Genie
Genie HDC222 User manual

Genie
Genie HD-SDI 2MP User manual

Genie
Genie VRD73TDN User manual

Genie
Genie GIPW4NPIR User manual

Genie
Genie GAHD18IRPTZ User manual

Genie
Genie GAHDB21W User manual

Genie
Genie SSAHD2LBVAF User manual

Genie
Genie WIP1VD User manual

Genie
Genie WIPX2LBVLPR User manual

Genie
Genie WIPX4BVAF User manual

Genie
Genie TPIR-607 Series User manual

Genie
Genie BWC-01 User manual

Genie
Genie SSIP2B User manual

Genie
Genie GSDNR-5355W Manual

Genie
Genie SSAHD2D User manual

Genie
Genie WISH96 Series User manual

Genie
Genie HDED2812IR User manual

Genie
Genie GSD106 User manual