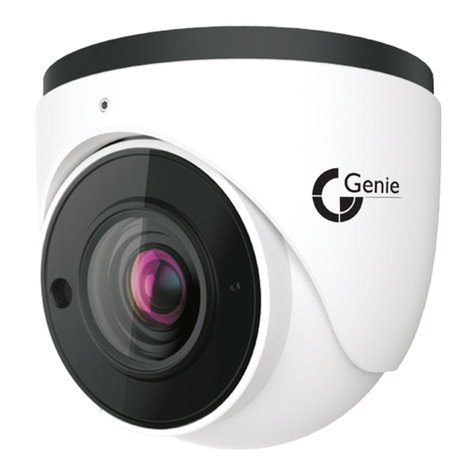
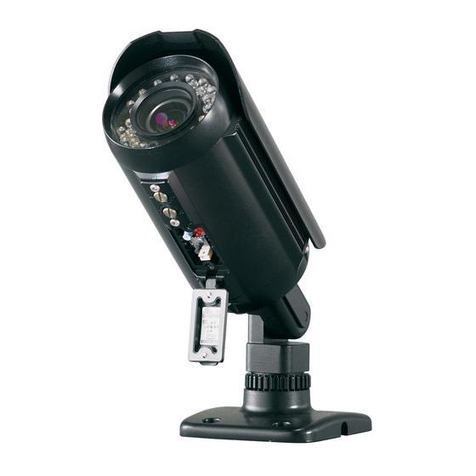
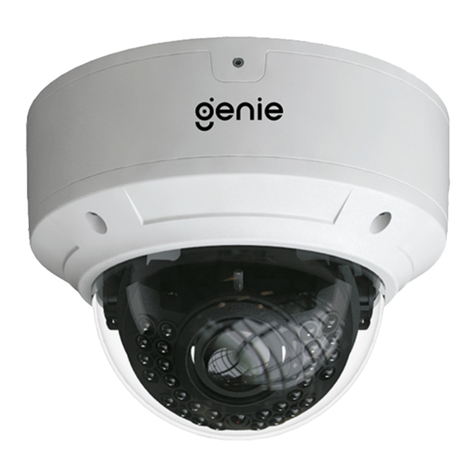
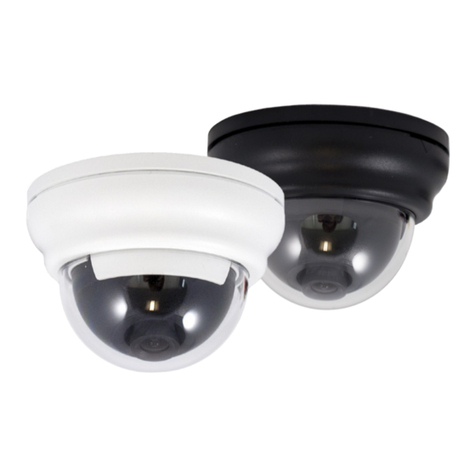
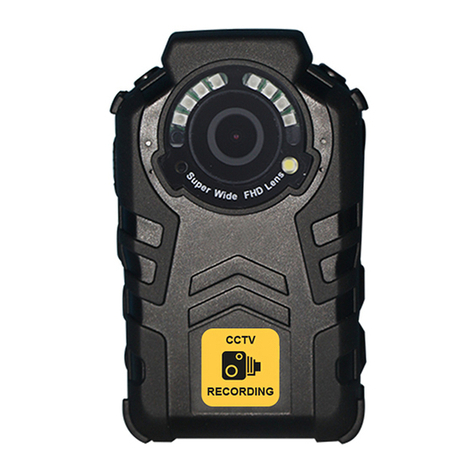
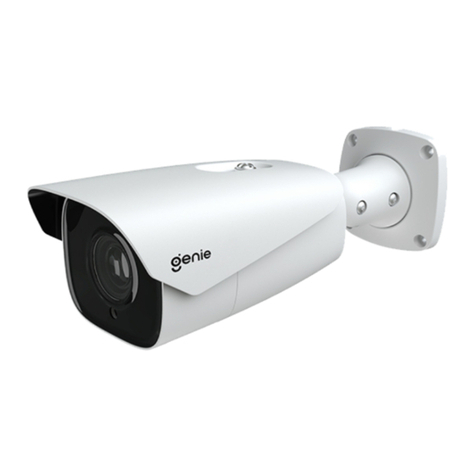
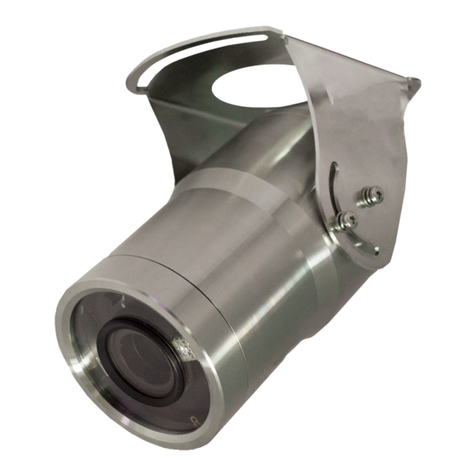
Genie ZD49IR User manual

USER MANUAL
DNR TRUE DAY&NIGHT CAMERA
ZD49IR

DNR TRUE DAY & NIGHT COLOUR CAMERA DNR TRUE DAY & NIGHT COLOUR CAMERA
-1-
Contents
Specication
Installation
How To Install
Safety Instruction
General Features
Menu Set Up
Exit
Trouble Shooting
► Lens
► Shutter Speed
► White Balance
► Back Light(BLC)
► Auto Gain Control
► DNR
► Sens - Up
► Special
♦ Camera ID
♦ Colour
♦ Sync
♦ Motion Detection
♦ Privacy
♦ Mirror
♦ Sharpness
♦ Reset
♦ Return
1
2
3
4
5
6
7
8
10
11
12
13
14
15
16
16
18
19
19
20
20
21
21
21
21
22


DNR TRUE DAY & NIGHT COLOUR CAMERA DNR TRUE DAY & NIGHT COLOUR CAMERA
-3-
CAMERA OPERATION
LENS
SHUTTER
(Condition & Speed Control)
WHITE BALANCE
BACK LIGHT
(Backlight Compensation)
AGC
(Auto Gain Control)
DNR
(Digital Noise Reduction)
SENS-UP (Low illuminance)
SPECIAL
EXIT
(SET-UP UP DOWN LEFT RIGHT)
●DC ●MANUAL
●FLK
●MANUAL ●ESC
●ATW
●AWC
●MANUAL
●OFF
●AUTO
●OFF
●LOW
●MIDDLE
●HIGH
●OFF
●LOW
●MIDDLE
●HIGH
●OFF
●LOW
●MIDDLE
●HIGH
●CAMERA ID
●COLOUR
●SYNC
●MOTION DETECTION ●PRIVACY
●MIRROR
●SHARPNESS
●RESET
●RETURN
The IR range shown below are maximum distances that can be achieved using this camera.
The environment and camera positioning both affect IR performance.
◈ SETTINGS
Settings can be made using the OSD buttons
located on the bottom of the camera.
(Adjust the IR Control Volume, using a screwdriver,
to increase or decrease the IR brightness level.)
OSD
CAMERA TITLE
WHITE BAL
BACKLIGHT
MOTION DET
FOCUS
EXPOSURE
SPECIAL
RESET
EXIT
DC
ATW
OFF
ON
D-ZOOM
SENS-UP
PRIVACY
OSD Control Board
DC Auto Iris Varifocal Lens
(4mm-9mm)
DC Auto Iris Varifocal Lens
(4mm-9mm)

DNR TRUE DAY & NIGHT COLOUR CAMERA DNR TRUE DAY & NIGHT COLOUR CAMERA
-4-
* Camera Adjustment
①Connect Video & Power Line (AC 24V or DC 12V Regulated Power)
②Position the camera for the correct angle of view.
③Loosen the locking screws and focus the camera.
④Re-tighten the locking screws.
DC Auto Iris Varifocal Lens
(4mm-9mm)

DNR TRUE DAY & NIGHT COLOUR CAMERA DNR TRUE DAY & NIGHT COLOUR CAMERA
-5-
Precautions for use
☞Please read this manual thoroughly before using this camera to become familiar with the correct
operational procedures.
Warranty
☞
This camera is supplied with three year warranty effective from the day of purchase on a return to
base basis(RTB).
Our standard Return Procedure needs to be followed for warranty repairs.
☞ Keep the camera box and packing in case the product needs to be returned.
Cautions When Using
☞ Do not open the camera body and touch any electrical parts to avoid possible electric shocks.
☞ Do not insert objects into the camera body to prevent re hazards and electric shock.
☞ Do not touch the camera with wet hands to avoid electric shock.
☞ Do not disconnect the power cord from a power plug when still connected to the outlet.
☞ Always disconnect the power by removing the plug from the power socket.
☞ If the camera emits a burning smell, immediately disconnect it from the power source and report
the problem to your distributor.
Cautions When Install
☞ Only apply power after installation of the product.
☞ Do not install the camera in a position facing directly at strong light source.
☞ Do not install or use the camera in areas of high humidity.
☞ Do not install near any cooling or heating equipment.
☞ Do not install the camera in dusty environments.
☞ Do not install the camera in places where the camera is subjected to physical shocks.
☞ This products must be used with a regulated DC 12V or AC 24V adaptor for power.
DNR TRUE DAY & NIGHT COLOUR CAMERA DNR TRUE DAY & NIGHT COLOUR CAMERA
-6-
◈DNR DSP Chip
Our DNR DSP chipset provides powerful functions and high resolution both Day and Night.
Functions include selectable white balance, selectable AGC, selectable Digital Noise Reduction,
Sens-Up, Camera ID, Privacy Zones, Mirror and Sharpness.
◈560TV Lines
The combination of DNR Technology and Sony Super HAD CCD image sensor gives an excellent
high resolution of 560 TV Lines.
◈Day & Night
Depending on luminance levels the camera switches automatically between colour and
monochrome. The camera’s IR Cut-Filter gives perfect colour rendition during the day.
◈Illumination
The advanced DSP and DNR chipsets provide clear subject detection at low luminance.
Images can be captured at extremely low light levels using the Sens-Up feature.
◈DNR( Digital Noise Reduction)
DNR technology removes the noise, especially in low light, resulting in clearer and superior
images. Ultra-high resolution even in extremely low light conditions.
◈Disk Saving Effects
DNR technology dramatically reduces recorded le size saving precious hard drive space.
File size is much smaller than standard CCTV le size.
◈Controlled by OSD menu
The camera is controlled by selecting the menu items and parameters displayed on the monitor
screen.

DNR TRUE DAY & NIGHT COLOUR CAMERA DNR TRUE DAY & NIGHT COLOUR CAMERA
-7-
CAMERA OPERATION
LENS
SHUTTER
(Condition & Speed Control)
WHITE BALANCE
BACK LIGHT
(Backlight Compensation)
AGC
(Auto Gain Control)
DNR
(Digital Noise Reduction)
SENS-UP (Low illuminance)
SPECIAL
EXIT
(SET-UP UP DOWN LEFT RIGHT)
●DC ●MANUAL
●FLK
●MANUAL ●ESC
●ATW
●AWC
●MANUAL
●OFF
●AUTO
●OFF
●LOW
●MIDDLE
●HIGH
●OFF
●LOW
●MIDDLE
●HIGH
●OFF
●LOW
●MIDDLE
●HIGH
●CAMERA ID
●COLOUR
●SYNC
●MOTION DETECTION ●PRIVACY
●MIRROR
●SHARPNESS
●RESET
●RETURN
Menu Set Up
Menu items can be selected by using the OSD buttons on the camera
I. Press the Set Up button.
The Set Up menu will be displayed on the monitor.
SETUP
LENS
SHUTTER
WHITE BAL
BACKLIGHT
AGC
DNR
SENS-UP
SPECIAL
EXIT
DC
--------
AWC
HIGH
OFF
MIDDLE
AUTO

DNR TRUE DAY & NIGHT COLOUR CAMERA DNR TRUE DAY & NIGHT COLOUR CAMERA
-8-
SETUP
LENS
SHUTTER
WHITE BAL
BACKLIGHT
AGC
DNR
SENS-UP
SPECIAL
EXIT
DC
--------
AWC
HIGH
OFF
MIDDLE
AUTO
2. Move and Select the required function using the Up and Down buttons.
● Move the status bar to select the desired feature by pressing the Up or Down buttons.
This function controls the image brightness.
I. Move the arrow indicator to LENS using the Up and Down buttons on the Set Up menu screen.
2. Select the desired lens type by pressing the Left or Right button.
3. Changing Menu Settings Using the Left or Right Buttons.
● Available values or status are displayed by pressing the Left or Right button.
Press the buttons until desired value/status is displayed.
4. After completing the setting, move the arrow indicator to EXIT and press the SET button to EXIT.
●
Move to the available submenu by moving arrow to desired feature.
●
Submenu is not available when this symbol is displayed ” -----”.
NOTE
◄┛

DNR TRUE DAY & NIGHT COLOUR CAMERA DNR TRUE DAY & NIGHT COLOUR CAMERA
-9-
SETUP
LENS
SHUTTER
WHITE BAL
BACKLIGHT
AGC
DNR
SENS-UP
SPECIAL
EXIT
DC
--------
AWC
HIGH
OFF
MIDDLE
AUTO
DC:DC Auto IRIS Lens
●
When DC is selected, the brightness can be adjusted.
Brightness control range is I - 70.
NOTE
L E N S
BRIGHTNESS
Press Set to Return
I---------I---------I 70
3. Press the SETUP button to return to the previous menu.

DNR TRUE DAY & NIGHT COLOUR CAMERA DNR TRUE DAY & NIGHT COLOUR CAMERA
-10-
This function is used to select Automatic or Manual shutter speed control.
I. On the Set Up menu screen, move the arrow indicator to SHUTTER using the Up or Down button.
2. Select the desired shutter mode using the Left or Right button.
◈ FLK: Select “FLK” mode when flickering occurs, caused by the unmatched frequency of electric
lights.
◈ ESC: Automatic shutter speed control. The image brightness is automatically controlled when ESC
mode is selected.
◈ MANUAL: Shutter speed can be selected manually.
SETUP
LENS
SHUTTER
WHITE BAL
BACKLIGHT
AGC
DNR
SENS-UP
SPECIAL
EXIT
DC
--------
AWC
HIGH
OFF
MIDDLE
AUTO
3. Press the SETUP button to exit after completing the set-up menu.
●
Lens Shutter speed is xed to 1/50 sec. if DC lens is selected.
●
Do not direct the camera at uorescent lights. It can cause problems with
image quality when in internal synchronisation mode.
NOTE

DNR TRUE DAY & NIGHT COLOUR CAMERA DNR TRUE DAY & NIGHT COLOUR CAMERA
-11-
The White Balance function is used to control the “on screen” colours.
I. Move the arrow indicator to WHITE BAL on the SETUP Menu screen using
the Up or Down button.
2. Select the desired mode by using the Left or Right button.
SETUP
LENS
SHUTTER
WHITE BAL
BACKLIGHT
AGC
DNR
SENS-UP
SPECIAL
EXIT
DC
--------
ATW
HIGH
OFF
MIDDLE
AUTO
※ There are three user selectable White Balance settings available.
◈ ATW : Normal setting; when colour temperature range is from 1,800° K to 10,500° K.
◈ AWC : To obtain the best result press the SET button while the camera is focused onto white
paper. If the environment and/or light source changes, the White Balance will require
re-adjustment.
◈ MANUAL: Used for fine adjustment when Manual mode has been selected. Select ATW
or AWC first then change to Manual mode and press the SETUP button.
Now increase or decrease the value of R-Gain(RED) and B-Gain(Blue) while
monitoring the colour changes to the image. Press the SET button when the
desired colours are obtained.
Under the following conditions the White Balance function may not operate correctly.
In such case, please select the AWC mode.
●
When the scene has very high colour temperature( Ex: Clear Sky, Sunset etc.).
●
When the scene and/or its surroundings are dark.
●
When the camera is installed in a place with considerable changes in illumination
or is facing directly into a fluorescent light source.
NOTE

DNR TRUE DAY & NIGHT COLOUR CAMERA DNR TRUE DAY & NIGHT COLOUR CAMERA
-12-
BLC ON BLC OFF
This camera provides intelligent light level control to overcome even strong backlight conditions.
I. Move the arrow indicator to BACKLIGHT using the Up or Down button on the SETUP Menu screen.
2. Select the desired level using the Left or Right button.
● HIGH: Gain can be increased max. from 6dB to 34dB.
● MIDDLE: Gain can be increased max. from 6dB to 30dB.
● LOW: Gain can be increased max. from 6dB to 18dB.
● OFF: BACKLIGHT function does not operate.
SETUP
LENS
SHUTTER
WHITE BAL
BACKLIGHT
AGC
DNR
SENS-UP
SPECIAL
EXIT
DC
--------
AWC
OFF
OFF
MIDDLE
AUTO

DNR TRUE DAY & NIGHT COLOUR CAMERA DNR TRUE DAY & NIGHT COLOUR CAMERA
-13-
3. Press the SETUP button. BRIGHTNESS can be adjusted from 1 to 70 max.
4. Press the SETUP button when the menu set up is complete.
1. Move the arrow indicator to AGC using Up or Down button on the SETUP Menu screen.
2. Select the desired level using the Left or Right button.
AGC controls image brightness. A higher gain increases brightness but also increases any noise.
● HIGH: Gain can be increased max. from 6dB to 34dB.
● MIDDLE: Gain can be increased max. from 6dB to 30dB.
● LOW: Gain can be increased max. from 6dB to 18dB.
● OFF: Gain is xed at 6dB.
SETUP
LENS
SHUTTER
WHITE BAL
BACKLIGHT
AGC
DNR
SENS-UP
SPECIAL
EXIT
DC
--------
AWC
OFF
HIGH
MIDDLE
AUTO
NOTE
Brightness
BRIGHTNESS
Press Set to Return
I---------I---------I 70

DNR TRUE DAY & NIGHT COLOUR CAMERA DNR TRUE DAY & NIGHT COLOUR CAMERA
-14-
DNR is used to reduce the level of “noise” on the screen.
I. Move the arrow indicator to DNR using the Up or Down button on the SETUP Menu screen.
2. Select the desired level of noise reduction using the Left or Right button.
● HIGH: High reduction of noise but ghosting is likely to occur.
● MIDDLE: Medium level of the noise reduction, most effective with a minimal ghost effect.
● LOW: Low reduction of noise without any ghosting.
● OFF: DNR is disabled.
SETUP
LENS
SHUTTER
WHITE BAL
BACKLIGHT
AGC
DNR
SENS-UP
SPECIAL
EXIT
DC
--------
AWC
OFF
HIGH
MIDDLE
AUTO

DNR TRUE DAY & NIGHT COLOUR CAMERA DNR TRUE DAY & NIGHT COLOUR CAMERA
-15-
3. Press the SETUP button when the menu set up is complete.
Good quality images can be displayed even in low lighting levels, using the Sens-Up function.
I. Move the arrow indicator to SENS-UP by pressing the Up or Down button on the SETUP Menu screen.
2. Select the desired setting using the Left or Right button.
● AUTO :Automatic ● OFF: Disabled
SETUP
LENS
SHUTTER
WHITE BAL
BACKLIGHT
AGC
DNR
SENS-UP
SPECIAL
EXIT
DC
--------
AWC
OFF
HIGH
MIDDLE
AUTO
●
If AGC is set to OFF SENS-UP does not work.
NOTE
●
Pressing the SENS-UP button can control magnification(adjusted in 12 increments).
●
Increasing magnification increases screen brightness but can also increase background
noise on the image.
●
When SENS-UP is activated the increased magnification can induce noise and pixelation;
this is quite normal.
NOTE

DNR TRUE DAY & NIGHT COLOUR CAMERA DNR TRUE DAY & NIGHT COLOUR CAMERA
-16-
1. Move the arrow indicator to 'SPECIAL' using the UP or Down button on the SETUP Menu screen.
2. Select the desired mode using the Left or Right button.
3) Press the SETUP button.
● CAMERA ID :When input, the Camera ID is displayed on the monitor.
I) Move the arrow indicator to CAMERA ID using the Up or Down button on the SETUP Menu screen.
2) Set to ON using the Left or Right button.
CAMERA ID
ABCDEFGHIJKLM
NOPQRSTUVWXYZ
abcdefghijklm
nopqrstuvwxyz
,
0 1 2 3 4 5 6 7 8 9
← → CLR POS END
▀ ──────────
SPECIAL
CAMERA ID
COLOUR
SYNC
MOTION DET
PRIVACY
MIRROR
SHARPNESS
RESET
RETURN
OFF
ON
INT
OFF
OFF
OFF
ON
●
When CAMERA ID is set to OFF, the Camera ID is not displayed on the monitor.
NOTE

DNR TRUE DAY & NIGHT COLOUR CAMERA DNR TRUE DAY & NIGHT COLOUR CAMERA
-17-
4) The Camera ID can be up to 15 alphanumeric characters in length.
① Move the cursor to choose an alphanumeric character.
5) To select the position where the Camera ID should be displayed on the screen.
① Move the cursor to POS and press the SET button.
② Choose a character in displayed range A-Z, a-z, 0-9 using the Up, Down, Left and Right buttons.
③ Select the desired character by pressing the SETUP button.
-The cursor moves to the next position, after character input, by pressing the SETUP button.
④ Repeat the above steps until the Camera ID has been created.
CAMERA ID
ABCDEFGHIJKLM
NOPQRSTUVWXYZ
abcdefghijklm
nopqrstuvwxyz
,
0 1 2 3 4 5 6 7 8 9
← → CLR POS END
▀ ──────────
CAMERA ID
ABCDEFGHIJKLM
NOPQRSTUVWXYZ
abcdefghijklm
nopqrstuvwxyz
,
0 1 2 3 4 5 6 7 8 9
← → CLR POS END
▀ ──────────
●
In cases where the wrong Camera ID has been input .........
Move the cursor to CLR and press SETUP button to erase characters from
left to right, and repeat the above steps to input the characters again.
NOTE

DNR TRUE DAY & NIGHT COLOUR CAMERA DNR TRUE DAY & NIGHT COLOUR CAMERA
-18-
② Created camera ID is displayed.
(Factory default position)
③ Select a new position by using the four
directional buttons. Press the SET button
to conrm the position.
6) Move the cursor to END and press the SET button after completing the above process.
● COLOUR
AUTO: Electronically senses Day & Night and switches to the appropriate mode.
ON : Fixed colour only mode.
CAM 1
●
Colour mode is not available when AGC is OFF.
NOTE

DNR TRUE DAY & NIGHT COLOUR CAMERA DNR TRUE DAY & NIGHT COLOUR CAMERA
-19-
● SYNC:
INT : Internal Synchronisation
● MOTION DETECTION(MD):
Whenever the camera detects motion it displays “Motion Detected” and incremental count on the
screen.
-. Press the SETUP button.
OFF: Disabled
ON: Selected AREA will sense detected
MOTION.
-. AREA SEL denes the selected
detection area for the camera.
-. Set ON selected AREA state (Activated).
-. Move the arrow indicator to dene the
area of the detection area by using TOP,
DOWN, LEFT, RIGHT.
-. Press the SETUP button to save the
selected data.
●
MD will be displayed on the screen but there is no Alarm Output signal available.
NOTE
MOTION DETECTION
AREA STATE OFF
Press Set to Return
TOP I---------I---------I 31
DOWN I---------I---------I 60
LEFT I---------I---------I 47
RIGHT I---------I---------I 31
►
AREA SEL AREA1
Table of contents
Other Genie Security Camera manuals

Genie
Genie WISH96 Series User manual

Genie
Genie GSDNR-6358 Manual

Genie
Genie GSD106 User manual

Genie
Genie SSAHD2D User manual

Genie
Genie WIPX4BVAF User manual

Genie
Genie SSIP2DVAF User manual

Genie
Genie VRD73IR User manual

Genie
Genie WAHD2LBV User manual

Genie
Genie GS5360VDC User manual

Genie
Genie WIPX2LBVLPR User manual

Genie
Genie VRD73TDN User manual

Genie
Genie ZD2812IR User manual

Genie
Genie ZD2812WL User manual

Genie
Genie WIP6F User manual

Genie
Genie PWIPN2EB User manual

Genie
Genie WIPX8BVAF5 User manual

Genie
Genie W96EBV User manual

Genie
Genie PWIP4EBVAF User manual

Genie
Genie UMD300 Series User manual

Genie
Genie GEBV series User manual