\
CHANG
NG
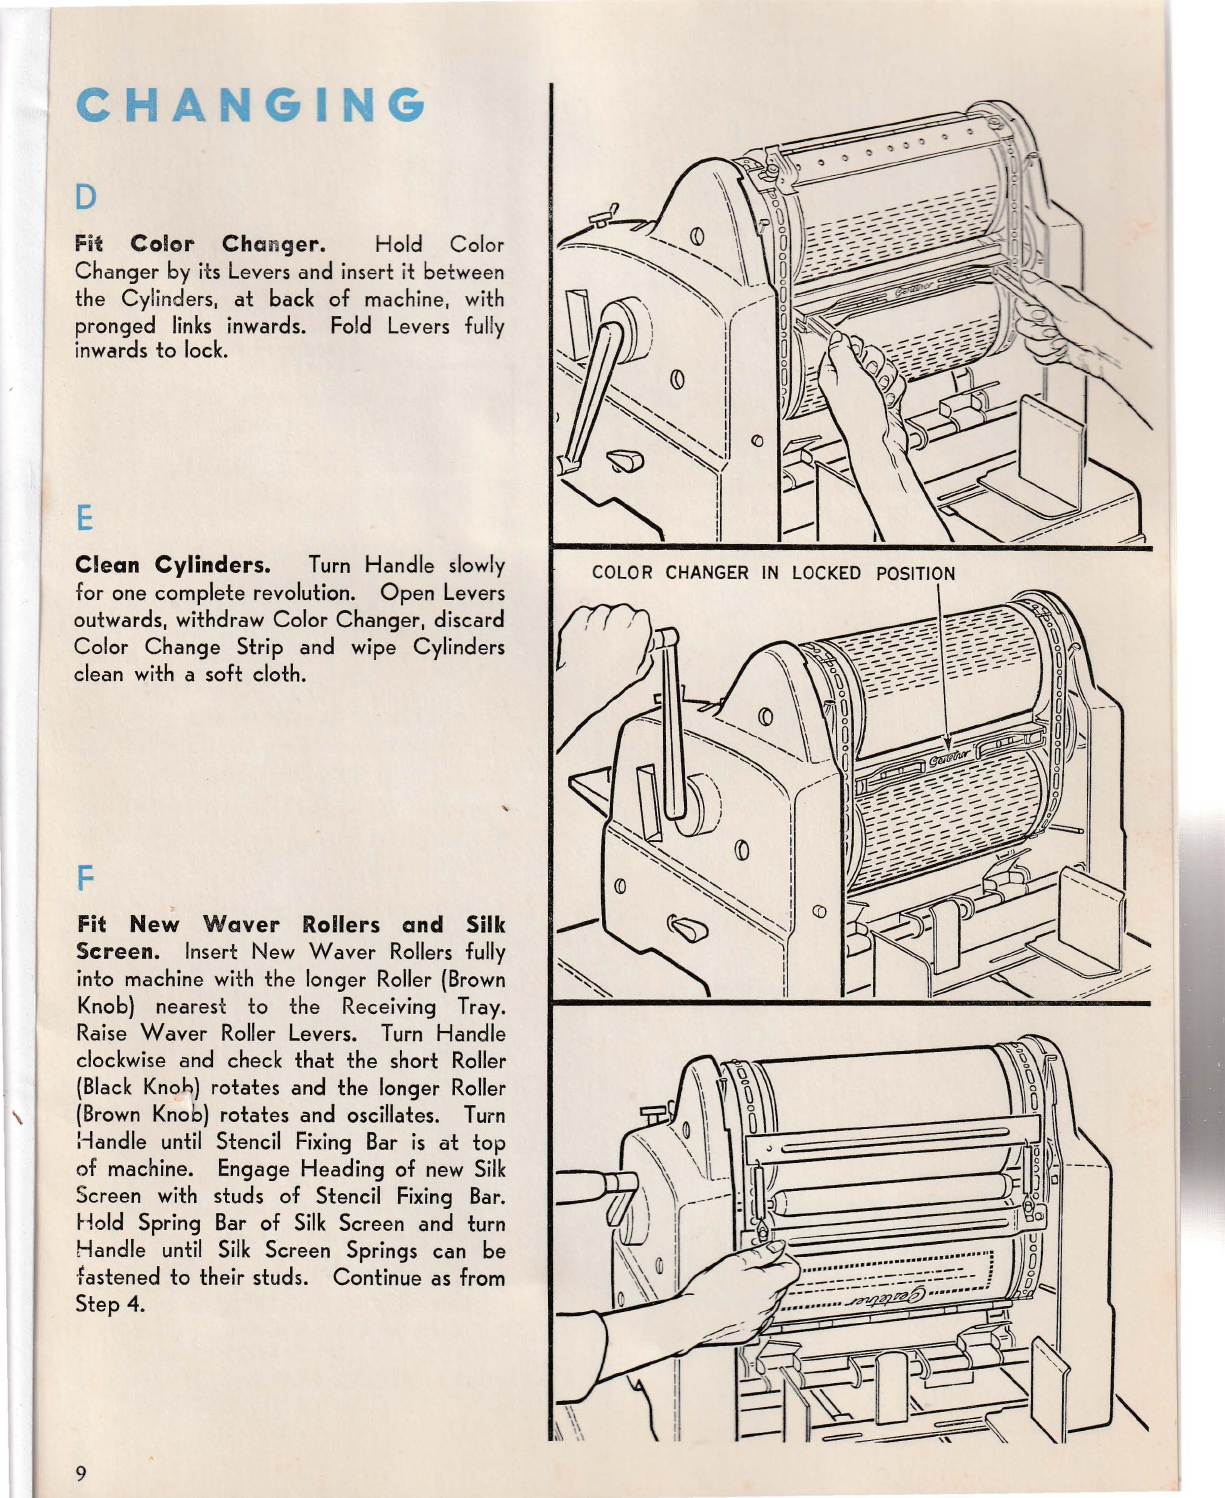
D
Fit
Color
Cha
n
ger.
Hold Color
Changer
by
its Levers and insert it between
the Cy
lind
ers,
at
back of machine,
with
pronged
links
inwards.
Fold
Levers
ful
ly
inwards to
lock.
E
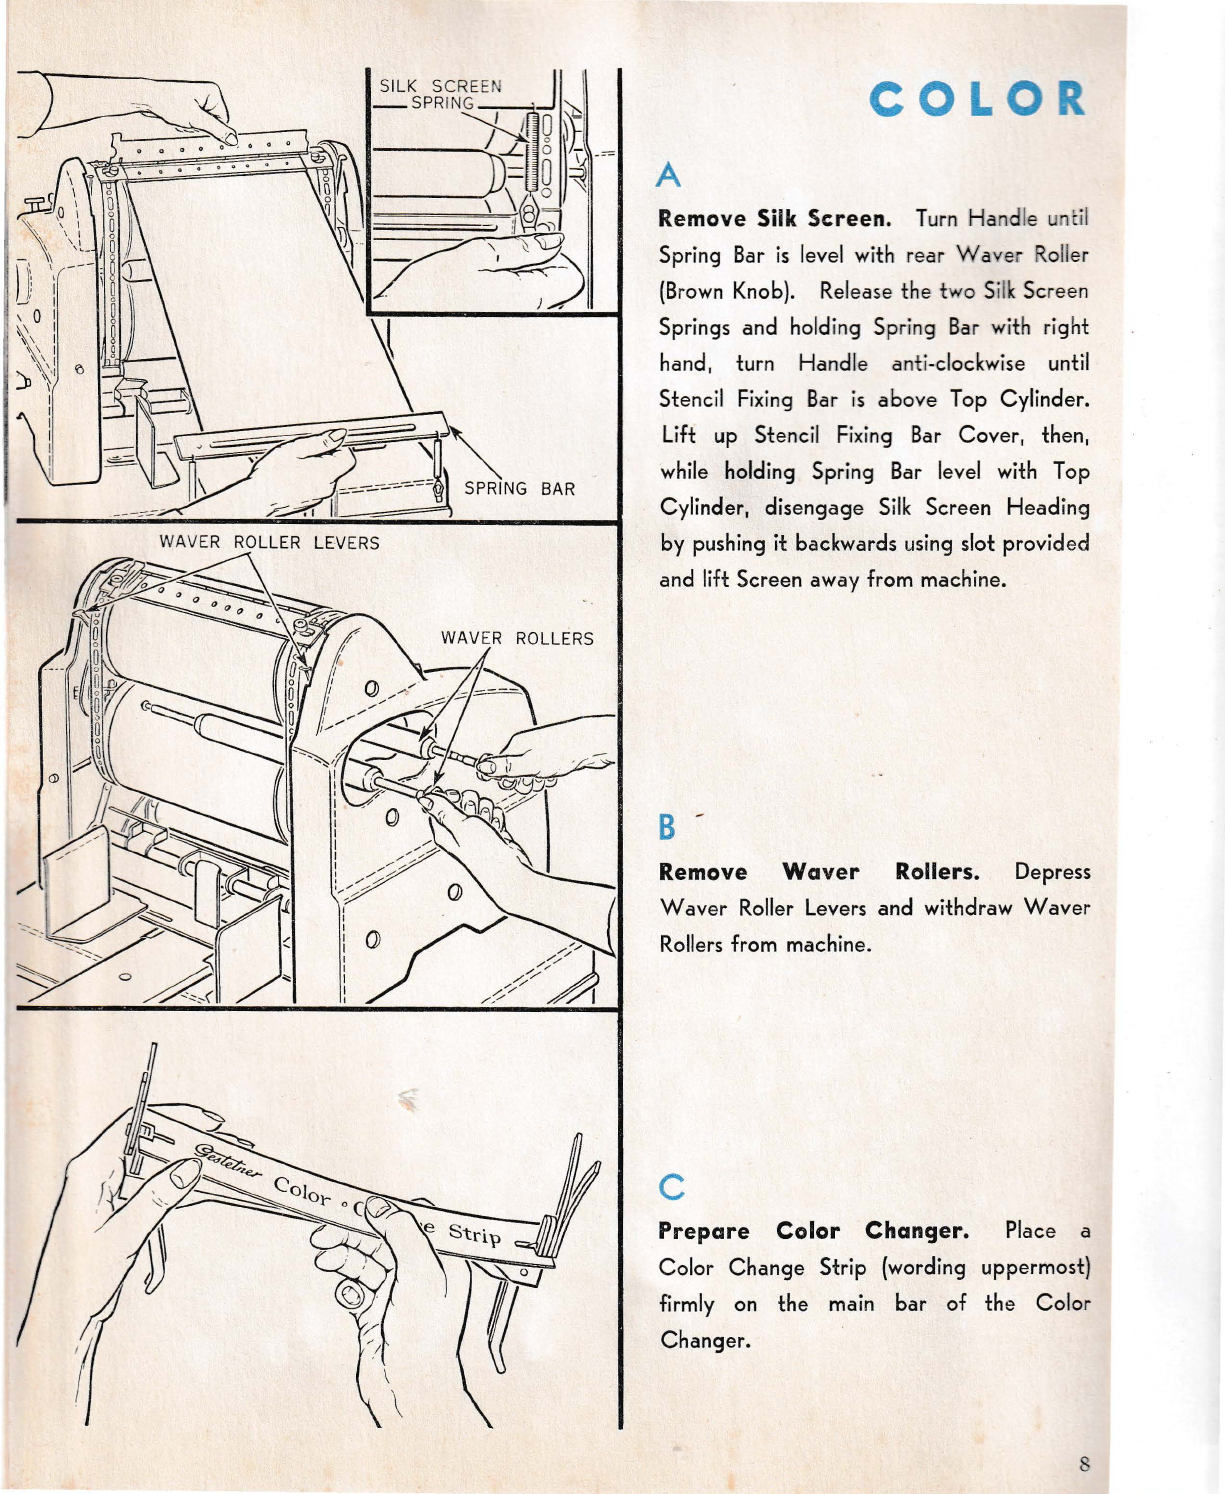
Clean Cylinders.
Turn
Handle
slowly
for one complete revolution. Open Levers
outwards, withdraw Color Changer, discard
Color Change Strip and wipe Cylinders
clean
with
a soft cloth.
F
Fit
New
Waver
Rollers and Silk
Screen. Insert
New
Waver
Rollers
fully
into machine
with
the longer
Roller
(Brown
Knob)
nearest to the Receiving Tray.
Raise
Waver
Roller
Levers.
Turn
Handle
clockwise and check that the short
Roller
(Black
Knoki)
rotates and the longer
Roller
(Brown
Knob)
rotates and oscillates.
Turn
Handle
until
Stencil
Fixing
Bar
is
at
top
of machine. Engage Heading of
new
Silk
Screen
with
studs of Stencil
Fixing
Bar.
Hold Spring
Bar
of
Silk
Screen and turn
Handle
until
Silk
Screen Springs can be
fastened to their studs. Continue as from
Step 4.
9
--
.....
\ ""'\ /,,.
~
I I _
--
- .
, 1 I
--
--
-
...
~
© I a~
-::--~~
-:,,,
I
~:
I
)
~~::~~j
O
~
~
' ' ,, ,,
,~
~
''(
►-
~
j --
~~
\
~~
,~
~
-~
\
\co
't
o~
§§~~~=§:~~~-
l
~
----
) i C \ 0
\
;:
',
············
~
·:·::·~·:·::~.:::---·-
-
--
-
--
-
---~r,,_tfi.,
••
.
......
~