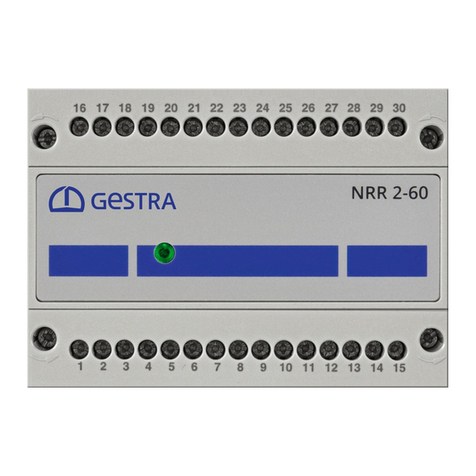
GESTRA NRR 2-61 User manual

Original Installation &
Operating Manual
EN
English
Level Controller
NRR 2-61
819694-00

2NRR 2-61 - Installation & Operating Manual - 819694-00
Contents
Content of this Manual................................................................................................................................... 4
Scope of delivery/Product package............................................................................................................... 4
How to use this Manual.................................................................................................................................. 5
Illustrations and symbols used...................................................................................................................... 5
Hazard symbols in this Manual...................................................................................................................... 5
Types of warning ............................................................................................................................................ 6
Specialist terms/Abbreviations...................................................................................................................... 7
Usage for the intended purpose..................................................................................................................... 8
Applicable directives and standards...........................................................................................................9
Improper use .................................................................................................................................................. 9
Basic safety notes ........................................................................................................................................ 10
Required personnel qualifications............................................................................................................... 10
Notes on product liability............................................................................................................................. 10
Function ........................................................................................................................................................ 11
Possible combinations of functions and equipment.................................................................................. 11
Technical data .............................................................................................................................................. 12
Name plate/Identification NRR 2-61............................................................................................................ 14
Factory settings............................................................................................................................................ 15
Functional elements and dimensions.......................................................................................................... 16
Installing the NRR 2-61 level controller....................................................................................................... 17
Electrical connection safety notes............................................................................................................... 17
Wiring diagram for NRR 2-61 level controller ............................................................................................. 18
Wiring diagram for NRR 2-61 level controller as 3-component regulator ................................................. 19
Electrical connection.................................................................................................................................... 20
Bus line, cable length and cross-section .................................................................................................. 20
Connecting the 24V DC power supply ......................................................................................................20
Connecting output contacts .....................................................................................................................20
Notes on connecting inductive loads........................................................................................................ 20
Connecting the actual value output OUT1 and analogue output OUT2 (4 - 20 mA) ....................................20
Wiring diagram of CAN bus system............................................................................................................. 21
Example ..................................................................................................................................................21
Important notes on connecting the CAN bus system................................................................................. 21
3NRR 2-61 - Installation & Operating Manual - 819694-00
Contents
Changing the equipment settings................................................................................................................ 22
Configuring the controller group and baud rate ........................................................................................ 23
Setting the measuring range ....................................................................................................................... 24
Bringing into service – start, operation and alarm..................................................................................... 25
The MIN2/MAX2 relays are configured as the MIN/MAX alarm on the URB 60 ..........................................25
The MIN2/MAX2 relays are configured as the pump 1/2 enable (ON/OFF) on the URB 60..........................26
Behaviour in the event of a malfunction ................................................................................................... 26
System malfunctions.................................................................................................................................... 27
Causes ....................................................................................................................................................27
Check the installation and configuration before systematic troubleshooting ............................................. 27
Indication of system malfunctions............................................................................................................28
What to do in the event of system malfunctions......................................................................................... 29
Taking out of service.................................................................................................................................... 29
Disposal ........................................................................................................................................................ 29
Returning decontaminated devices............................................................................................................. 29
EU Declaration of Conformity....................................................................................................................... 30

4NRR 2-61 - Installation & Operating Manual - 819694-00
Content of this Manual
Product:
Level controller NRR 2-61
First edition:
BAN 819694-00/08-2019cm
Applicable documents:
Installation & Operating Manual BAN 819699-xx for URB 60 Visual Display and Operating Unit
You can find the latest Installation & Operating Manuals on our website:
http://www.gestra.com/documents/brochures.html
© Copyright
All rights reserved. Any misuse, particularly reproduction and dissemination to third parties, is not permit-
ted. The General Terms & Conditions of GESTRA AG apply.
Scope of delivery/Product package
1 x Level controller NRR 2-61
1 x Installation & Operating Manual

5NRR 2-61 - Installation & Operating Manual - 819694-00
How to use this Manual
This Installation & Operating Manual describes the correct use of the NRR 2-61 level controller. It applies
to persons who integrate this equipment in control systems, install, bring into service, operate, maintain
and dispose of this equipment. Anyone carrying out the above-mentioned activities must have read this
Installation & Operating Manual and understood its contents.
Read this Manual in full and follow all instructions.
Please also read the instructions for use of any accessories.
The Installation & Operating Manual is part of the equipment package. Keep it in an easily accessible
location.
Availability of this Installation & Operating Manual
Make sure this Installation & Operating Manual is always available to the operator.
If you pass on or sell the equipment to a third party, please also hand over the Installation & Operating
Manual.
Hazard symbols in this Manual
Danger zone/Dangerous situation
Danger of death from electric shock
Illustrations and symbols used
1. Action to be taken
2.
Lists
Bullet points in lists
A Keys to illustrations
Additional
information
Read the relevant Installation & Operating Manual

6NRR 2-61 - Installation & Operating Manual - 819694-00
Types of warning
DANGER
Warning of a dangerous situation that results in death or serious injury.
WARNING
Warning of a dangerous situation that may possibly result in death or serious injury.
CAUTION
Warning of a situation that may result in minor or moderate injury.
ATTENTION
Warning of a situation that results in damage to property or the environment.

7NRR 2-61 - Installation & Operating Manual - 819694-00
Specialist terms/Abbreviations
Here, we explain some abbreviations, specialist terms, etc., which are used in this Manual.
CAN (Controller Area Network) bus
Data transmission standard and interface for connecting electronic equipment,sensors and control systems.
Data can be sent and received.
TRV .. / NRG .. / LRG ... / SRL ...
GESTRA equipment and type designations, see page 8.
PhotoMOS output
PhotoMOS are a special kind of semiconductor relay, which use a light-emitting diode on the input side that
is optically coupled to an output transistor. This type of electrically non-conductive connection makes sure
the input and output circuits are electrically isolated from each other.
PI controller
Controller with proportional (P) and integral (I) control.
SELV
Safety Extra Low Voltage

8NRR 2-61 - Installation & Operating Manual - 819694-00
Usage for the intended purpose
The NRR 2-61 level controller can be used in conjunction with NRG 26-60 and NRG 26-61 level electrodes
as a water level controller and limit switch in steam and water boilers and in condensate and feedwater
tanks.
Combinations with a URW 60 universal converter*
The NRR 2-61 level controller can also be used for the above applications in combination with a URW 60
universal converter * and an external level electrode (with a current output of 4-20 mA).
* The URW 60 universal converter converts the analogue 4-20 mA signals from the level electrodes
into CAN bus signals.
Configuration, operation and visual display
The equipment is configured and operated and information is viewed via the URB 60 visual display and
operating unit.
Overview of possible unit combinations
Level controller Level electrode Universal converter
(analogue to CAN bus) Visual display and operating unit
NRR 2-61
NRG 26-60
NRG 26-61 - URB 60
Ext. 4 - 20 mA URW 60 URB 60
Fig. 1
Key to Fig. 1:
NRR = level controller
NRG = level electrode
URW = universal converter
URB = visual display and operating unit
To ensure the proper use of equipment during all types of use, you must also read the
Installation & Operating Manuals for the system components used.
You can find the latest Installation & Operating Manuals for the system components named
in Fig. 1 on our website:
http://www.gestra.com/documents/brochures.html

9NRR 2-61 - Installation & Operating Manual - 819694-00
Usage for the intended purpose
Applicable directives and standards
The NRR 2-61 level controller has been tested and approved for use in the scope governed by the follow-
ing directives and standards:
Directives:
Directive 2014/35/EU Low Voltage Directive
Directive 2014/30/EU EMC Directive
Directive 2011/65/EU RoHS Directive
Standards:
DIN EN 60730-1 Automatic electrical controls – Part 1:
General requirements
EN 61326-1 Electrical equipment for measurement, control and laboratory use –
EMC requirements
Standards documents:
VdTÜV Bulletin BP WASS 0100-RL
Requirements for water level control and limiting equipment
Improper use
There is a danger of death due to explosion if the equipment is used in potentially explo-
sive atmospheres.
Do not use the equipment in potentially explosive atmospheres.

10 NRR 2-61 - Installation & Operating Manual - 819694-00
Basic safety notes
There is a risk of electric shock during work on electrical systems.
Always switch off the voltage to the equipment before performing work on the terminal
strips.
Check that the system is not carrying live voltage before commencing work.
Faulty equipment jeopardises system safety.
If the NRR 2-61 level controller does not behave as described on pages 25 to 26, it
may be faulty.
Perform failure analysis.
Only replace faulty equipment with identical equipment from GESTRA AG.
Required personnel qualifications
Activity Personnel
Integration in control system Specialist staff Plant designer
Installation/electrical
connection/bringing into service Specialist staff Electrician/installer
Operation Boiler service technician Staff trained by the plant operator
Maintenance work Specialist staff Electrician
Setup work Specialist staff Plant construction
Fig. 2
Notes on product liability
We the manufacturer cannot accept any liability for damages resulting from improper use of the equip-
ment.

11NRR 2-61 - Installation & Operating Manual - 819694-00
Function
The NRR 2-61 level controller is a continuous controller. It evaluates the data telegrams from a
level electrode (e.g. NRG 26-60 or NRG 26-61) or from a URW 60 universal converter in cycles.
In the level controller, the actual value is compared with the setpoint, and a corrective signal is formed
to compensate the control deviation. In addition, switching operations can be triggered by the output
contacts if defined switchpoints are reached.
The data are transferred to an ISO 11898 CAN bus via the CANopen protocol.
Function tests and failure diagnosis are performed using the URB 60 visual display and operating unit.
The data telegrams contain the following information:
Level values from electrodes
Error signals in the event of faults in electronic or mechanical parts
Behaviour in the event of MIN/MAX water level alarms
When MIN/MAX water level alarms arise, the appropriate output contact opens.
Possible combinations of functions and equipment
Combining the NRR 2-61 level controller with the level electrodes and the URB 60 visual display and operating
unit provides the following functions:
Level controller NRR 2-61
Function
Evaluation of CAN bus data telegrams from connected
NRG 26-60 or NRG 26-61 level electrodes.
Evaluation of CAN bus data telegrams from the connected URW 60 universal converter
in combination with a 4-20 mA current output from a level electrode.
Continuous controller with proportional plus integral control (PI controller) and actuation of a
continuous control valve. *
* Alternatively: actuation of a frequency-controlled pump.
2 x MIN/2 x MAX water level alarm.
Alternatively:
1 x MIN/1 x MAX water level alarm.
2 x pump enable (ON/OFF) with actuation of a frequency-controlled pump.
Current inputs for steam and feedwater flowrate
(3-component control)
Actual value output 4-20 mA.
Fig. 3

12 NRR 2-61 - Installation & Operating Manual - 819694-00
Technical data
Supply voltage
24 V DC +/-20 %
Power consumption
max. 5 VA
Current input
max. 0.3 A
Required external fuse
0.5 A M
Input/output
Interface for CAN bus to ISO 11898, CANopen, insulated
Inputs NRR 2-61
1 x analogue input IN 2, 4 - 20 mA (feedwater flowrate) - (option)
1 x analogue input IN 3, 4 - 20 mA (steam flowrate) - (option)
Outputs *
2 x MIN/2 x MAX alarm (MIN1/MAX1 alarm, MIN2/MAX2 alarm)
4 x potential-free changeover contacts (changeover relays), contact material **
Maximum switching current - 8 A at 250 V AC / 30 V DC - cos ϕ= 1
or
1 x MIN1/1 x MAX1 alarm and
2 x pump enable (ON/OFF) - (MIN2/MAX2 = enable pump 1/pump 2)
2 x potential-free changeover contacts (changeover relays), MIN1/MAX1 alarm, contact material **
2 x potential-free changeover contacts (changeover relays), MIN2/MAX2 enable pump 1/2, contact
material **
Maximum switching current - 8 A at 250 V AC / 30 V DC - cos ϕ= 1
* Contact material AgNi0.15, AgSnO2
** Inductive loads must have interference suppression (RC combination) as per the manufacturer's
specification
Off delay of MIN/MAX alarm outputs
Factory default setting 3 seconds.
Analogue output
1 x actual value output OUT 1: 4 - 20 mA, e.g. for an actual value display
1 x analogue output OUT 2: 4 - 20 mA, control point Yw
Max. load resistance 500 W

13NRR 2-61 - Installation & Operating Manual - 819694-00
Technical data
Indicators and controls
1 x multicolour LED (orange, green, red)
orange = power up
green = running
red = malfunction
1 x 4-pole code switch for setting the controller group and baud rate
Protection class
II double insulated
IP rating to EN 60529
Housing: IP 40
Terminal strip: IP 20
Electrical safety
Degree of contamination 2 for installation in control cabinet with protection rating IP 54, fully insulat-
ed
Admissible ambient conditions
Service temperature: - 10 °C – 55 °C (0 °C – 55 °C at power-on)
Storage temperature: - 20 °C – 70 °C *
Transport temperature: - 20 °C – 80 °C (< 100 hours) *
Air humidity: max. 95 %, non-condensing
* Only switch on after a 24-hour defrosting period
Housing
Housing material: Lower section of black polycarbonate (glass-fibre reinforced), front of grey polycar-
bonate
2 x 15-pole terminal strips, removable separately
Max. cross-section per screw terminal:
1 x 4.0 mm2solid or
1 x 2.5 mm2stranded with sleeve, or
2 x 1.5 mm2stranded with sleeve
Housing attachment: Mounting clip on support rail TH 35 (to EN 60715)
Weight
Approx. 0.5 kg

14 NRR 2-61 - Installation & Operating Manual - 819694-00
Name plate/Identification NRR 2-61
Fig. 4
Equipment
designation
Supply voltage/
power con-
sumption/pro-
tection rating
Current
approval
Admissible
ambient
temperature
Manufacturer
Wiring
diagram
Safety
note
CE
marking
Disposal
information
T55°C (131°F)
IP 40 (IP20)
5VA
Betriebsanleitung
beachten
Seeinstallation
instructions
Voir instructions de
montage
GESTRA AG
Münchener Str. 77
28215 Bremen
GERMANY
Niveauregler
Level Controller
Régulateur de niveau
TÜV.WR . xx-xxx
17
2
22
7
27
12
16
1
21
6
26
11
18
3
23
8
28
13
19
4
24
9
29
14
20
5
25
10
30
15
120
Ω
24V
20%
Option CH CL
CanBus
M0,5A
NRR 2-61
+
OUT 1/4-20mA
OUT 2/4-20mA
MIN1 MAX1
3s
MAX2
3s3s MIN2
3s
24V =
+
_
+
_
+
_
xxxxxxxxxxxx
T55°C (131°F)
IP 40 (IP20)
5VA
Betriebsanleitung
beachten
Seeinstallation
instructions
Voir instructions de
montage
GESTRA AG
Münchener Str. 77
28215 Bremen
GERMANY
Niveauregler
Level Controller
Régulateur de niveau
TÜV.WR . xx-xxx
17
2
22
7
27
12
16
1
21
6
26
11
18
3
23
8
28
13
19
4
24
9
29
14
20
5
25
10
30
15
120
Ω
24V
20%
24V =
OUT 1/4-20mA
OUT 2/4-20mA
Option CH CL
CanBus
IN 2 / 4-20mA
IN 3 / 4-20mA
M0,5A
NRR 2-61
+
MIN1 MAX1
3s
MAX2
3s
3s MIN2
3s
+
_
+
_
+
_
+
_
+
_
xxxxxxxxxxxx
Fig. 5
NRR 2-61 as
3-component
regulator
The date of production is printed on the back of the equipment.
Serial number

15NRR 2-61 - Installation & Operating Manual - 819694-00
Factory settings
The level controller is delivered with the following factory default settings:
Baud rate: 50 kBit/s (max. cable length 1000 m)
Controller group: 1
Code switch setting: Sliding switch, white (1 to 4 = OFF)
Configuring the controller group and baud rate,
see page 23, Fig. 10.
MAX1 switchpoint: 80 %
MAX2 switchpoint: 60 %
MIN2 switchpoint: 40 %
MIN1 switchpoint: 20 %
Setpoint: 50% of measuring range
Direction of corrective action: Inlet control
Proportional band (Pb): ± 20 % of setpoint
Reset time (Ti): 0 seconds
Neutral zone: ± 5 % of setpoint
MIN/MAX alarm
off delay: 3 seconds (factory set)
When actuating a frequency-controlled pump -
MIN2/MAX2 relay function: Enable pump 1/2 (ON/OFF)
Controlled operation: Automatic
Pump 1: On
Pump 2: On
On threshold: 40 %
Off threshold: 60 %
Forced switchover: 20 %

16 NRR 2-61 - Installation & Operating Manual - 819694-00
Functional elements and dimensions
A Upper terminal strip
B Lower terminal strip
C Fastening screws (M3)
D 4-pole code switch, for setting the controller
group and baud rate
E Front membrane with status LED, see page 24
F Housing
G Support rail TH 35
The code switch can be accessed by
disconnecting and removing the lower
terminal strip.
Equipment settings,
see page 23.
Fig. 6
12345678910 11 12 13 14 15
100
73
118
1
2
MAX
1
2716 17 18 19 20 21 22 23 24 25 26 28 29 30
12345678910 11 12 13 14 15
100
73
118
1
2
MAX
1
2716 17 18 19 20 21 22 23 24 25 26 28 29 30
A
B C
F
G
D
E

17NRR 2-61 - Installation & Operating Manual - 819694-00
Installing the NRR 2-61 level controller
The NRR 2-61 level controller snaps onto a TH 35 support rail in a control cabinet.
DANGER
There is a risk of electric shock during work on electrical systems.
Switch off the voltage to the system before you install the equipment.
Check that the system is not carrying live voltage before commencing work.
1. Switch off the voltage to the system, or secure the surrounding equipment in the control cabinet, if
live, so it cannot be touched.
2. Carefully press the unit onto the support rail until the holder clips into place.
Electrical connection safety notes
DANGER
Incorrectly connecting the level controller or any associated components
is a danger to system safety.
Connect the level controller and all associated components as shown in the wiring diagrams
in Fig. 7/Fig. 8 of this Manual.
Do not use unused terminals as jumpers or support terminals.

18 NRR 2-61 - Installation & Operating Manual - 819694-00
Wiring diagram for NRR 2-61 level controller
Fig. 7
2716 17 18 19 20 21 22 23 24 25 26 28 29 30
123456789101112131415
24 V DC
4-20 mA
+
CH CL S
120Ω
–
M 0,5 A
+
–
4-20 mA
+
–
Relay output
MIN 1 MIN 2
Supply voltage
On-site fuse
M 0.5 A
Option
CAN bus
CH = CAN High
CL = CAN Low
S = Shield
MAX 2 MAX 1
Actual value output Analogue output,
control point
3 s 3 s
OUT 1
OUT 2
MIN1
alarm
MIN2
alarm
MAX2
alarm
MAX1
alarm
3 s 3 s

19NRR 2-61 - Installation & Operating Manual - 819694-00
Wiring diagram for NRR 2-61 level controller as 3-component regulator
Fig. 8
2716 17 18 19 20 21 22 23 24 25 26 28 29 30
123456789101112131415
24 V DC
4-20 mA
+
CH CL S
120Ω
–
M 0,5 A
+
–
4-20 mA
+
–
4-20 mA
+
–
4-20 mA
+
–
Relay output
MIN 1 MIN 2 MAX 2 MAX 1
Option
CAN bus
CH = CAN High
CL = CAN Low
S = Shield
Supply voltage
On-site fuse
M 0.5 A
Actual value output Analogue output,
control point
Analogue input 2:
Feedwater flowrate (option)
Analogue input 3:
Steam flowrate
(option)
OUT 1
OUT 2
3 s 3 s
MIN1
alarm
MIN2
alarm
MAX2
alarm
MAX1
alarm
3 s 3 s

20 NRR 2-61 - Installation & Operating Manual - 819694-00
Electrical connection
Bus line, cable length and cross-section
A shielded, multi-core, twisted-pair control cable, e.g. UNITRONIC®BUS CAN 2 x 2 x .. mm2or
RE-2YCYV-fl 2 x 2 x .. mm2must be used as the bus line.
Pre-wired control cables (with plug and coupling) are available as accessories in various lengths.
The baud rate (transfer rate) is determined by the cable length between the bus terminal devices, and
the wire cross-section is determined by the overall power input of the measuring sensors.
As far as possible, route the bus line separately from power lines and protected from environmental
influences.
Connecting the 24V DC power supply
The NRR 2-61 level controller is supplied with 24 V DC.
A safety power supply unit that delivers a Safety Extra Low Voltage (SELV) must be used to supply the
equipment with 24V DC.
Use an M 0.5 A fuse as an external fuse.
Connecting output contacts
Connect the outputs as shown in the wiring diagrams in Fig. 7/Fig. 8.
Only use the terminals specified in the wiring diagrams.
Use a T 2.5 A fuse to protect the switching contacts.
Notes on connecting inductive loads
All connected inductive loads, such as contactors and actuators, must have interference suppression
using RC combinations as per the manufacturer's specifications.
Connecting the actual value output OUT1 and analogue output OUT2 (4 - 20 mA)
Please note the load resistance of max. 500 W.
Use a screened, multi-core control cable with a minimum conductor size of 0.5 mm2,
e.g. LIYCY 2 x 0.5 mm2.
Maximum cable length = 100 m.
Route connecting cables separately from power cables.
Table of contents
Other GESTRA Controllers manuals

GESTRA
GESTRA NRR 2-52 User manual

GESTRA
GESTRA LRR 1-50 User manual

GESTRA
GESTRA NRR 2-50 User manual

GESTRA
GESTRA NRR 2-40 User manual

GESTRA
GESTRA NRS 1-5b Quick guide

GESTRA
GESTRA NRS 1-9 User manual

GESTRA
GESTRA NRR 2-50 User manual

GESTRA
GESTRA LRR 1-52 User manual

GESTRA
GESTRA LRR 1-50 User manual

GESTRA
GESTRA LRR 1-52 User manual

GESTRA
GESTRA TA 7 Service manual

GESTRA
GESTRA NRR 2-40 User manual

GESTRA
GESTRA LRR 1-52 Installation instructions

GESTRA
GESTRA LRR 1-5 User manual

GESTRA
GESTRA LRR 1-60 User manual

GESTRA
GESTRA LRR 1-50 Manual

GESTRA
GESTRA NRR 2-50 User manual

GESTRA
GESTRA NRZ 2-1 Quick guide

GESTRA
GESTRA NRS 1-40 User manual

GESTRA
GESTRA NRR 2-52 Installation instructions